Warning! The content within this article is over 36 months old and, therefore, may be out of date.
HOWTO: Deploy VMware vRealize Automation 6.x Application Services
VMware vRealize Automation vRealize Application Services VCAP6 VCAP6-CMA
Published on 12 March 2017 by Christopher Lewis. Words: 450. Reading Time: 3 mins.
Introduction
This post is a part of a series of posts for preparation for the VCAP6-CMA Deploy exam. For the full exam prep resources check here .
In this post we are covering the deployment of vRealize Application Services.
Prerequisite Steps
- A fully deployed vRealize Automation 6.x implementation.
Overview
- Deploy VMware vRealize Application Services Appliance.
- Configure VMware vRealize Application Services.
- Navigate to the Application Services Portal
Step by Step Instructions
Note:
- For anyone who has deployed an OVF/OVA before (such as the vRealize Automation Identity Appliance or the vRealize Automation Appliance) the steps will look very familiar!
- As I am running vSphere 6.5 in my lab the vRealize Application Services appliance didn’t deploy through vCenter and i could only manage to get it deployed using the vSphere Host client. The steps are the similar, albeit the interface is slightly different.
Deploy VMware vRealize Application Services Appliance
- Within the VMware vSphere Host Client, click Create/Register VM.
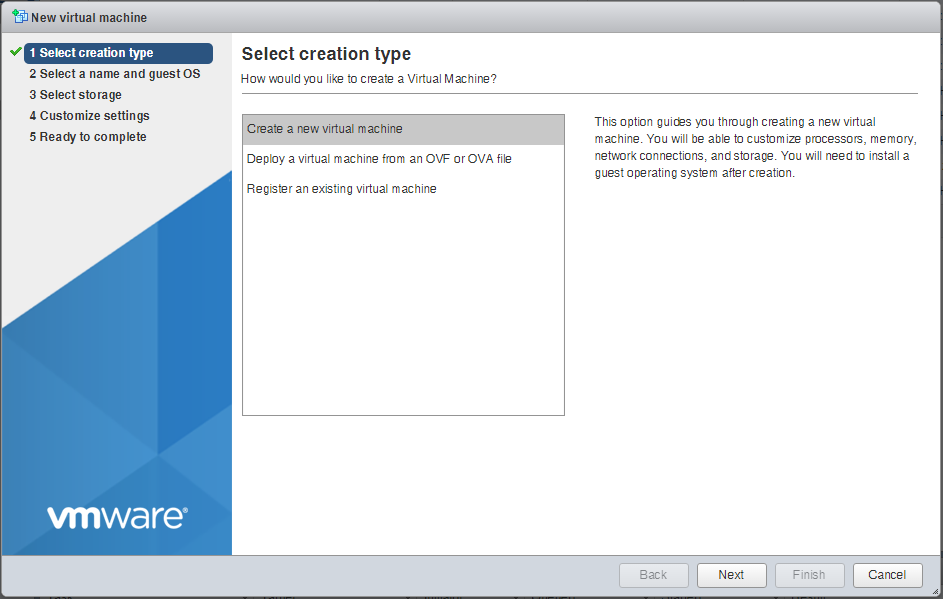
- Select Deploy a virtual Machine from an OVF or OVA file and click Next.
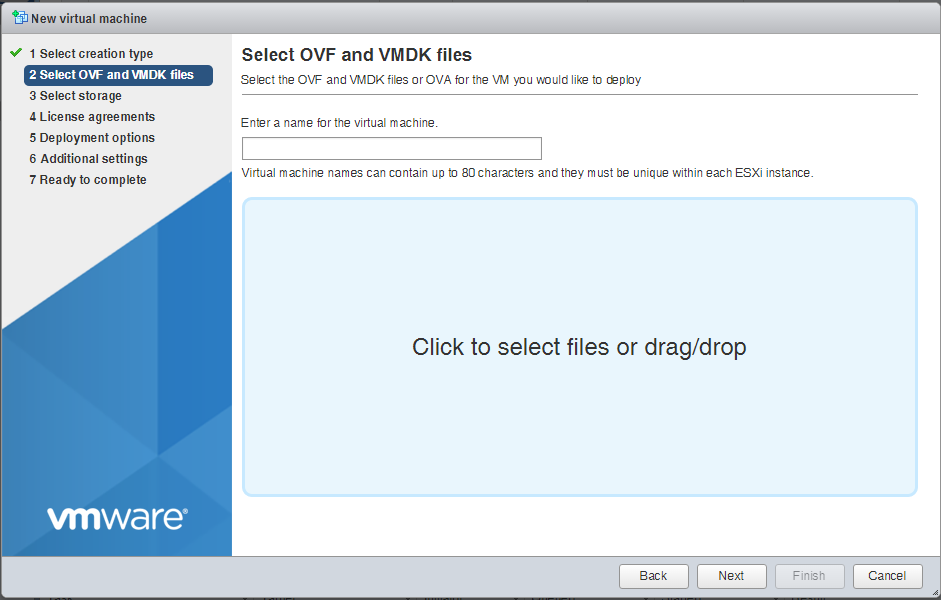
- Type the Name to be given to the Application Services appliance into the Enter a name for the virtual machine textbox and then click the area, navigate to the OVA file and click Open.
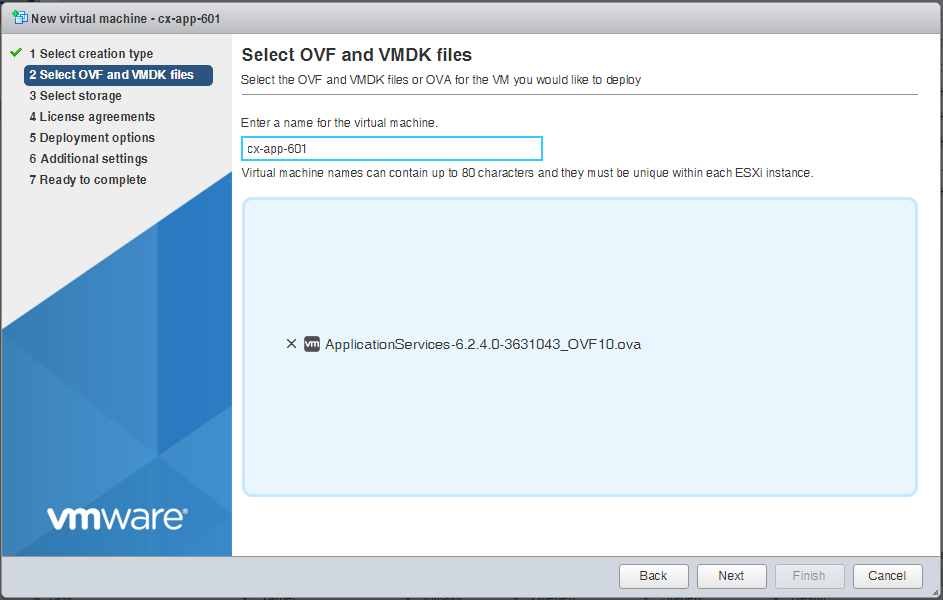
- Click Next.
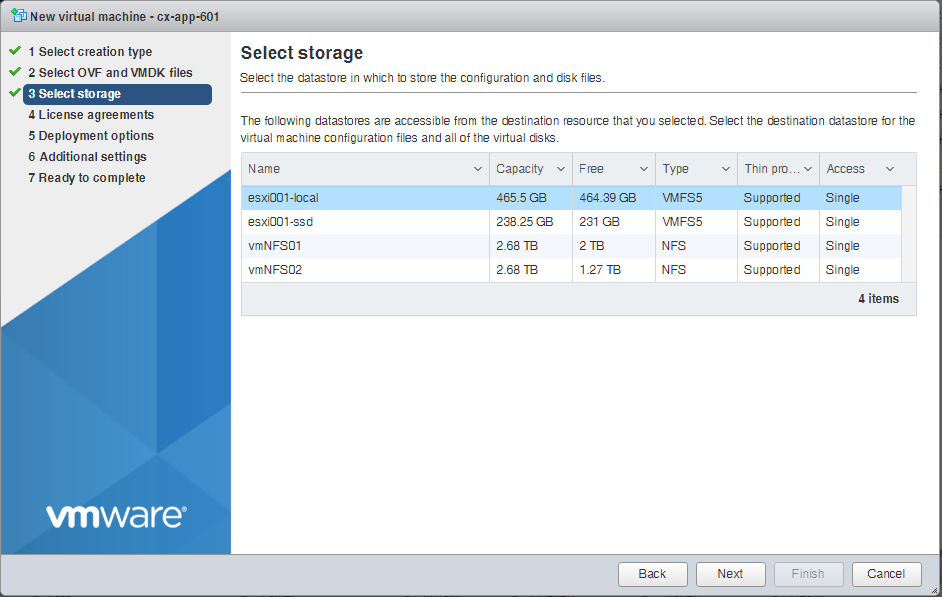
- Select the target storage location and click Next.
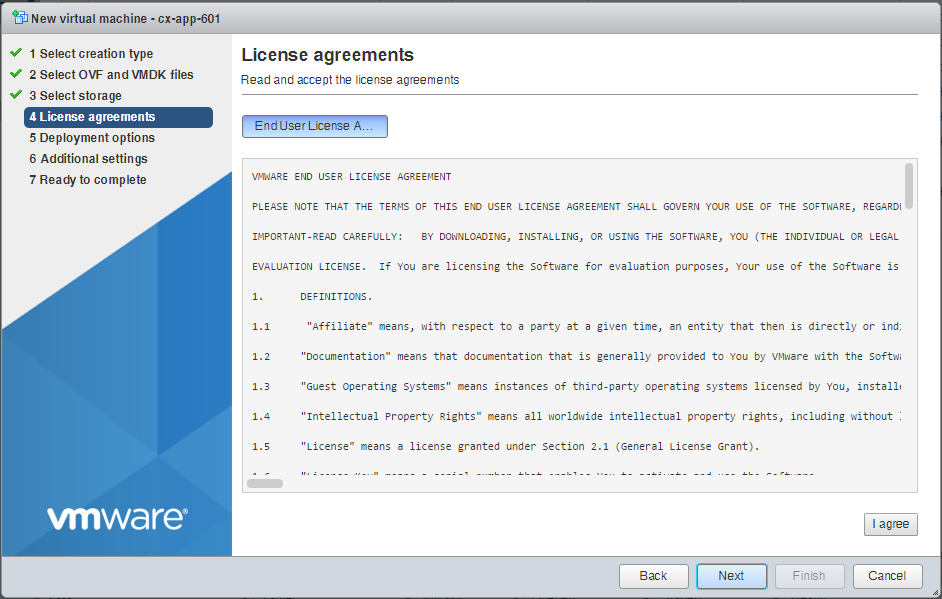
- Click I agree.
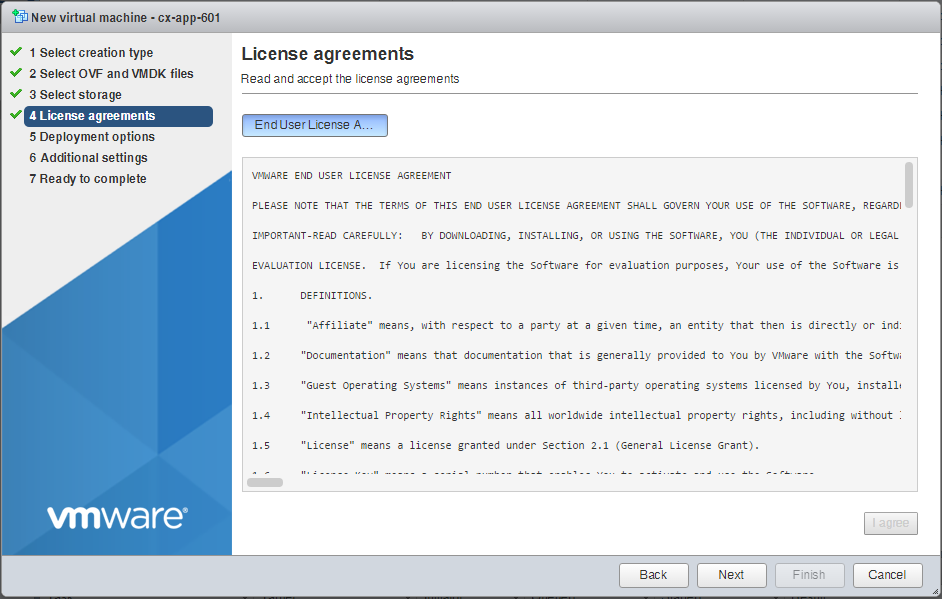
- Click Next.
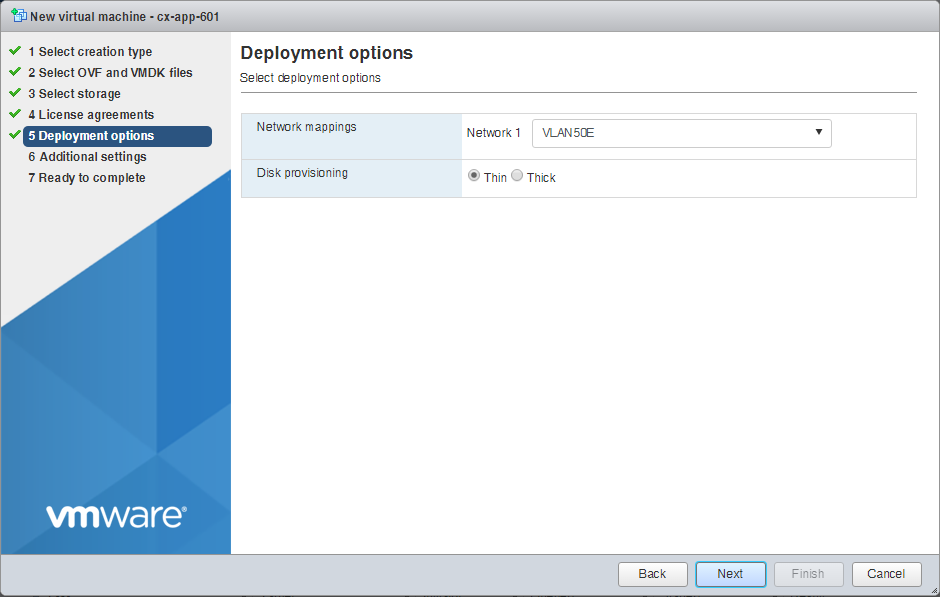
- Select the correct network (port group) from the Network 1 dropdown and select the appropriate Disk Provisioning option. Click Next.
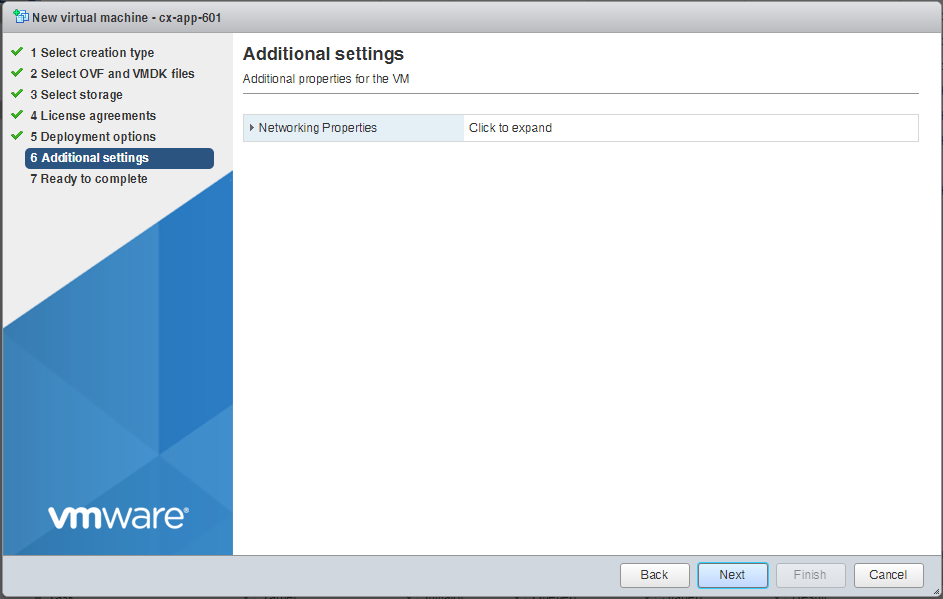
- Expand Networking Properties.
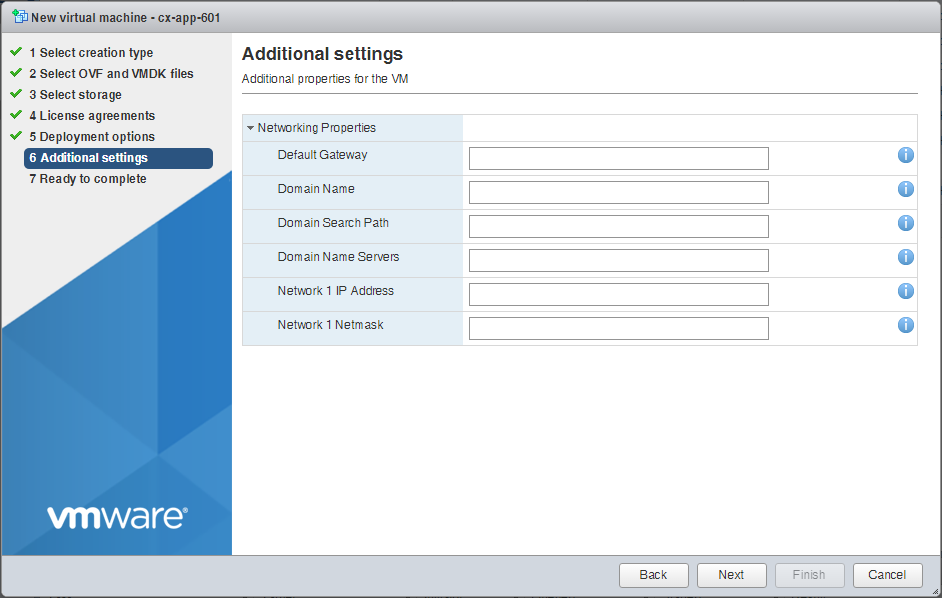
- Enter the following information into the relevant textbox:
- Default Gateway
- Domain Name
- Domain Name Servers
- Network 1 IP Address
- Network 1 Netmask
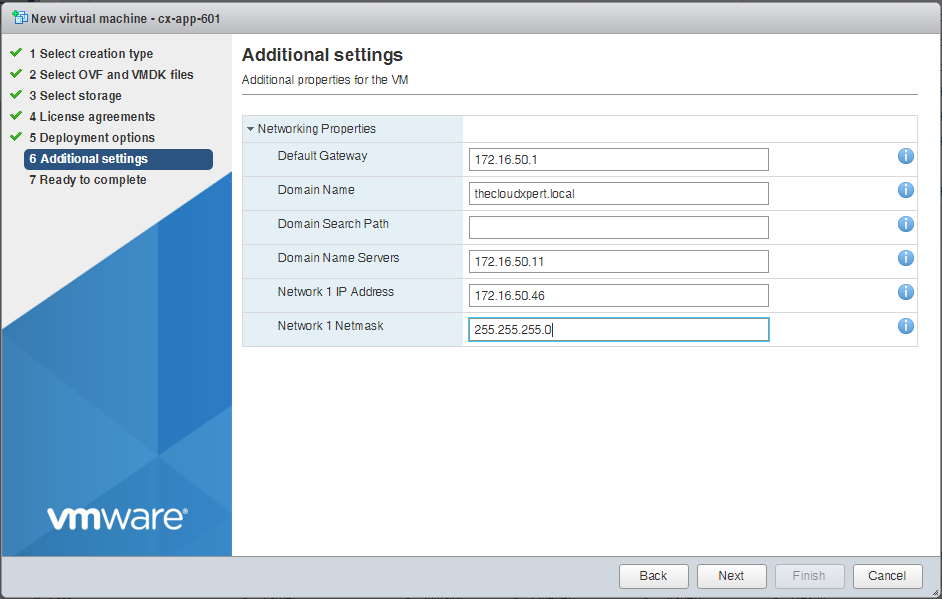
- Click Next.
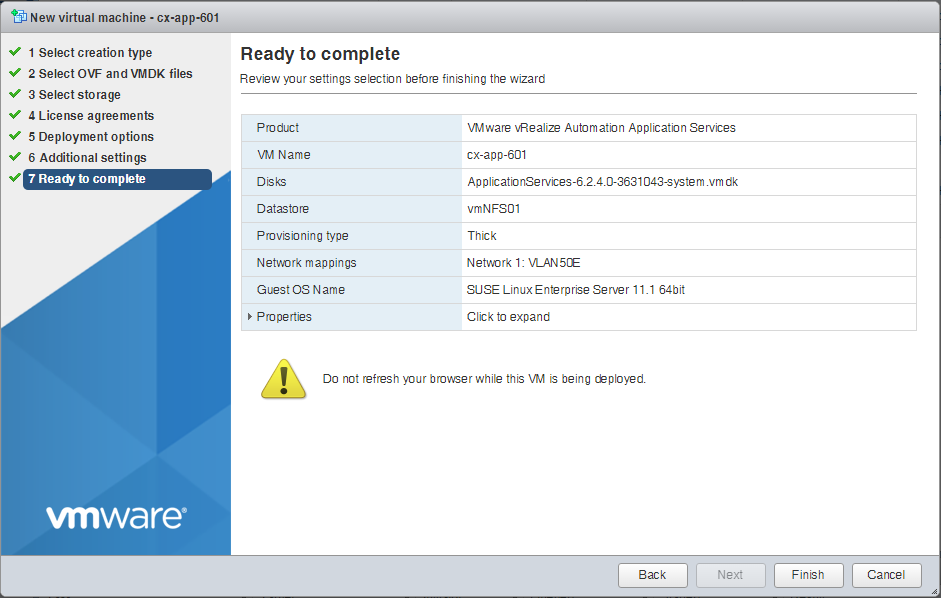
- Click Finish.
The vRealize Application Services appliance will now be deployed.
Configure VMware vRealize Application Services
- Log into vSphere Web Client and start a remote control session to the vRealize Application Services Appliance.
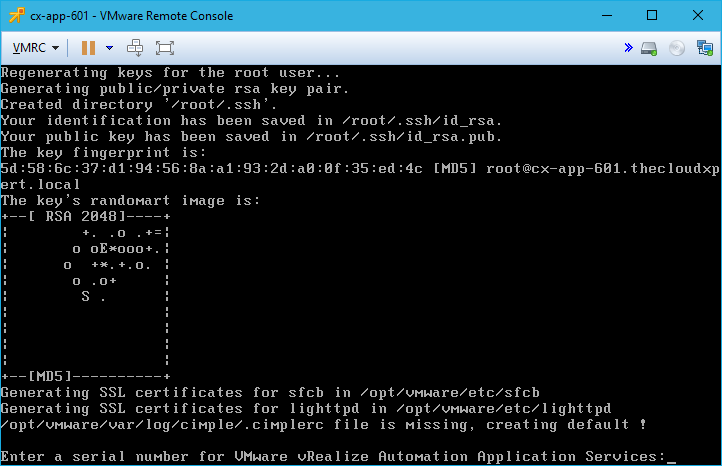
- Type the Serial Number for vRealize Application Services and press Enter.
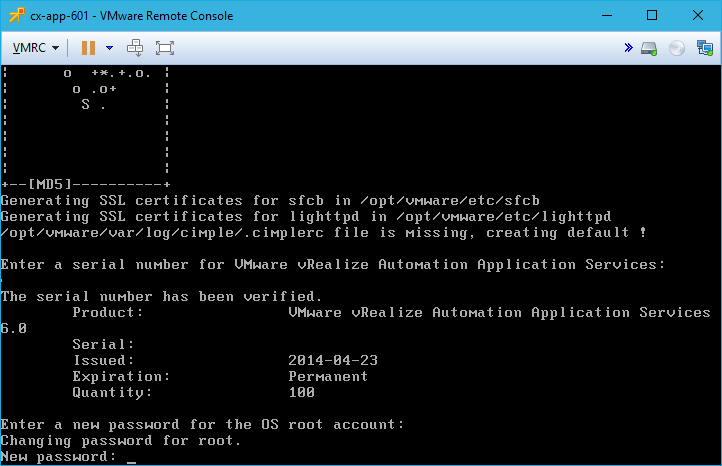
- Type the password for the
rootaccount, press Enter, Re-type the password for therootaccount and press Enter.
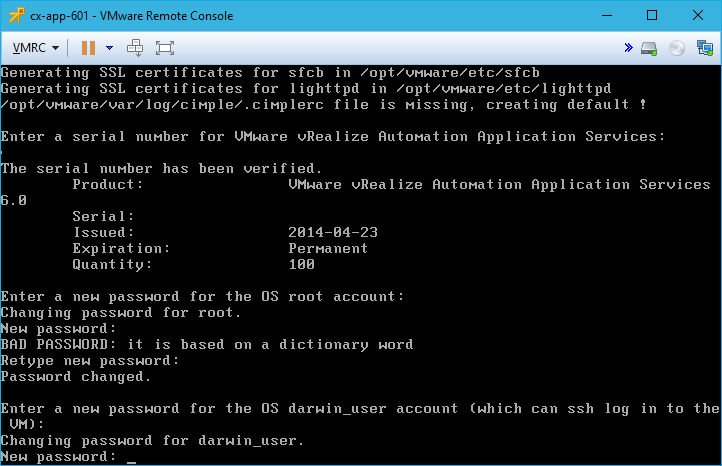
- Type the password for
darwin_user, press Enter, re-enter the password and press Enter.
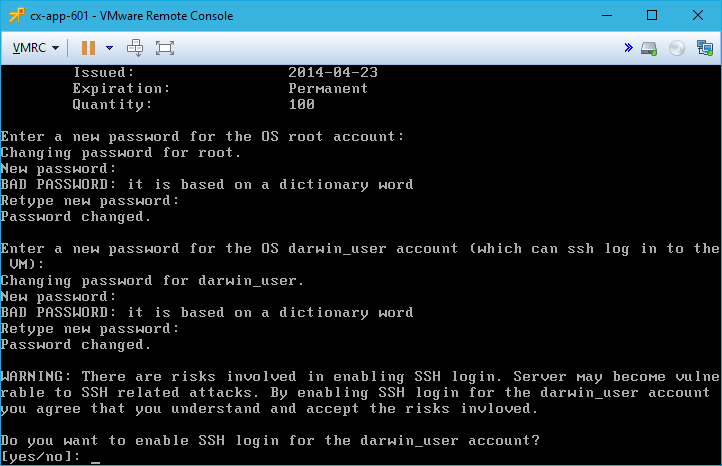
- Type
Yesand press Enter to enable SSH on the appliance.
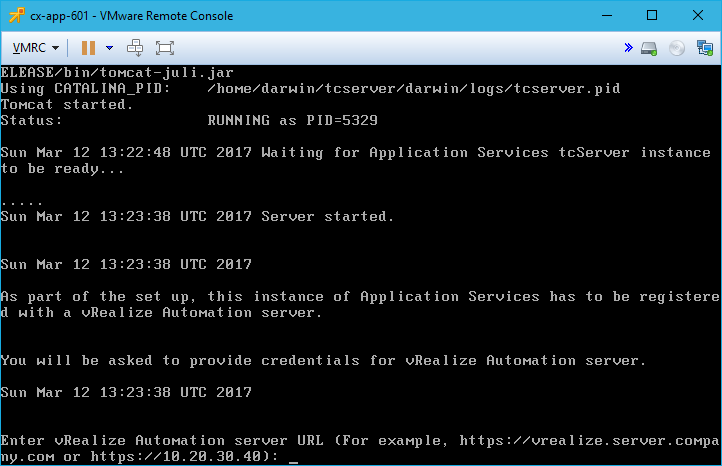
- Type
https://vrealize.fqdnand press Enter.
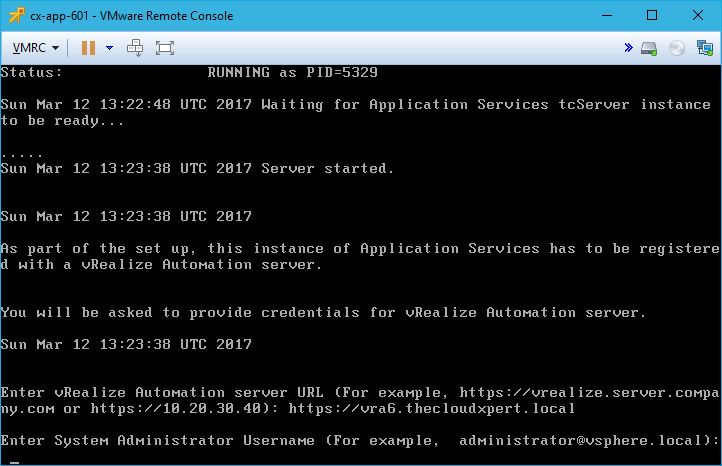
- Type
administrator@vsphere.local, press Enter, enter the password foradministrator@vsphere.localand press Enter.
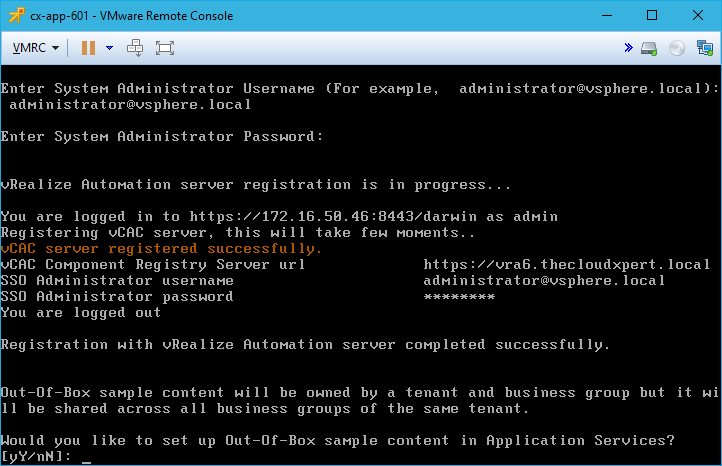
- Type
Nand press Enter.
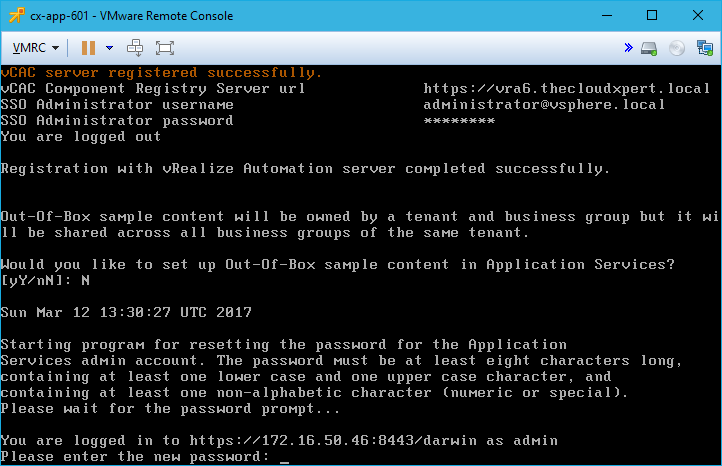
- Type a new password for the admin user. press Enter and then re-type the password and press Enter.
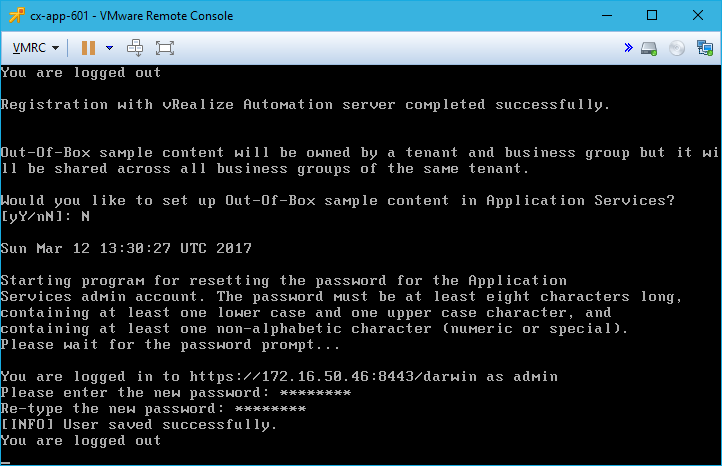
- You will now be automatically logged out.
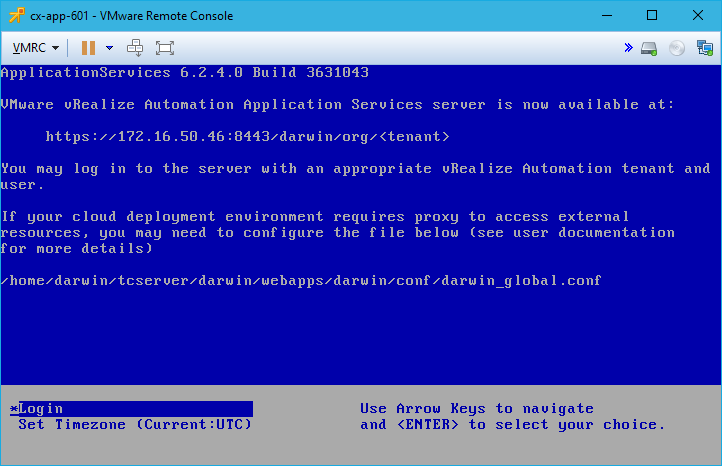
Navigate to the Application Services Portal
- To access the Application Services Portal, open a web browser and navigate to
https://app-services.fqdn:8443/darwin/org/<tenant>.
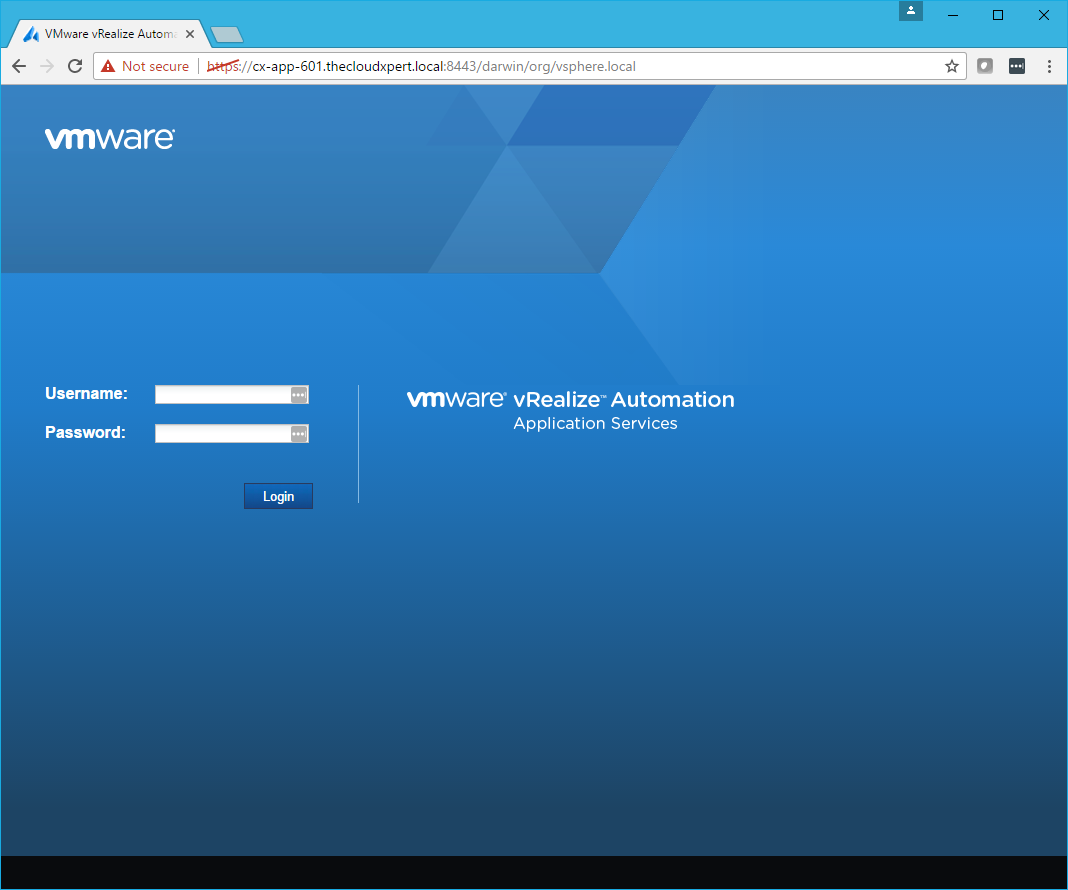
- Type the username and password and click Login.
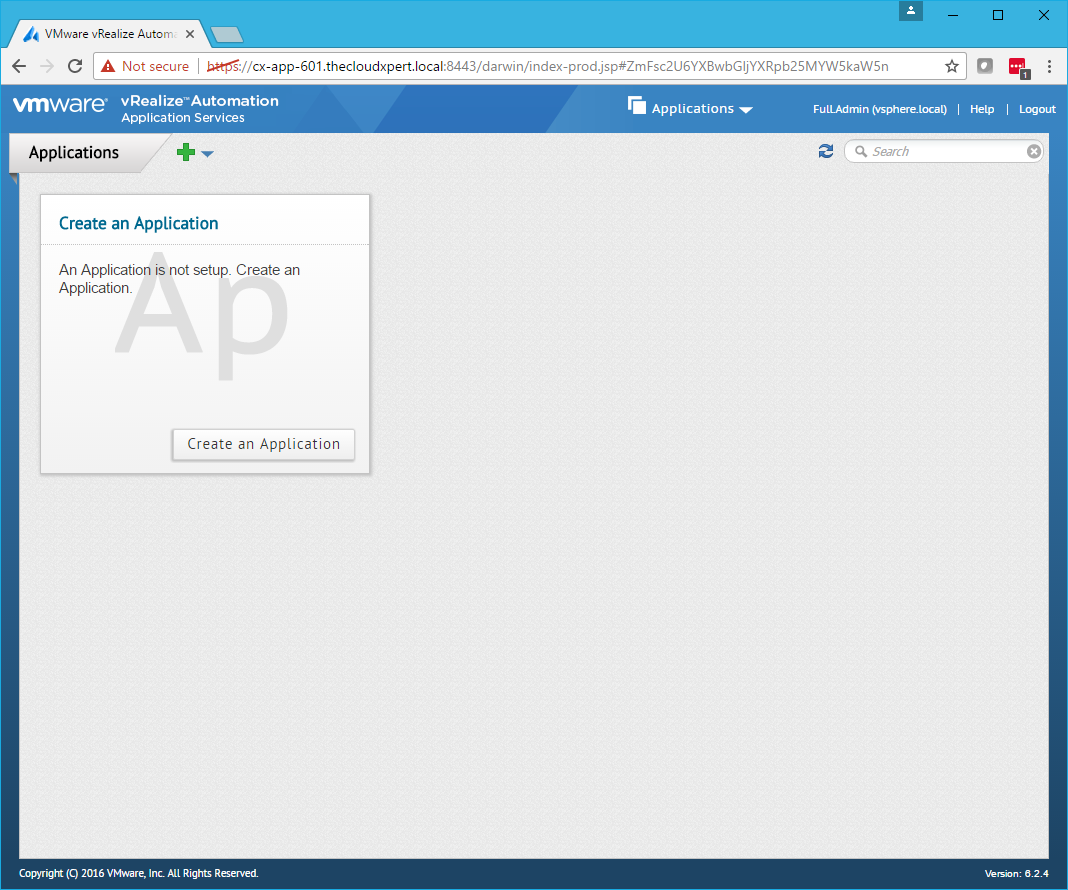
Note:
To be able to log in you’re user account will need to have been granted one of the four Application Services roles.
Published on 12 March 2017 by Christopher Lewis. Words: 450. Reading Time: 3 mins.
Related Post(s):
- VCAP6-CMA Deploy - Objective 8.1: Deploy and Manage a vRealize Business Standard Appliance ()
- VCAP6-CMA Deploy - Objective 4.4: Import existing workloads ()
- HOWTO: Configure a vRealize Automation 6 Advanced Services Endpoint for vCenter Server ()
- VCAP6-CMA Deploy - Objective 6.1: Configure Advanced Service Designer ()
- HOWTO: Configure a vRealize Automation 6 Advanced Services Endpoint for Active Directory ()
About the Author:

Name: Christopher Lewis
Twitter/X: thecloudxpert
Role: Domain Expert - VCF Automation & VCF Operations
Company: VMware / Broadcom
Recent Posts by Christopher Lewis:
Blog Categories:
active directory 6
aria automation 9
aria operations 2
aws 2
certificate authority 5
certificates 5
certification 91
general 9
home lab 2
microsoft 7
nsx 45
nsx v 41
powercli 8
powershell 6
vcap 48
vcap6 2
vcenter 4
vcf 2
vcix 2
vexpert 9
vmug 5
vmware 99+
vmware aria automation 9
vmware aria operations 5
vmware cloud 3
vmware explore 2
vmware identity manager 2
vmworld 36
vrealize automation 80
vrealize business 2
vrealize operations manager 5
vrealize orchestrator 13
vrealize suite 14
vrealize suite lifecycle manager 20
vsan 5
vsphere 9
windows 6
Top Tags:
active directory 6
api 18
barcelona 24
certificates 11
certification 7
howto 33
microsoft 7
multi tenancy 9
nsx v 43
platform services controller 8
powercli 8
powershell 7
psc 6
vcap 9
vcap6 45
vcap6 cma 48
vcap6 nv 37
vcix6 nv 36
vexpert 19
vmug 8
vmware 99+
vmware aria 12
vmware aria automation 9
vmworld 35
vmworld 2016 13
vmworld 2017 9
vra 13
vrealize automation 74
vrealize operations 8
vrealize orchestrator 21
vrealize suite lifecycle manager 11
vrslcm 20
vsan 7
vsphere 12
