Using the vRealize Suite Lifecycle Manager (vRSLCM) API for vRSLCM Day 2 Operations - Managing SSL certificates
vRealize Suite Lifecycle Manager vRSLCM API
Published on 23 May 2022 by Christopher Lewis. Words: 1739. Reading Time: 9 mins.
Introduction
In this post, we will look at how we can use the VMware vRealize Suite Lifecycle Manager (vRSLCM) API to complete Day 2 Operations for managing the creation and onboarding of SSL certificates in vRSLCM.
Within vRSLCM, we can generate self-signed, generate Certificate Signing Requests (CSR) and import CA-signed certificates Once under management, we can easily apply those certificates to the vRealize Suite products within each of our managed environments. We are going to be using cURL to run API calls to complete the following operational tasks for managing certificates:
- Viewing existing SSL certificates
- Creating a self-signed SSL certificate
- Creating a Certificate Signing Request (CSR)
- Importing a CA-signed SSL certificate
- Deleting a SSL certificate
This post is a part of a series that covers how we can install, configure and manage the vRealize Suite using the vRSLCM API.
Prerequisites
The following prerequisites are required for this blog post:
- vRSLCM 8.6.x (or above) has been deployed successfully within the environment.
- vRSLCM local administrator (admin@local) credentials.
- A Certificate Authority to be able to generate a CA-signed certificate or a CA-signed Certificate.
Walkthrough
Viewing Existing SSL Certificates
Overview
Using the vRSLCM REST API, we can view the existing certificates already stored within the vRSLCM locker service.
API Request
The following REST API request is required:
- Request Type: GET
- Request URL:
https://{vrslcm.fqdn}/lcm/locker/api/v2/certificates - Request Header(s):
- Accept: application/json
- Content-Type: application/json
- Authorization: Basic {admin@local credential hash}
- Request Body Values:
- None
API Example
An example cURL command for this REST API is:
curl --location --request GET 'https://{vrslcm.fqdn}/lcm/locker/api/v2/certificates' \
--header 'Accept: application/json' \
--header 'Content-Type: application/json' \
--header 'Authorization: Basic {admin@local credential hash}'
API Response
If you have no certificates, the expected response returned will be:
{
    "page": 0,
    "total": 0,
    "certificates": []
}
If you have previously created or imported certificates, the response will be similar to:
{
    "page": 0,
    "total": 1,
    "certificates": [
        {
            "vmid": "abcd4e27-1642-4da7-a617-c001d8f9ea2d",
            "subject": "CN=vrslcm.fqdn,OU=thecloudxpert,O=thecloudxpert,L=London,ST=United Kingdom,C=GB",
            "issuer": "CN=vRealize Suite Lifecycle Manager Locker CA,O=VMware,C=IN",
            "algorithm": "SHA256WITHRSA",
            "sha1": "{sha1 fingerprint}",
            "alias": "VMware Identity Manager",
            "healthy": true,
            "referenced": false
        }
    ]
}
As we can see from the screenshot, a certificate already exists within the vRSLCM locker:
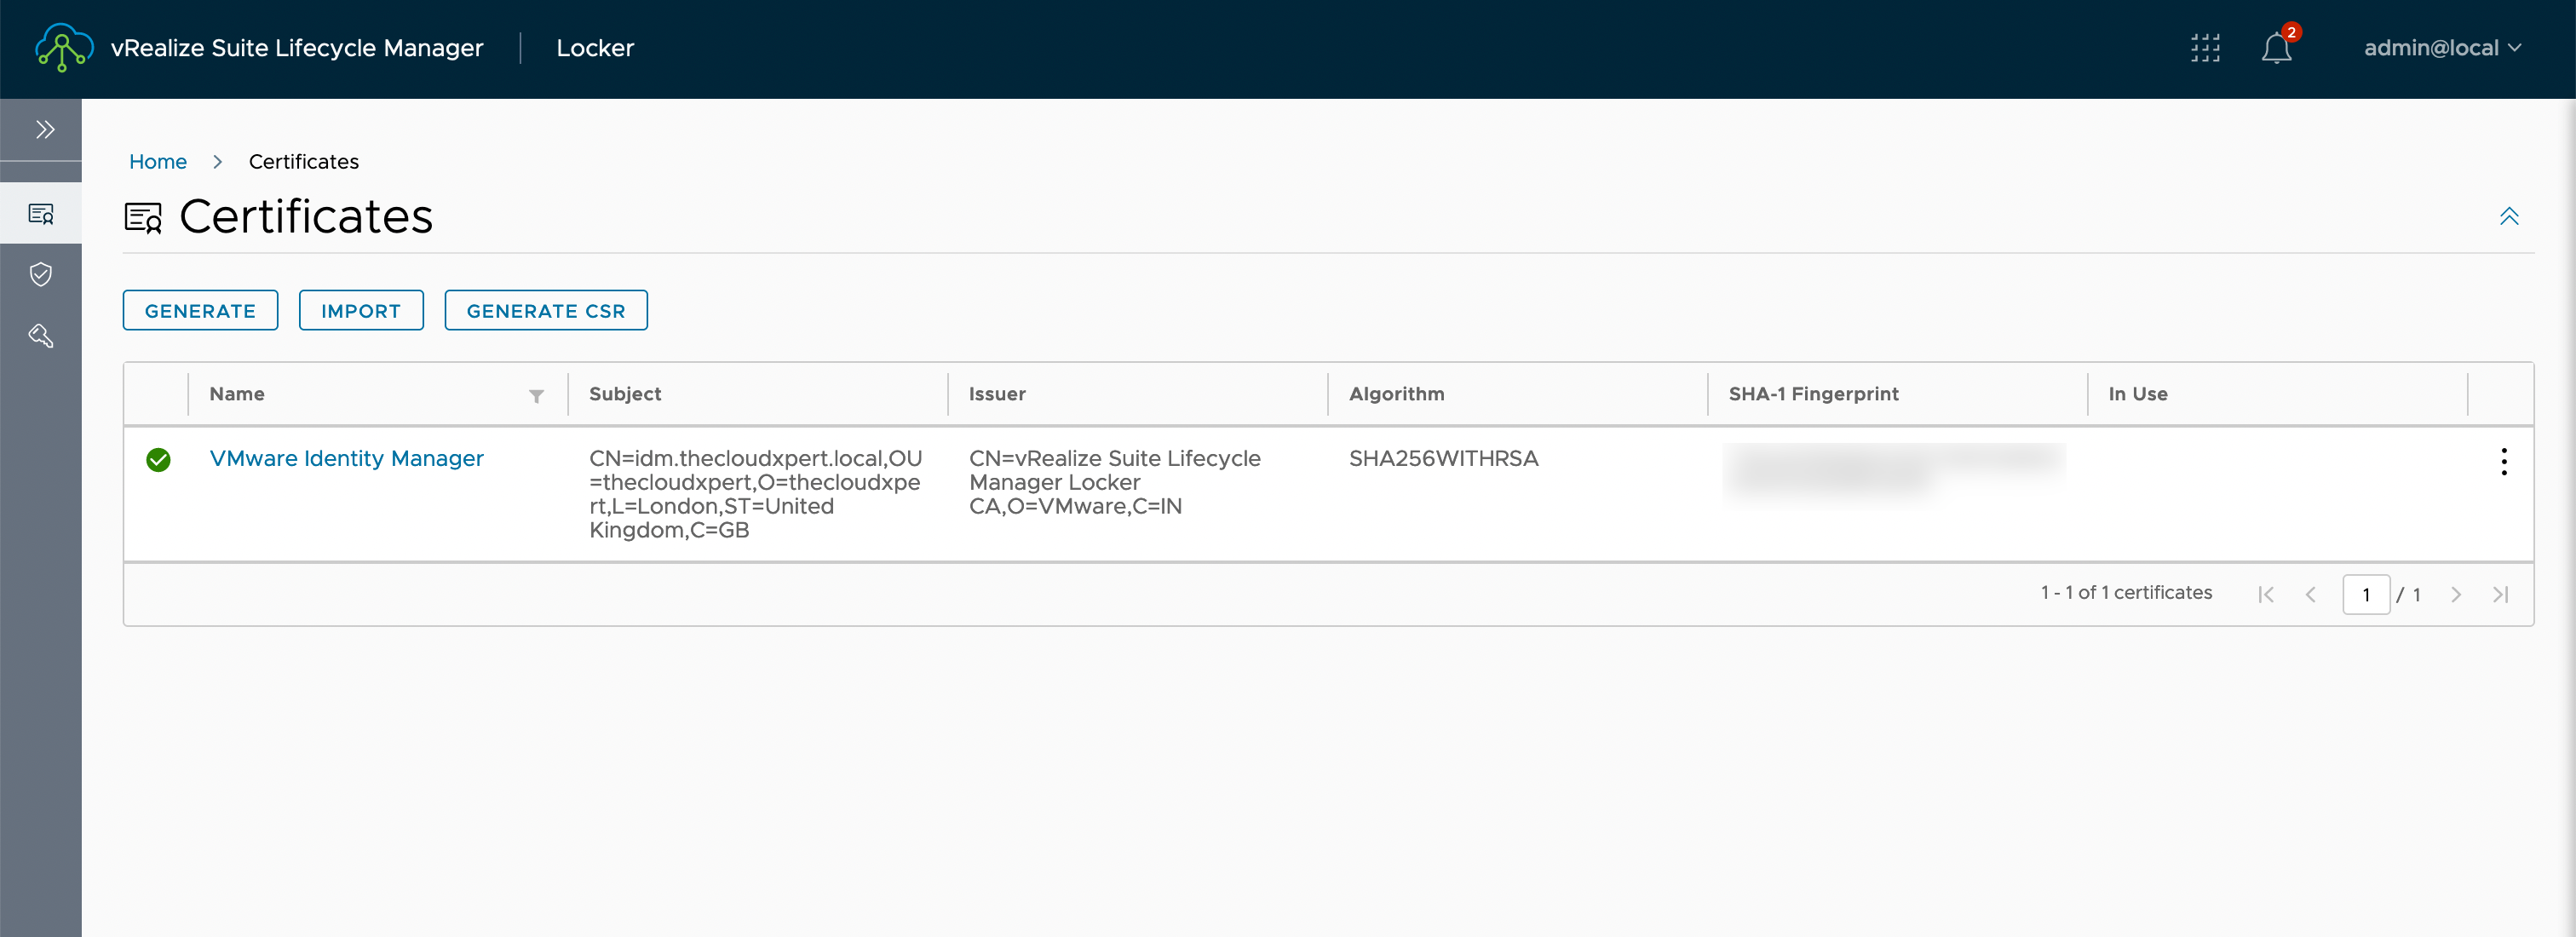
Let us go ahead and create a new one!
Creating a Self-Signed SSL Certificate
Overview
In this section we are going to use the vRSLCM API to create a self-signed certificate Self-signed certificates can be easily generated and used during the installation of the vRealize Suite if no CA-signed certificate is available.
We are going to be using the API to complete the same request that can be completed in the UI, which is shown in the screenshot below:
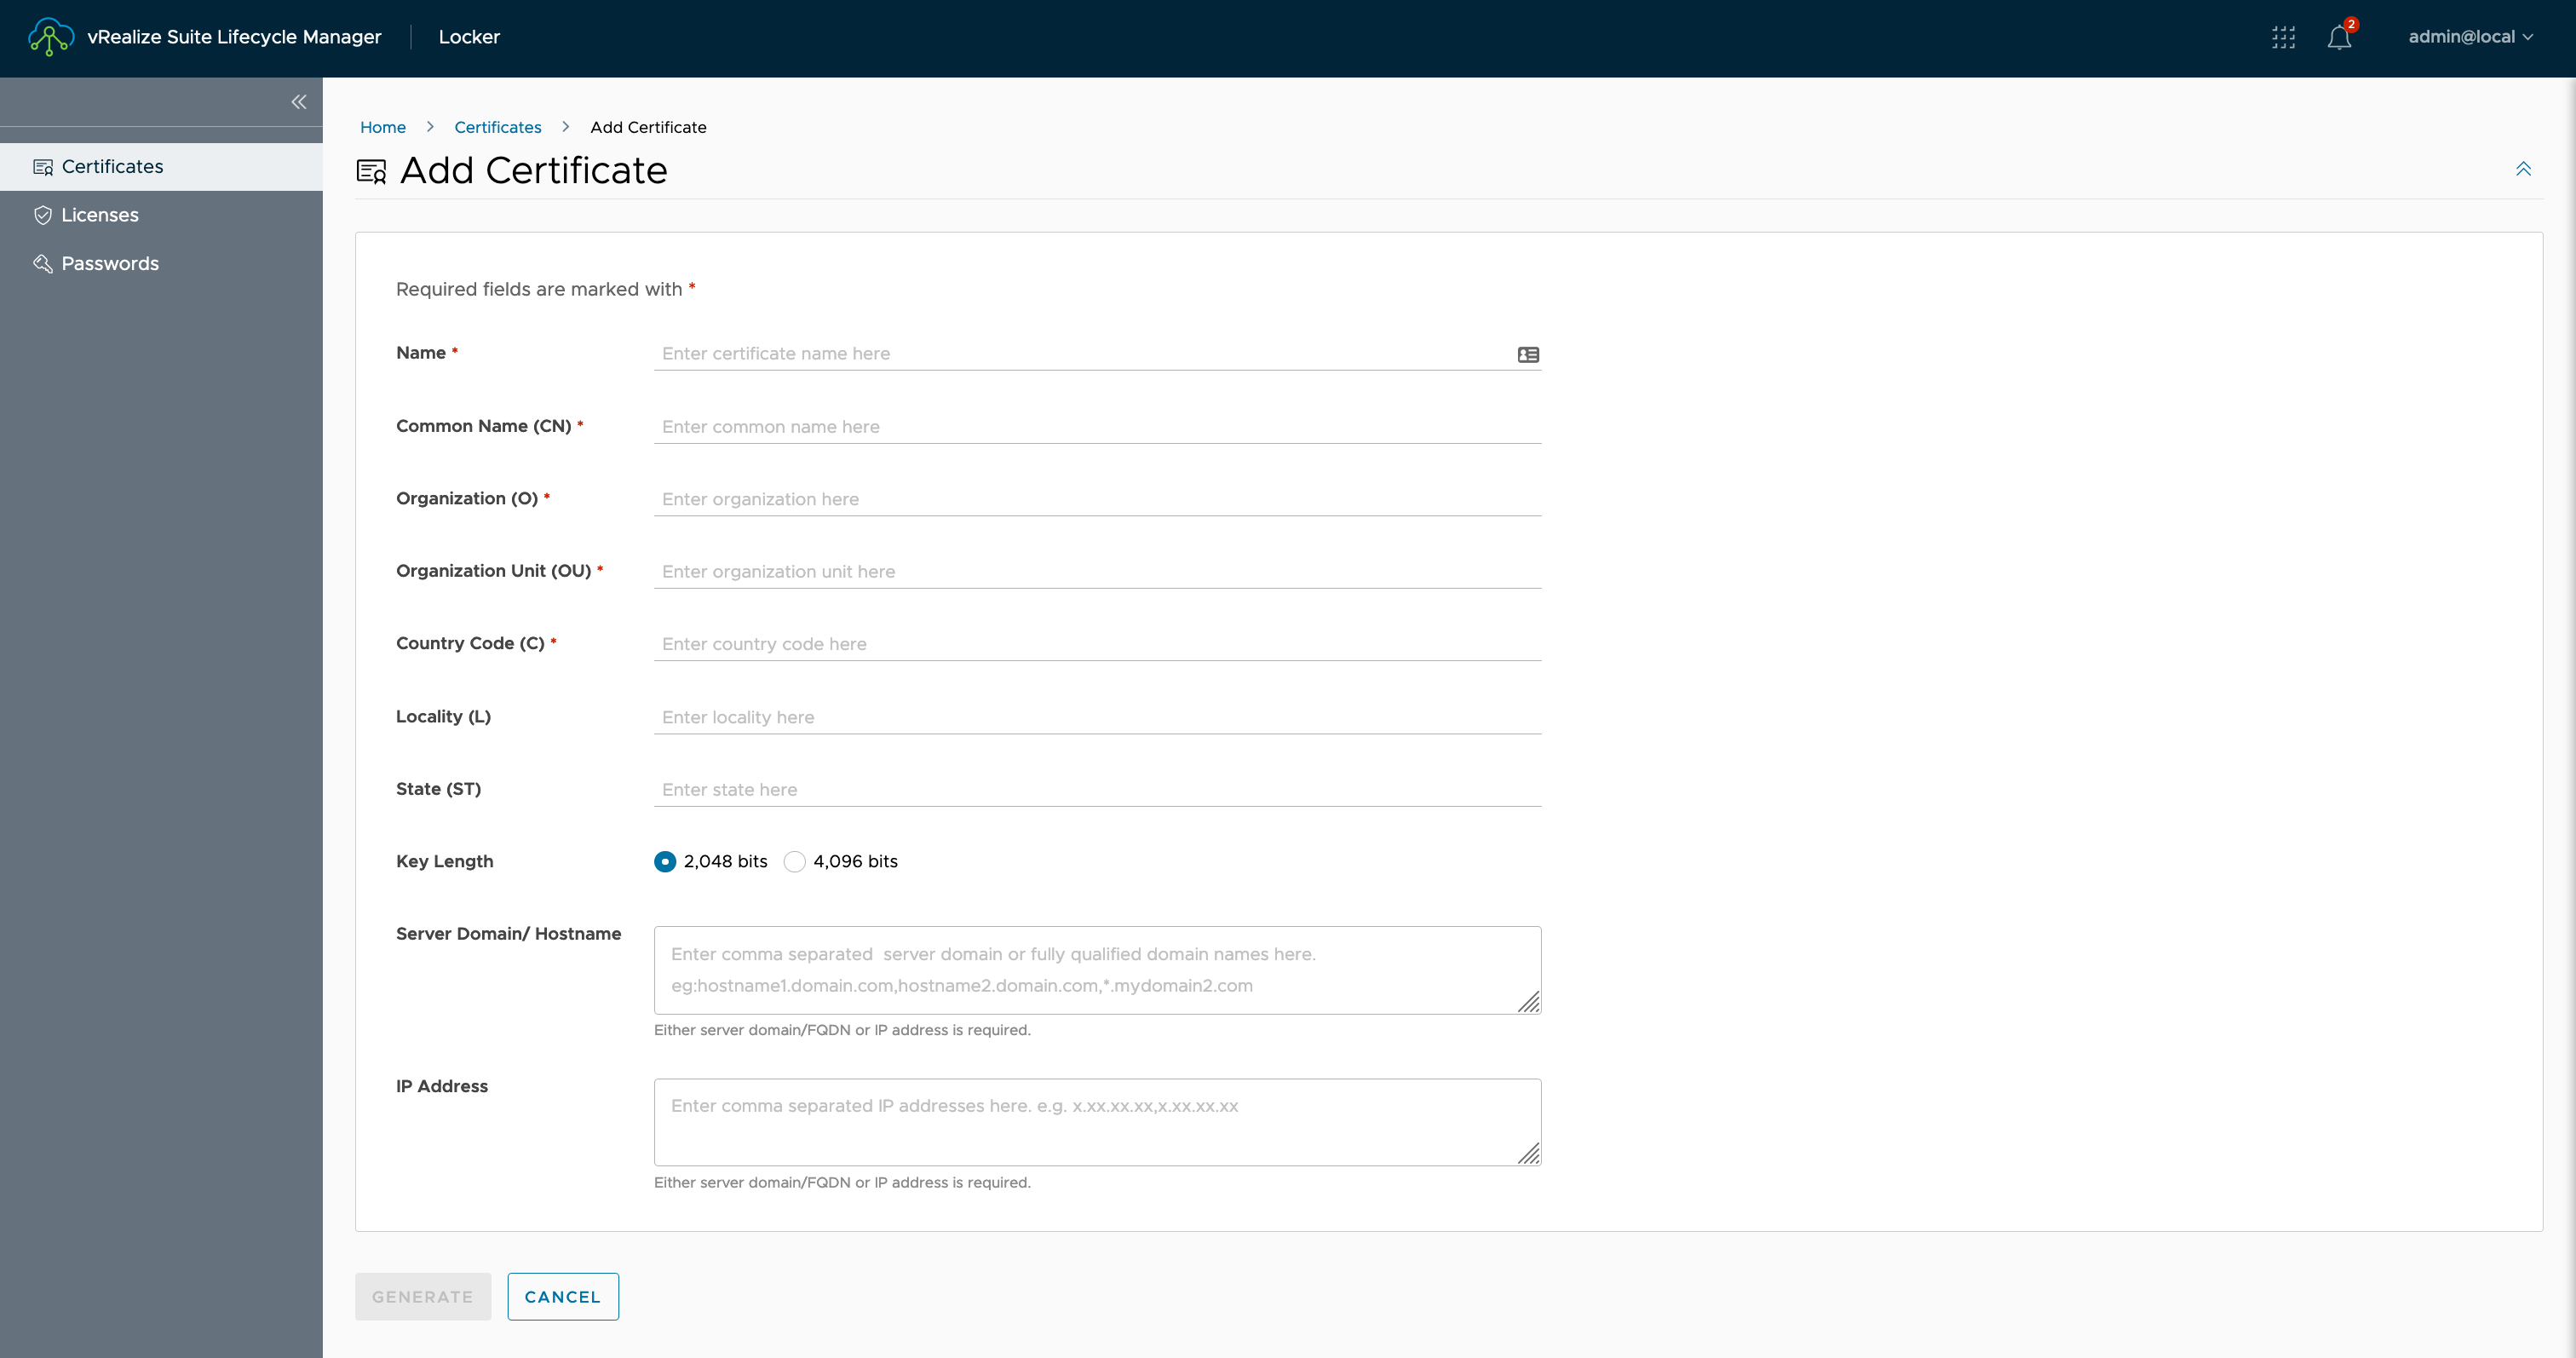
API Request
The following REST API request is required:
- Request Type: POST
- Request URL:
https://{vrslcm.fqdn}/lcm/locker/api/v2/certificates - Request Header(s):
- Accept: application/json
- Content-Type: application/json
- Authorization: Basic {insert credential hash}
- Request Body Values:
- alias - the user friendly name for the certificate in the UI.
- cN - the fqdn of the product, such as
vrli.thecloudxpert.local. - ip - (OPTIONAL) a list of IP addresses that should be included in the certificate.
- host - a list of the fqdns of each host that should be included in the certificate.
- oU - the Organizational Unit value for the SSL certificate.
- size - the Key Length of the certificate, either 2048 or 4096.
- o - the Organization value for the SSL certificate.
- l - the Location value for the SSL certificate.
- sT - the State value for the SSL certificate.
- c - the Country Code value for the SSL certificate.
API Example
An example cURL command for this REST API is:
curl --location --request POST 'https://{vrslcm.fqdn}/lcm/locker/api/v2/certificates' \
--header 'Accept: application/json' \
--header 'Content-Type: application/json' \
--header 'Authorization: Basic {admin@local credential hash}' \
--data-raw '{
    "alias": "vRealize Operations Manager",
    "ip": [],
    "host": [
        "vrops.thecloudxpert.local"
        ],
    "cN": "vrops.thecloudxpert.local",
    "oU": "thecloudxpert",
    "size": "2048",
    "o": "thecloudxpert",
    "l": "London",
    "sT": "United Kingdom",
    "c": "GB"
  }'
API Response
The response returned from a successful request (Status Code=200 OK) will be something like:
{
    "alias": "VMware vRealize Operations",
    "key": "{privateKey}",
    "certChain": "{chainCert}",
    "leafCert": "{leafCert}",
    "validations": [],
    "validity": {
        "period": "1 year, 11 months and 28 days",
        "expiresOn": "2024-05-28T11:40:48.000+0000",
        "issuedOn": "2022-05-29T11:40:48.000+0000",
        "healthy": true
    },
    "certInfo": {
        "subject": "CN=vrops.thecloudxpert.local,OU=thecloudxpert,O=thecloudxpert,L=London,ST=United Kingdom,C=GB",
        "issuer": "CN=vRealize Suite Lifecycle Manager Locker CA,O=VMware,C=IN",
        "san": "DNS: vrops.thecloudxpert.local",
        "algorithm": "SHA256WITHRSA",
        "keyAlgorithm": "RSA",
        "keyLength": 2048,
        "sha256": "{sha256 fingerprint}",
        "sha1": "{sha1 fingerprint}"
    }
}
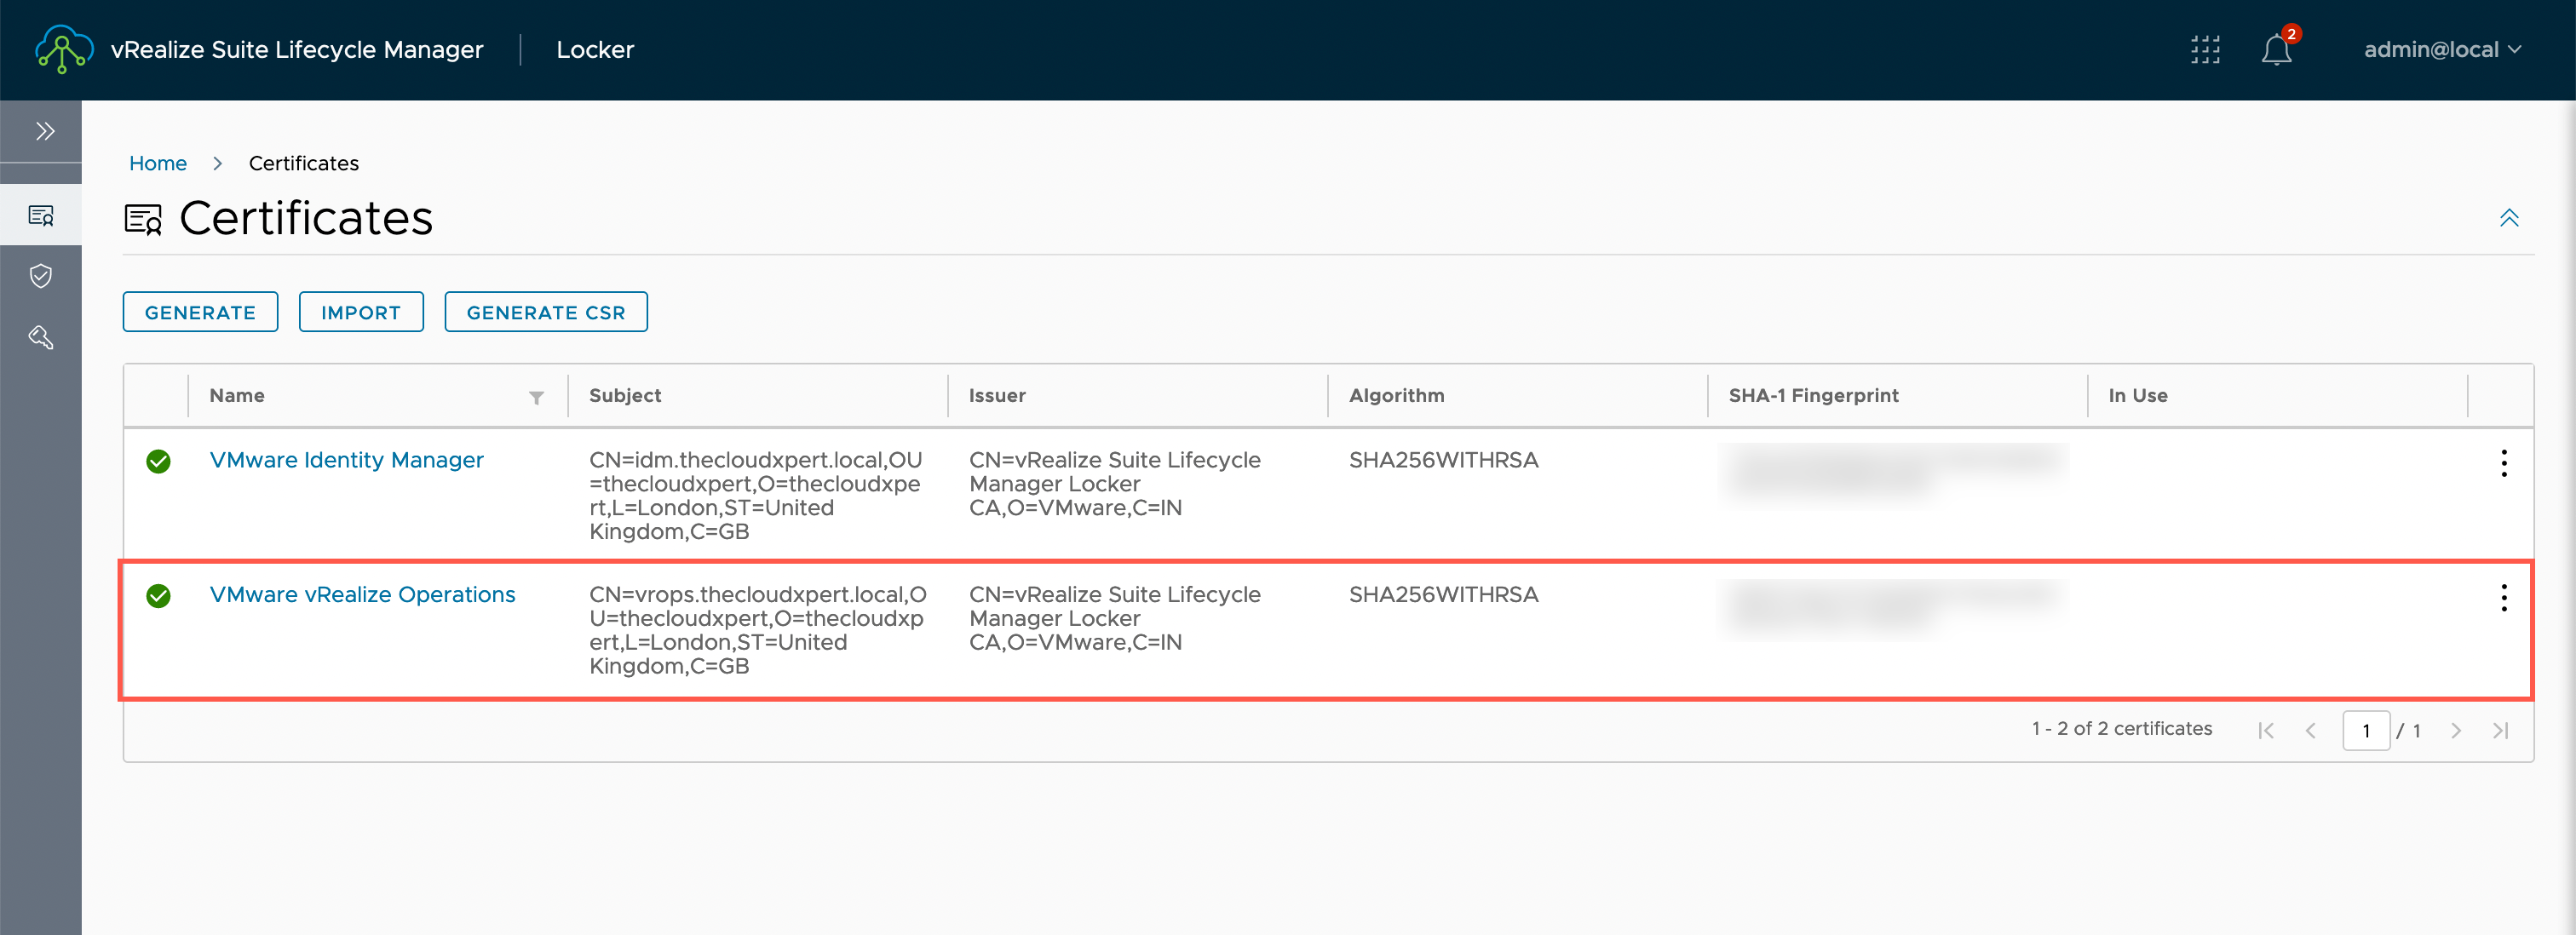
If we logged into vRSLCM using the UI (and navigated to Locker > Certificates), we would now see the following certificates configured:
Creating a Certificate Signing Request (CSR)
Overview
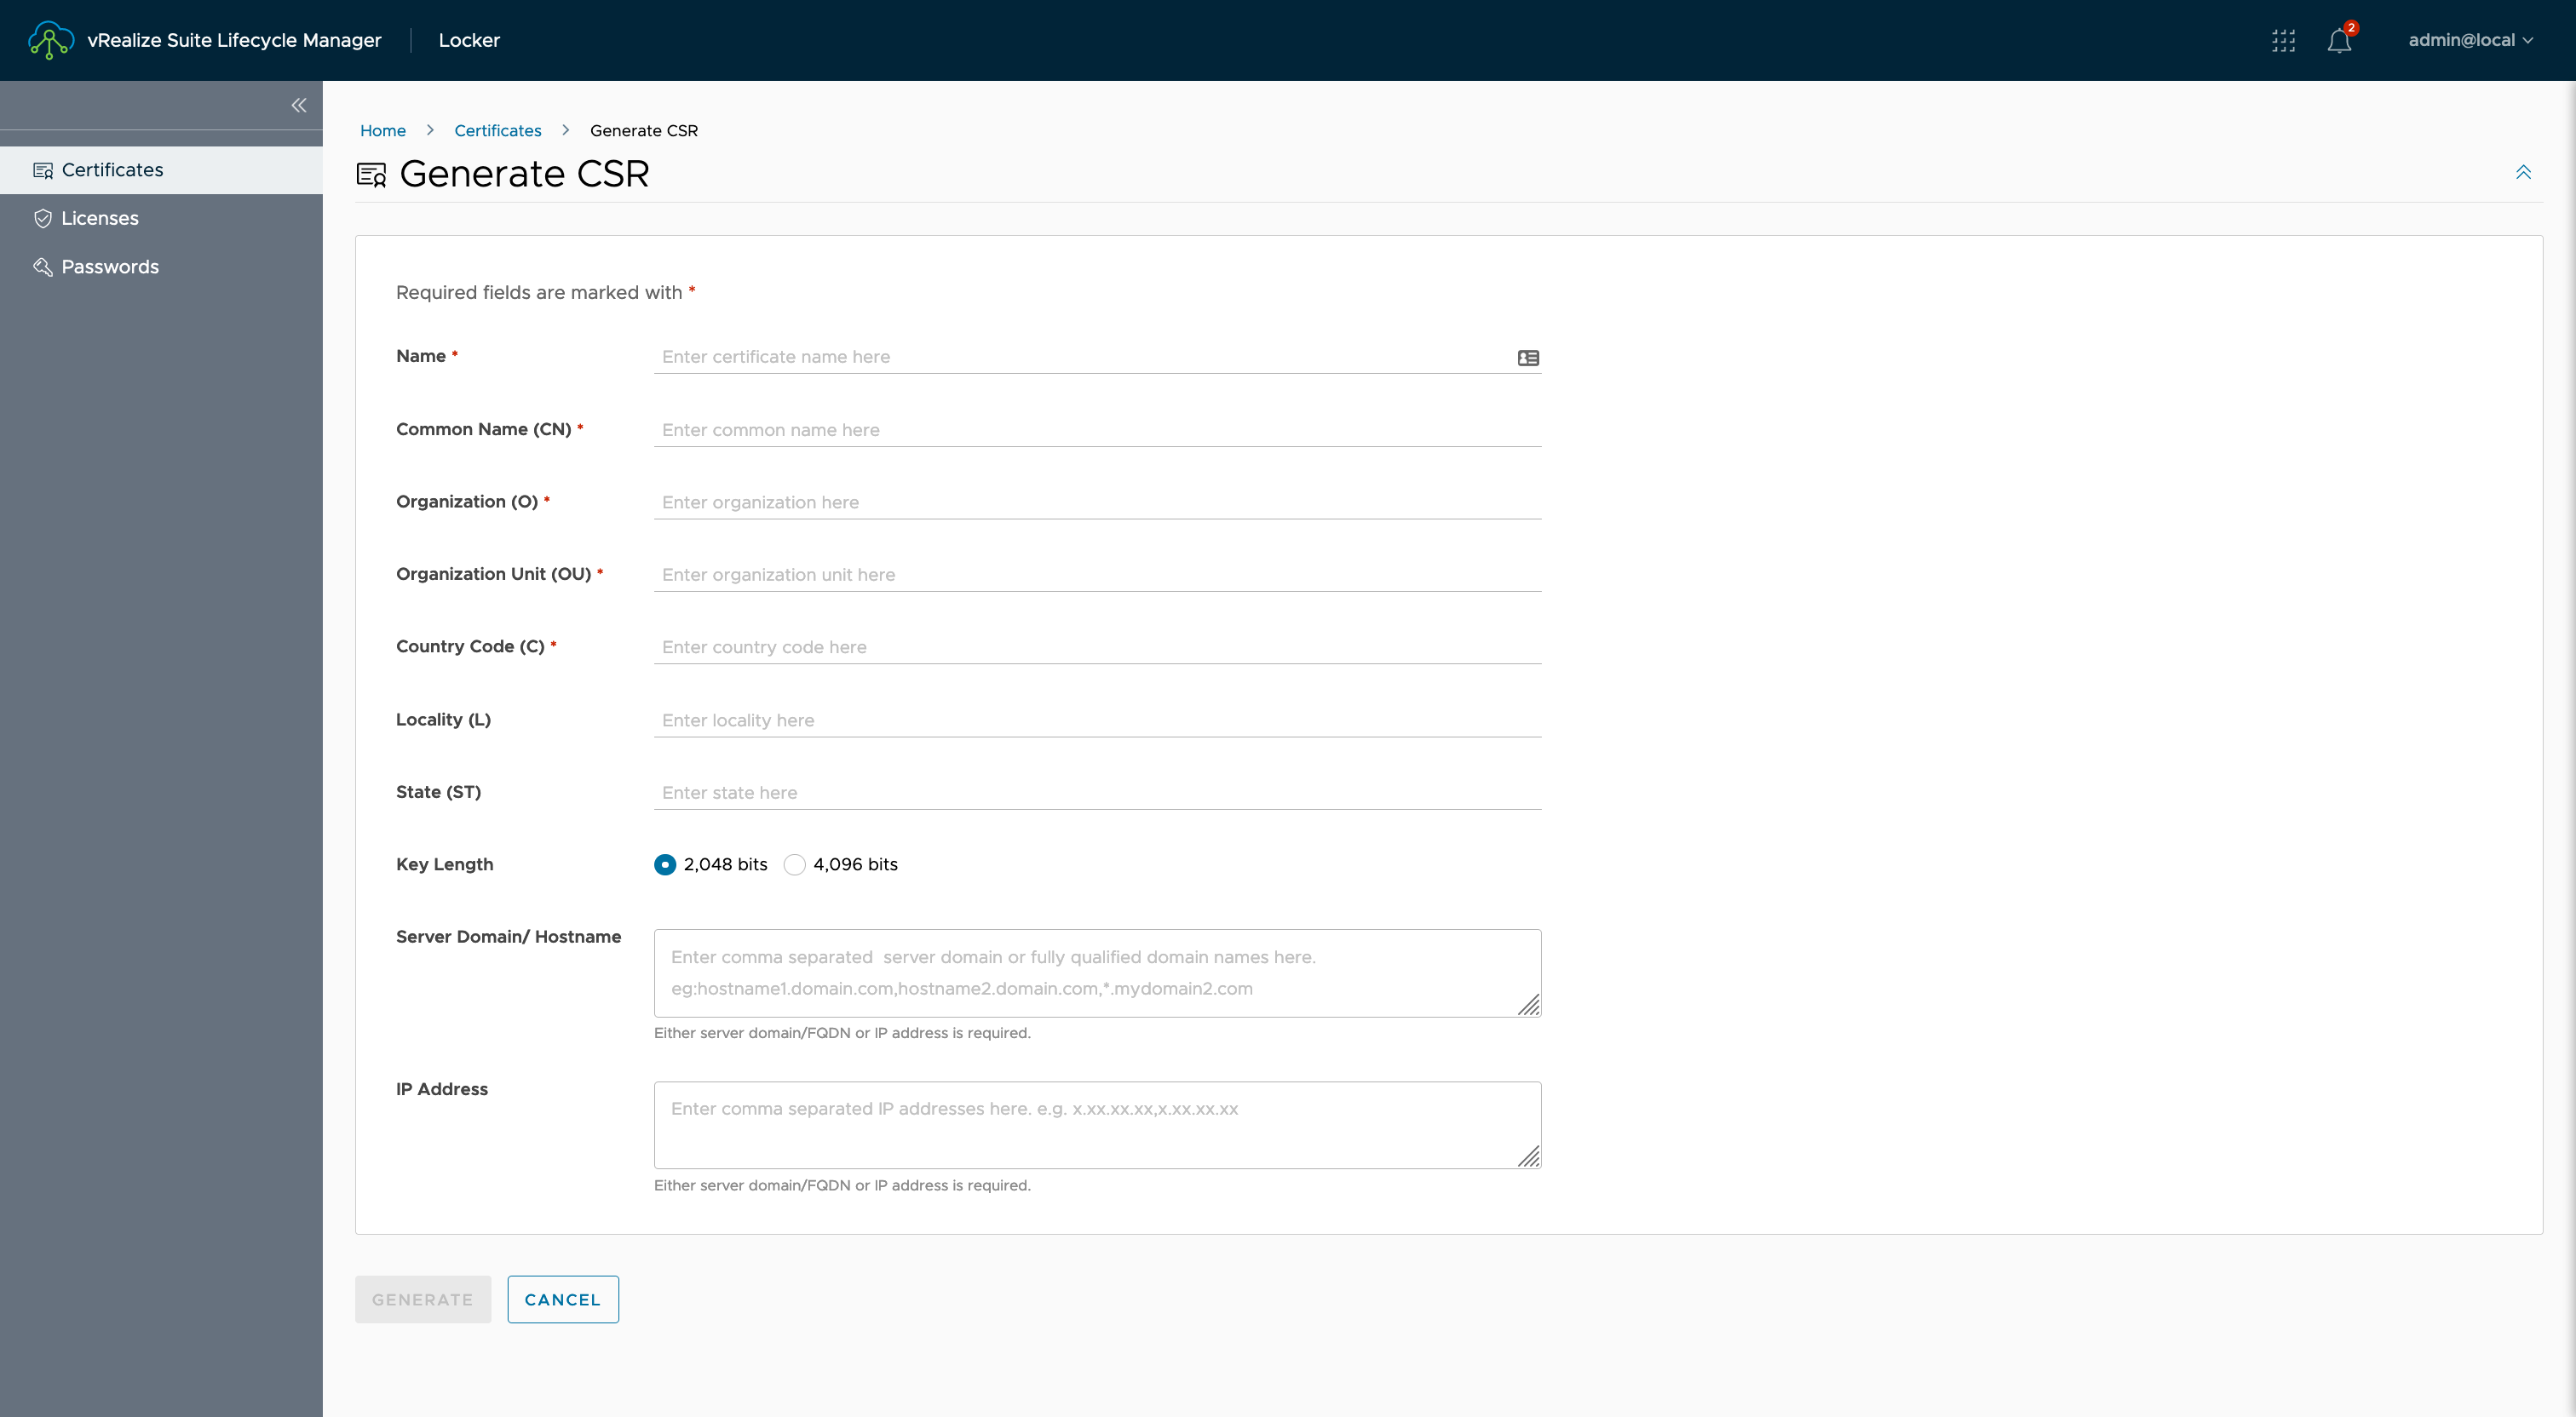
In an enterprise environment, you may need to use a CA-signed SSL certificate To do this you need to generate a Certificate Signing Request (CSR) which can be used to generate the certificate Now you can do this using a tool (such as OpenSSL) but you can also use vRSLCM to make this easier.
As you can see from the screenshot below, the following information required to create the CSR using the UI.
API Request
The following REST API request is required:
- Request Type: POST
- Request URL:
https://{vrslcm.fqdn}/lcm/locker/api/v2/certificates/csr - Request Header(s):
- Accept: application/json
- Content-Type: application/json
- Authorization: Basic {insert credential hash}
- Request Body Values:
- cN - the fqdn of the product, such as
vrli.thecloudxpert.local. - ip - (OPTIONAL) a list of IP addresses that should be included in the certificate.
- host - a list of the fqdns of each host that should be included in the certificate.
- oU - the Organizational Unit value for the SSL certificate.
- size - the Key Length of the certificate, either 2048 or 4096.
- o - the Organization value for the SSL certificate.
- l - the Location value for the SSL certificate.
- sT - the State value for the SSL certificate.
- c - the Country Code value for the SSL certificate.
- cN - the fqdn of the product, such as
API Example
An example cURL command for this REST API is:
curl --location --request POST 'https://{vrslcm.fqdn}/lcm/locker/api/v2/certificates/csr' \
--header 'Accept: application/json' \
--header 'Content-Type: application/json' \
--header 'Authorization: Basic {admin@local credential hash}'
--data-raw '{
  "c": "GB",
  "cN": "vra.thecloudxpert.local",
  "host": [
    "vra.thecloudxpert.local"
  ],
  "ip": [],
  "l": "London",
  "o": "thecloudxpert",
  "oU": "thecloudxpert",
  "sT": "United Kingdom",
  "size": 4096
}'
API Response
The expected response returned from a successful request (Status Code=200) will be the CSR and the Key used to encrypt the CSR.
-----BEGIN CERTIFICATE REQUEST-----
{Certificate Request Text}
-----END CERTIFICATE REQUEST-----
-----BEGIN PRIVATE KEY-----
{Private Key Text}
-----END PRIVATE KEY-----
These two components can be sent to whomever is responsible for creating SSL Certificate so that a CA-signed SSL certificate can be generated.
Importing a CA-Signed SSL Certificate
Overview
Once we have been given an SSL certificate, we can import it into vRSLCM so that we can then use it to replace either the existing self-signed or CA-signed certificate.
API Request
The following REST API request is required:
- Request Type: POST
- Request URL:
https://{vrslcm.fqdn}/lcm/locker/api/v2/certificates/import - Request Header(s):
- Accept: application/json
- Content-Type: application/json
- Authorization: Basic {insert credential hash}
- Request Body Values:
- alias - the user friendly name for the SSL certificate in the UI.
- certificateChain - a string of the SSL certificate chain in order {leaf}->{sub-ordinate CA}->{CA}.
- passphrase - (OPTIONAL) the passphrase for the SSL certificate.
- privateKey - a string value of the key used to encrypt the SSL certificate.
API Example
An example cURL command for this REST API is:
curl --location --request POST 'https://{vrslcm.fqdn}/lcm/locker/api/v2/certificates/import' \
--header 'Accept: application/json' \
--header 'Content-Type: application/json' \
--header 'Authorization: Basic {admin@local credential hash}'
--data-raw '{
  "alias": "VMware vRealize Automation",
  "certificateChain": "-----BEGIN CERTIFICATE-----\n{certchain data}\n-----END CERTIFICATE-----\n",
  "passphrase": "",
  "privateKey": "-----BEGIN PRIVATE KEY-----\n{encryption key data}}\n-----END PRIVATE KEY-----\n"
}'
API Response
The expected response returned from a successful request (Status Code=200) will a confirmation that the SSL certificate has been imported.
{
    "alias": "VMware vRealize Automation",
    "key": "-----BEGIN PRIVATE KEY-----\n{encryption key data}}\n-----END PRIVATE KEY-----\n",
    "certChain": "-----BEGIN CERTIFICATE-----\n{certchain data}\n-----END CERTIFICATE-----\n",
    "leafCert": "-----BEGIN CERTIFICATE-----\n{leaf cert data}\n-----END CERTIFICATE-----\n",
    "validations": [],
    "validity": {
        "period": "9 months and 29 days",
        "expiresOn": "2023-03-29T18:31:13.000+0000",
        "issuedOn": "2022-05-30T09:57:00.000+0000",
        "healthy": true
    },
    "certInfo": {
        "subject": "C=GB,ST=United Kingdom,L=London,O=thecloudxpert,OU=thecloudxpert,CN=vra.thecloudxpert.local",
        "issuer": "DC=local,DC=thecloudxpert,CN=CX-CA",
        "san": "DNS: vra.thecloudxpert.local",
        "algorithm": "SHA512WITHRSA",
        "keyAlgorithm": "RSA",
        "keyLength": 4096,
        "sha256": "{sha256 fingerprint}",
        "sha1": "{sha1 fingerprint}"
    }
}
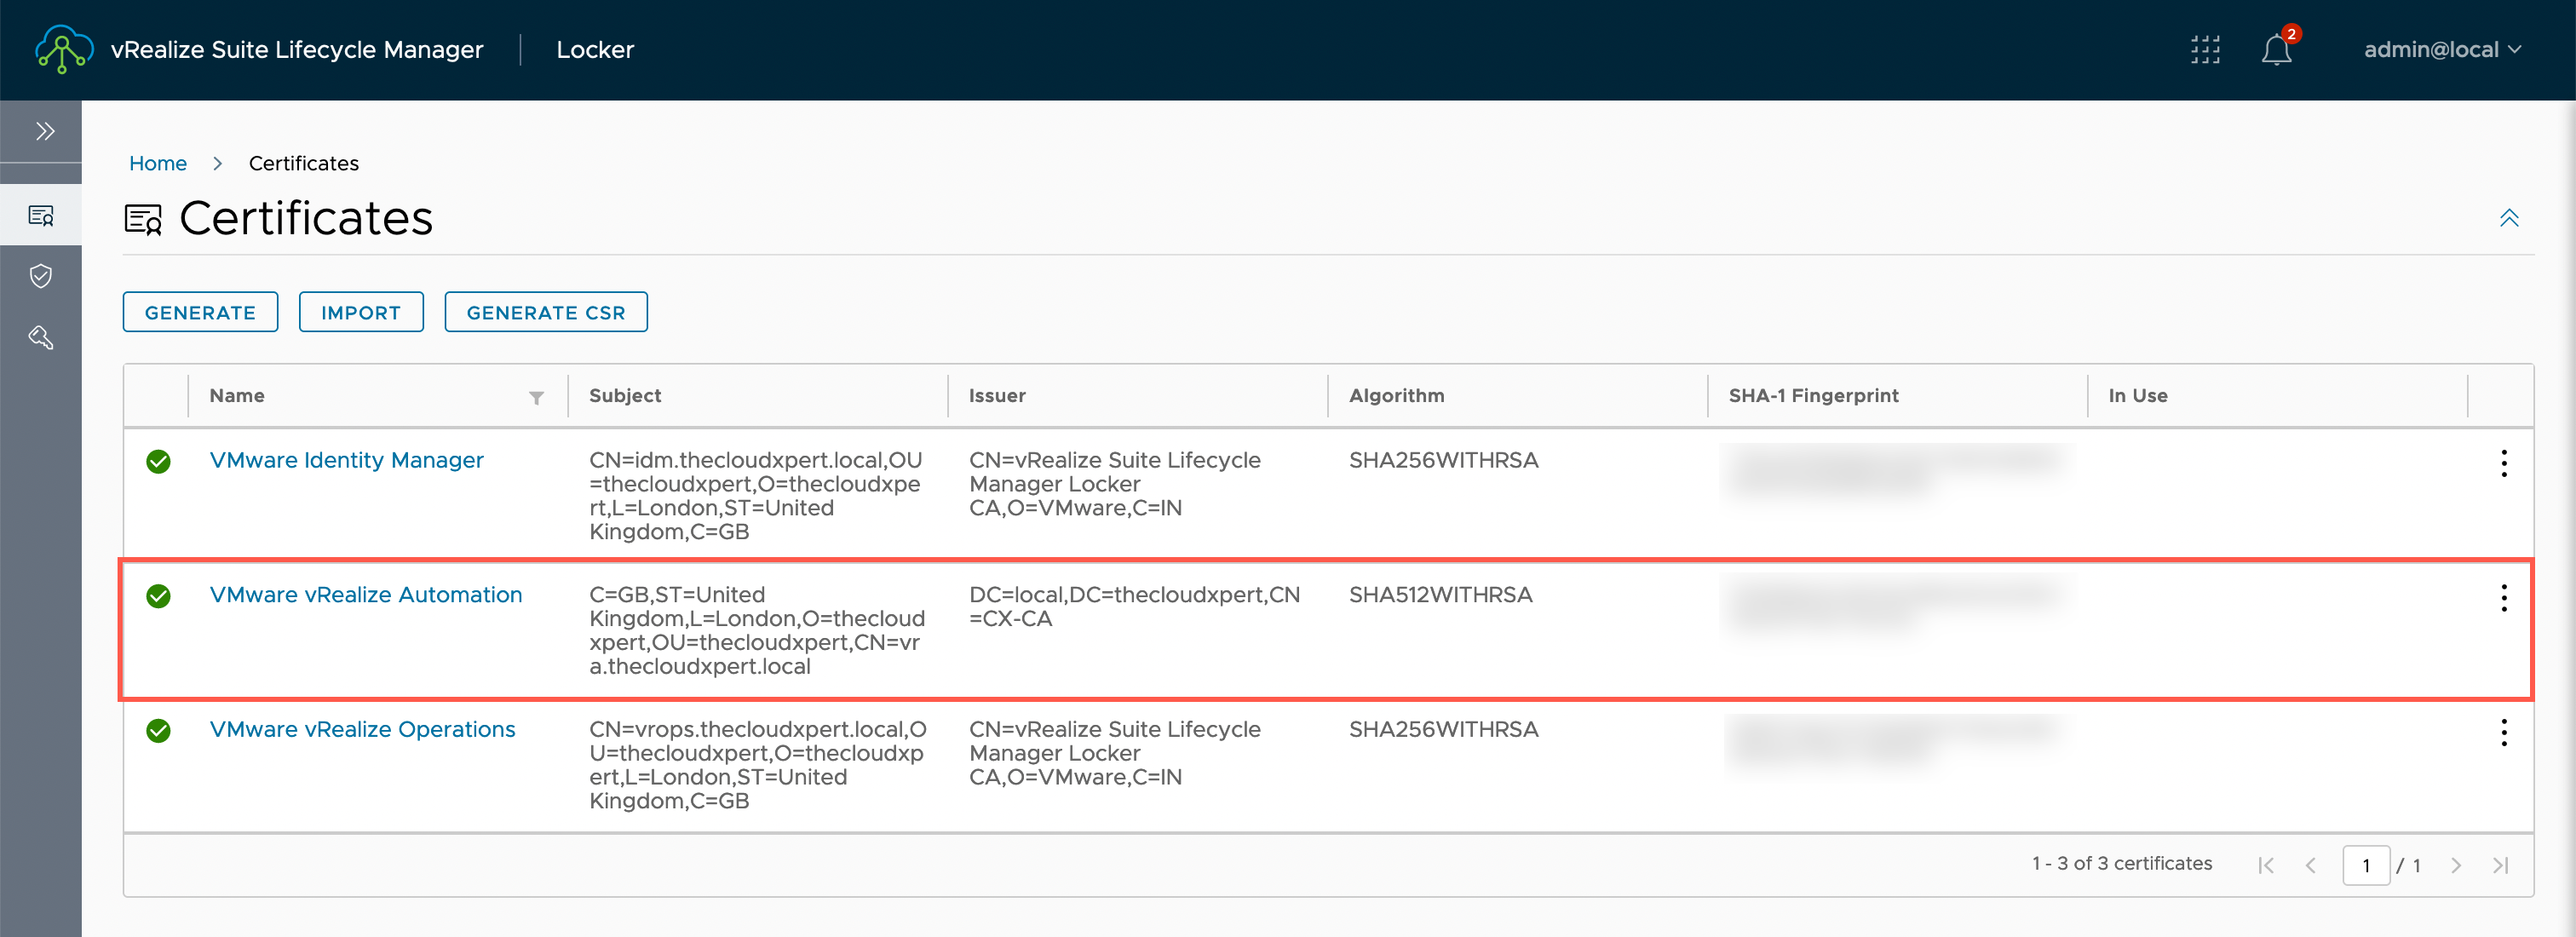
If we logged into vRSLCM using the UI (and navigated to Locker > Certificates), we would now see the following certificates configured:
Deleting a SSL Certificate
Overview
Once a certificate has expired and has been replaced. it maybe prudent to remove it In this section, we will explore how we can use the API to remove an existing SSL certificate from vRSLCM.
API Request
The following REST API request is required:
- Request Type: DELETE
- Request URL:
https://{vrslcm.fqdn}/lcm/locker/api/v2/certificates/{vmid}- vmid - the unique id of the SSL certificate.
- Request Header(s):
- Accept: application/json
- Content-Type: application/json
- Authorization: Basic {insert credential hash}
- Request Body Values:
- none
vmid can be obtained by querying the certificates available using the API calls in
Viewing existing SSL Certificates
.
API Example
An example cURL command for this REST API is:
curl --location --request DELETE 'https://{vrslcm.fqdn}/lcm/locker/api/v2/certificates/{vmid}' \
--header 'Accept: application/json' \
--header 'Content-Type: application/json' \
--header 'Authorization: Basic {admin@local credential hash}'
API Response
The expected response returned from a successful request (Status Code=200) will a confirmation that the SSL certificate has been imported.
{
    "certChain": "-----BEGIN CERTIFICATE-----\n{certchain data}\n-----END CERTIFICATE-----\n",
    "key": "-----BEGIN PRIVATE KEY-----\n{encryption key data}}\n-----END PRIVATE KEY-----\n",
    "vmid": "{vmid}",
    "alias": "VMware vRealize Automation",
    "leafCert": "-----BEGIN CERTIFICATE-----\n{leaf cert data}\n-----END CERTIFICATE-----\n",
    "validations": [],
    "validity": {
        "period": "9 months and 29 days",
        "expiresOn": "2023-03-29T18:31:13.000+0000",
        "issuedOn": "2022-05-30T09:57:00.000+0000",
        "healthy": true
    },
    "certInfo": {
        "subject": "C=GB,ST=United Kingdom,L=London,O=thecloudxpert,OU=thecloudxpert,CN=vra.thecloudxpert.local",
        "issuer": "DC=local,DC=thecloudxpert,CN=CX-CA",
        "san": "DNS: vra.thecloudxpert.local",
        "algorithm": "SHA512WITHRSA",
        "keyAlgorithm": "RSA",
        "keyLength": 4096,
        "sha256": "{sha256 fingerprint}",
        "sha1": "{sha1 fingerprint}"
    }
}
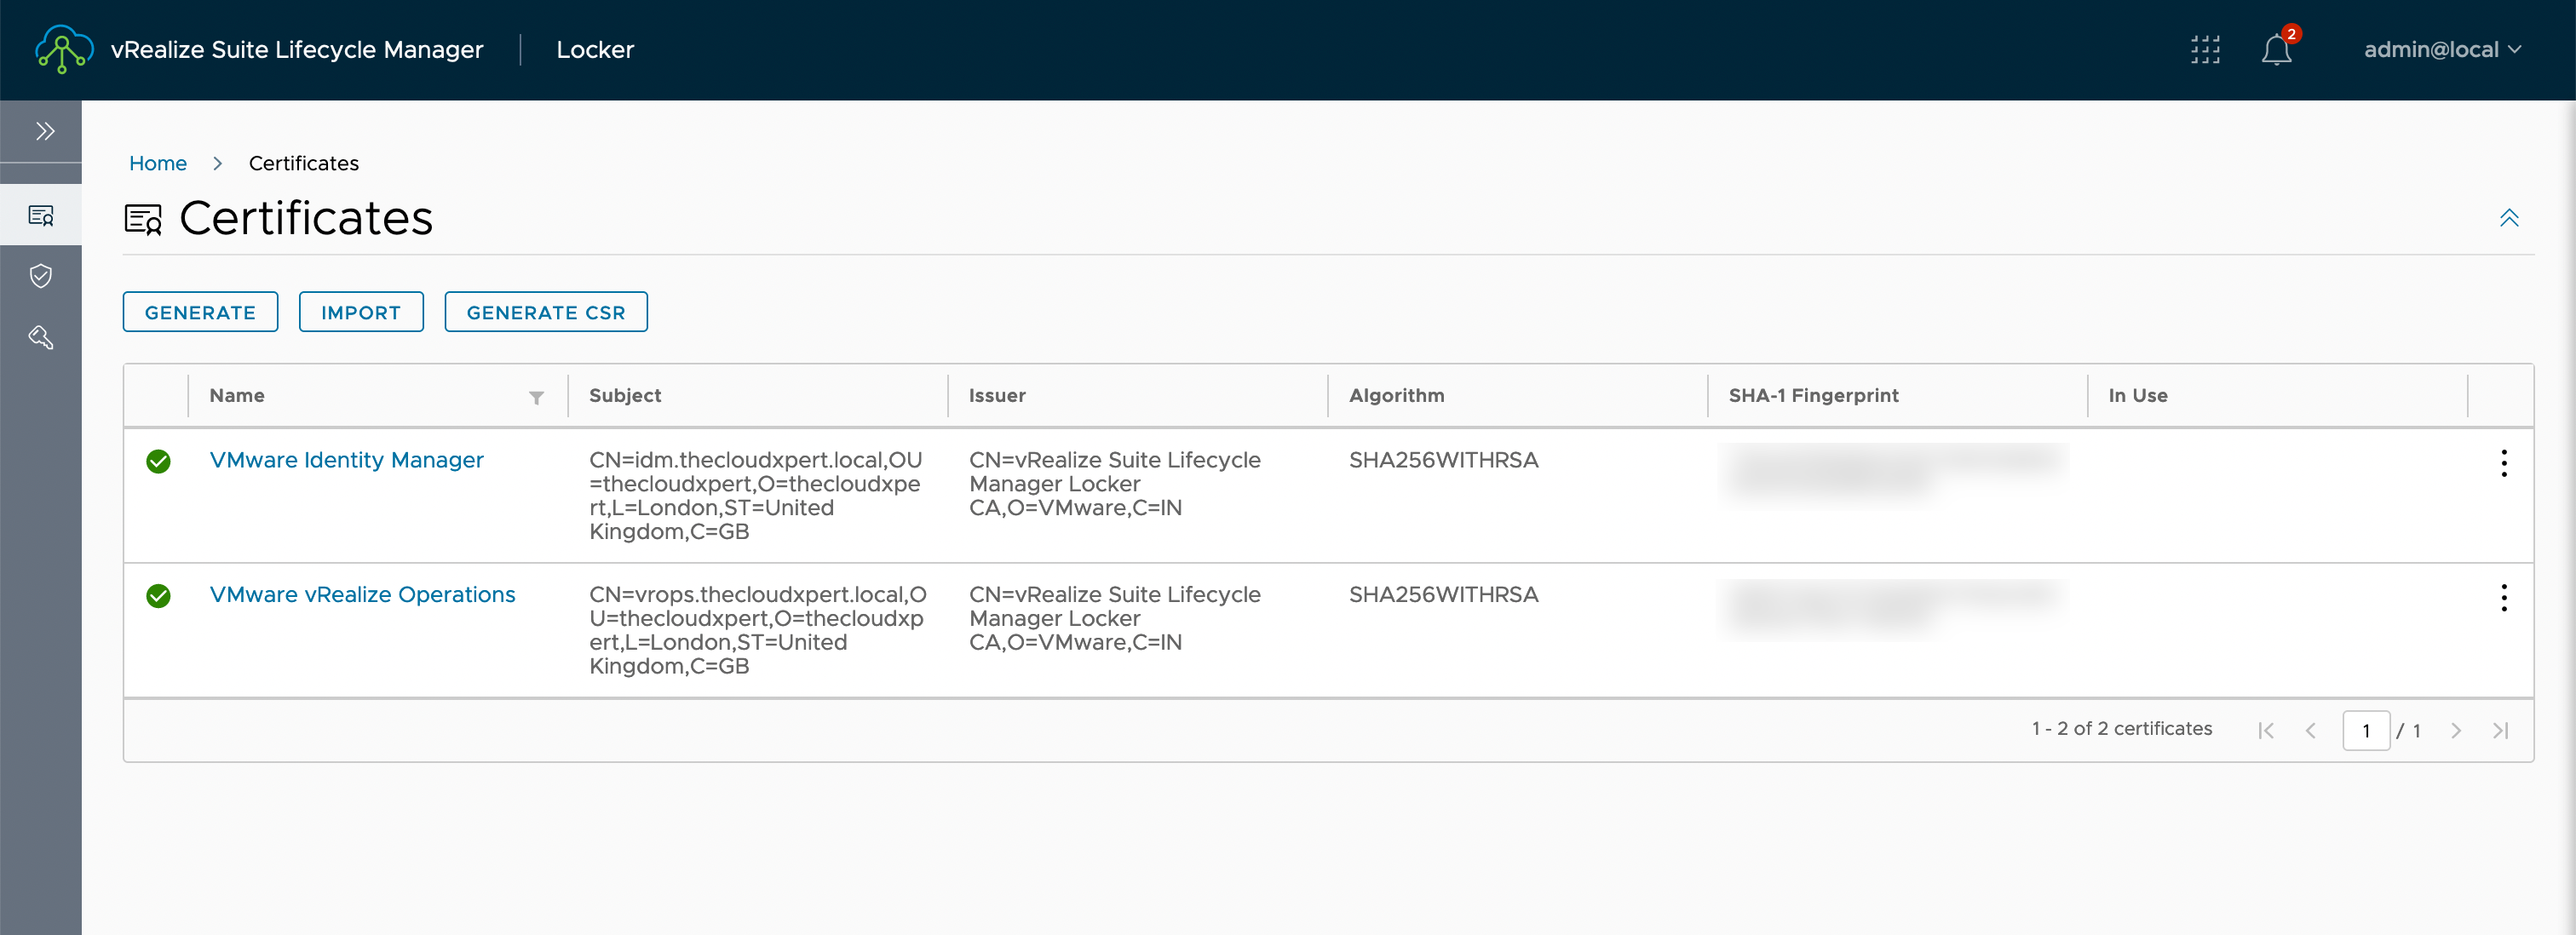
If we logged into vRSLCM using the UI (and navigated to Locker > Certificates), the target certificate would be removed and we would now see the following certificates configured:
Wrapping It All Up
In this short post we have explored the way in which we can manage (creating, importing and deleting) SSL certificates in vRSLCM using the API.
If this API this snippet has been helpful, make sure you checkout the rest of the series !
Published on 23 May 2022 by Christopher Lewis. Words: 1739. Reading Time: 9 mins.
- Using the vRealize Suite Lifecycle Manager (vRSLCM) API for vRSLCM Day 2 Operations - Upgrading vRSLCM ()
- Using the vRealize Suite Lifecycle Manager (vRSLCM) API for vRSLCM Day 2 Operations - Downloading Products from My VMware ()
- Using the vRealize Suite Lifecycle Manager (vRSLCM) API for vRSLCM Day 2 Operations - Managing Global DNS ()
- Using the vRealize Suite Lifecycle Manager (vRSLCM) API for vRSLCM Day 2 Operations - Managing Global NTP ()
- Using the vRealize Suite Lifecycle Manager (vRSLCM) API for vRSLCM Day 2 Operations - Managing Datacenters ()

