VCF 9 Day 2 - Installing VCF Operations for logs
VMware VCF
Published on 6 February 2026 by Christopher Lewis. Words: 963. Reading Time: 5 mins.
I’m not sure why VCF Operations for logs is not considered a mandatory component in VCF. In my view it is definitely a critical component because, if nothing else, there is a number of VCF Operations dashboards and features that rely on events from VCF Operations for logs.
With that in mind, let us walk through how to install and configure VCF Operations for logs as a Day 2 activity.
Step By Step Guide
Prerequisites
To complete the step by step guide, you will need have completed the following:
- Successfully deployed an instance of VCF 9.
- Configured either an online or offline depot and downloaded the VCF Operations for logs install binaries.
- Created DNS records for the number of appliances being deployed and the integrated load balancer.
- Create a credential in VCF9 Fleet Manager that contains the password for the admin account.
Walkthrough
Installing VCF Operations for logs
- Navigate to the VCF Operations url (i.e.
https://<ops.fqdn>) in the web browser.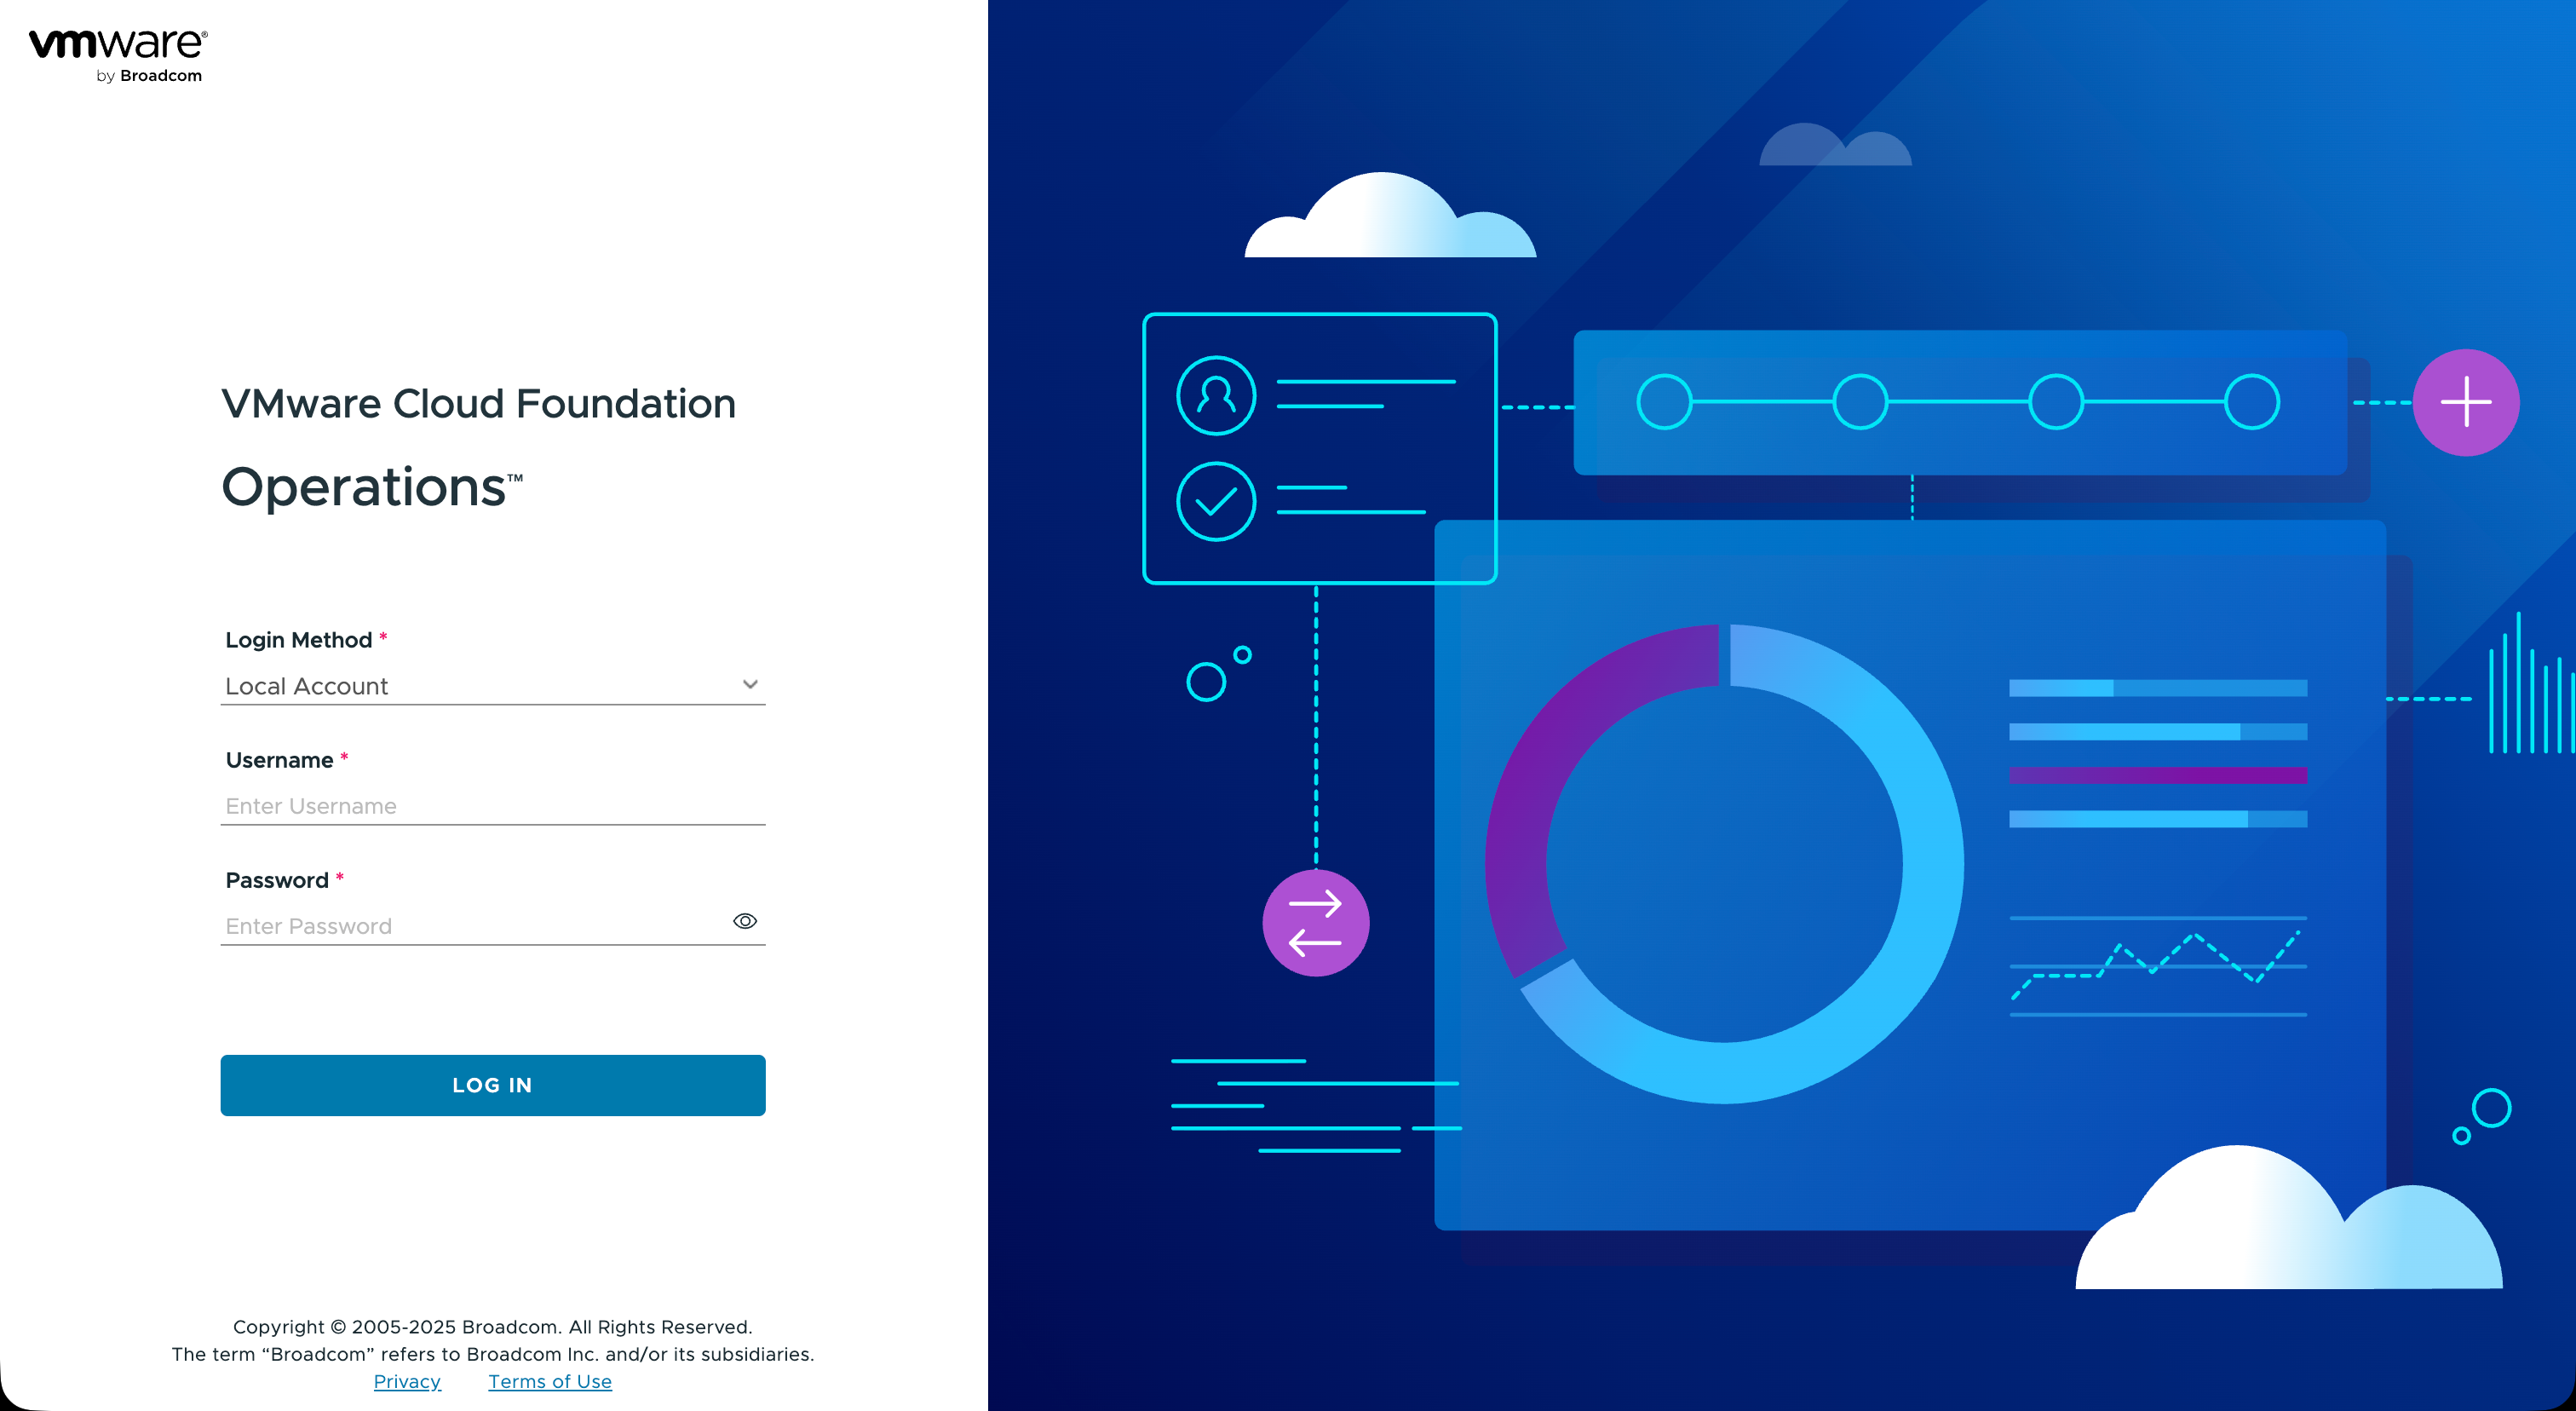
- From the Login Method dropdown, select Local Account and then, in the Username field, type
admin, enter the admin password into the Password field and click LOG IN.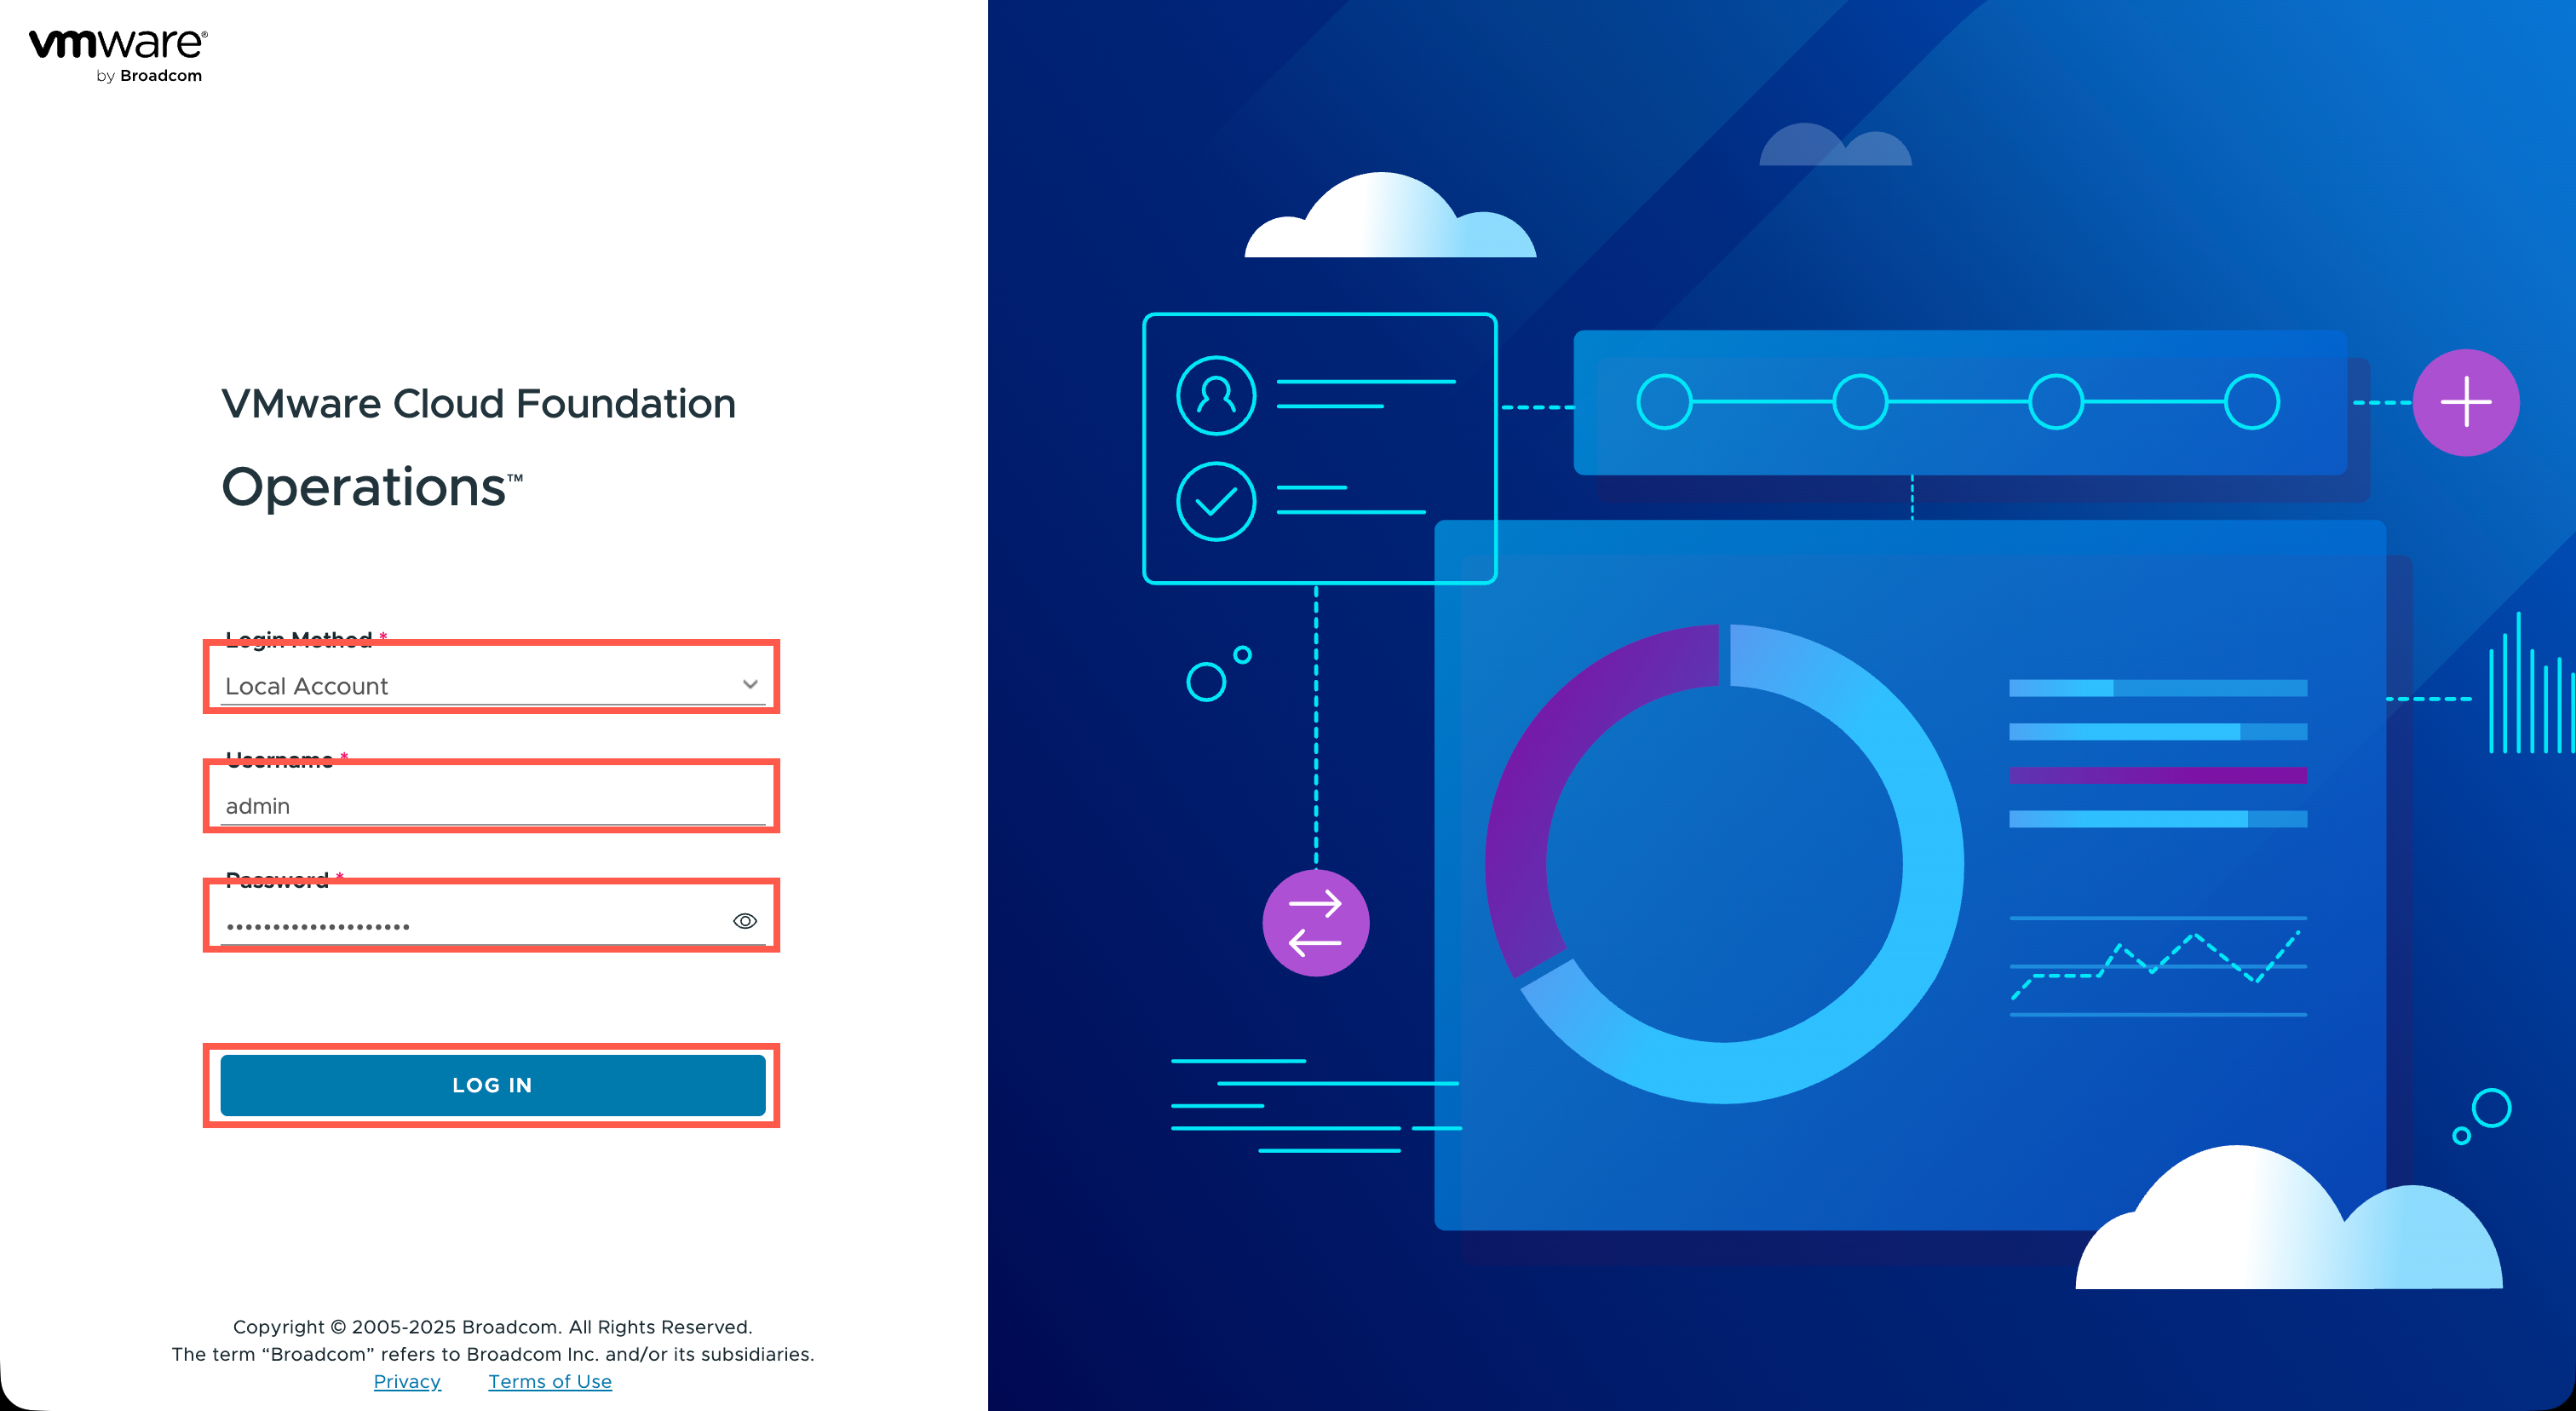
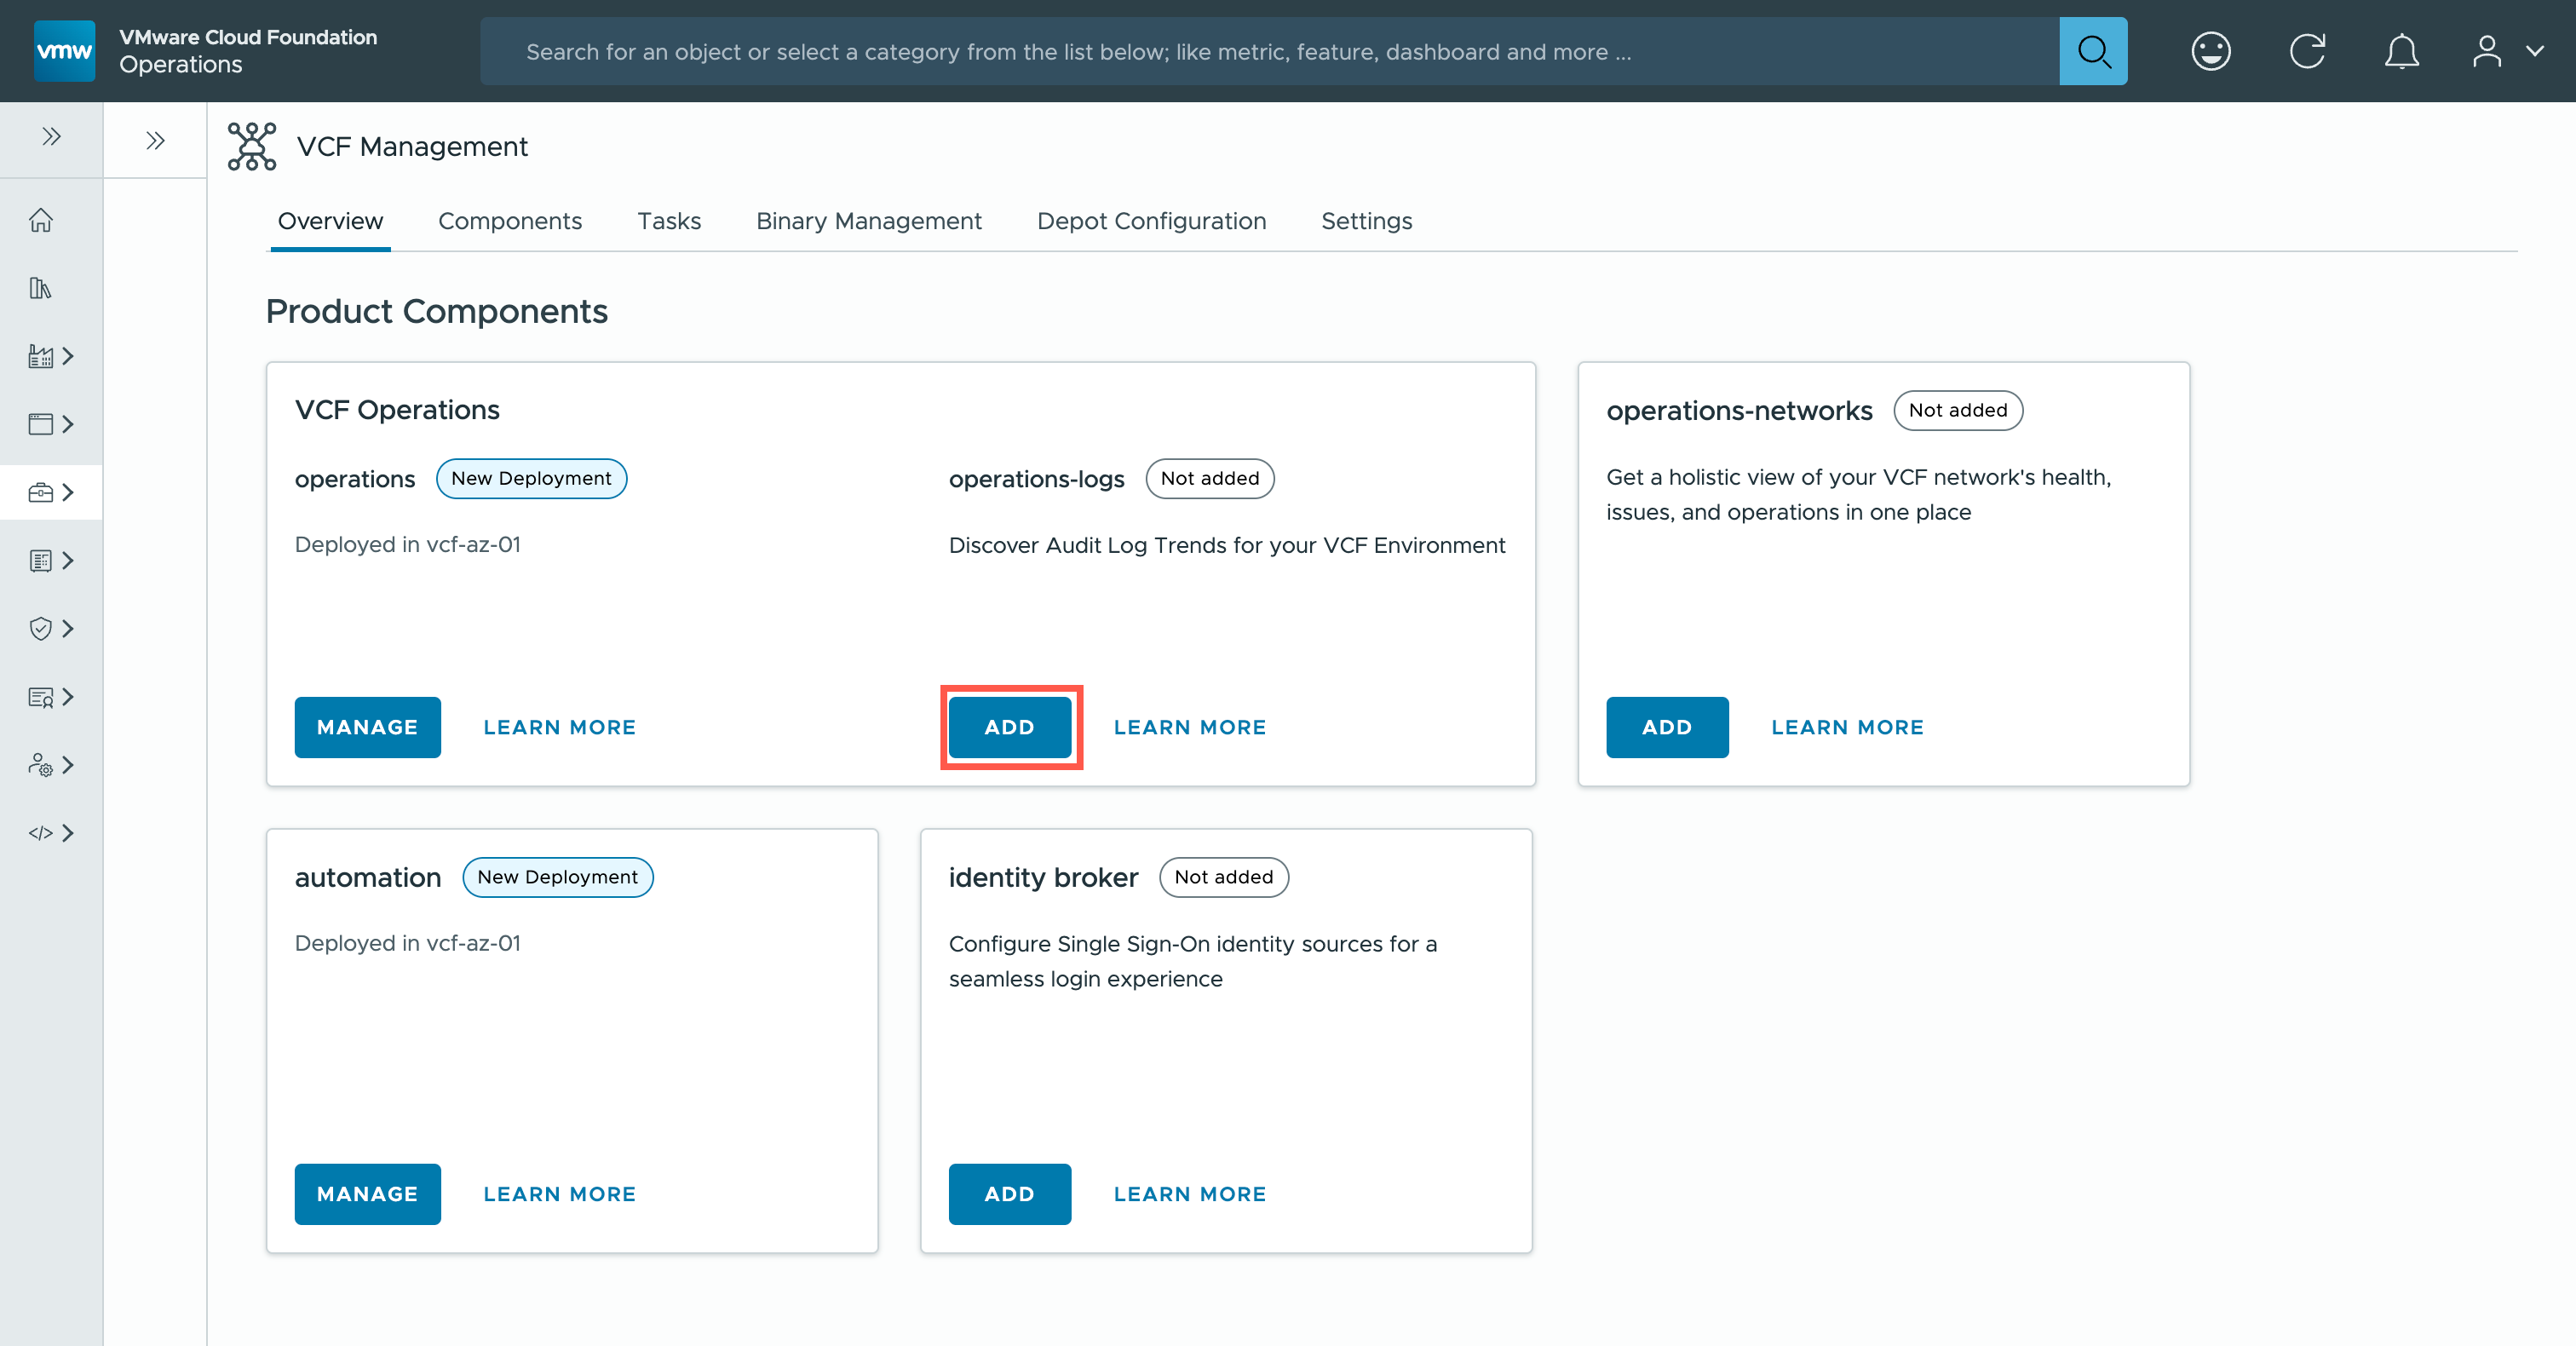
- From the VCF Operations Home page, click Fleet Management and then click Lifecycle.
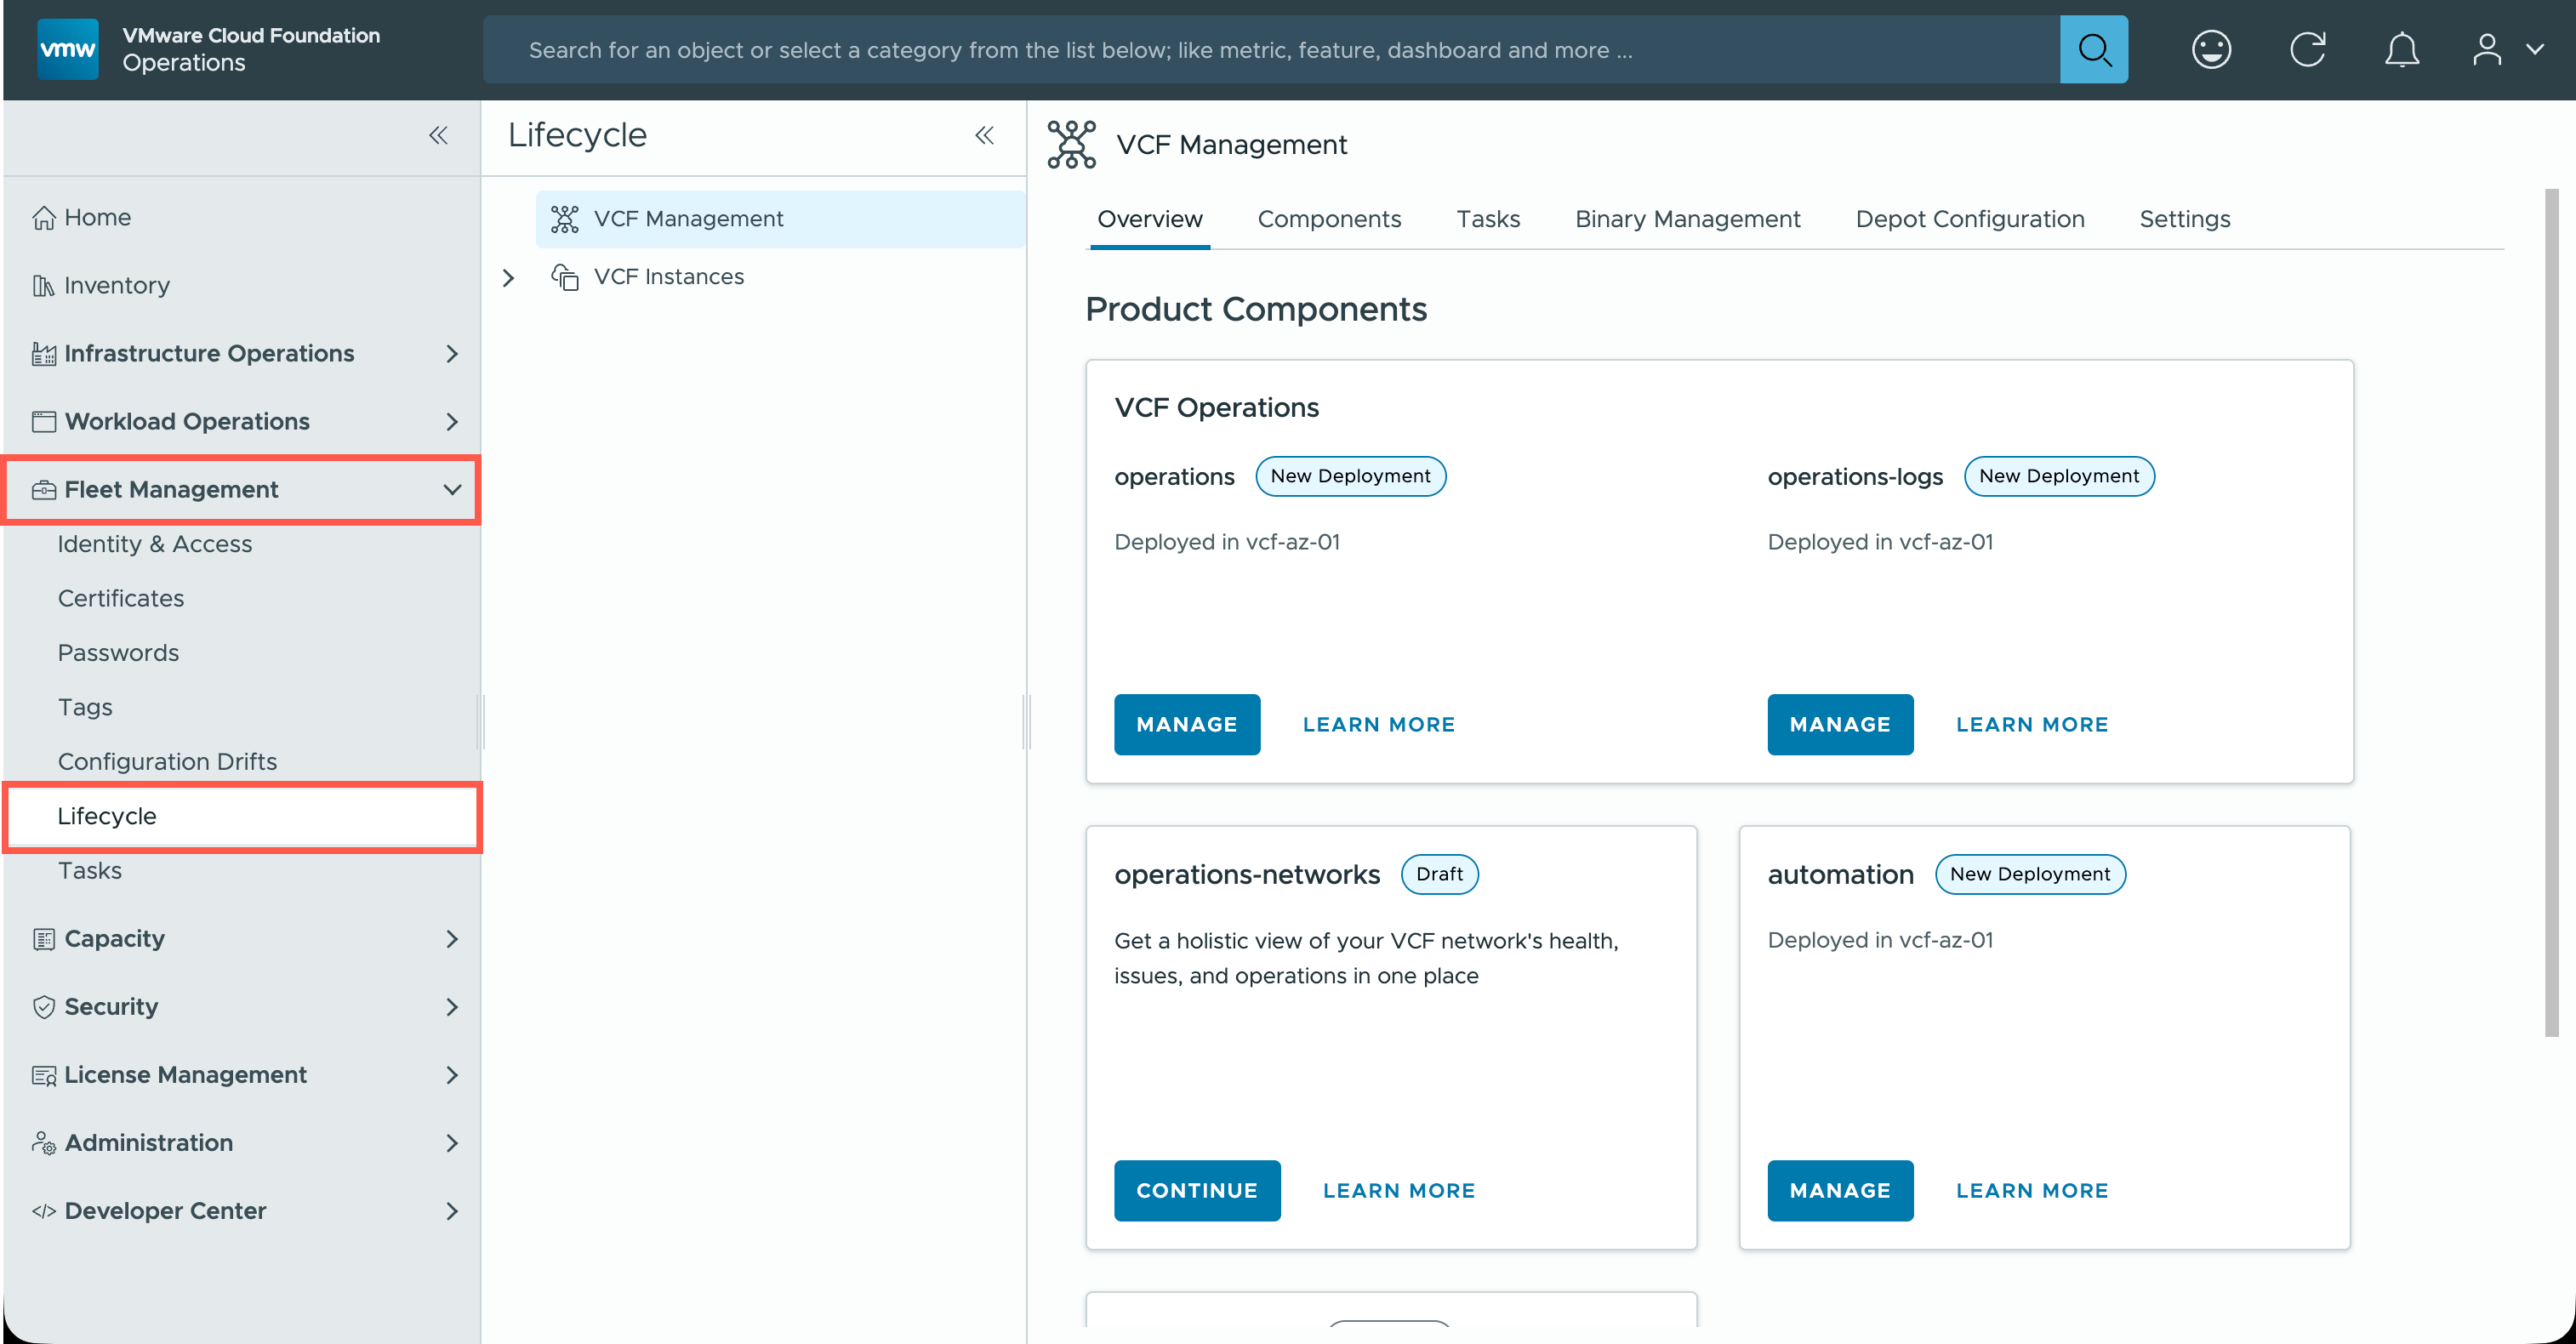
- Click « (twice) to minimize the navigation menu.
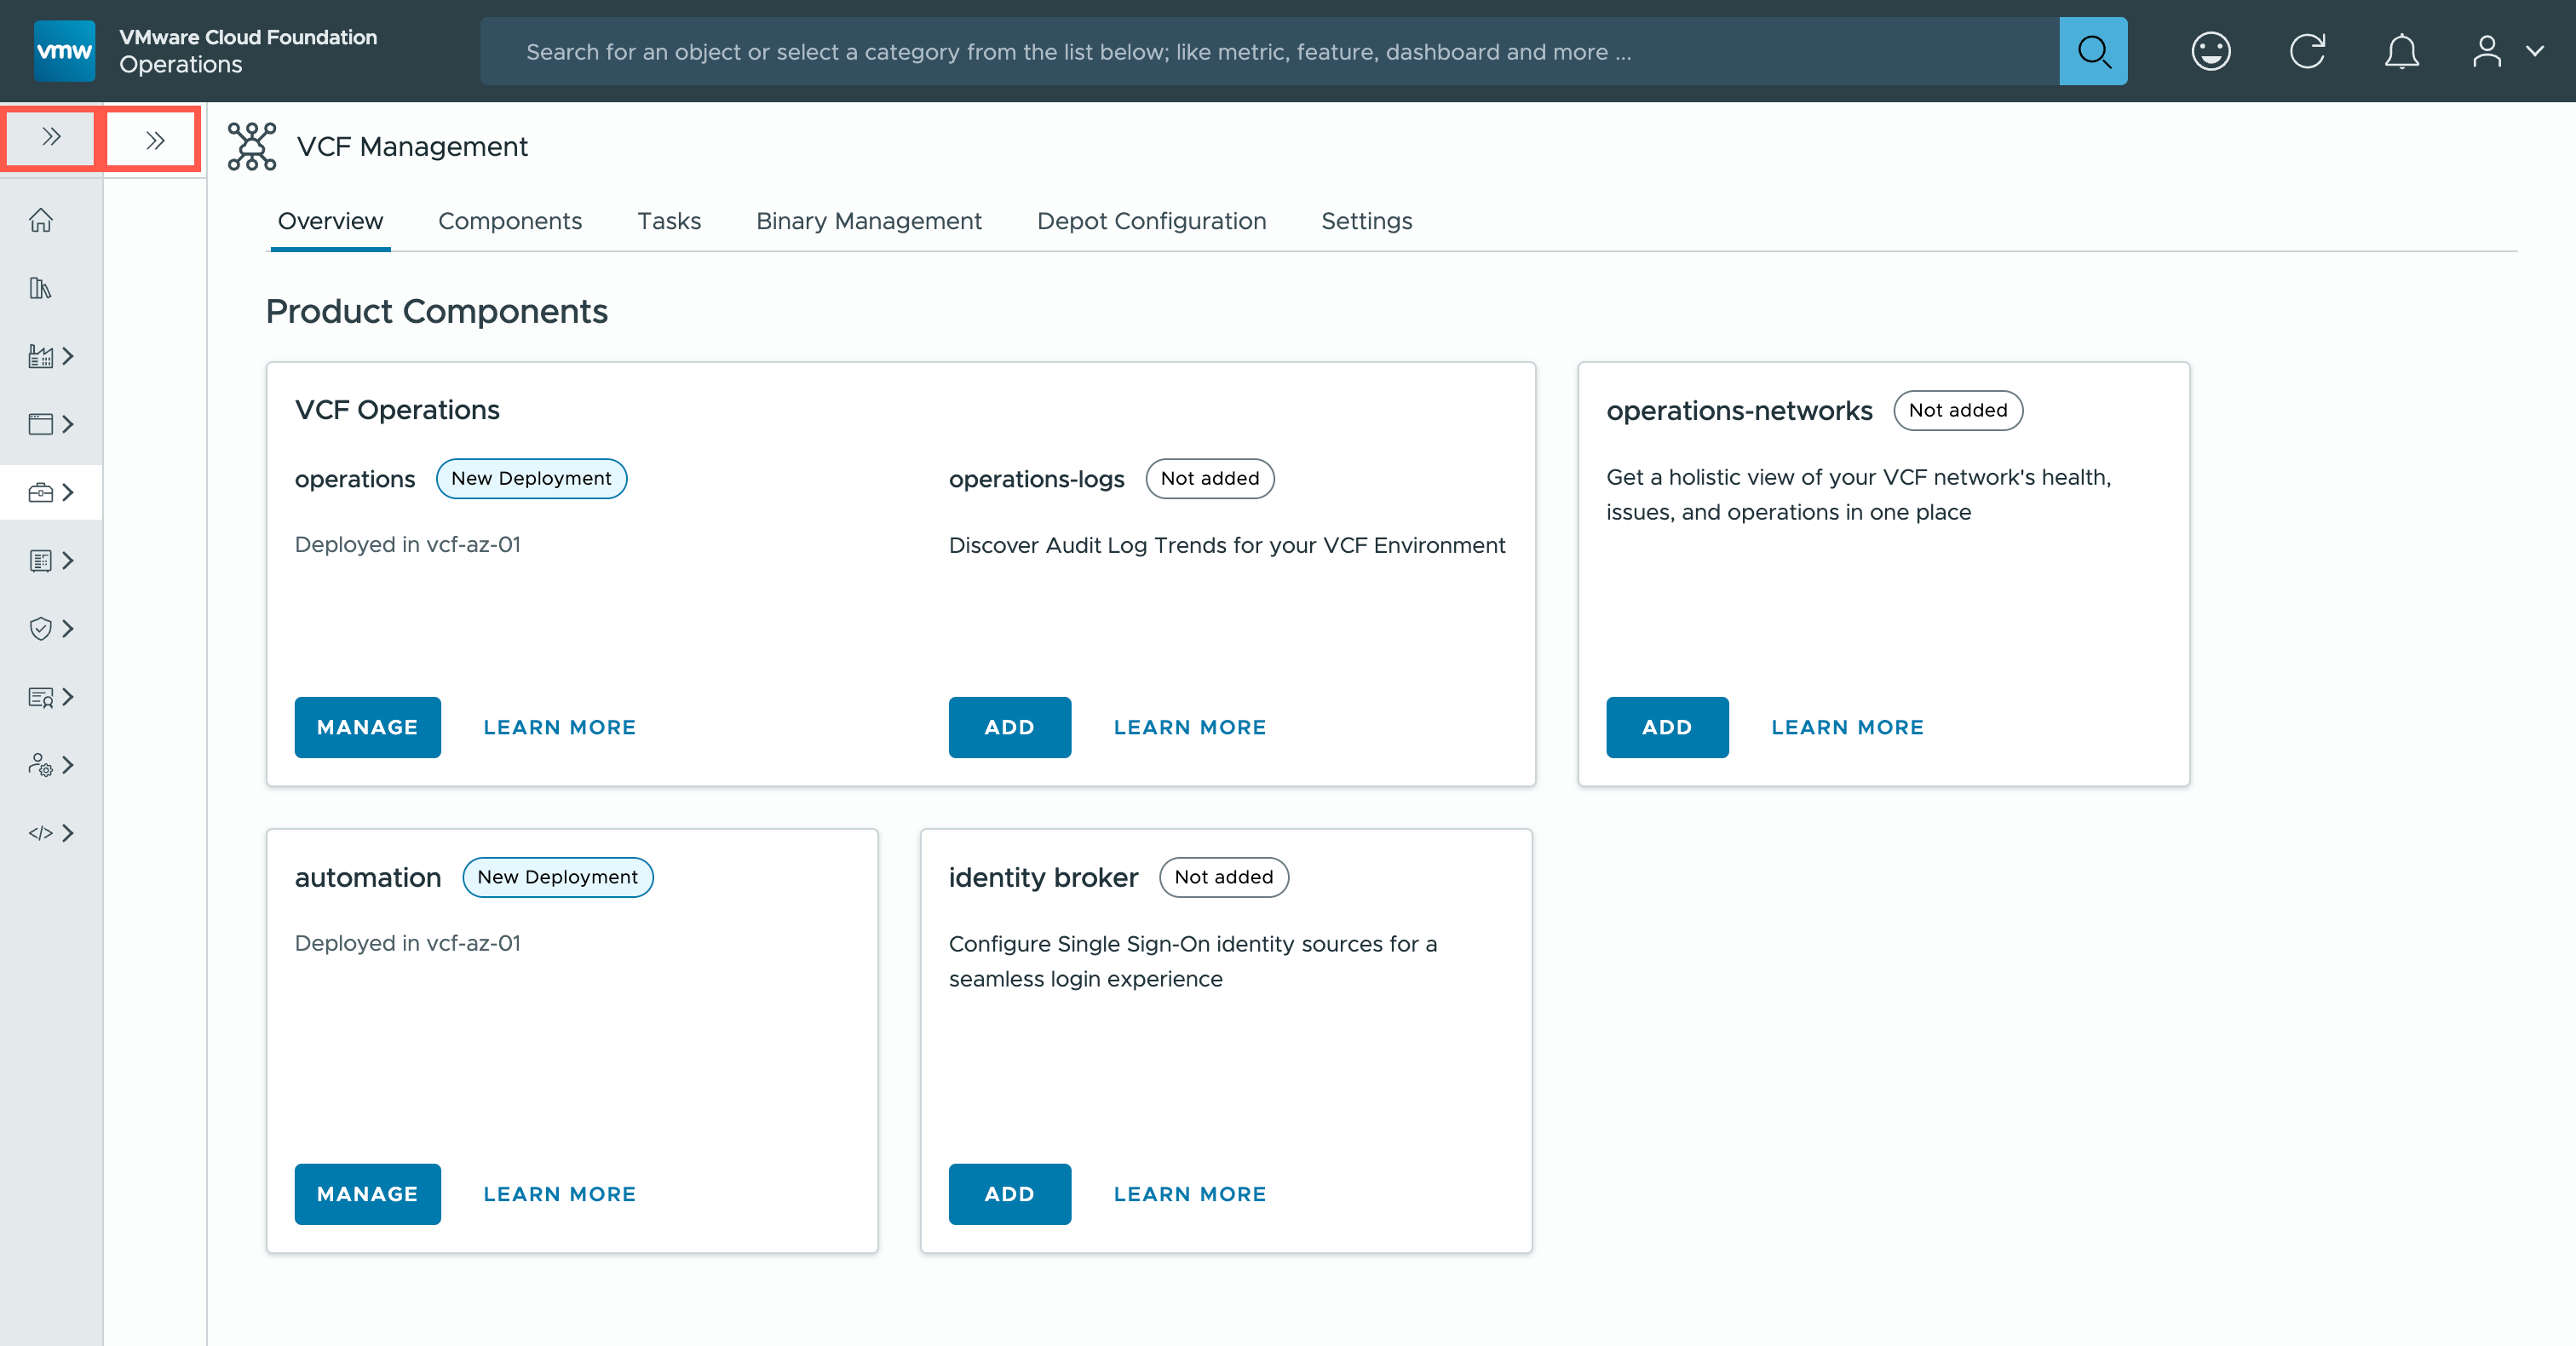
- At the Product Components page, click ADD.
- At the Deployment page, select New Install from the Installation Type option, select 9.0.2.0 from the Version dropdown and select Standard from the Deployment Type dropdown.
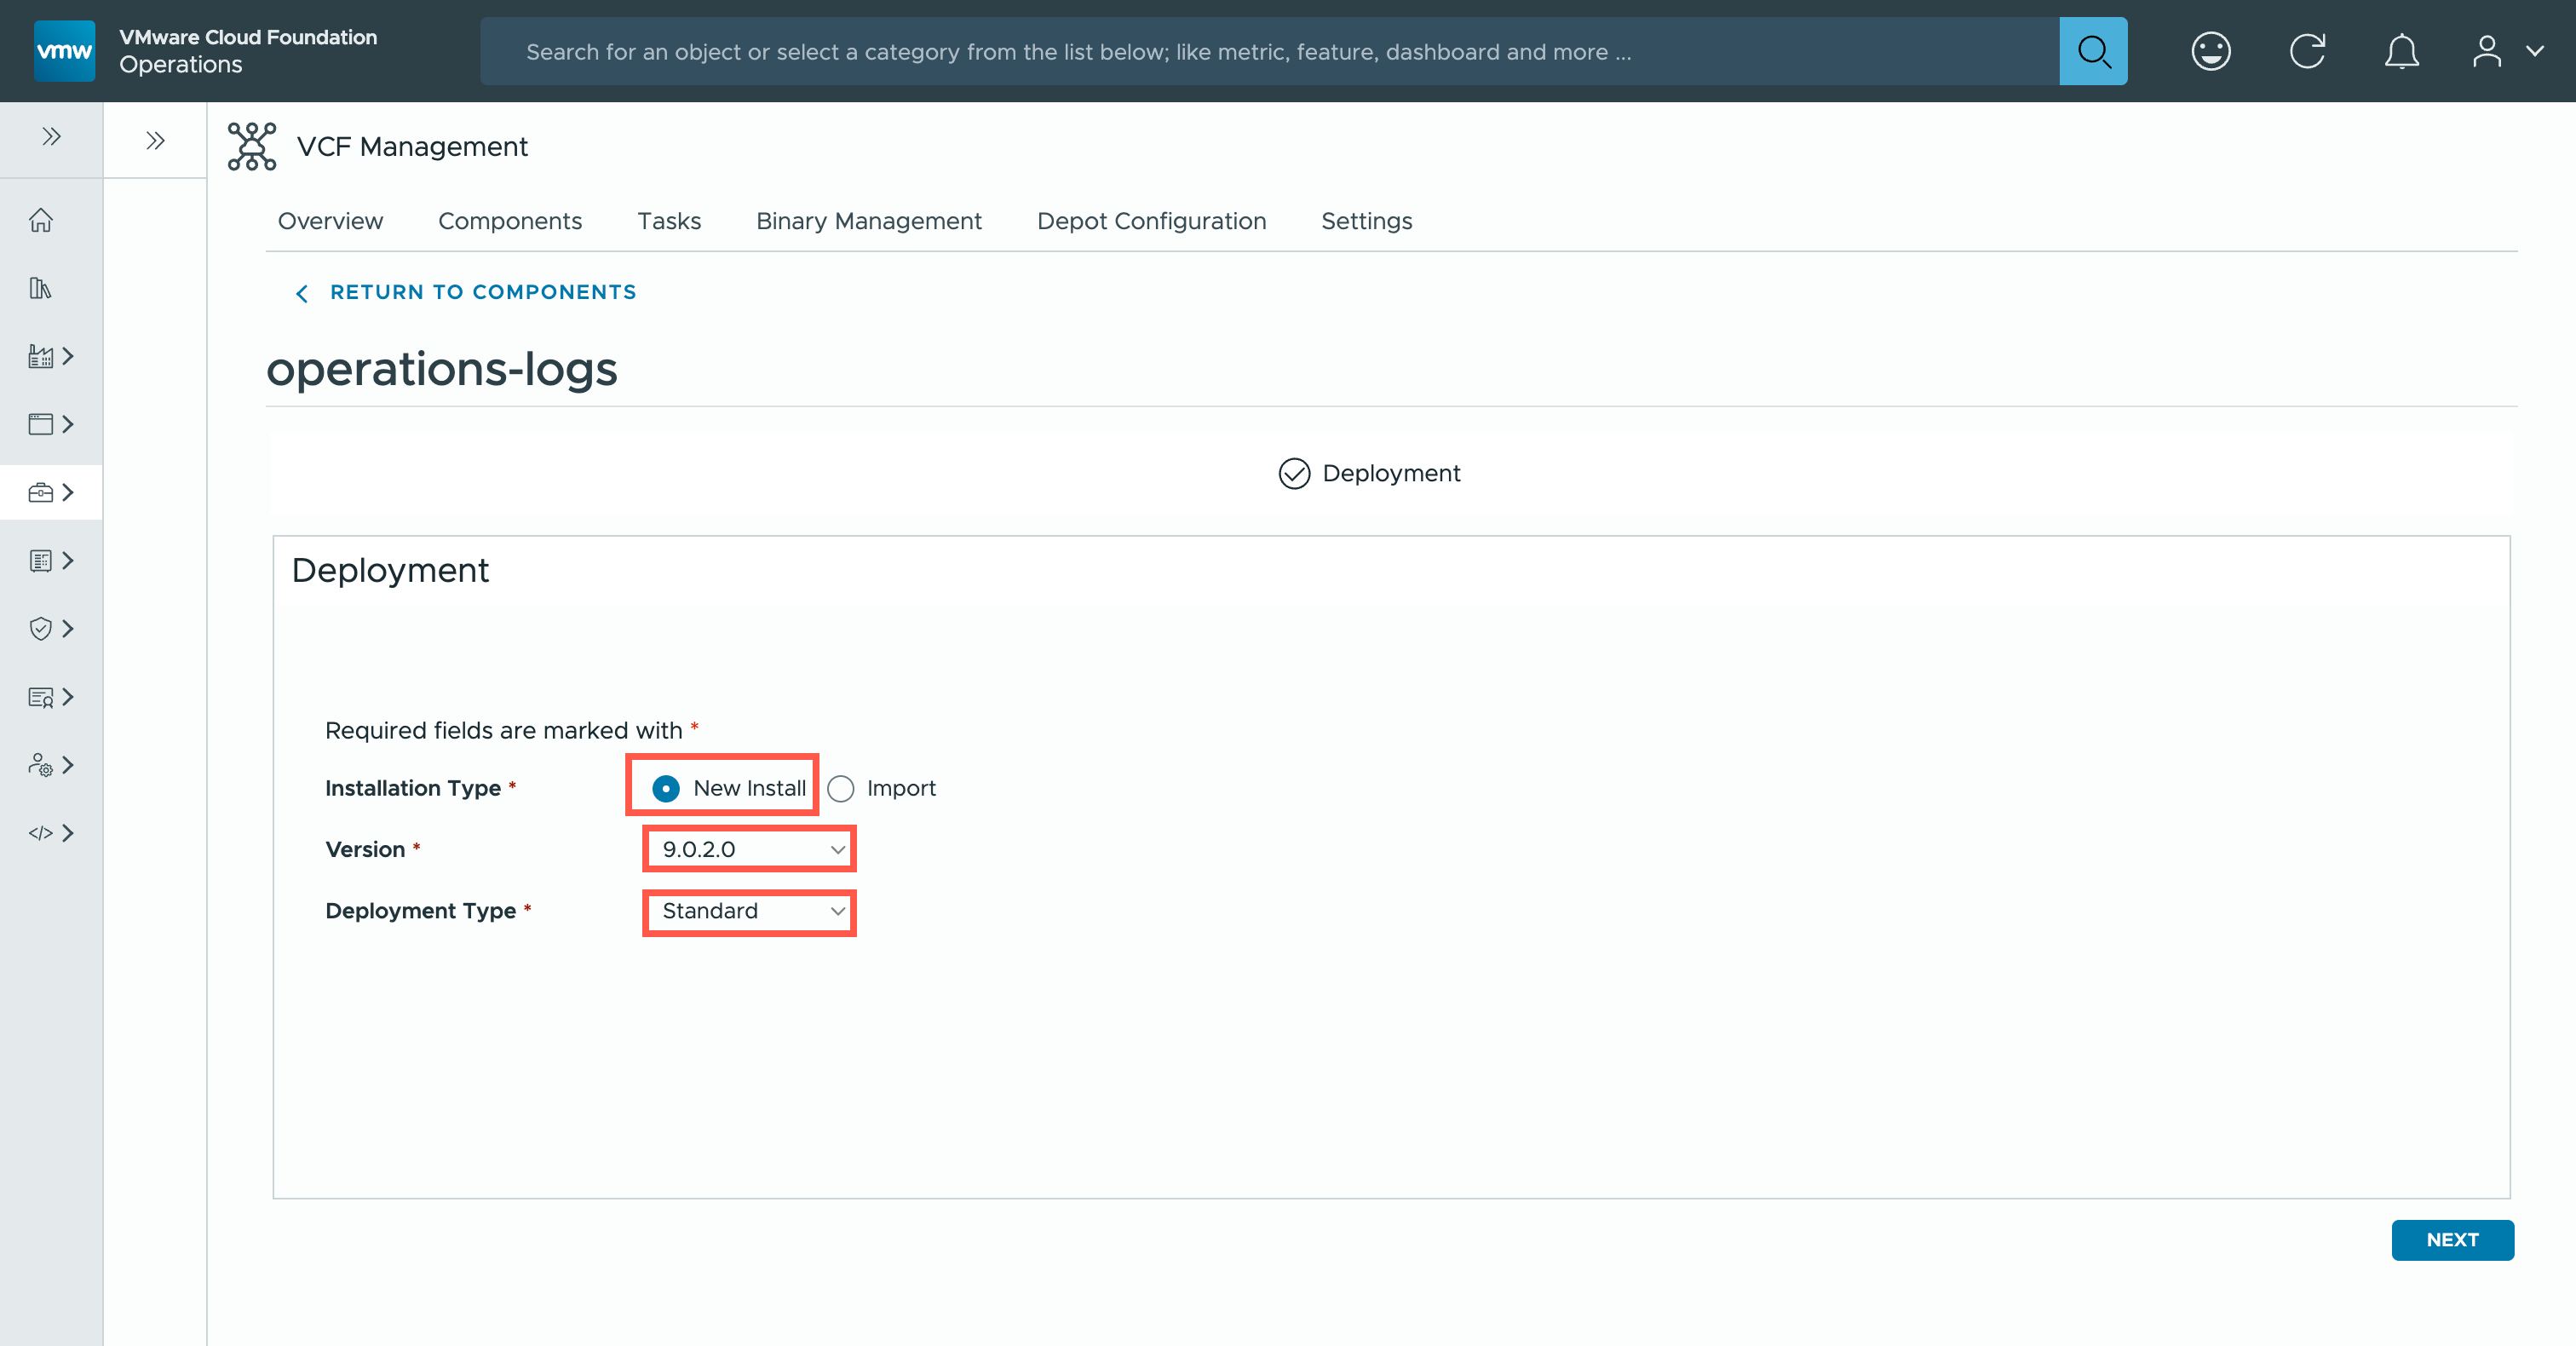
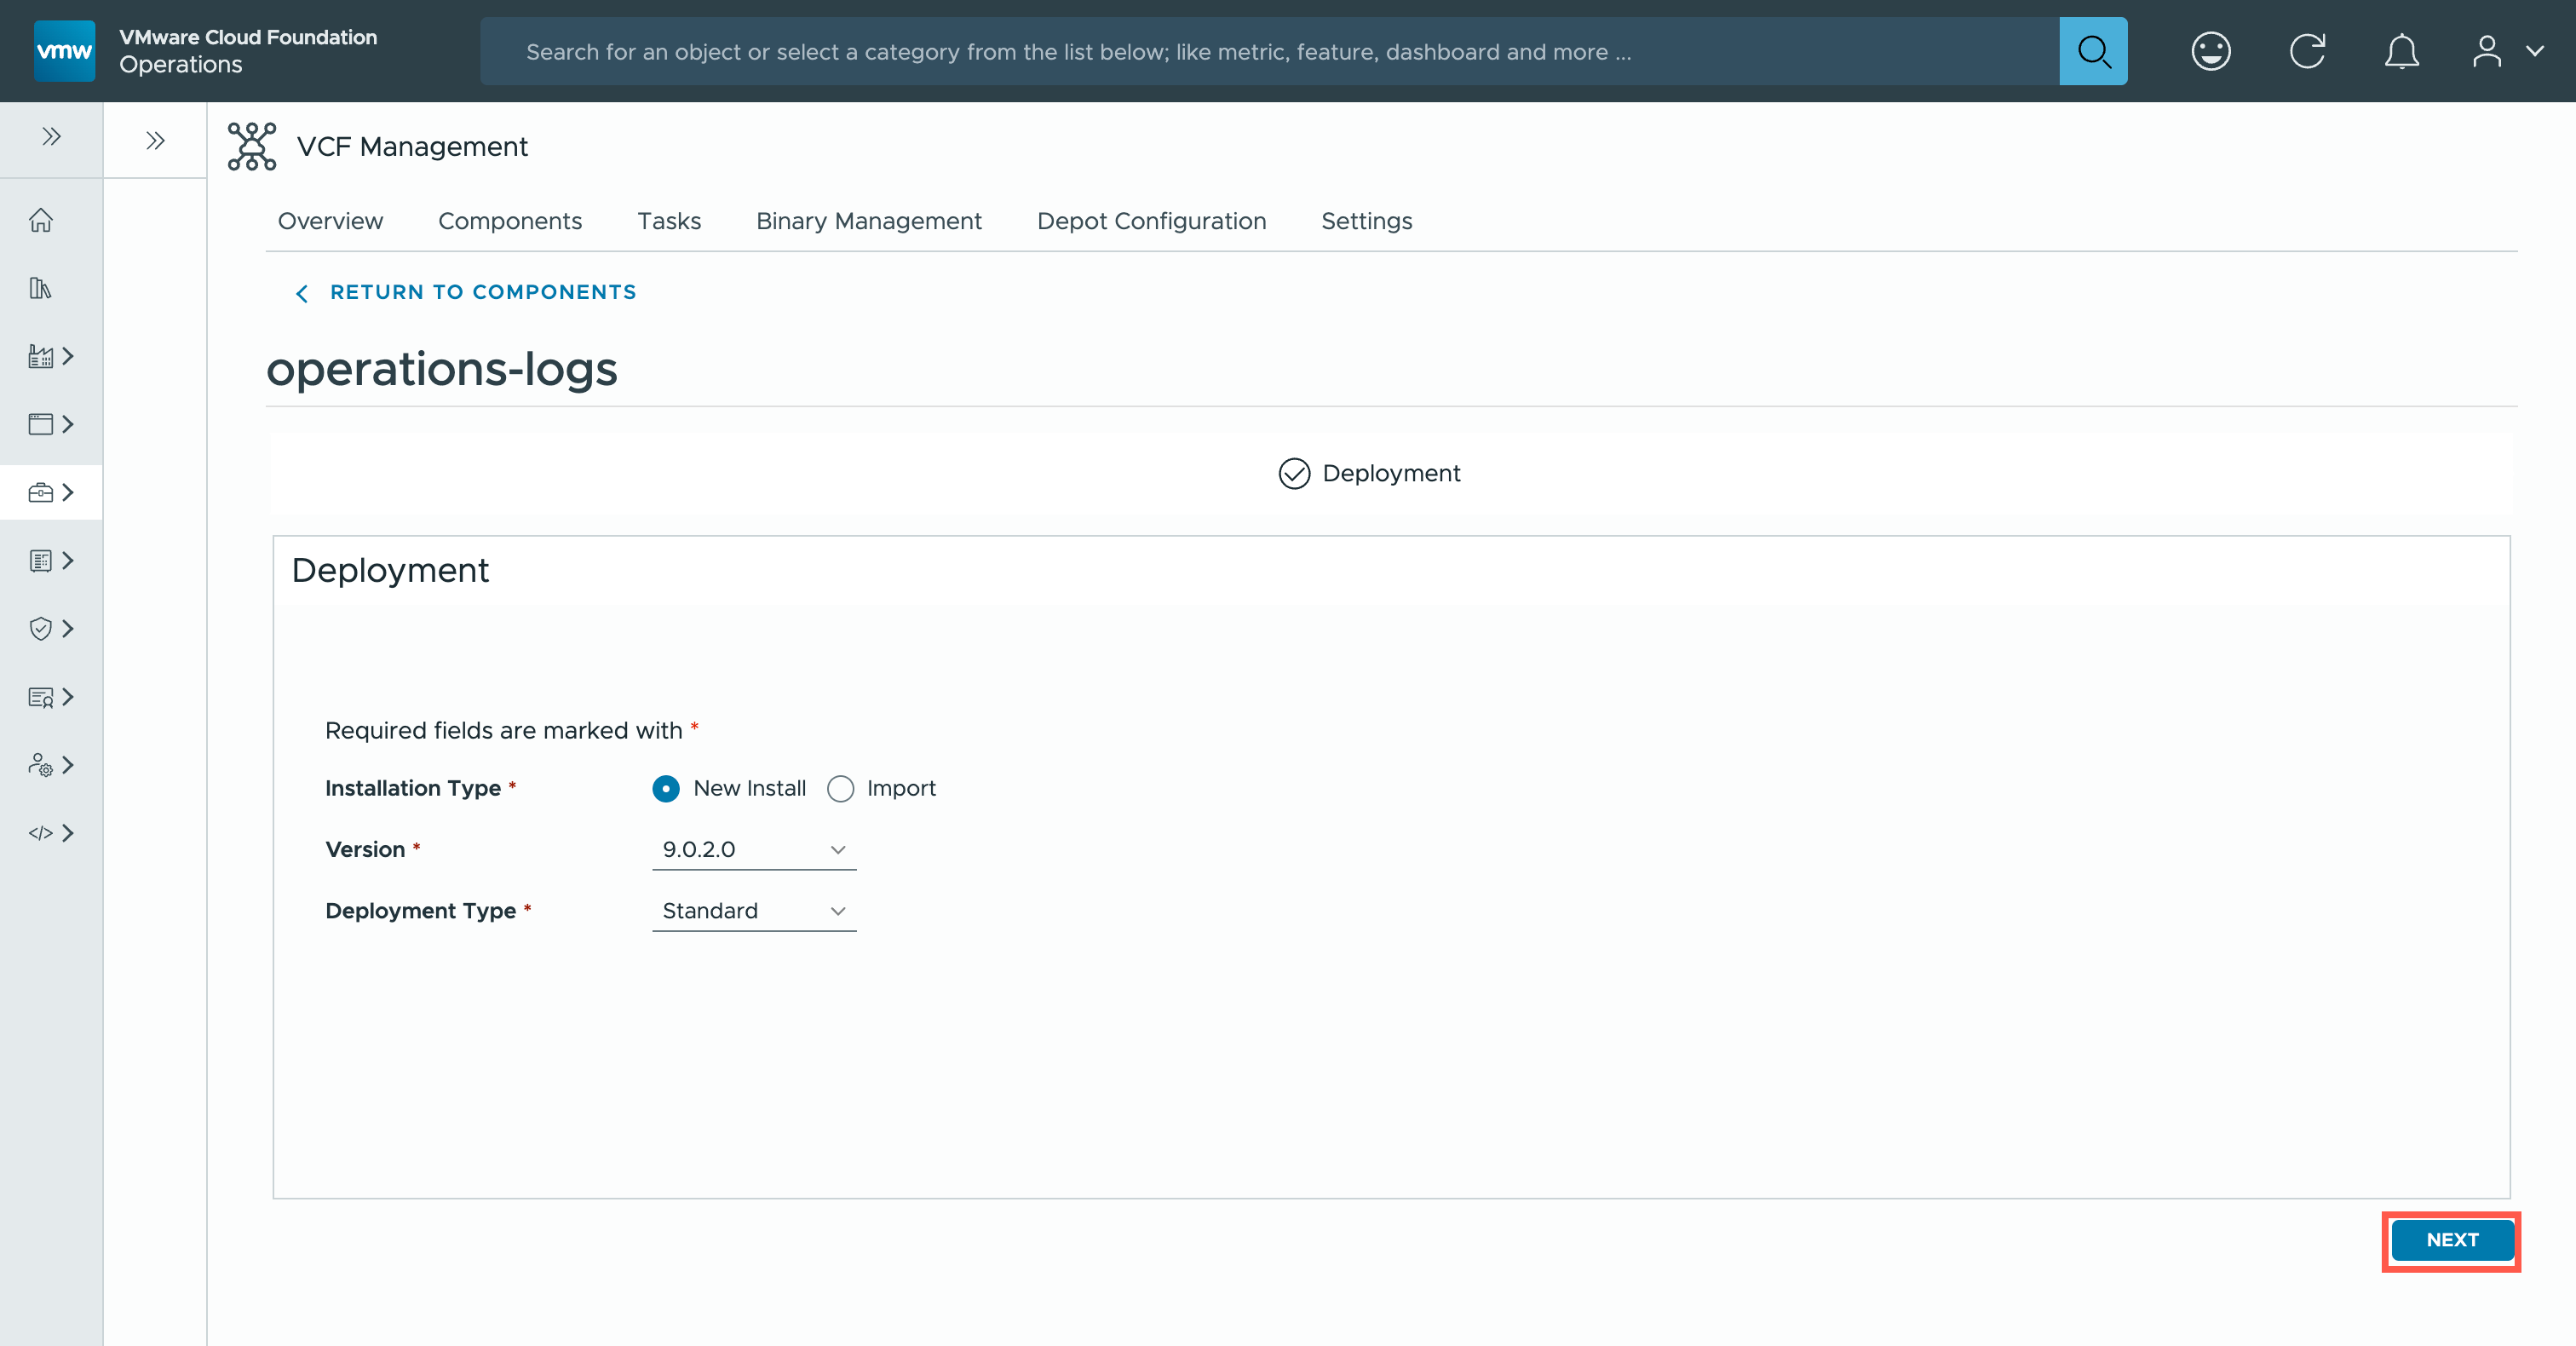
- At the Deployment page, click NEXT.
- At the Certificate page, select the Operations for Logs certificate from the dropdown of existing certificates.
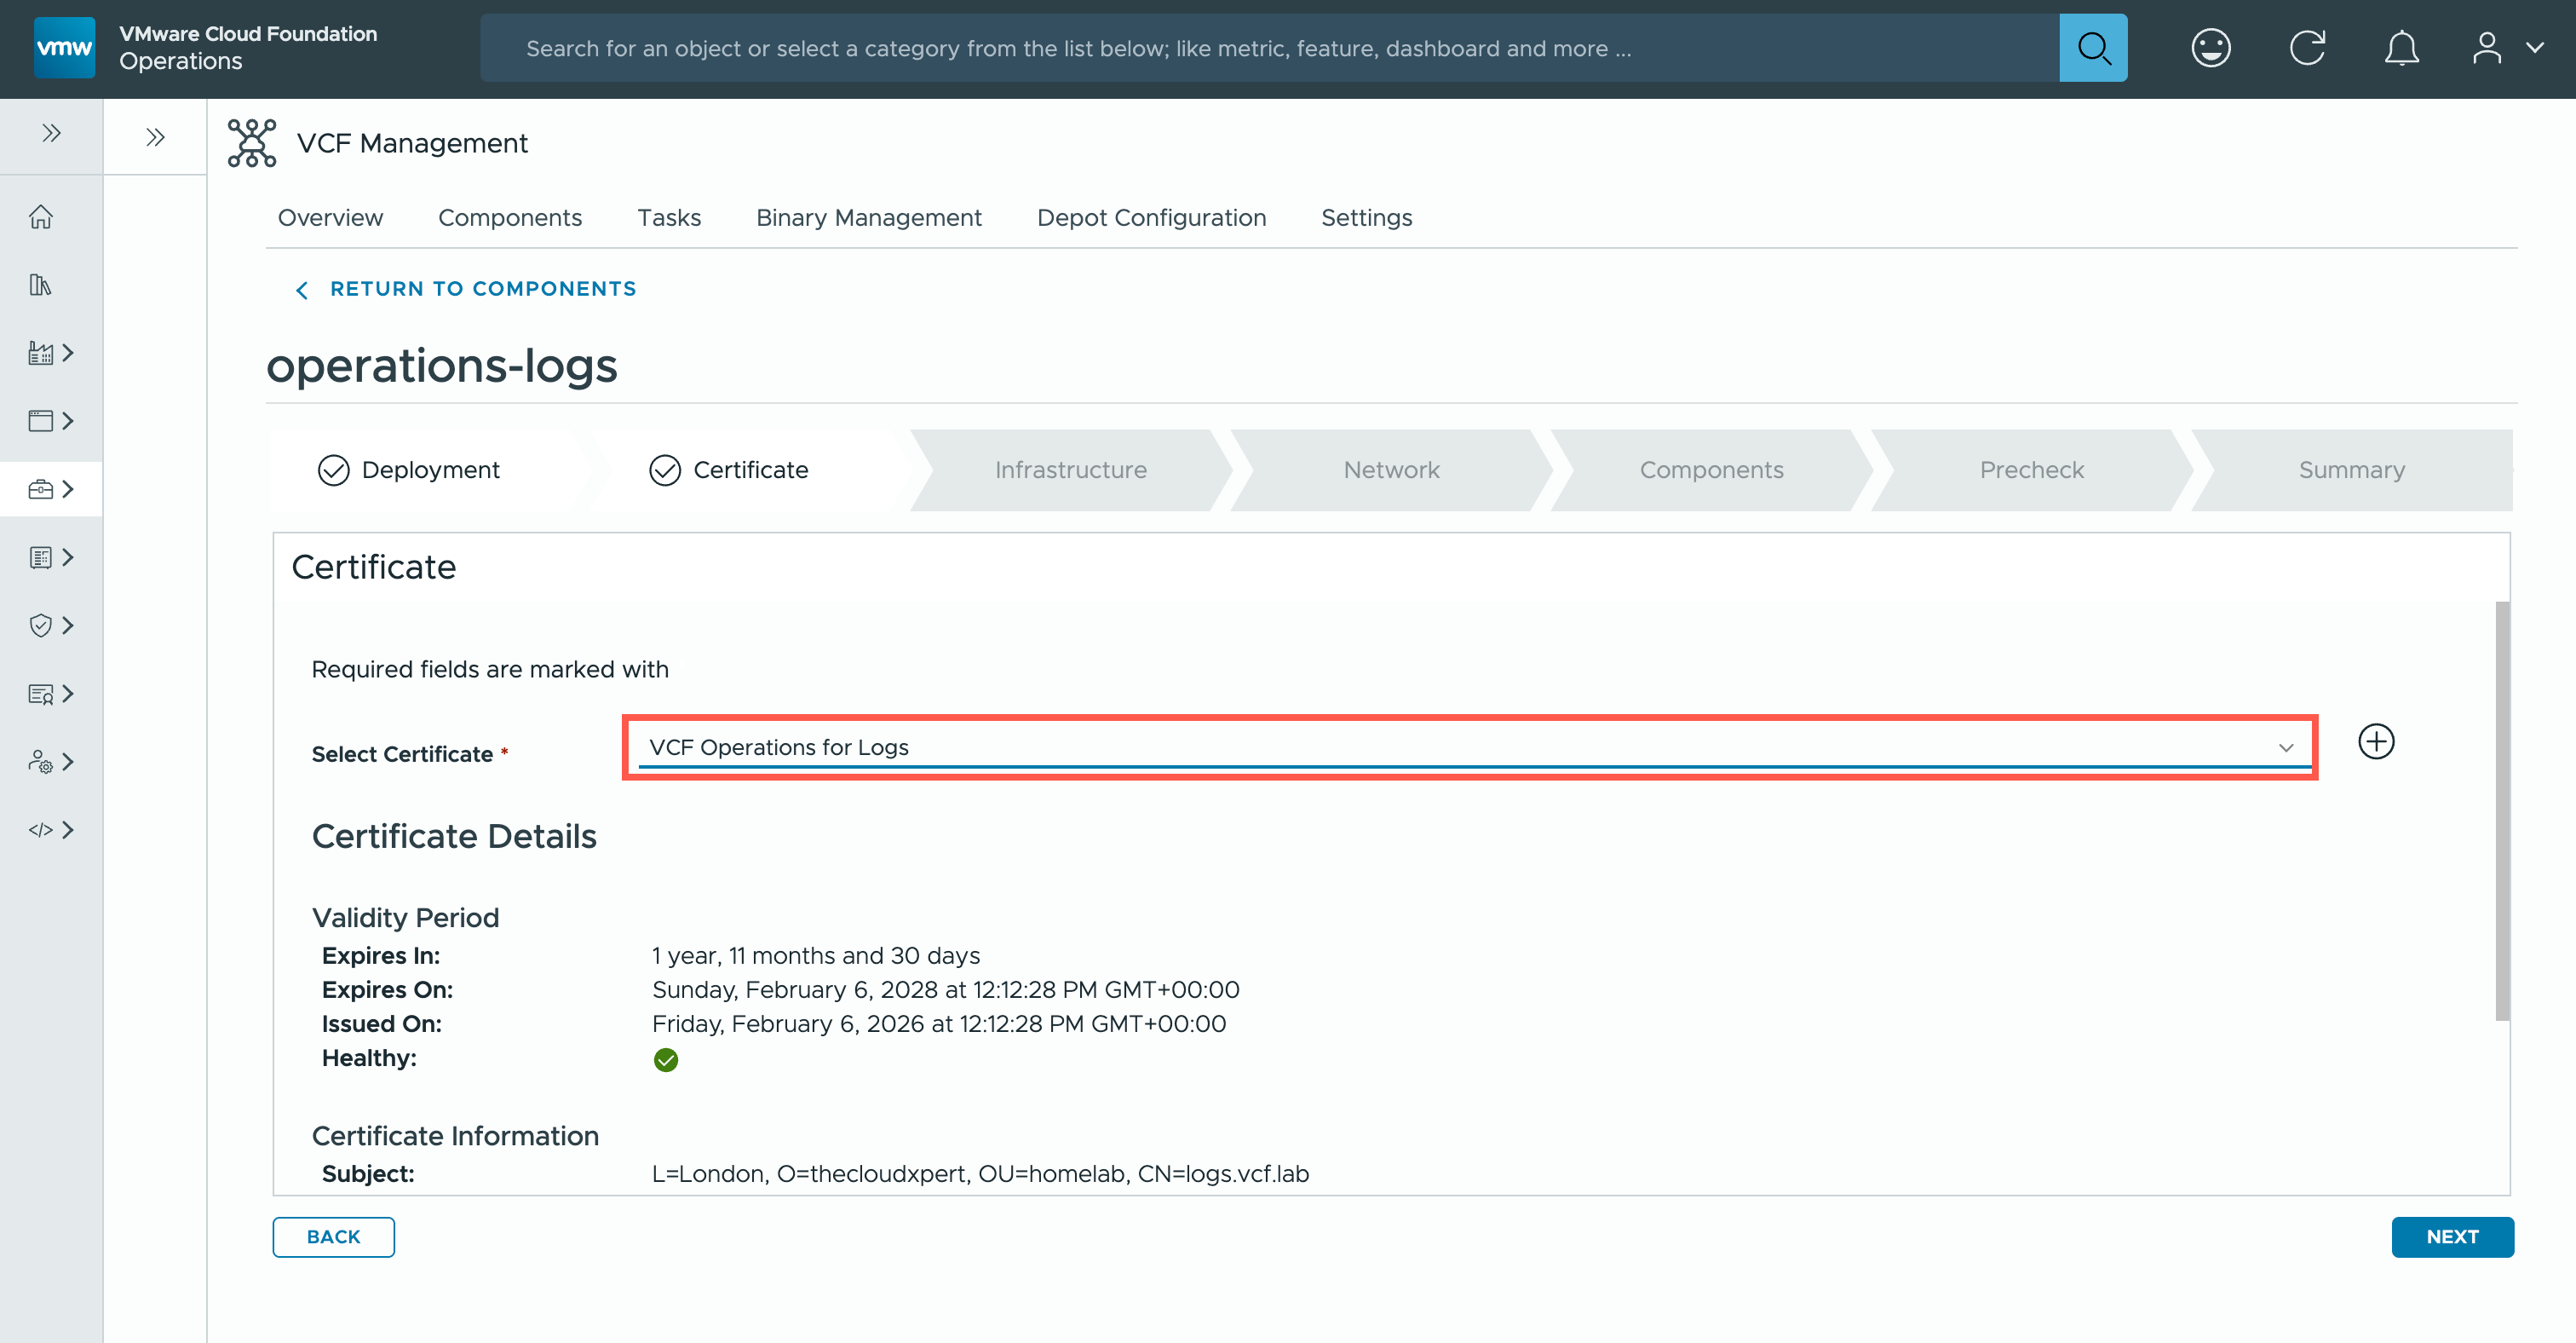
- At the Certificate page, click NEXT.

- At the Infrastructure page, select <vcenter.fqdn> from the Select vCenter Server dropdown, select the <target.cluster> from the Select Cluster dropdown and then scroll down.
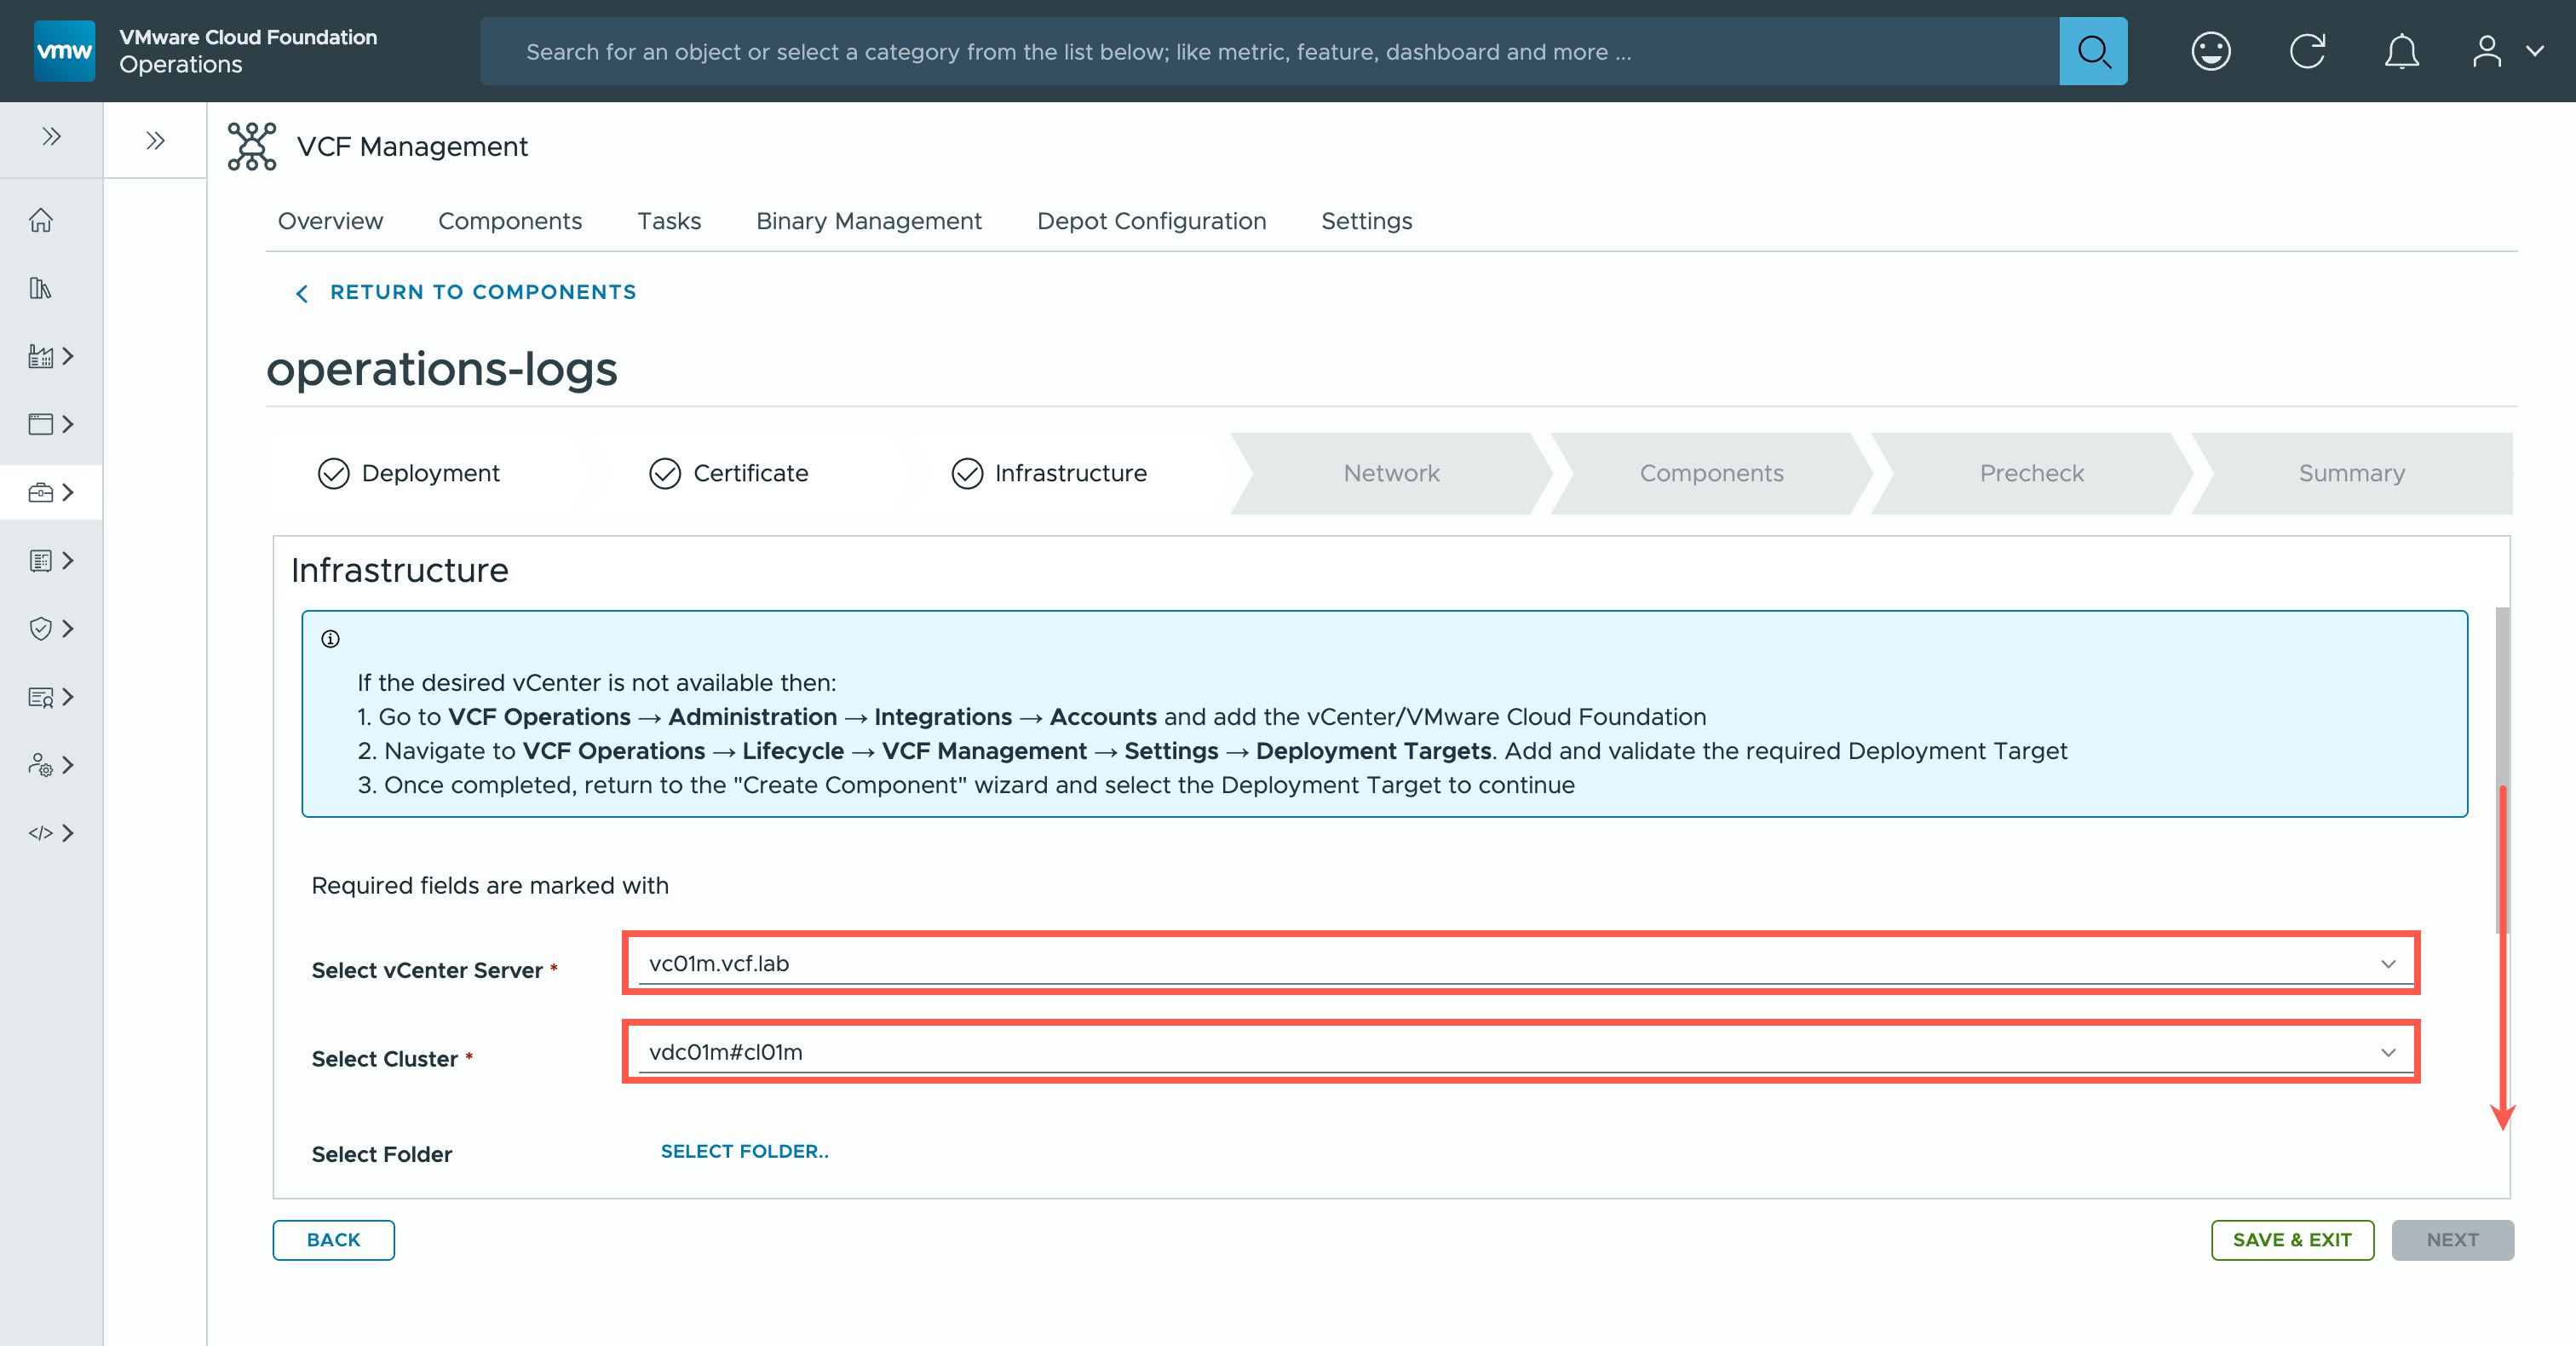
- At the Infrastructure page, select <target.network> from the Select Network dropdown, select the <target.datastore> from the Select Datastore dropdown and, finally, ensure that Thin is selected from the Select Disk Mode dropdown.
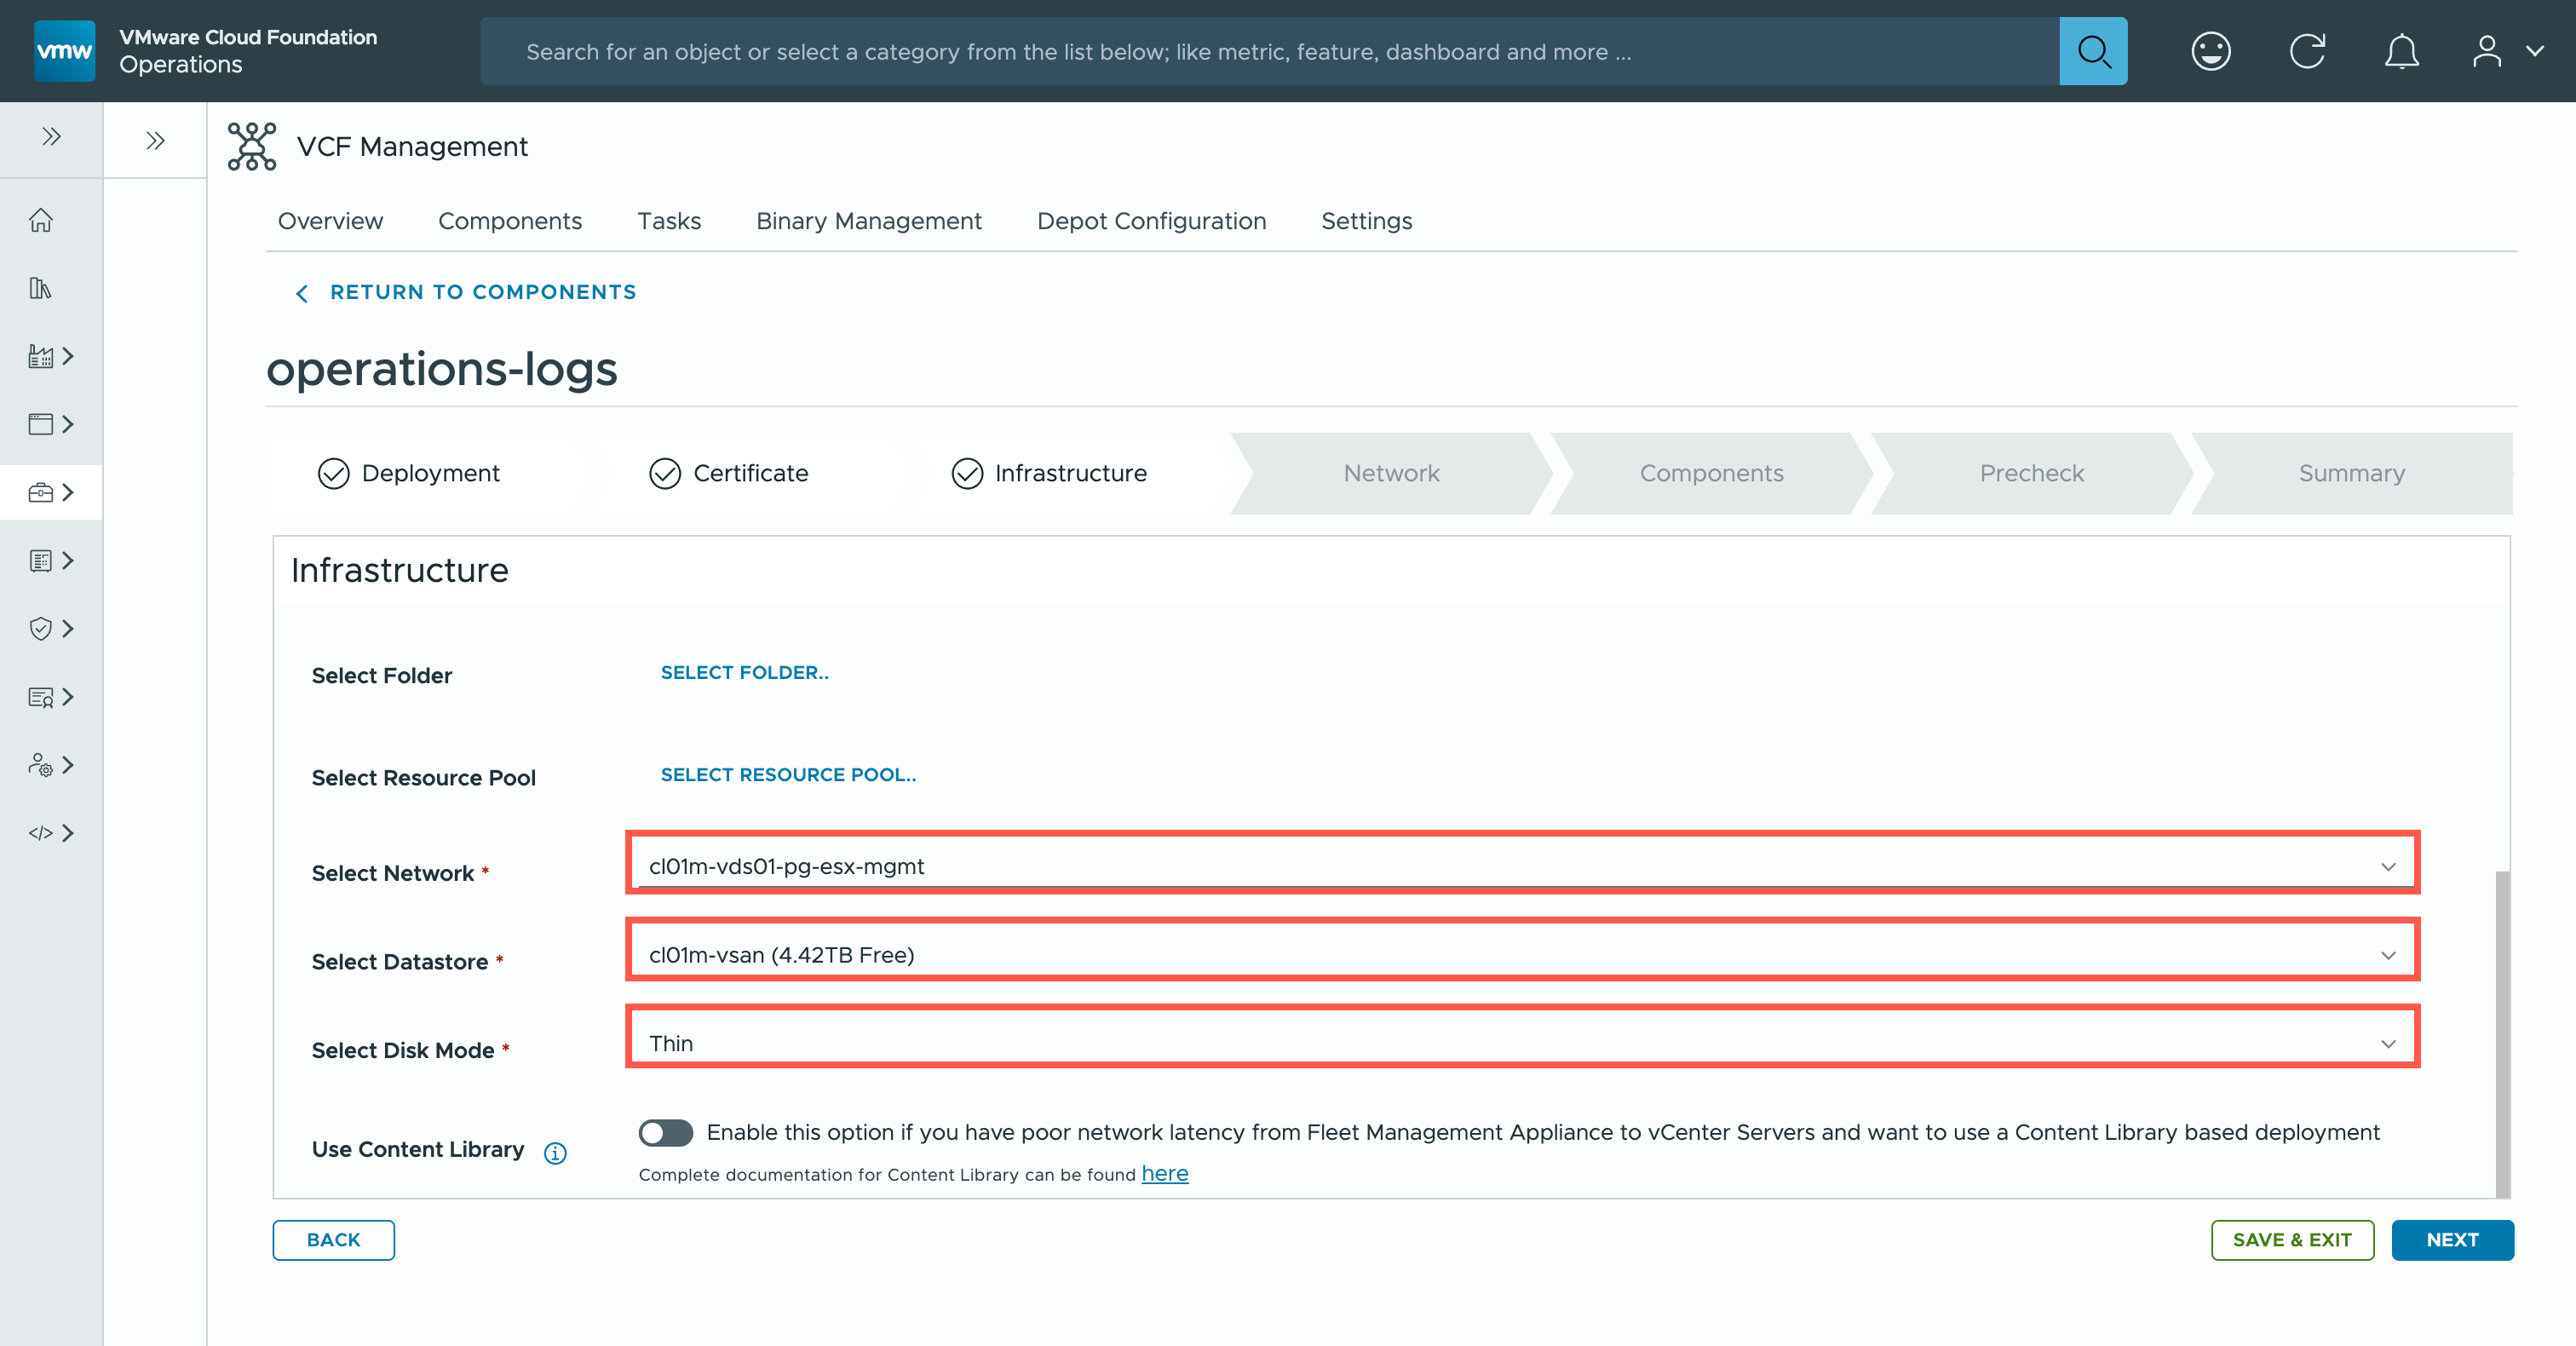
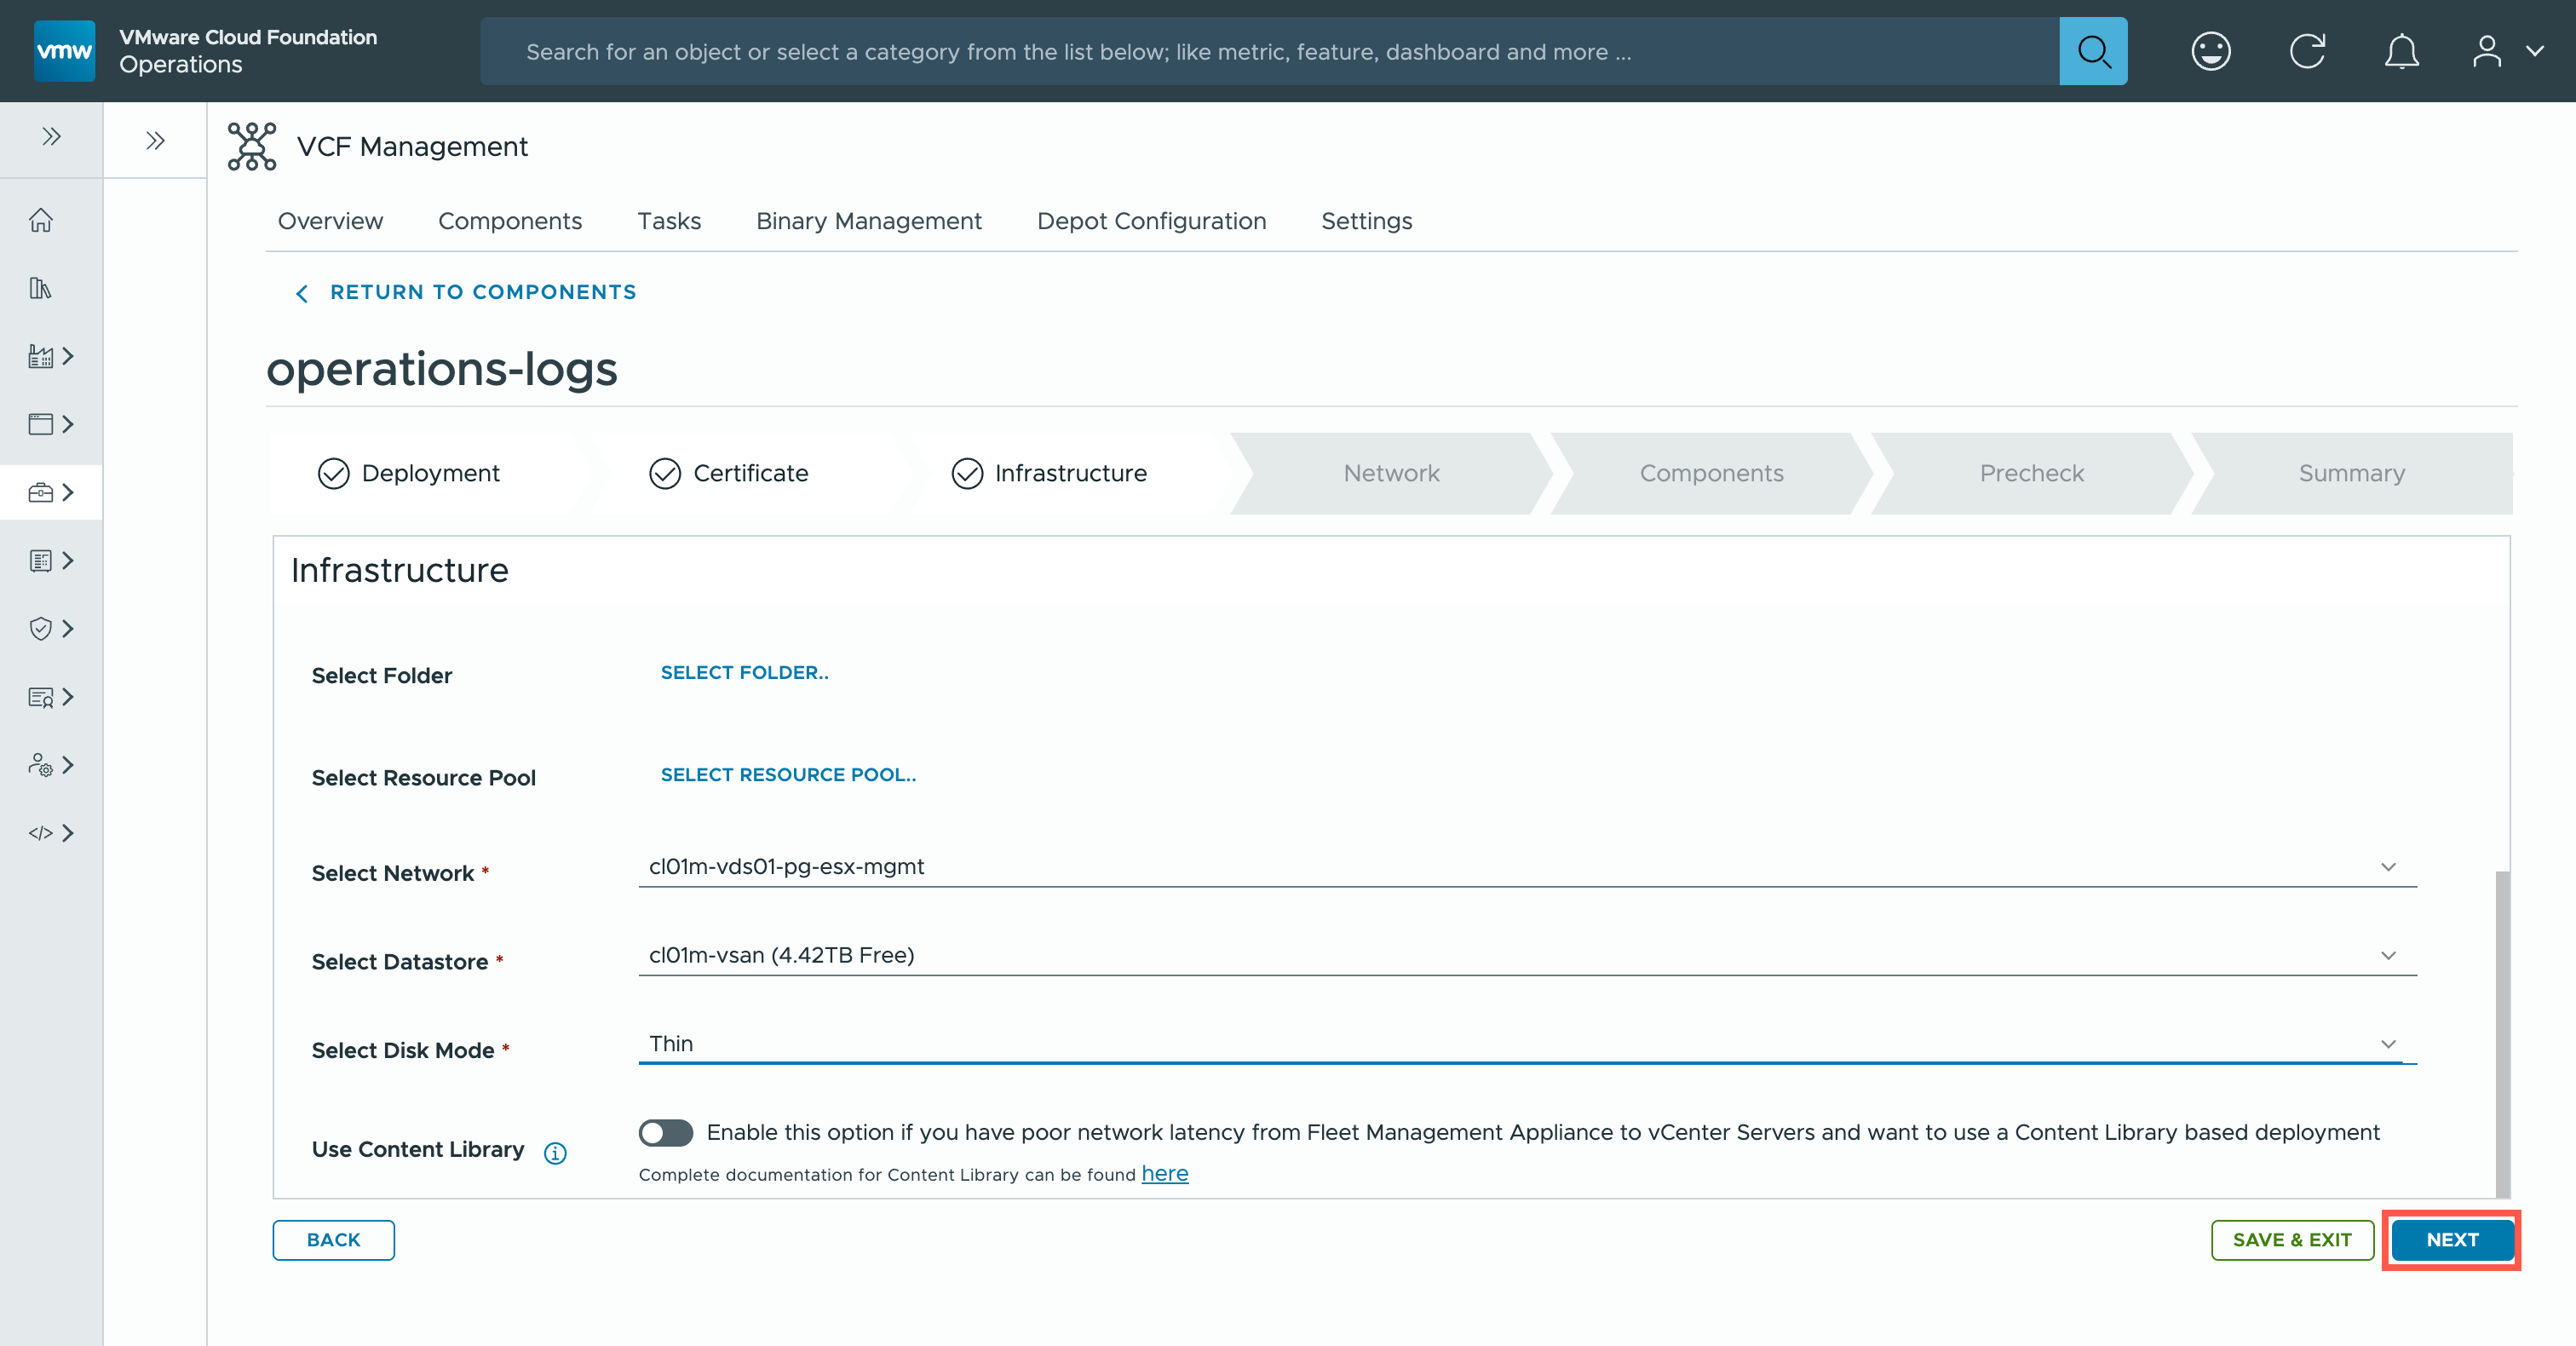
- At the Certificate page, click NEXT.
- At the Network page, at the Domain Name and Domain Search Path fields, type
vcf.lab.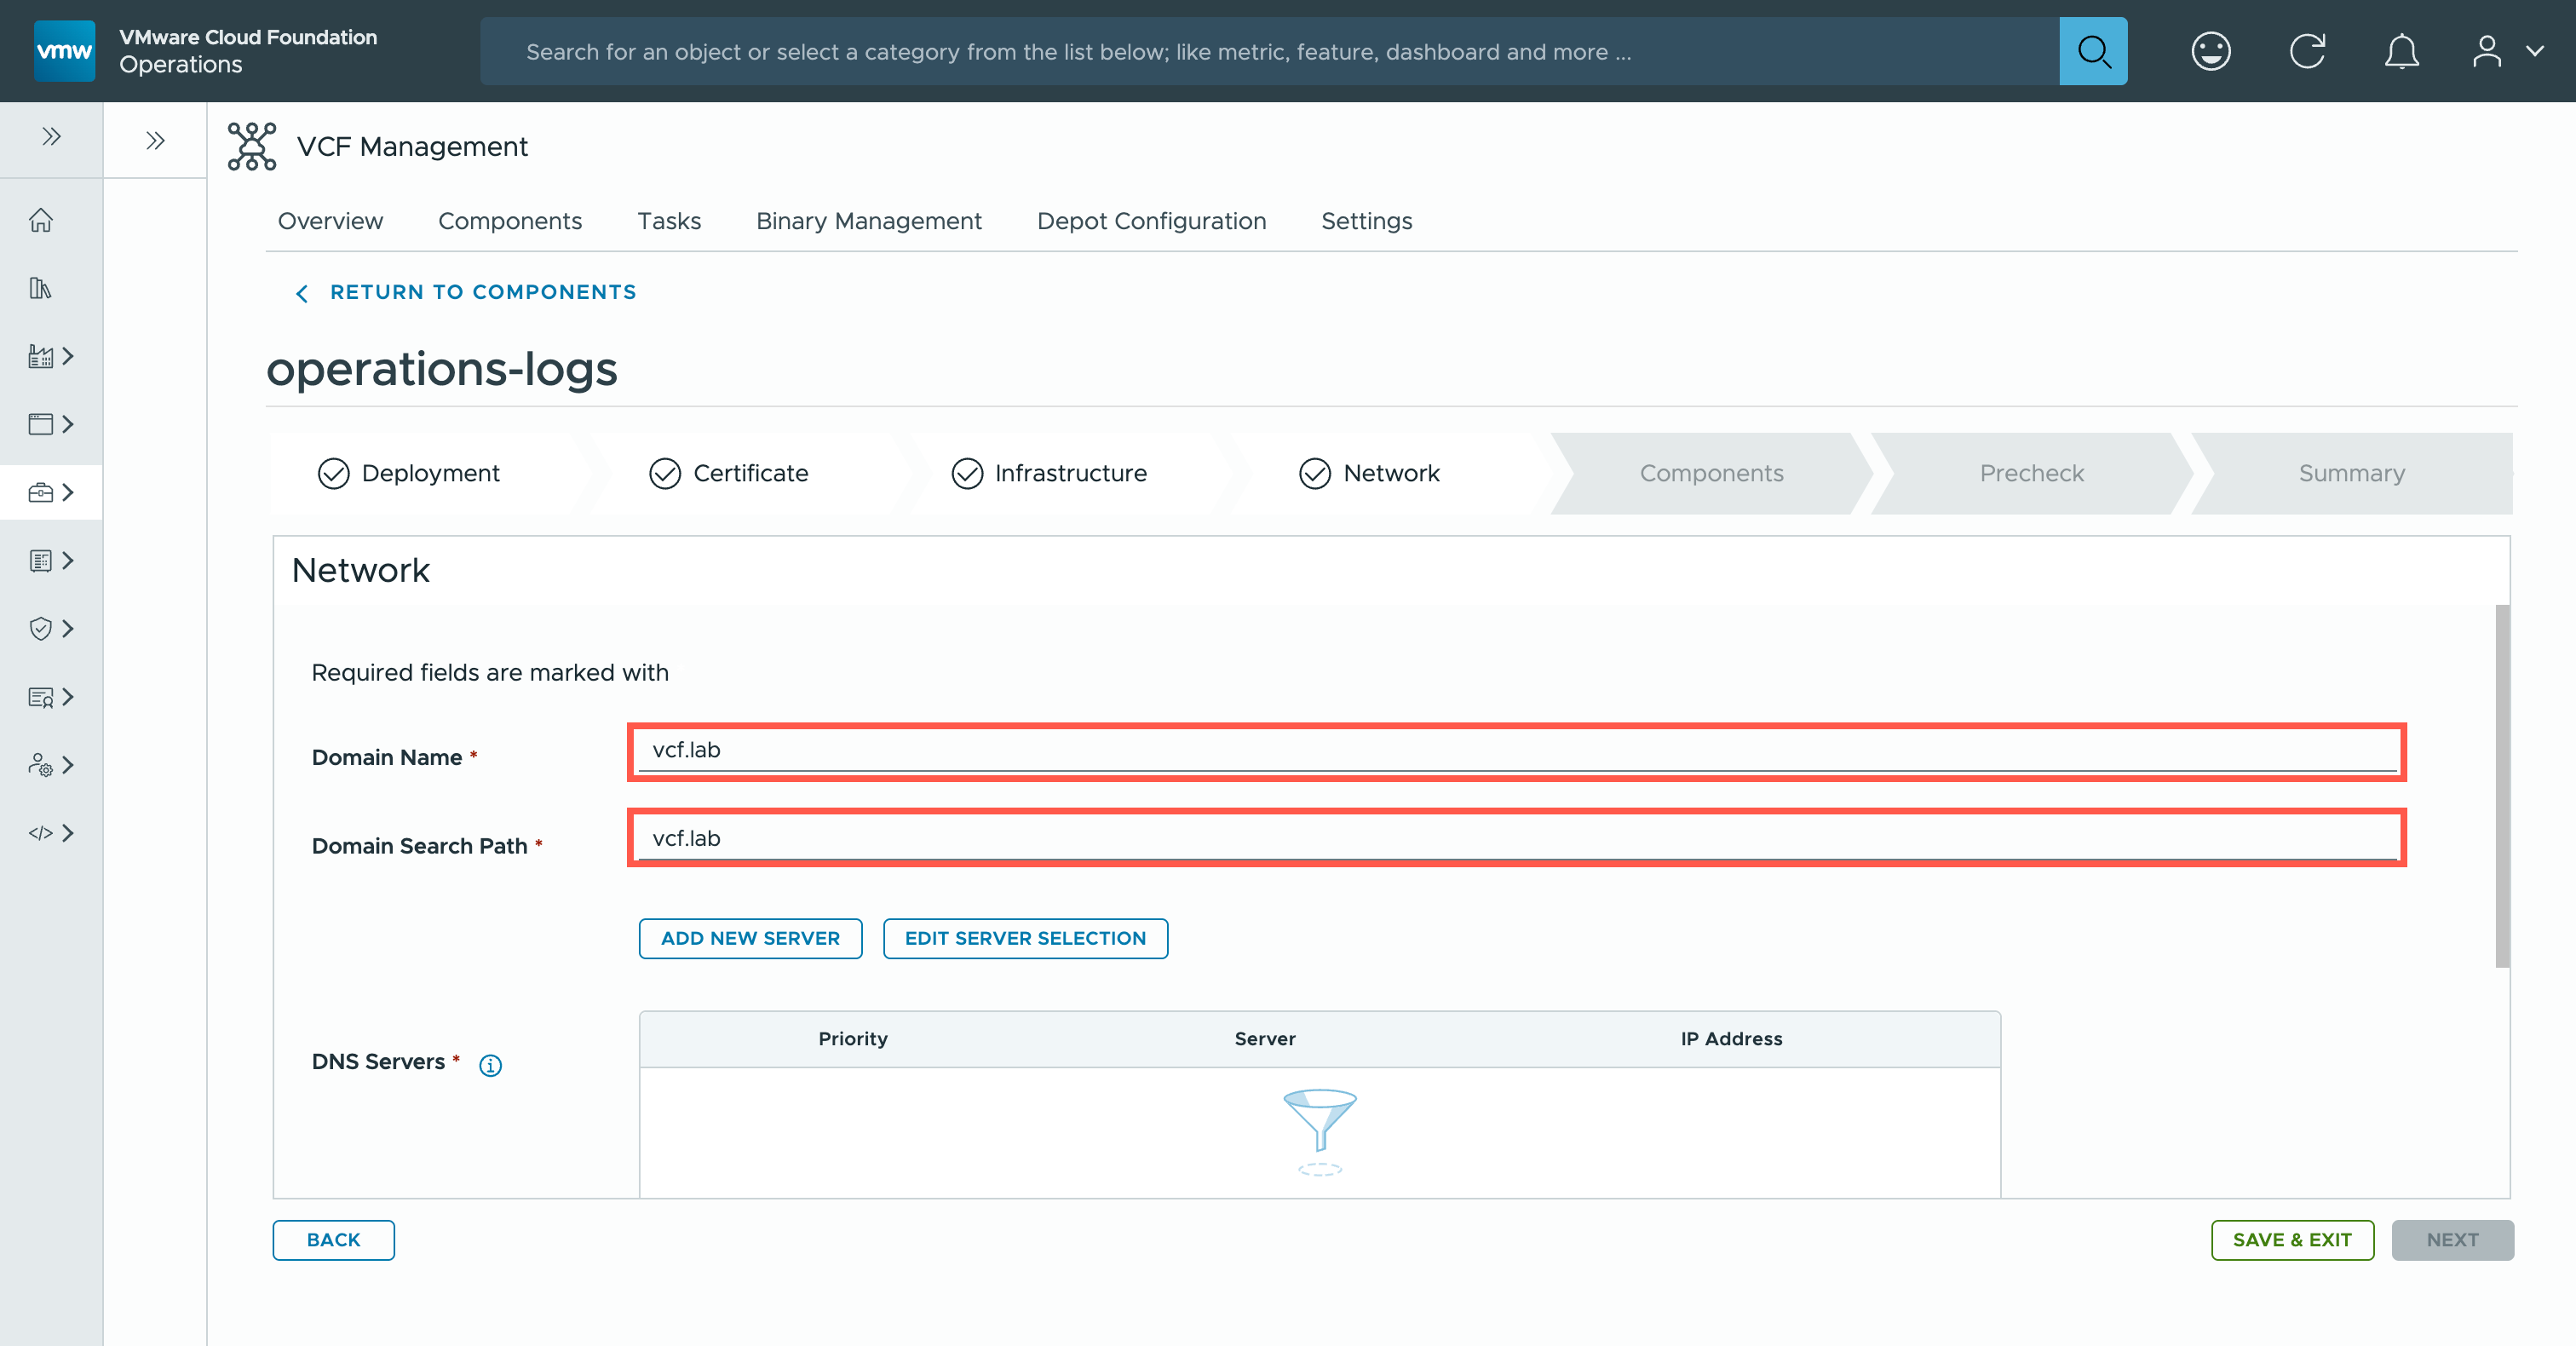
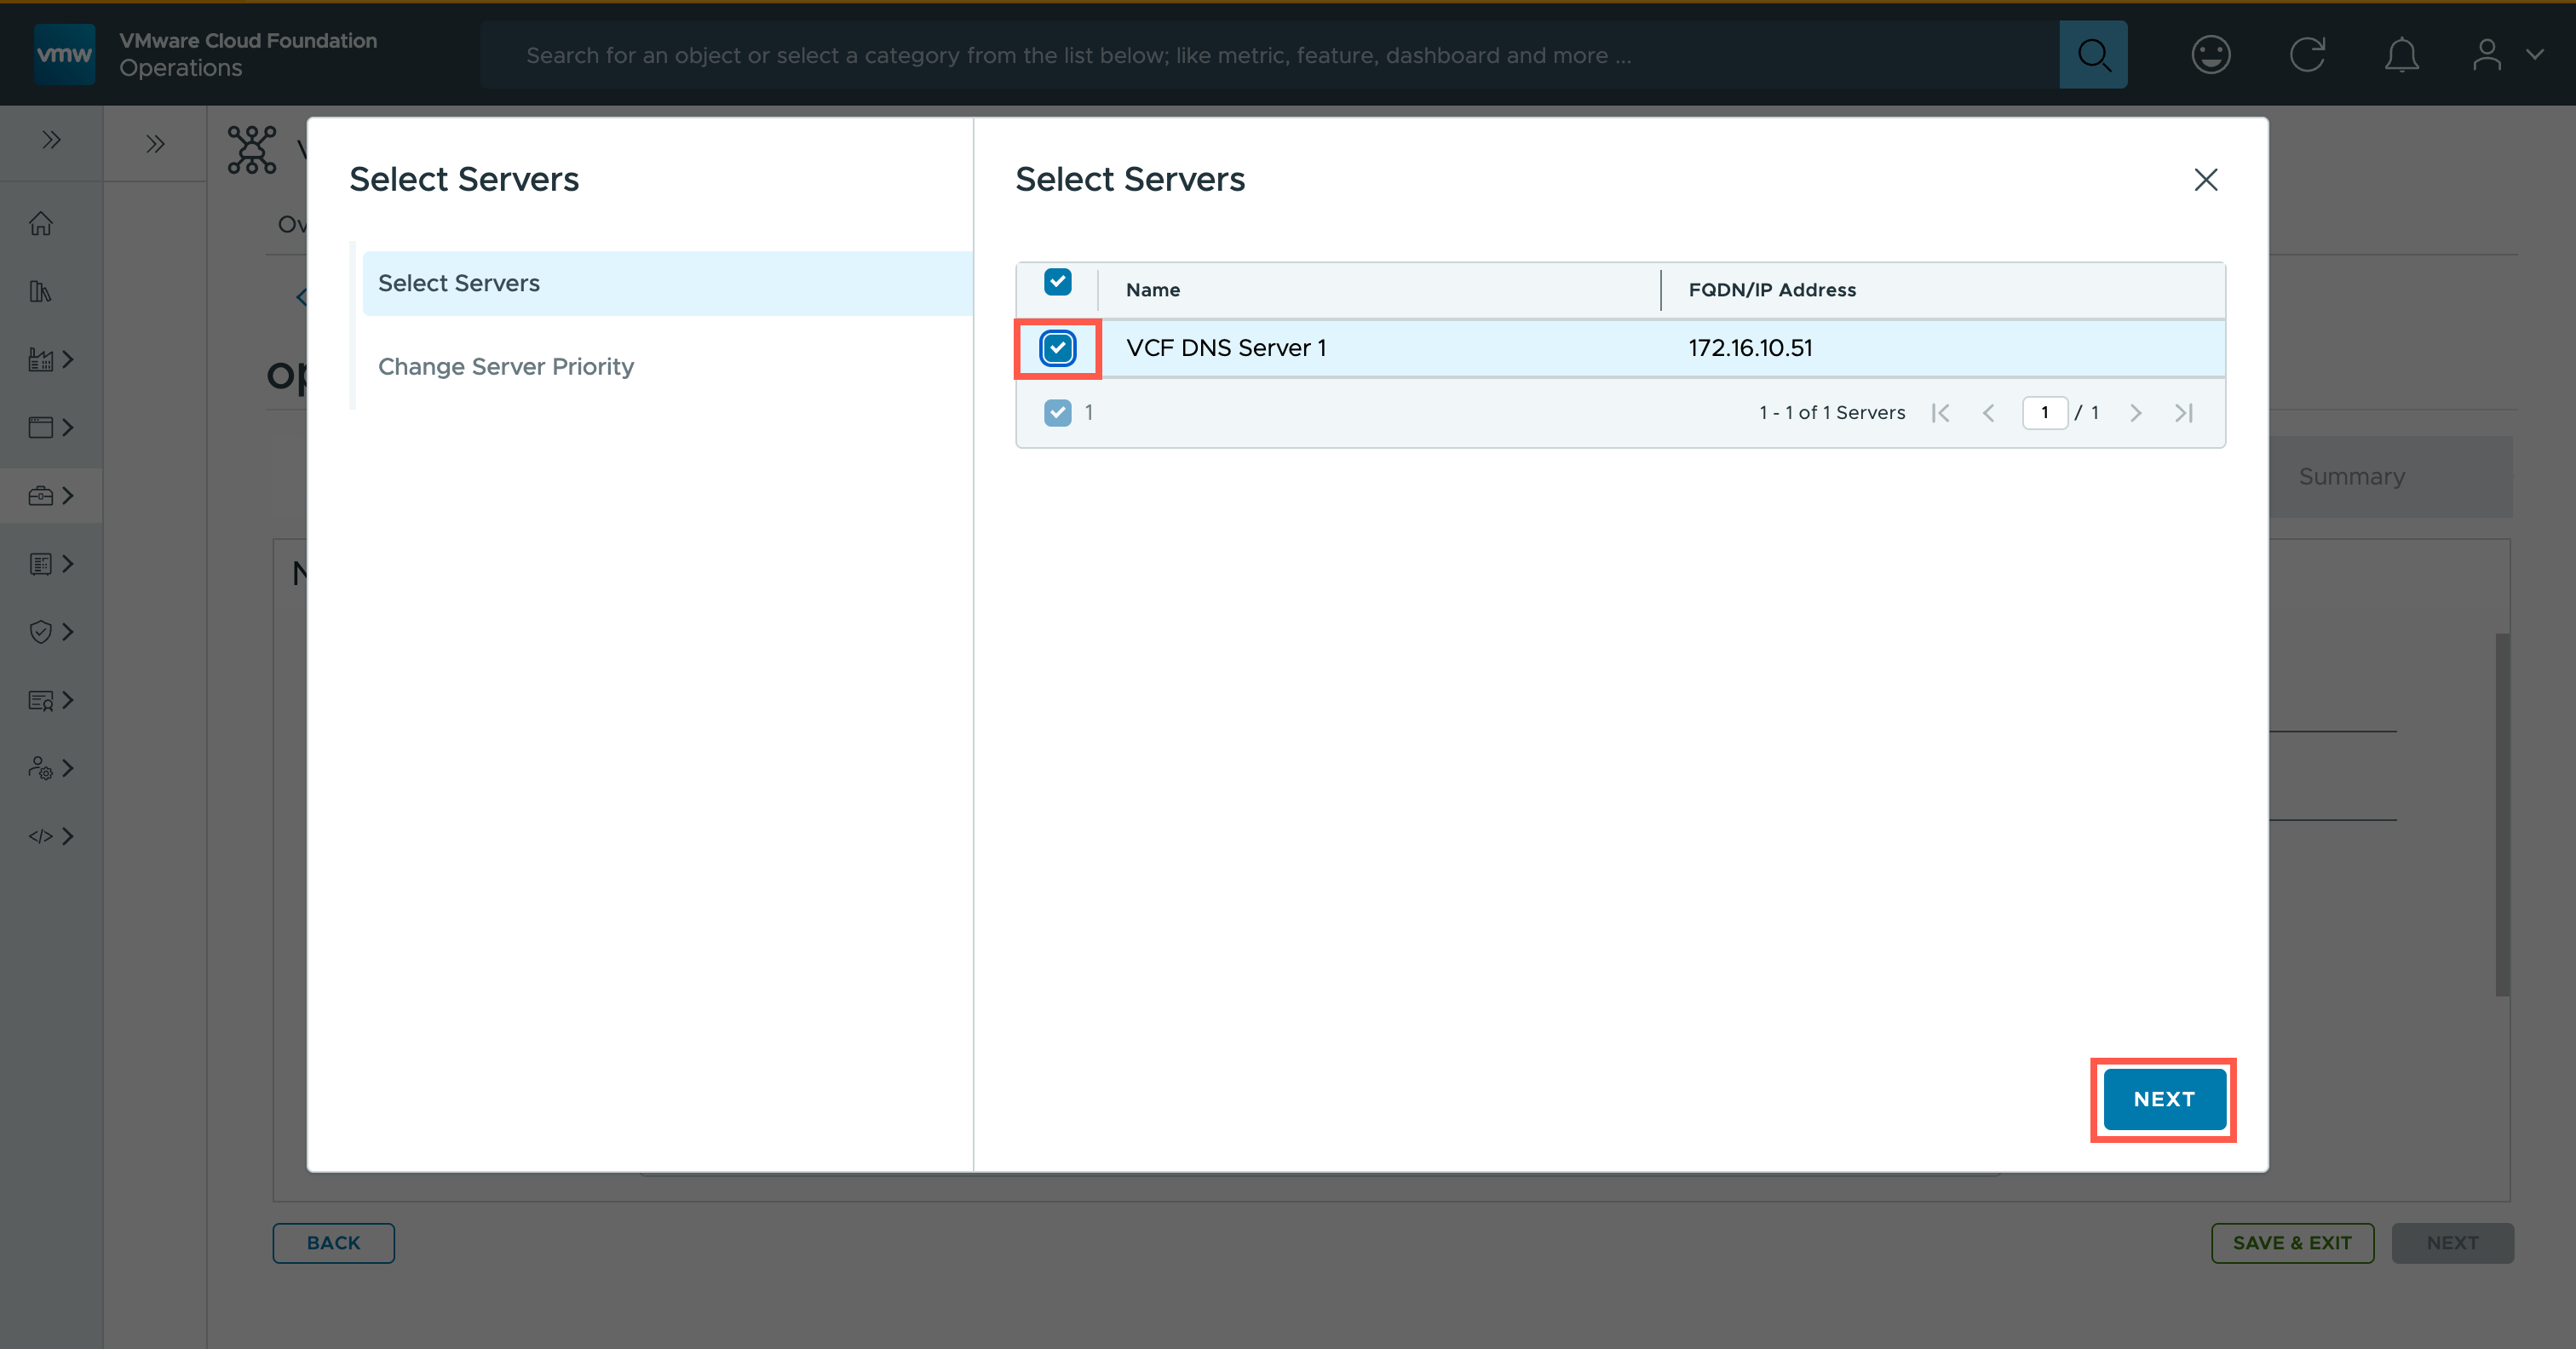
- At the Network page, click EDIT SERVER SELECTION.
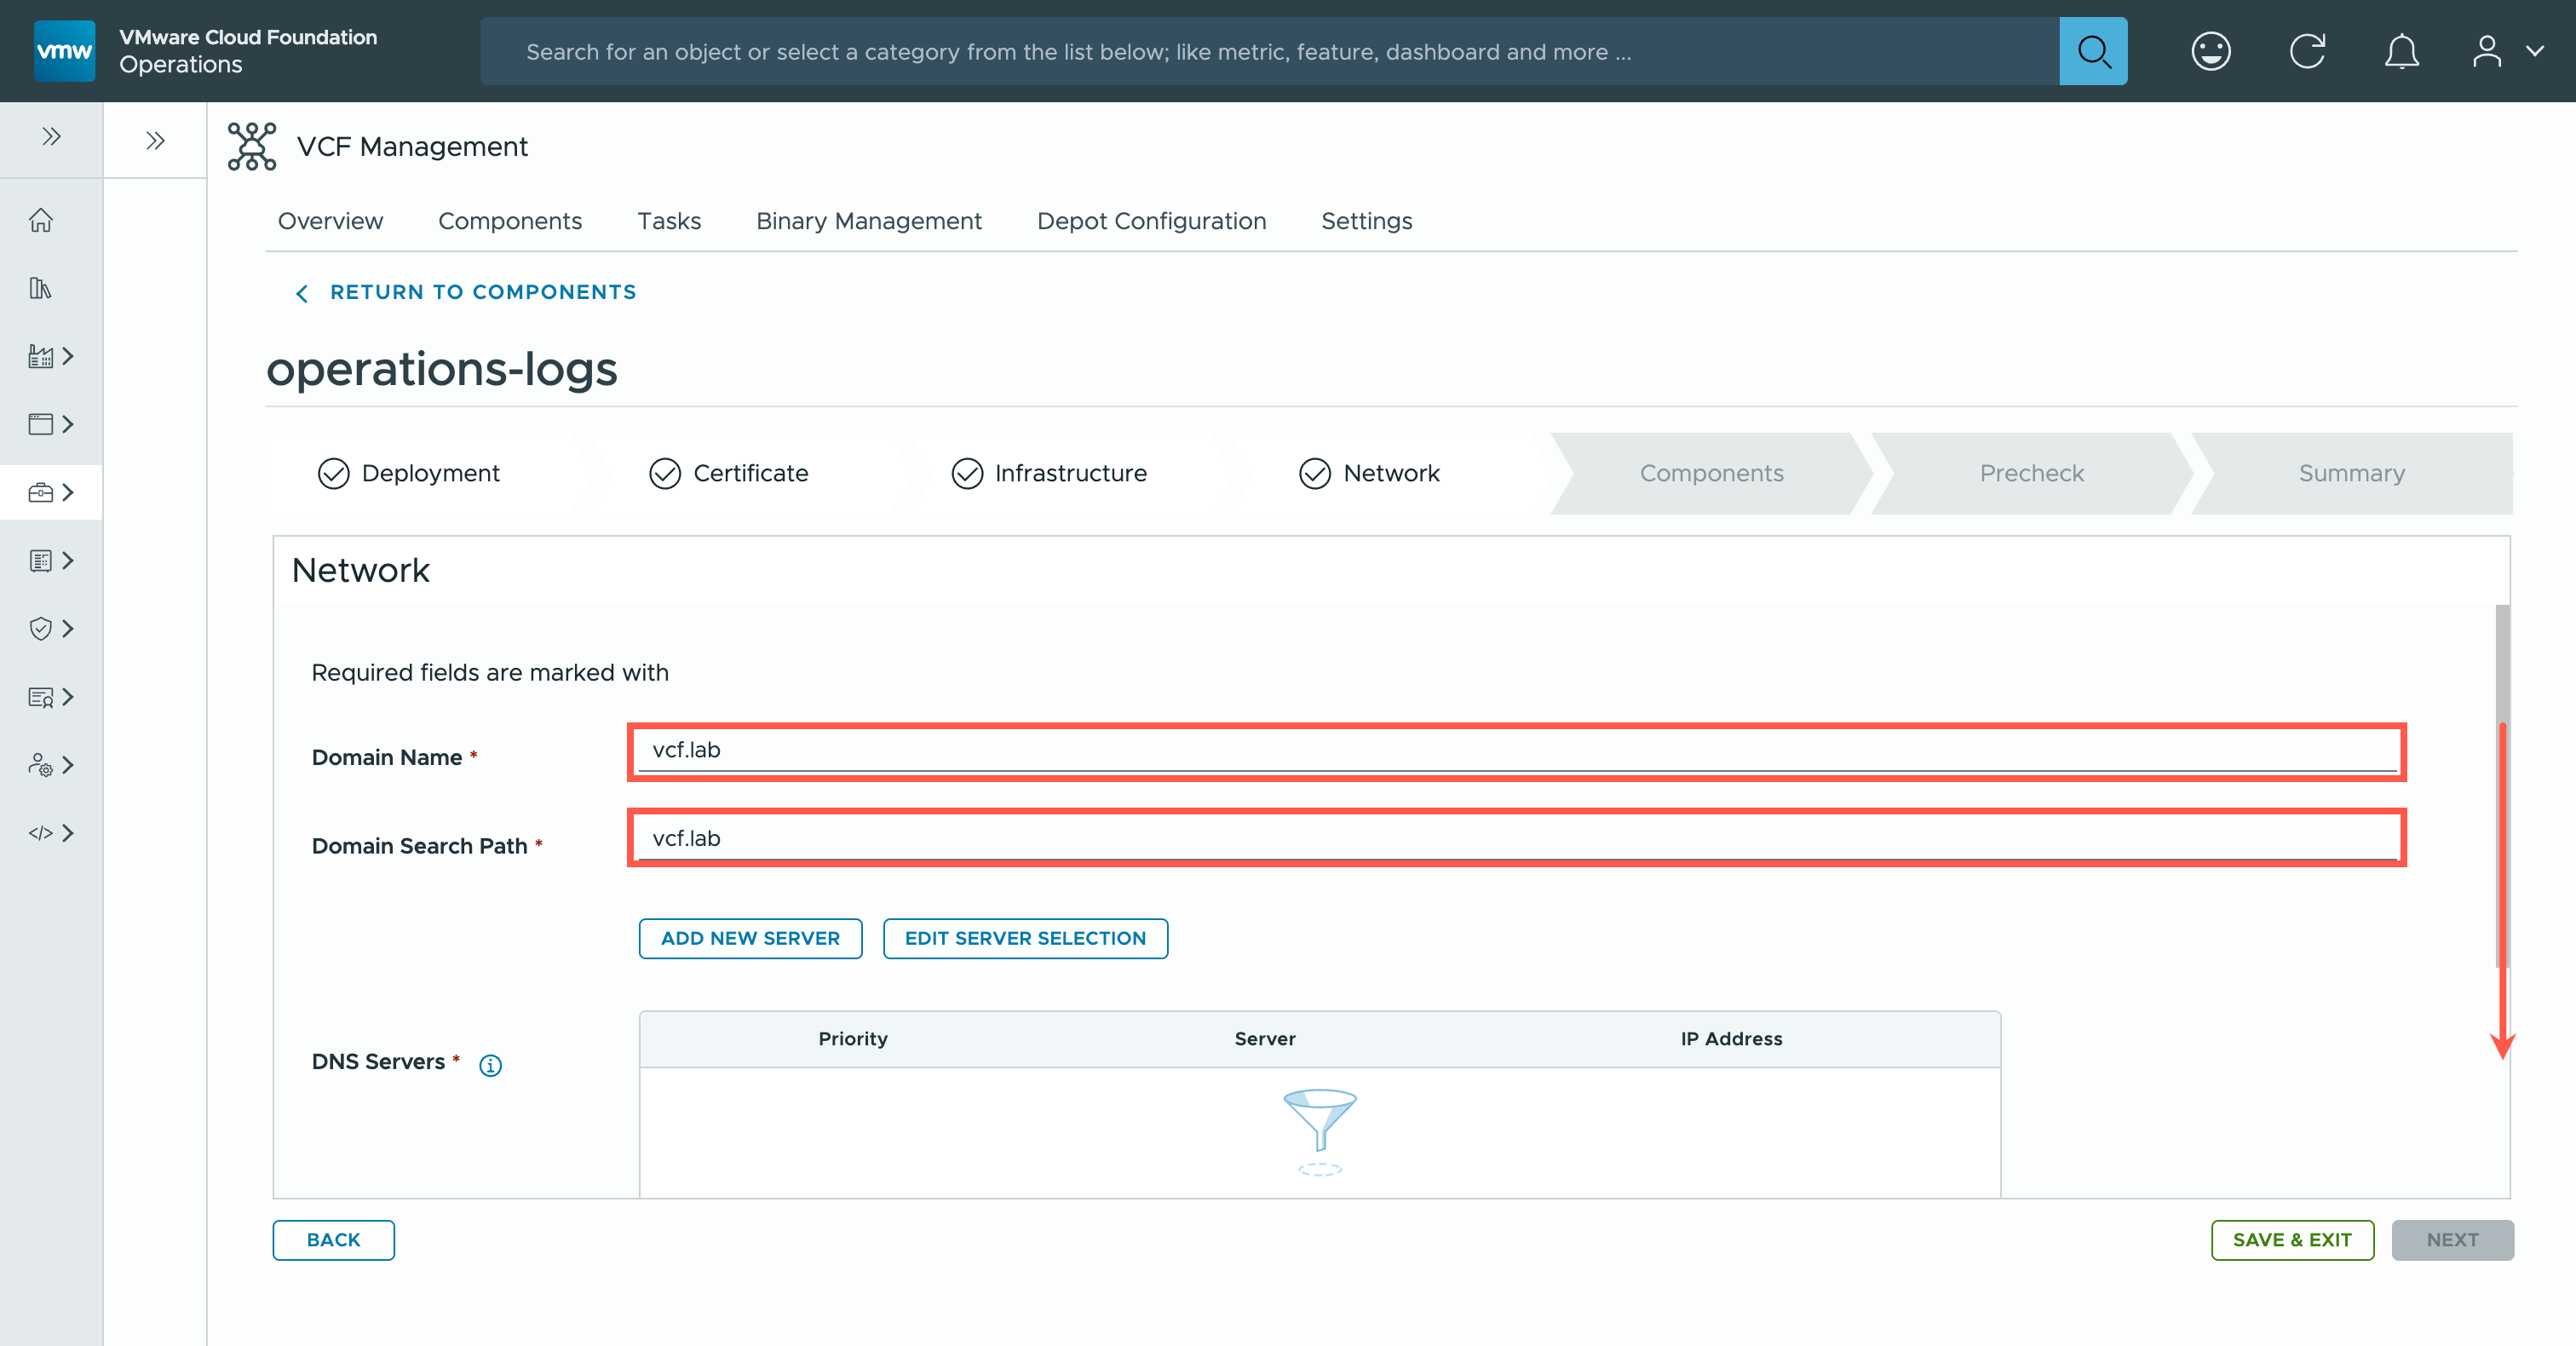
- At the Select Servers dialog, check the checkbox next to the DNS Servers to be enabled and click NEXT.
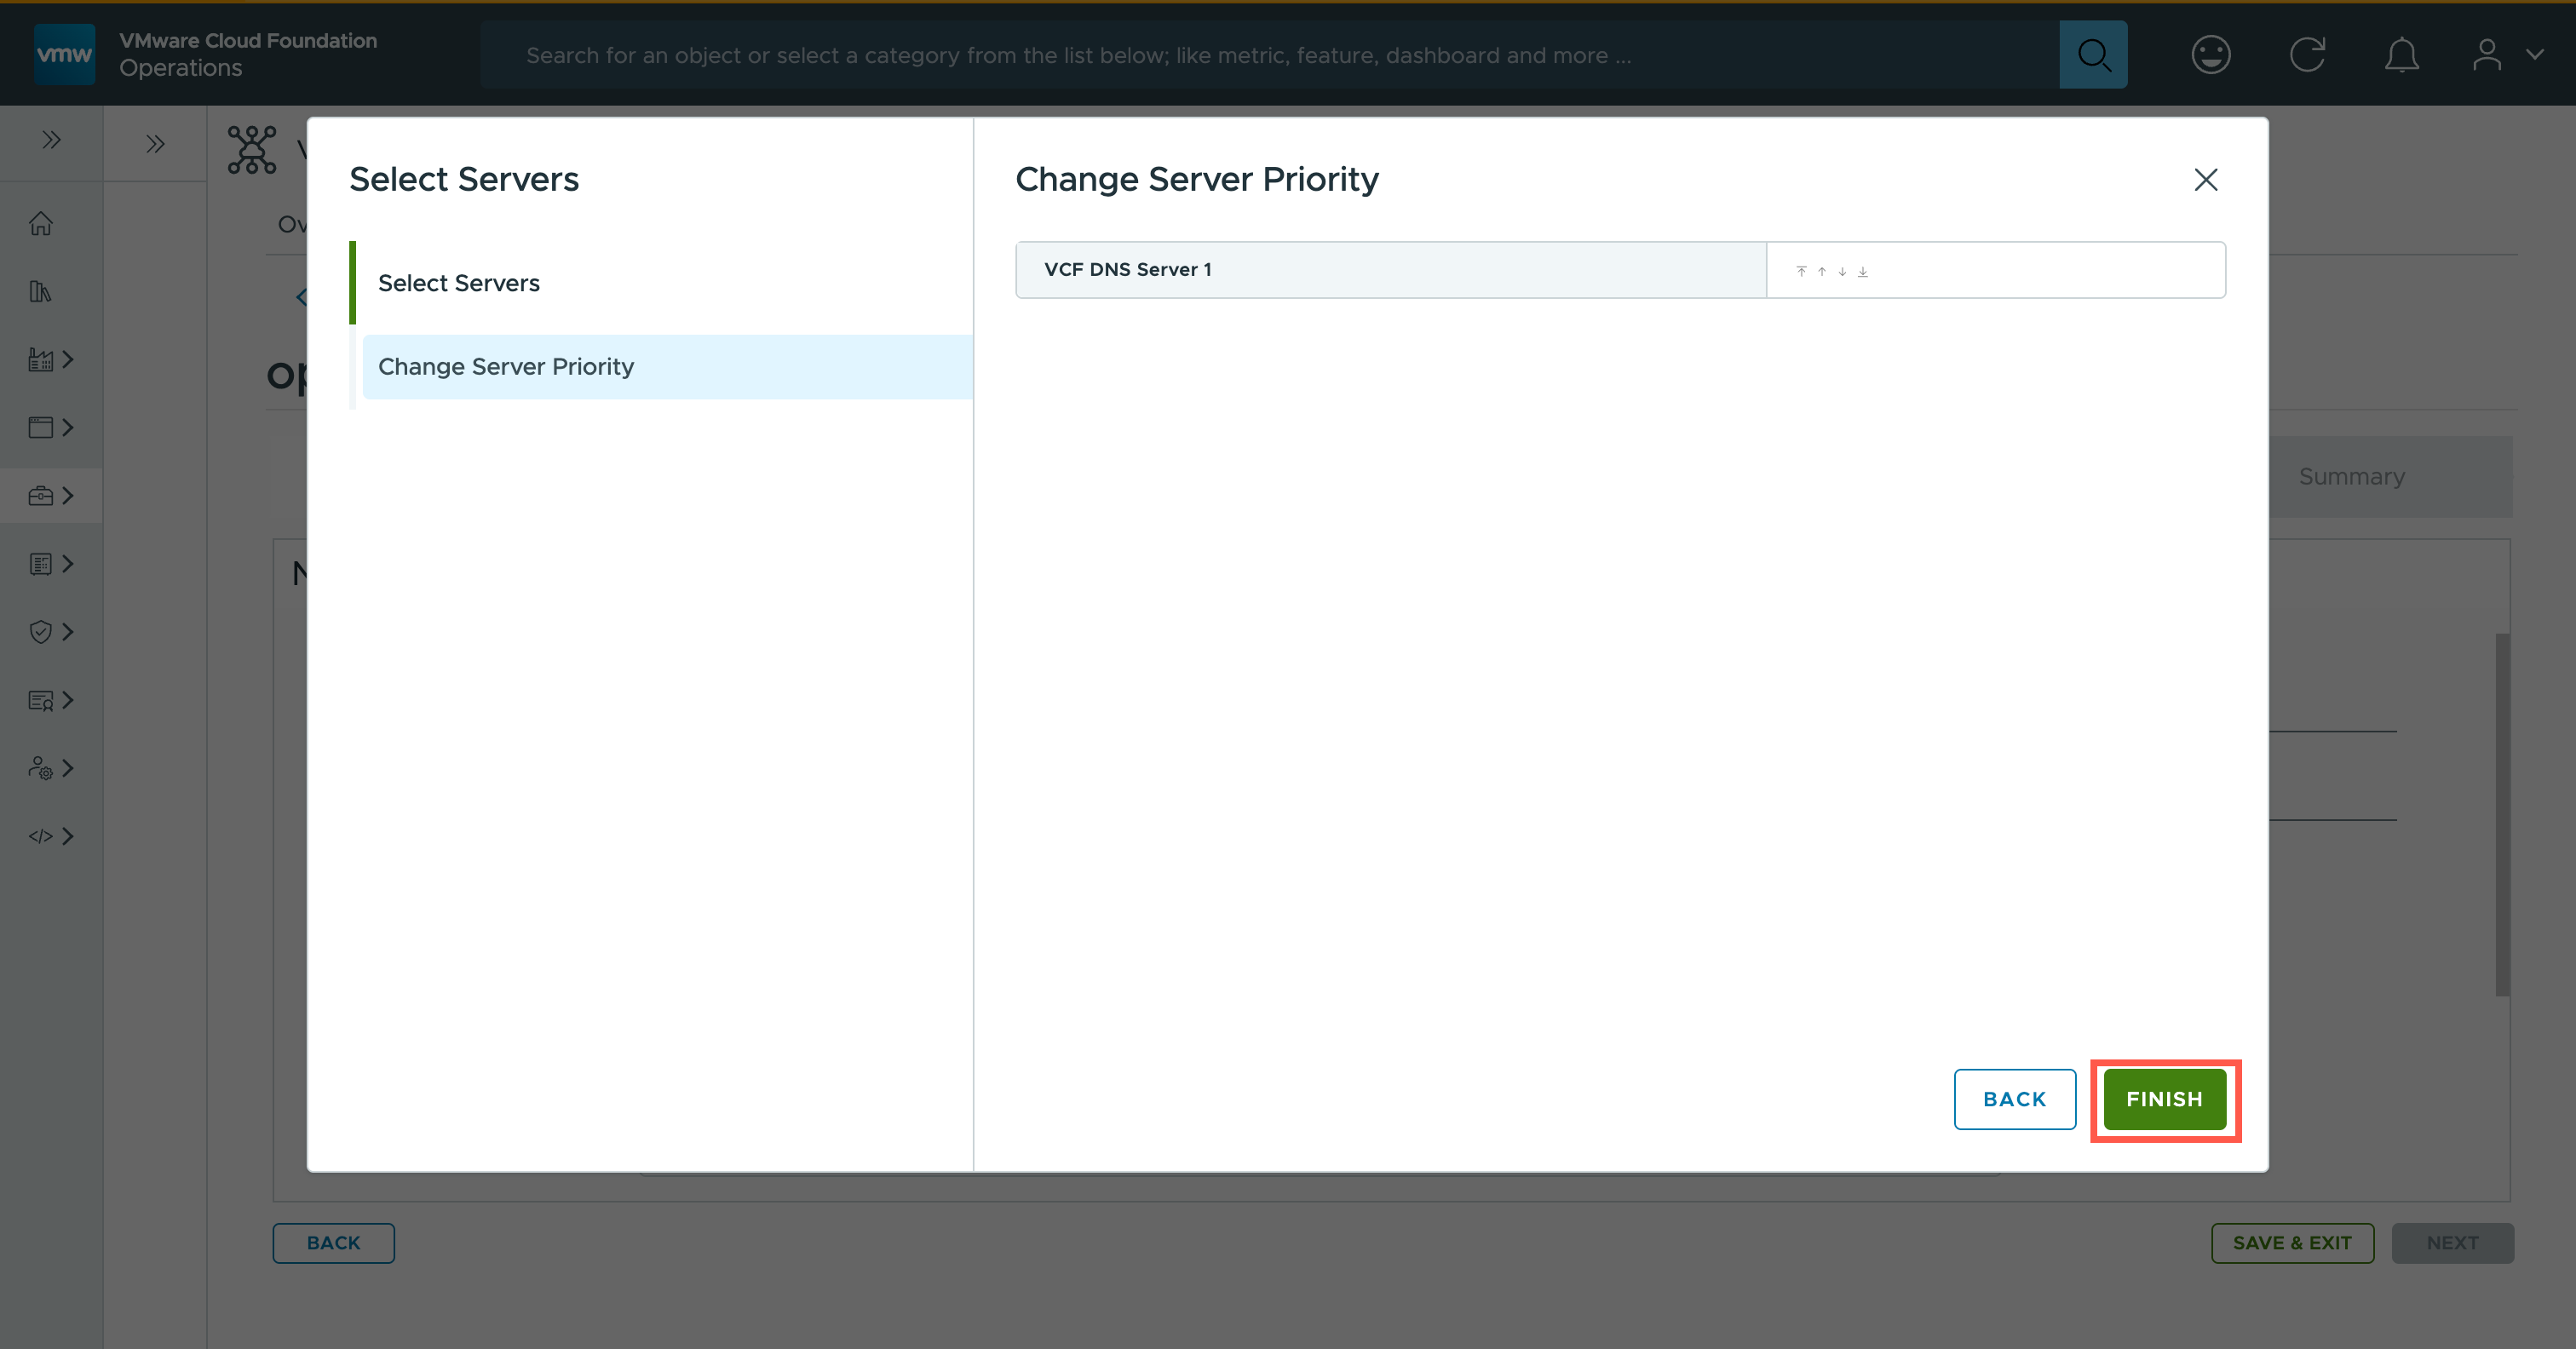
- At the Select Servers dialog, click FINISH.
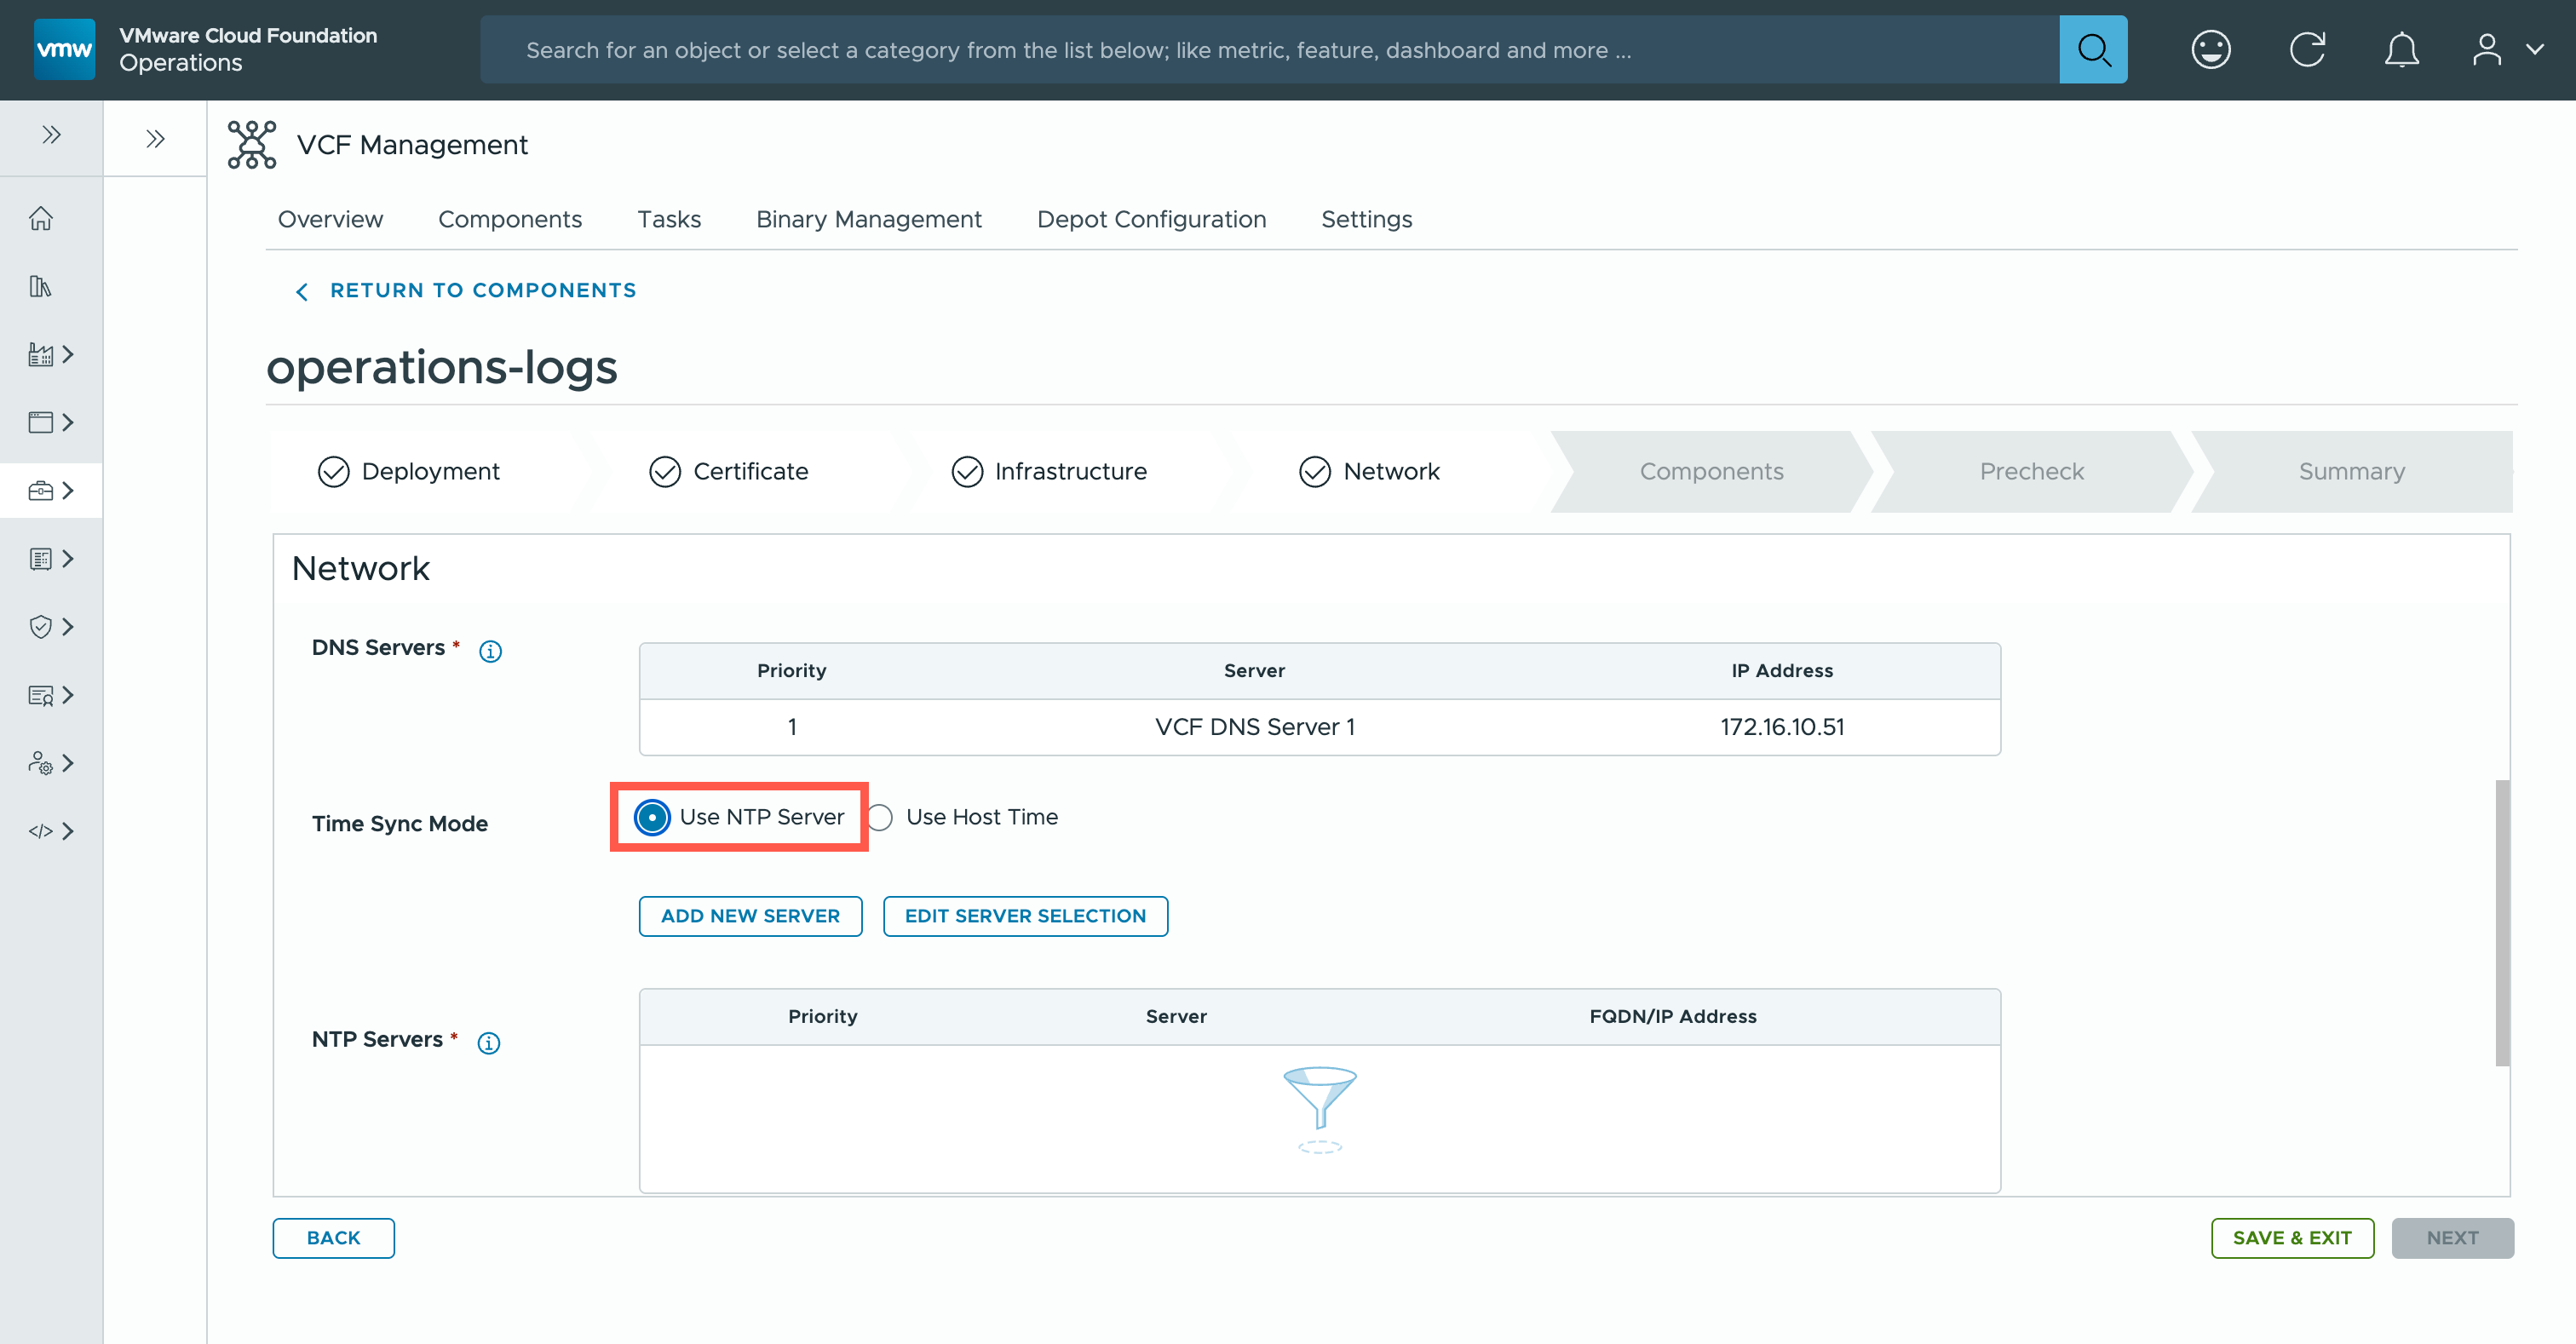
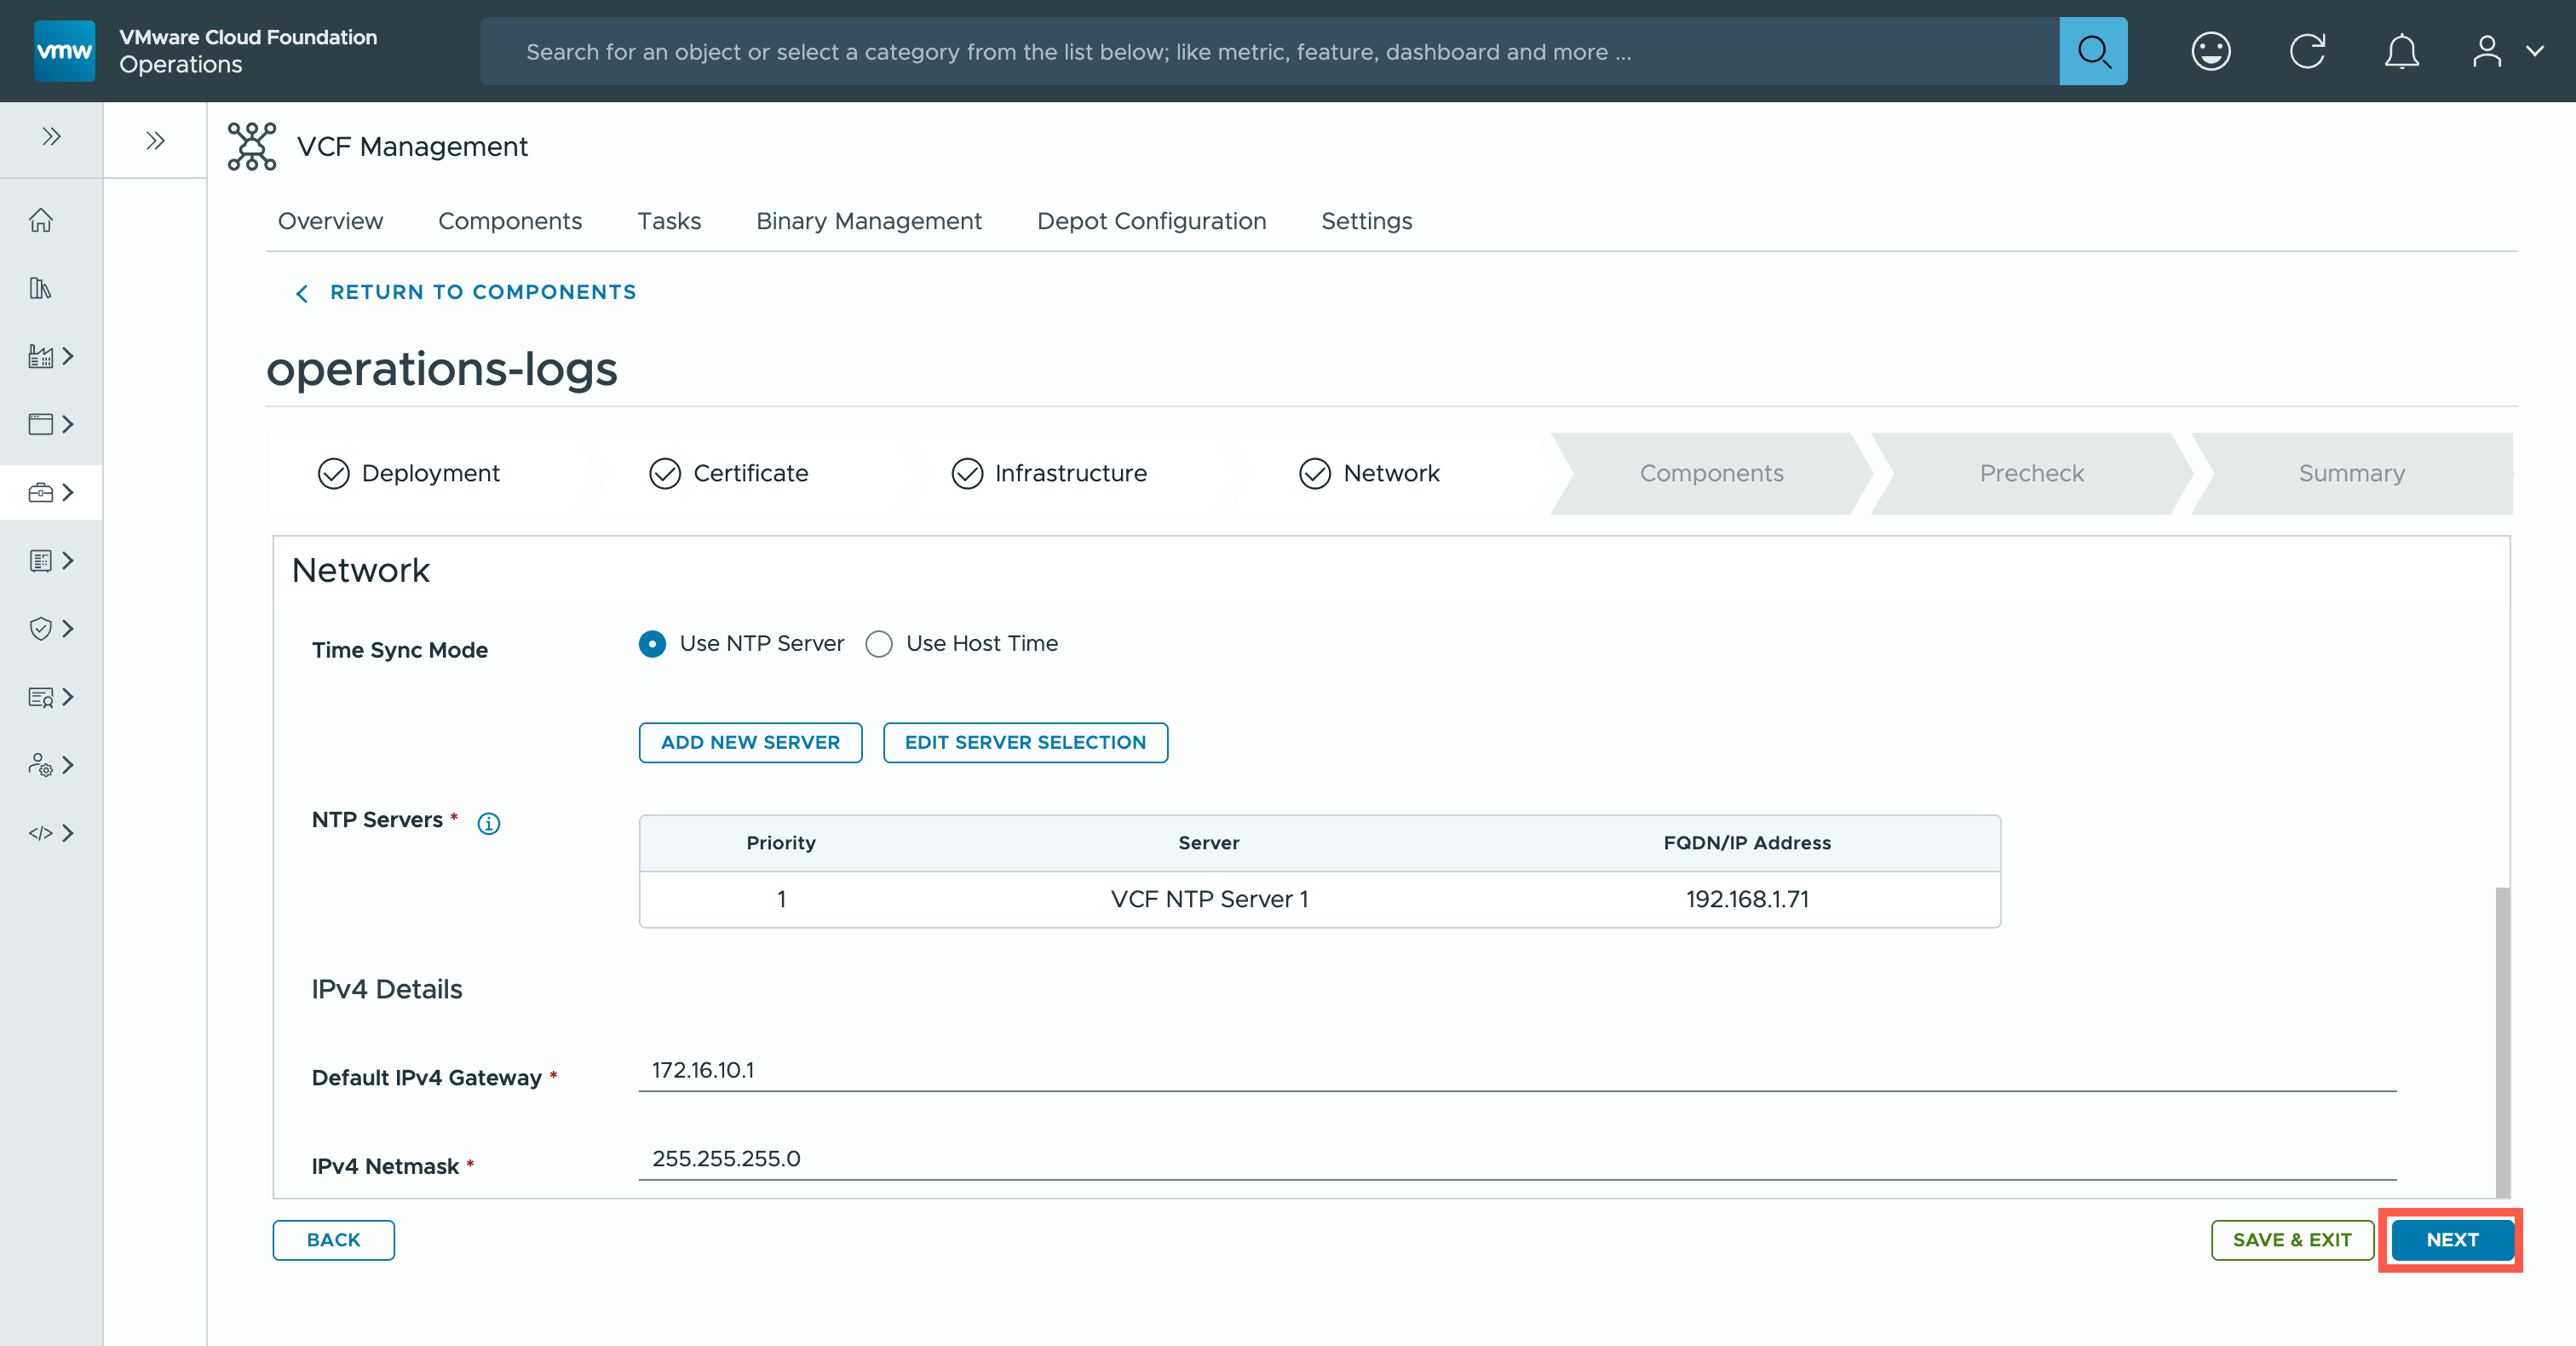
- At the Network page, scroll down and then, under the Time Sync Mode options, select the Use NTP Server option.
- At the Network page, click EDIT SERVER SPECIFICATION.
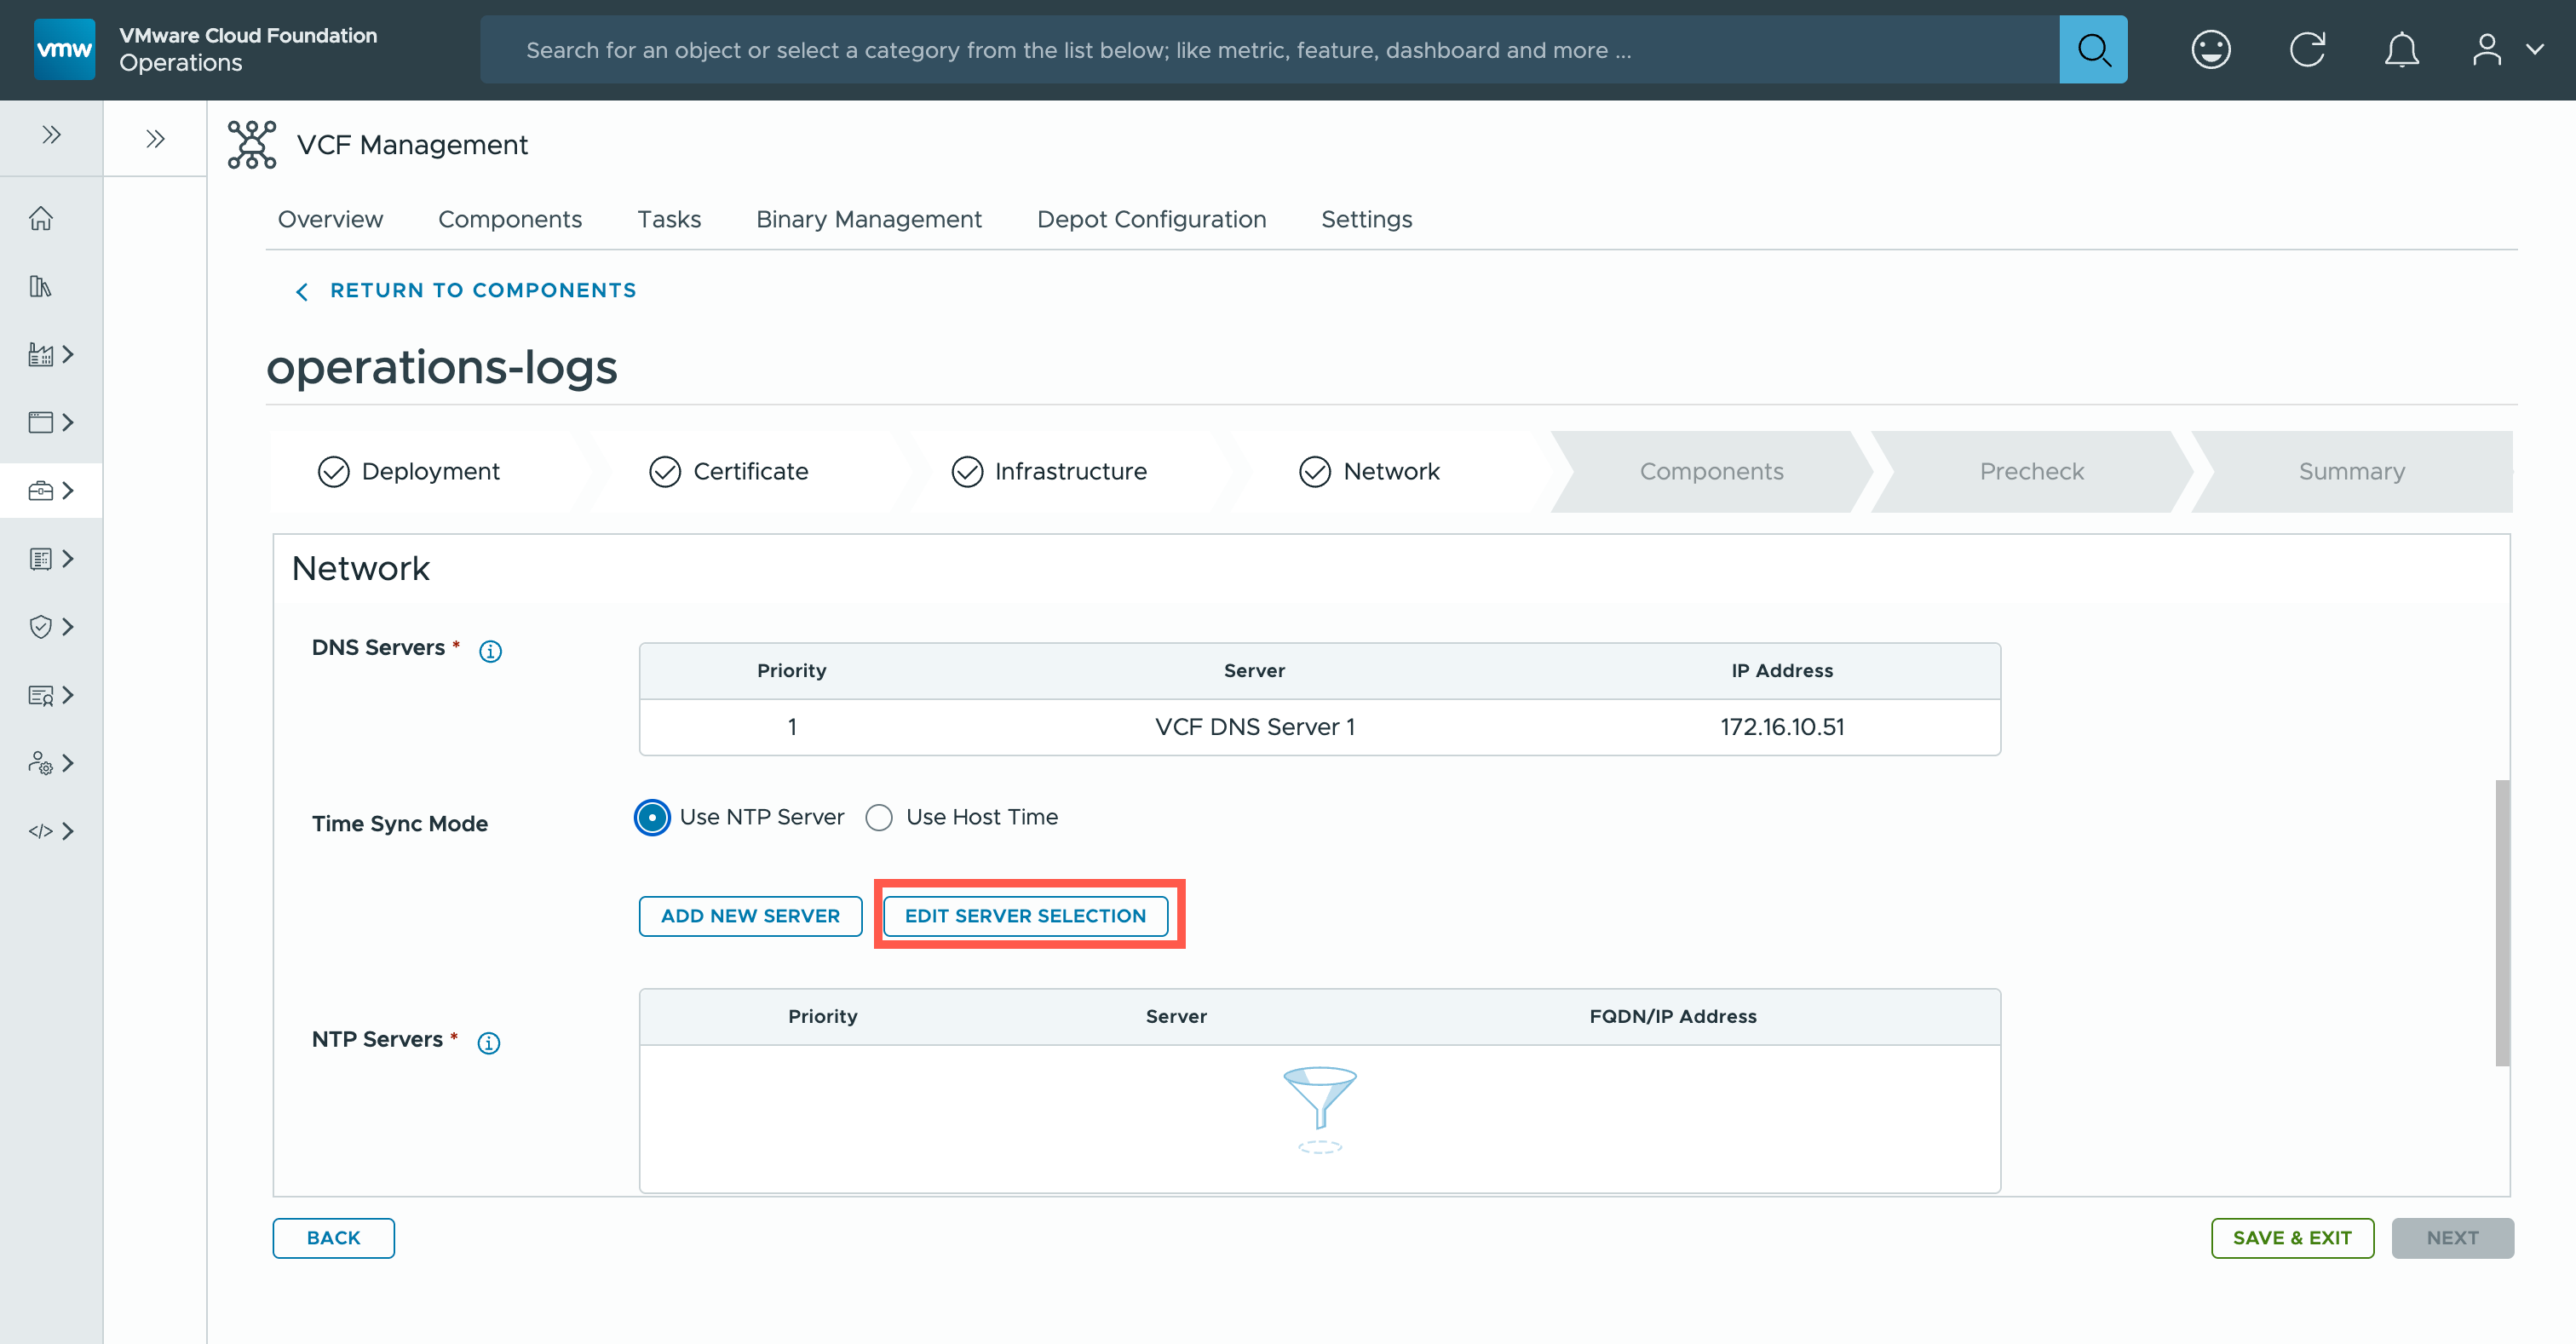
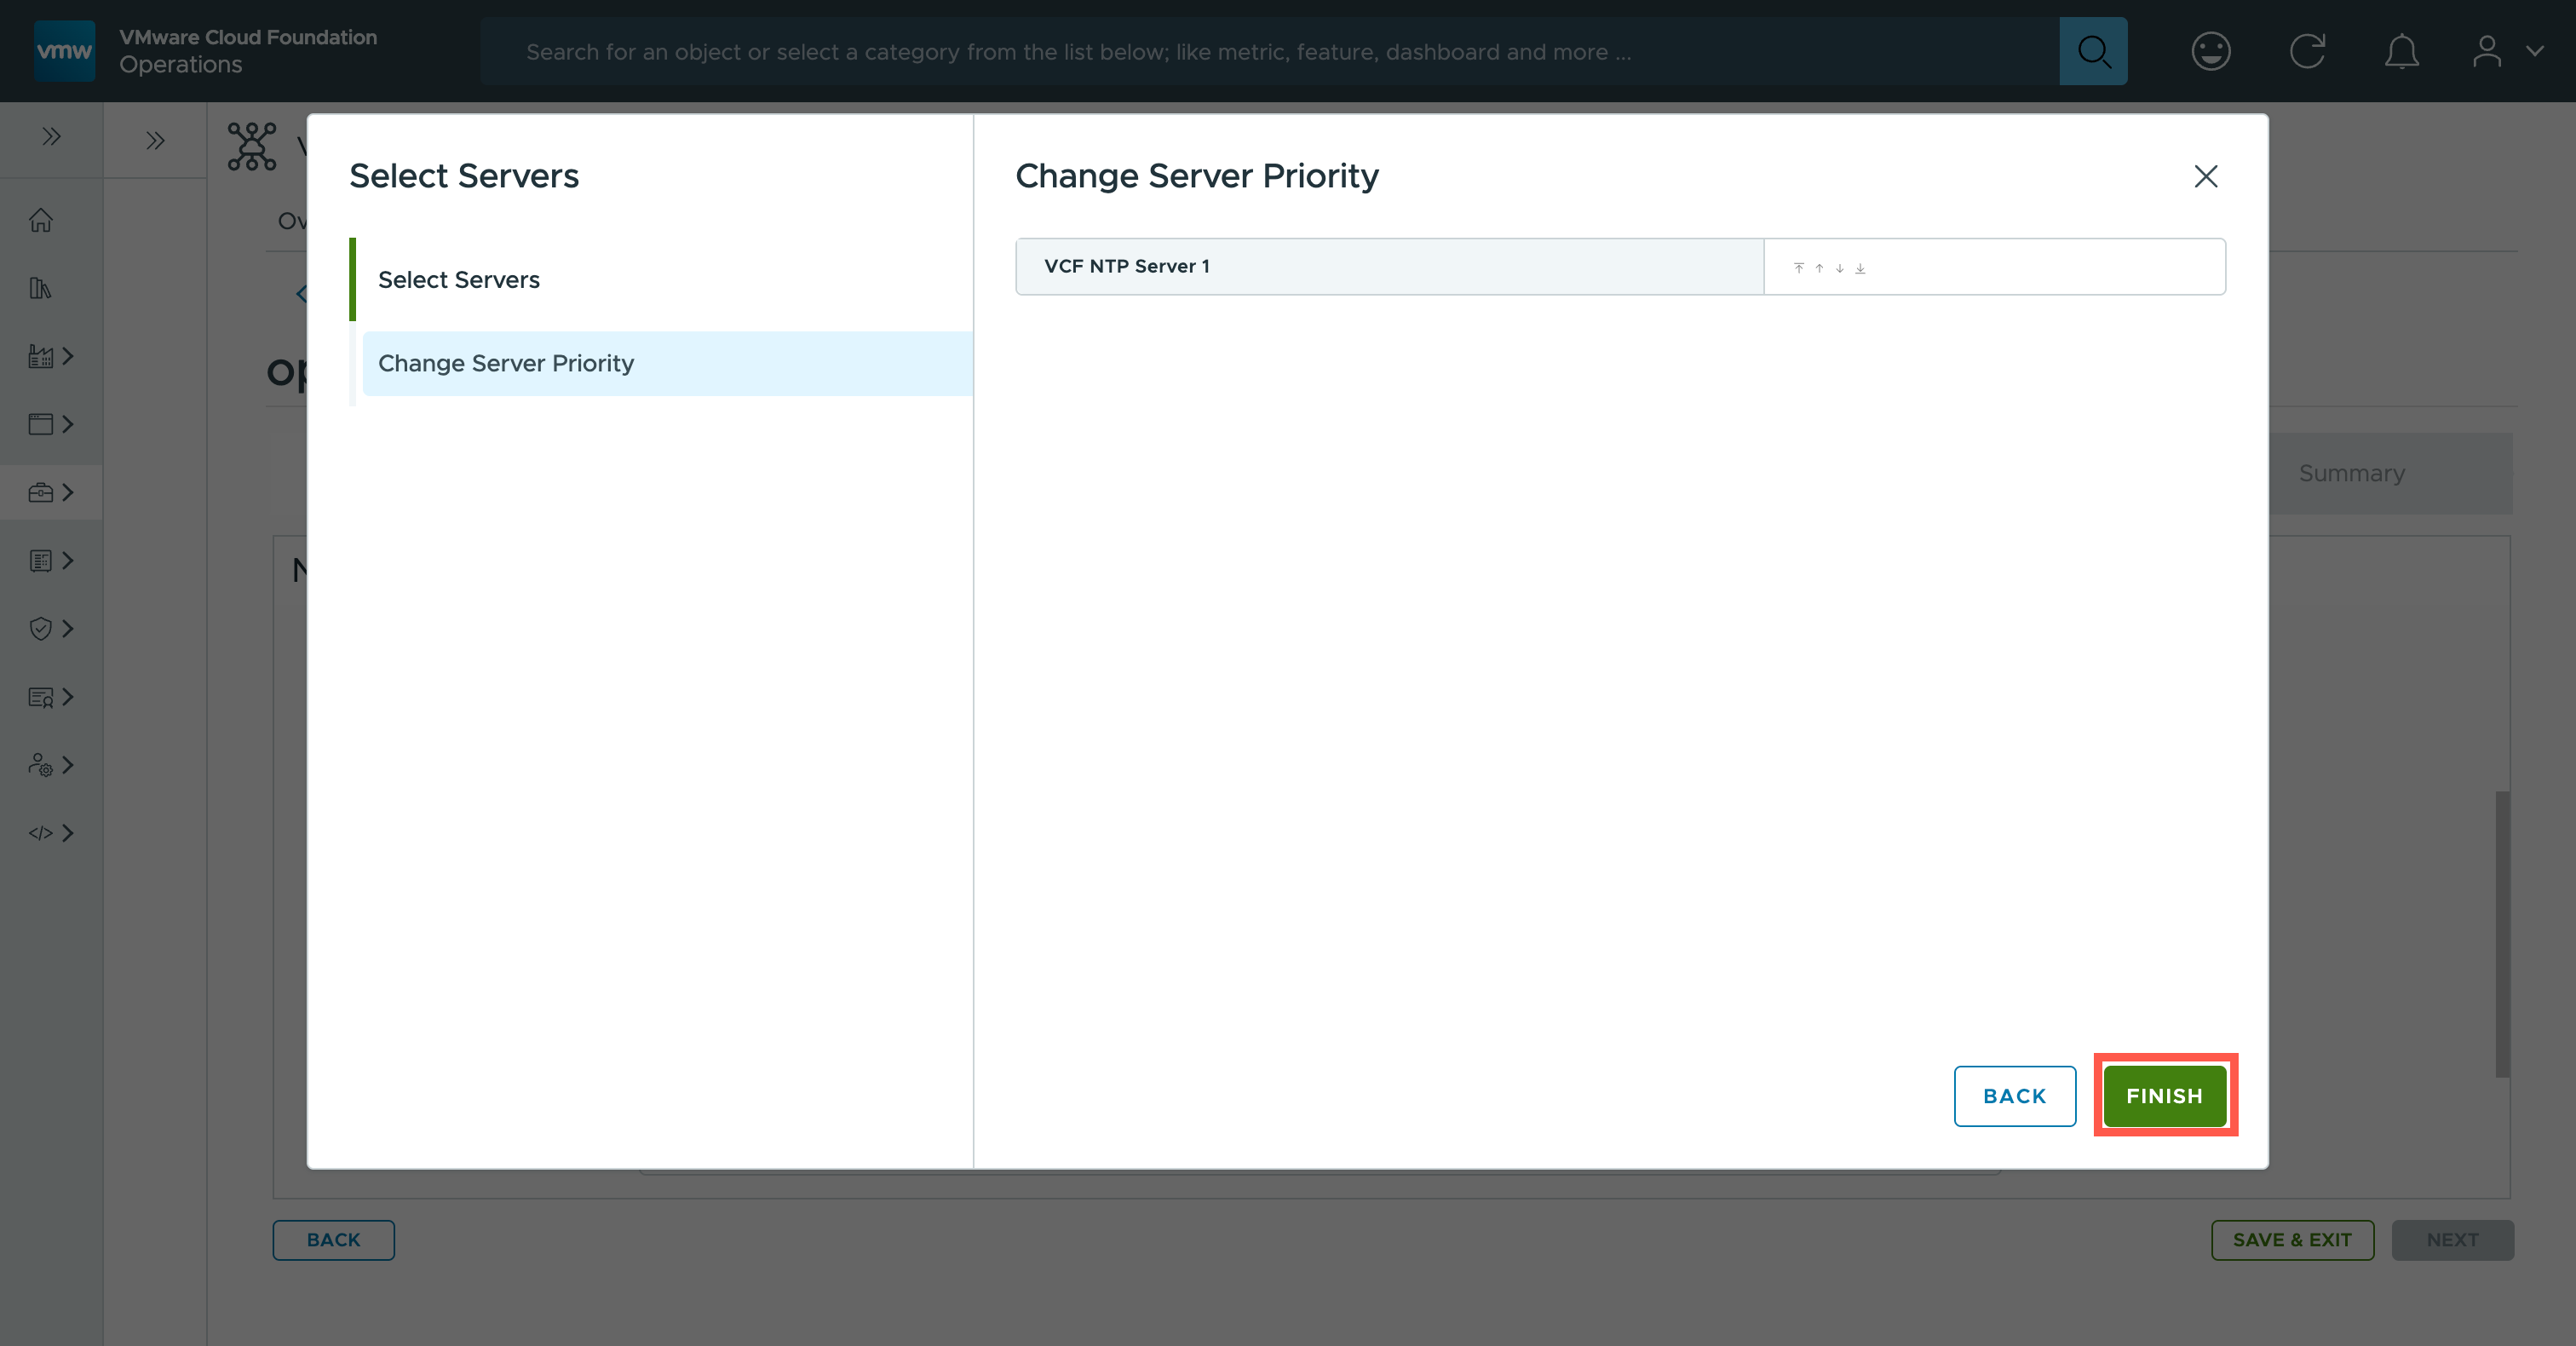
- At the Select Servers dialog, check the checkbox next to the NTP Servers to be enabled and click NEXT.
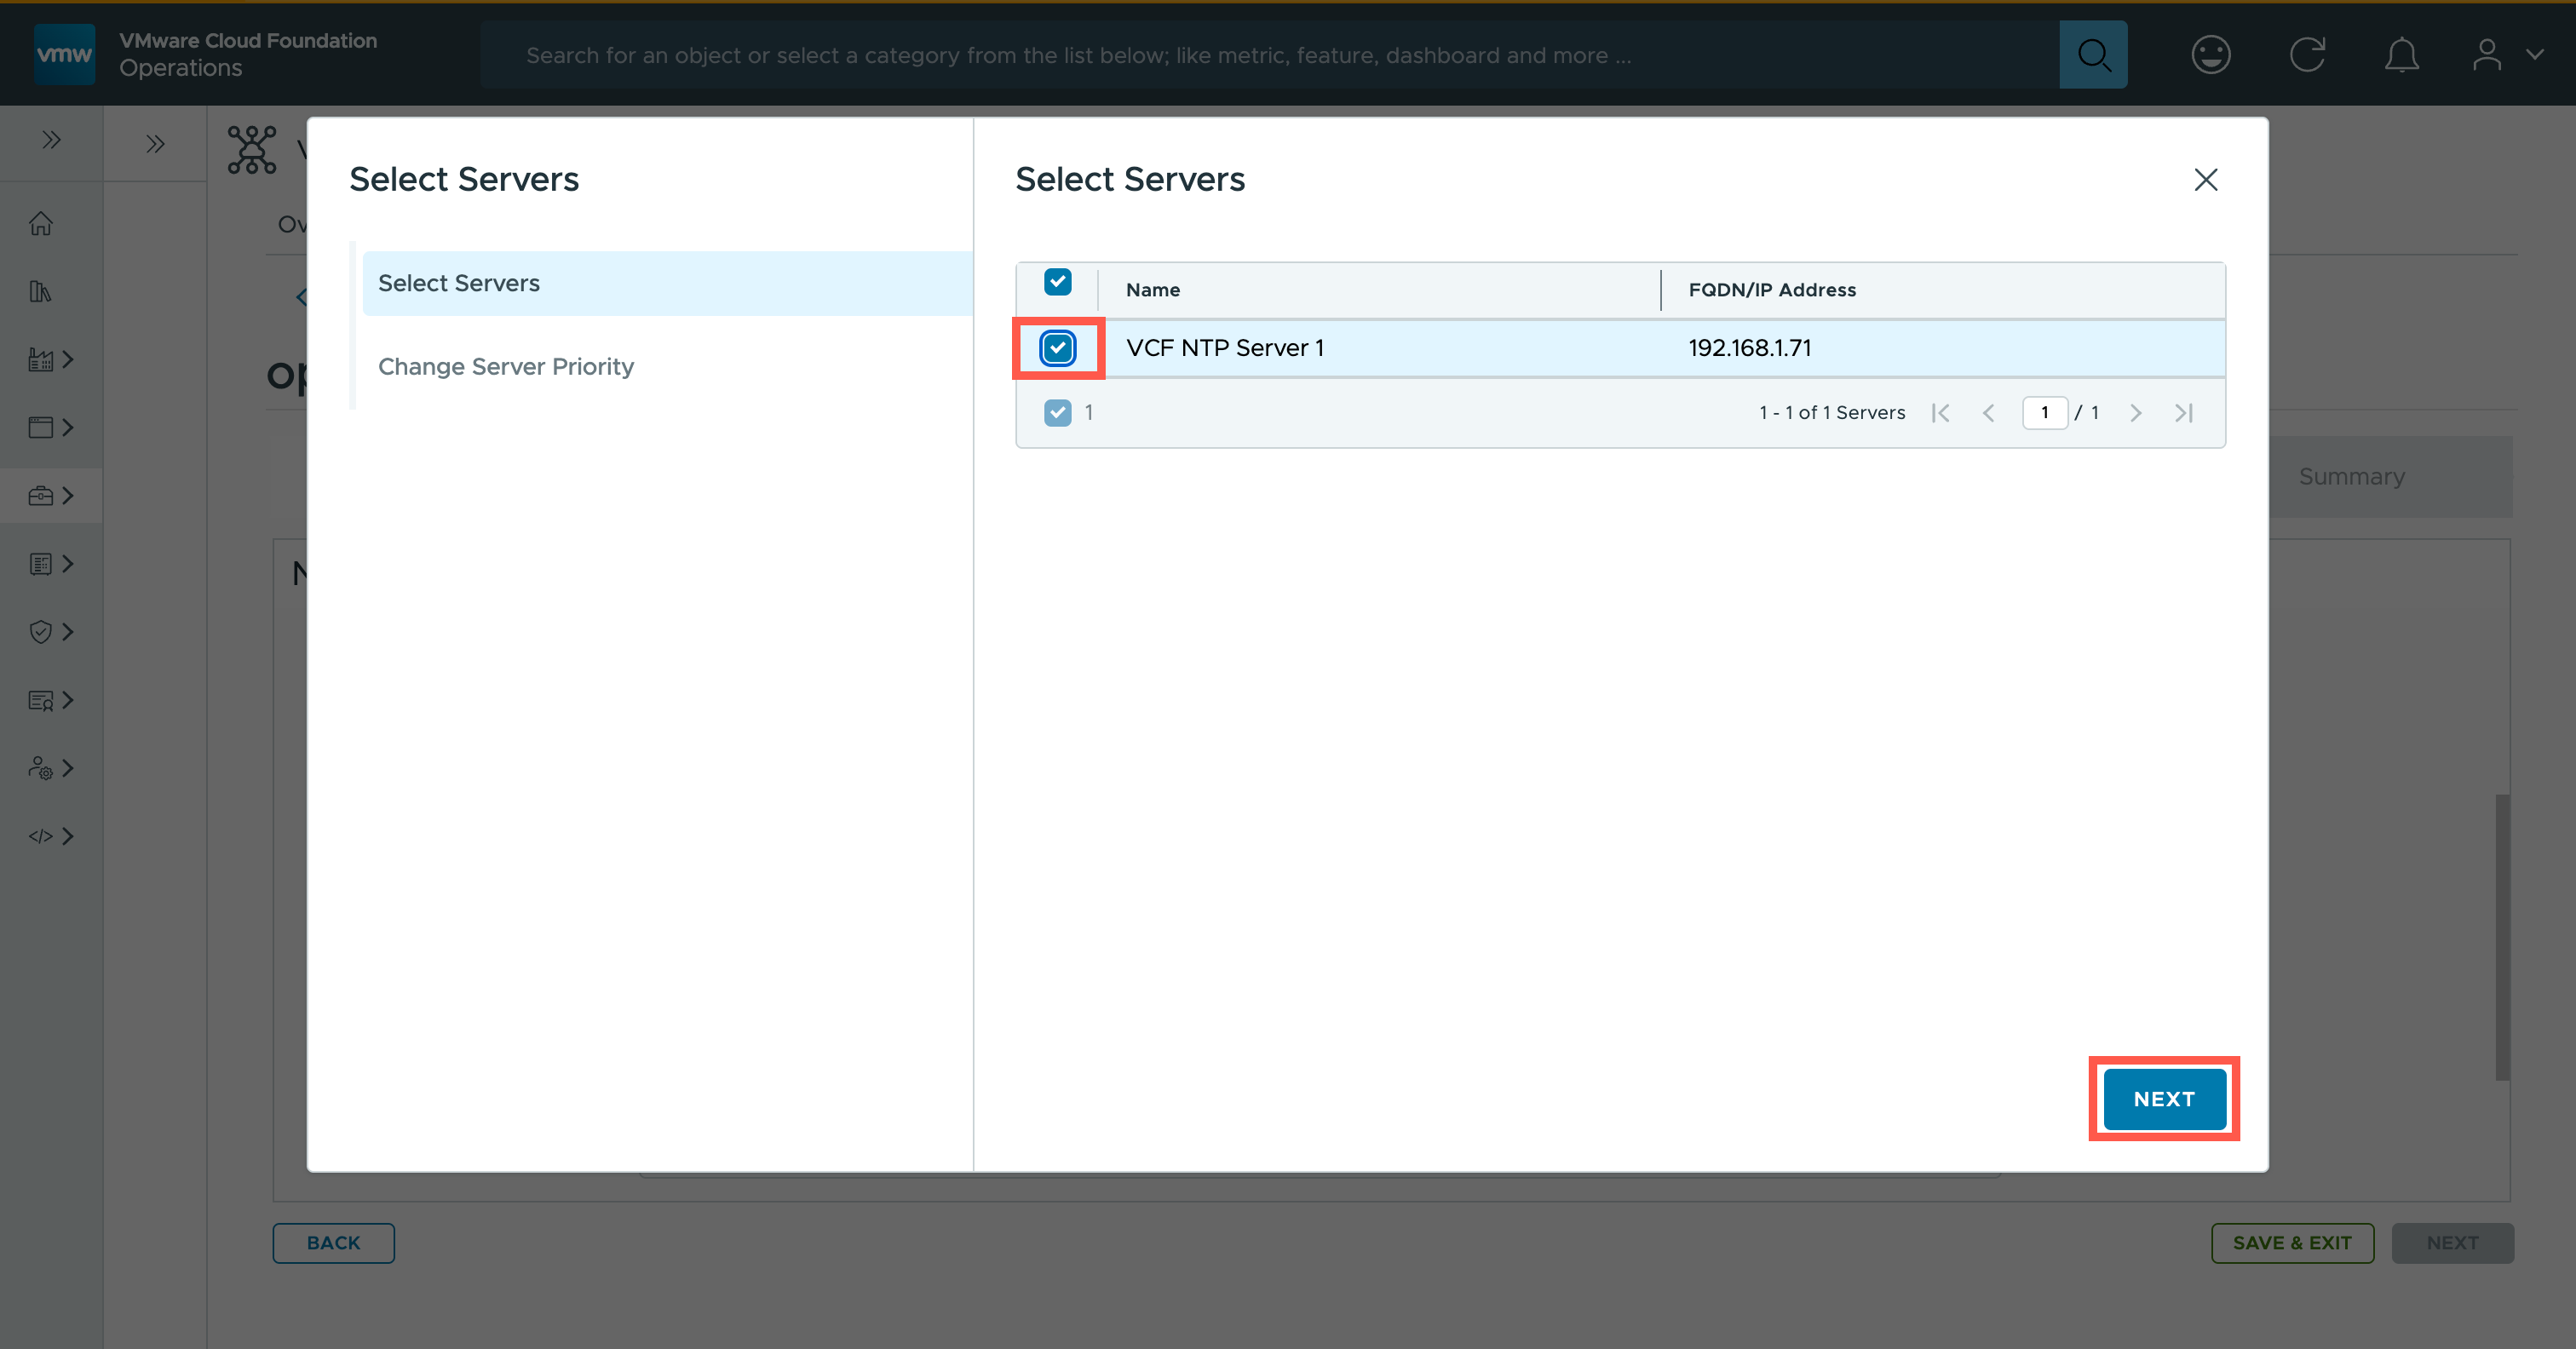
- At the Select Servers dialog, click FINISH.
- At the Network page, type
<default.gateway>into the Default IPv4 Gateway field and<ipv4.netmask>into the IPv4 Netmask field.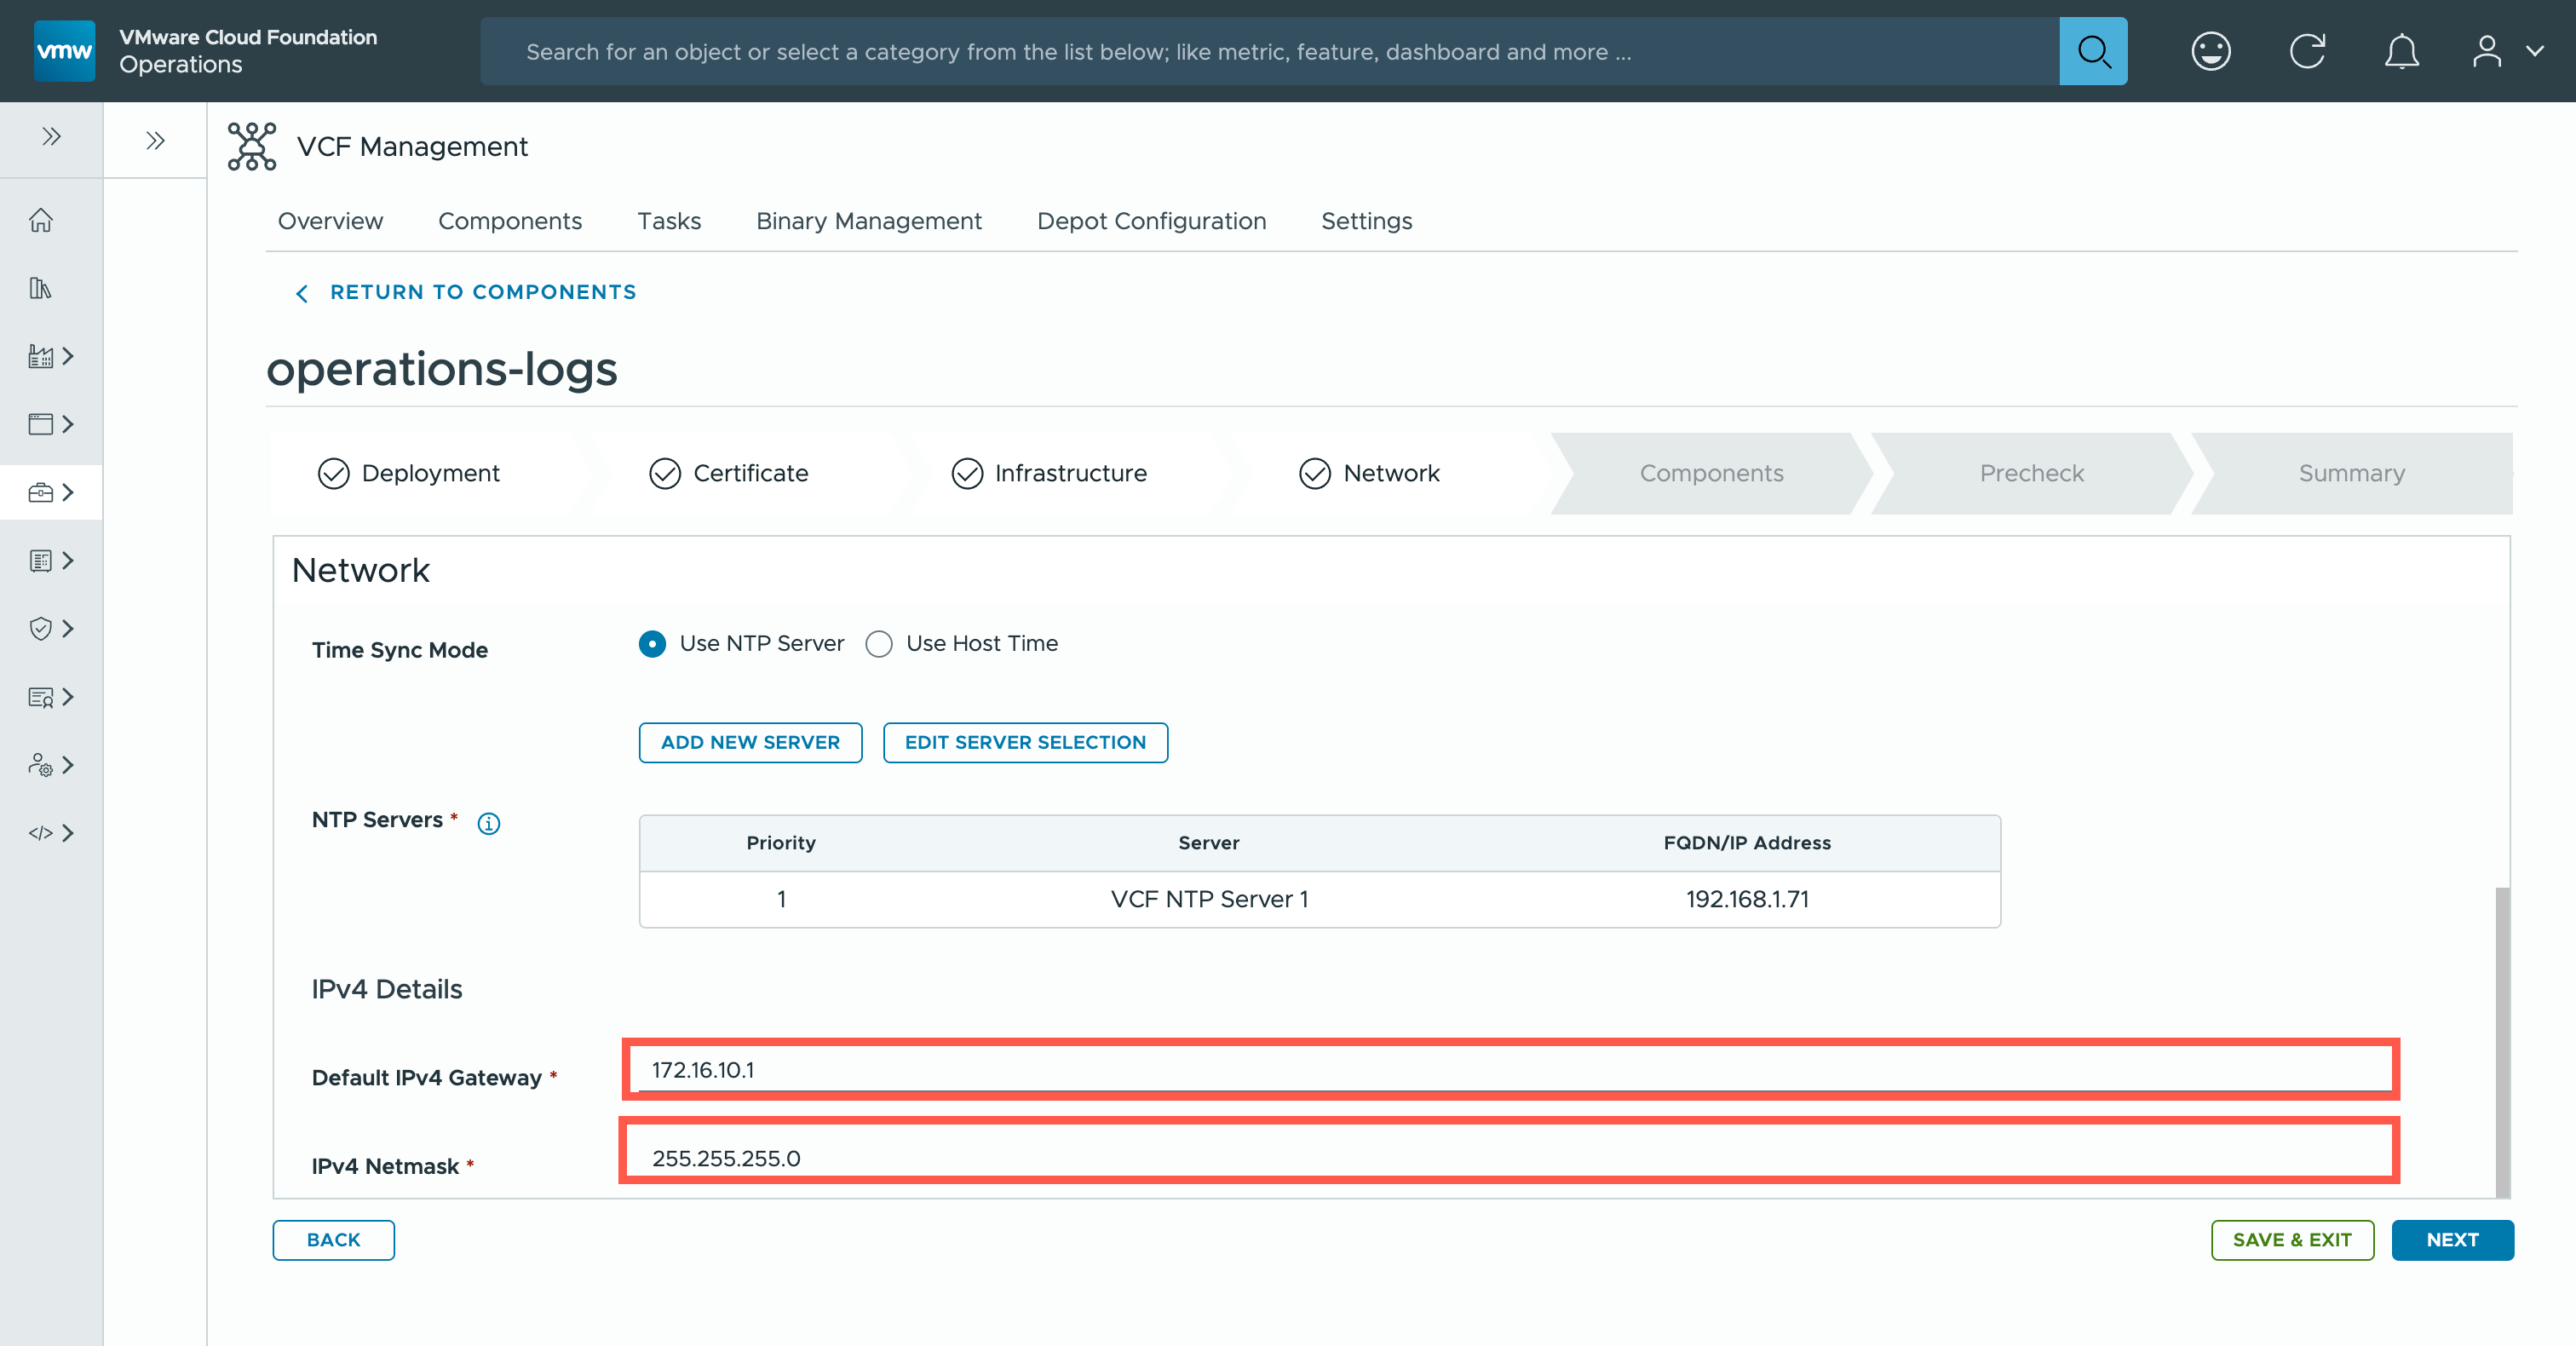
- At the Network page, click Next.
- At the Components page, select the appropriate Node Size from the dropdown and then scroll down.
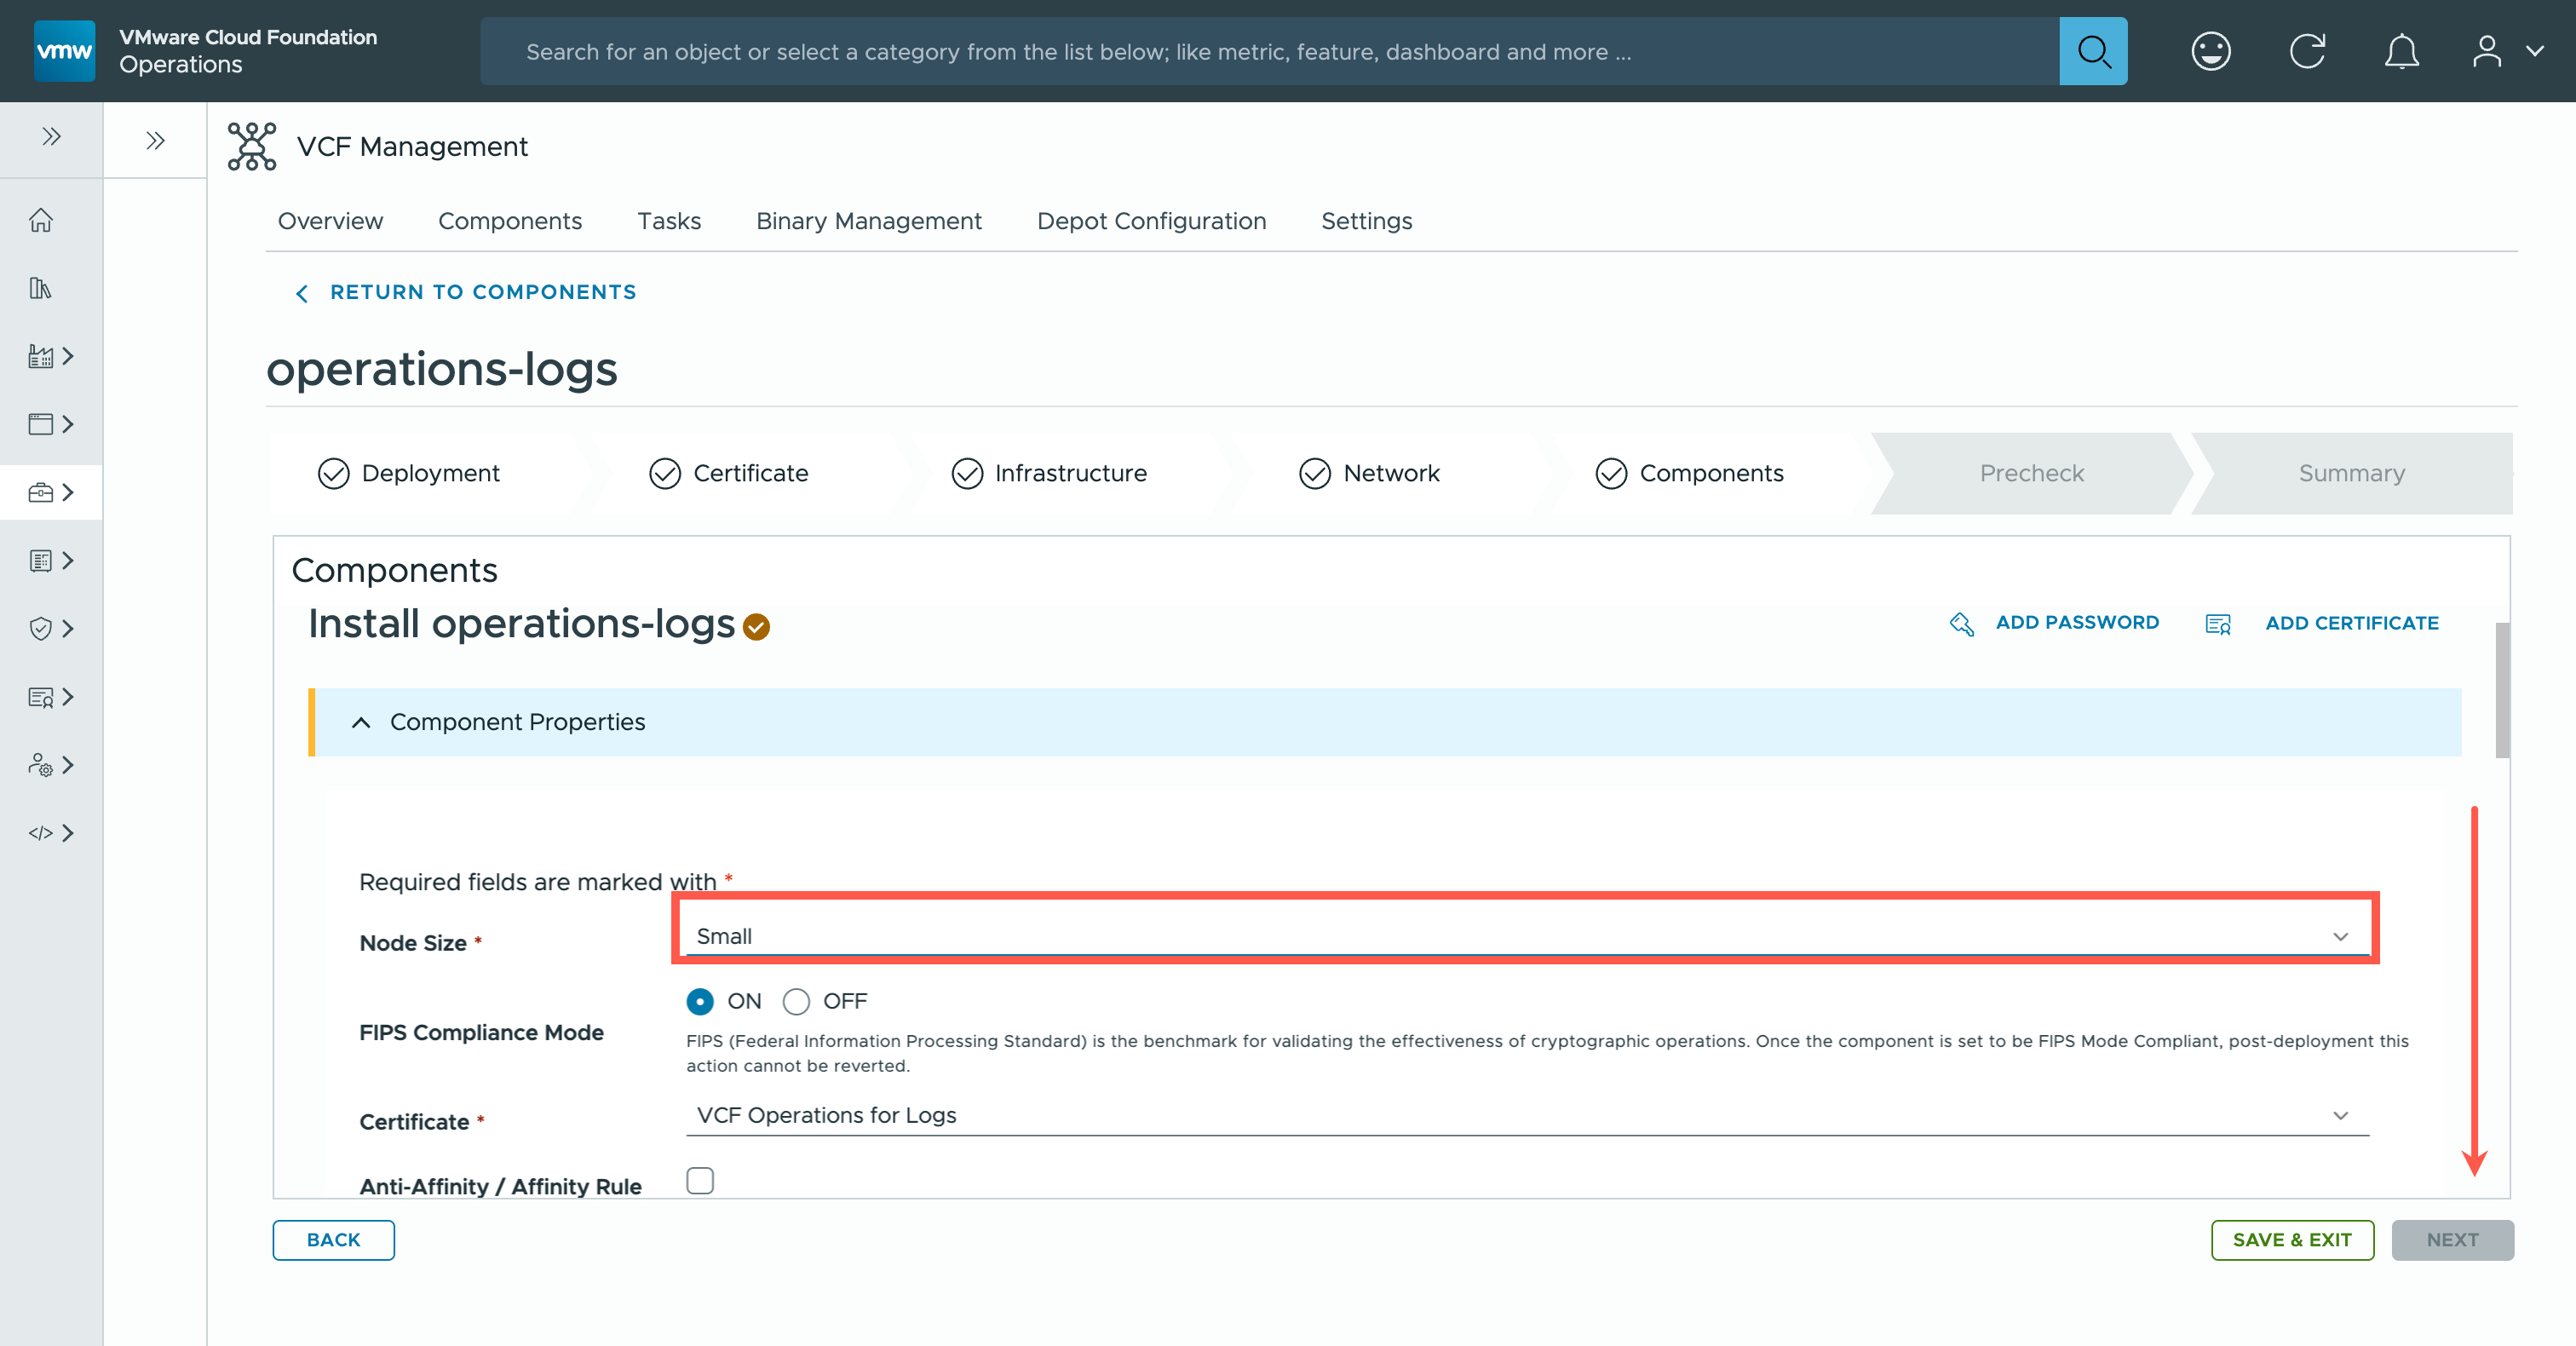
- At the Components page, select the appropriate options need for your install and type the
<admin.email>into the Admin Email field.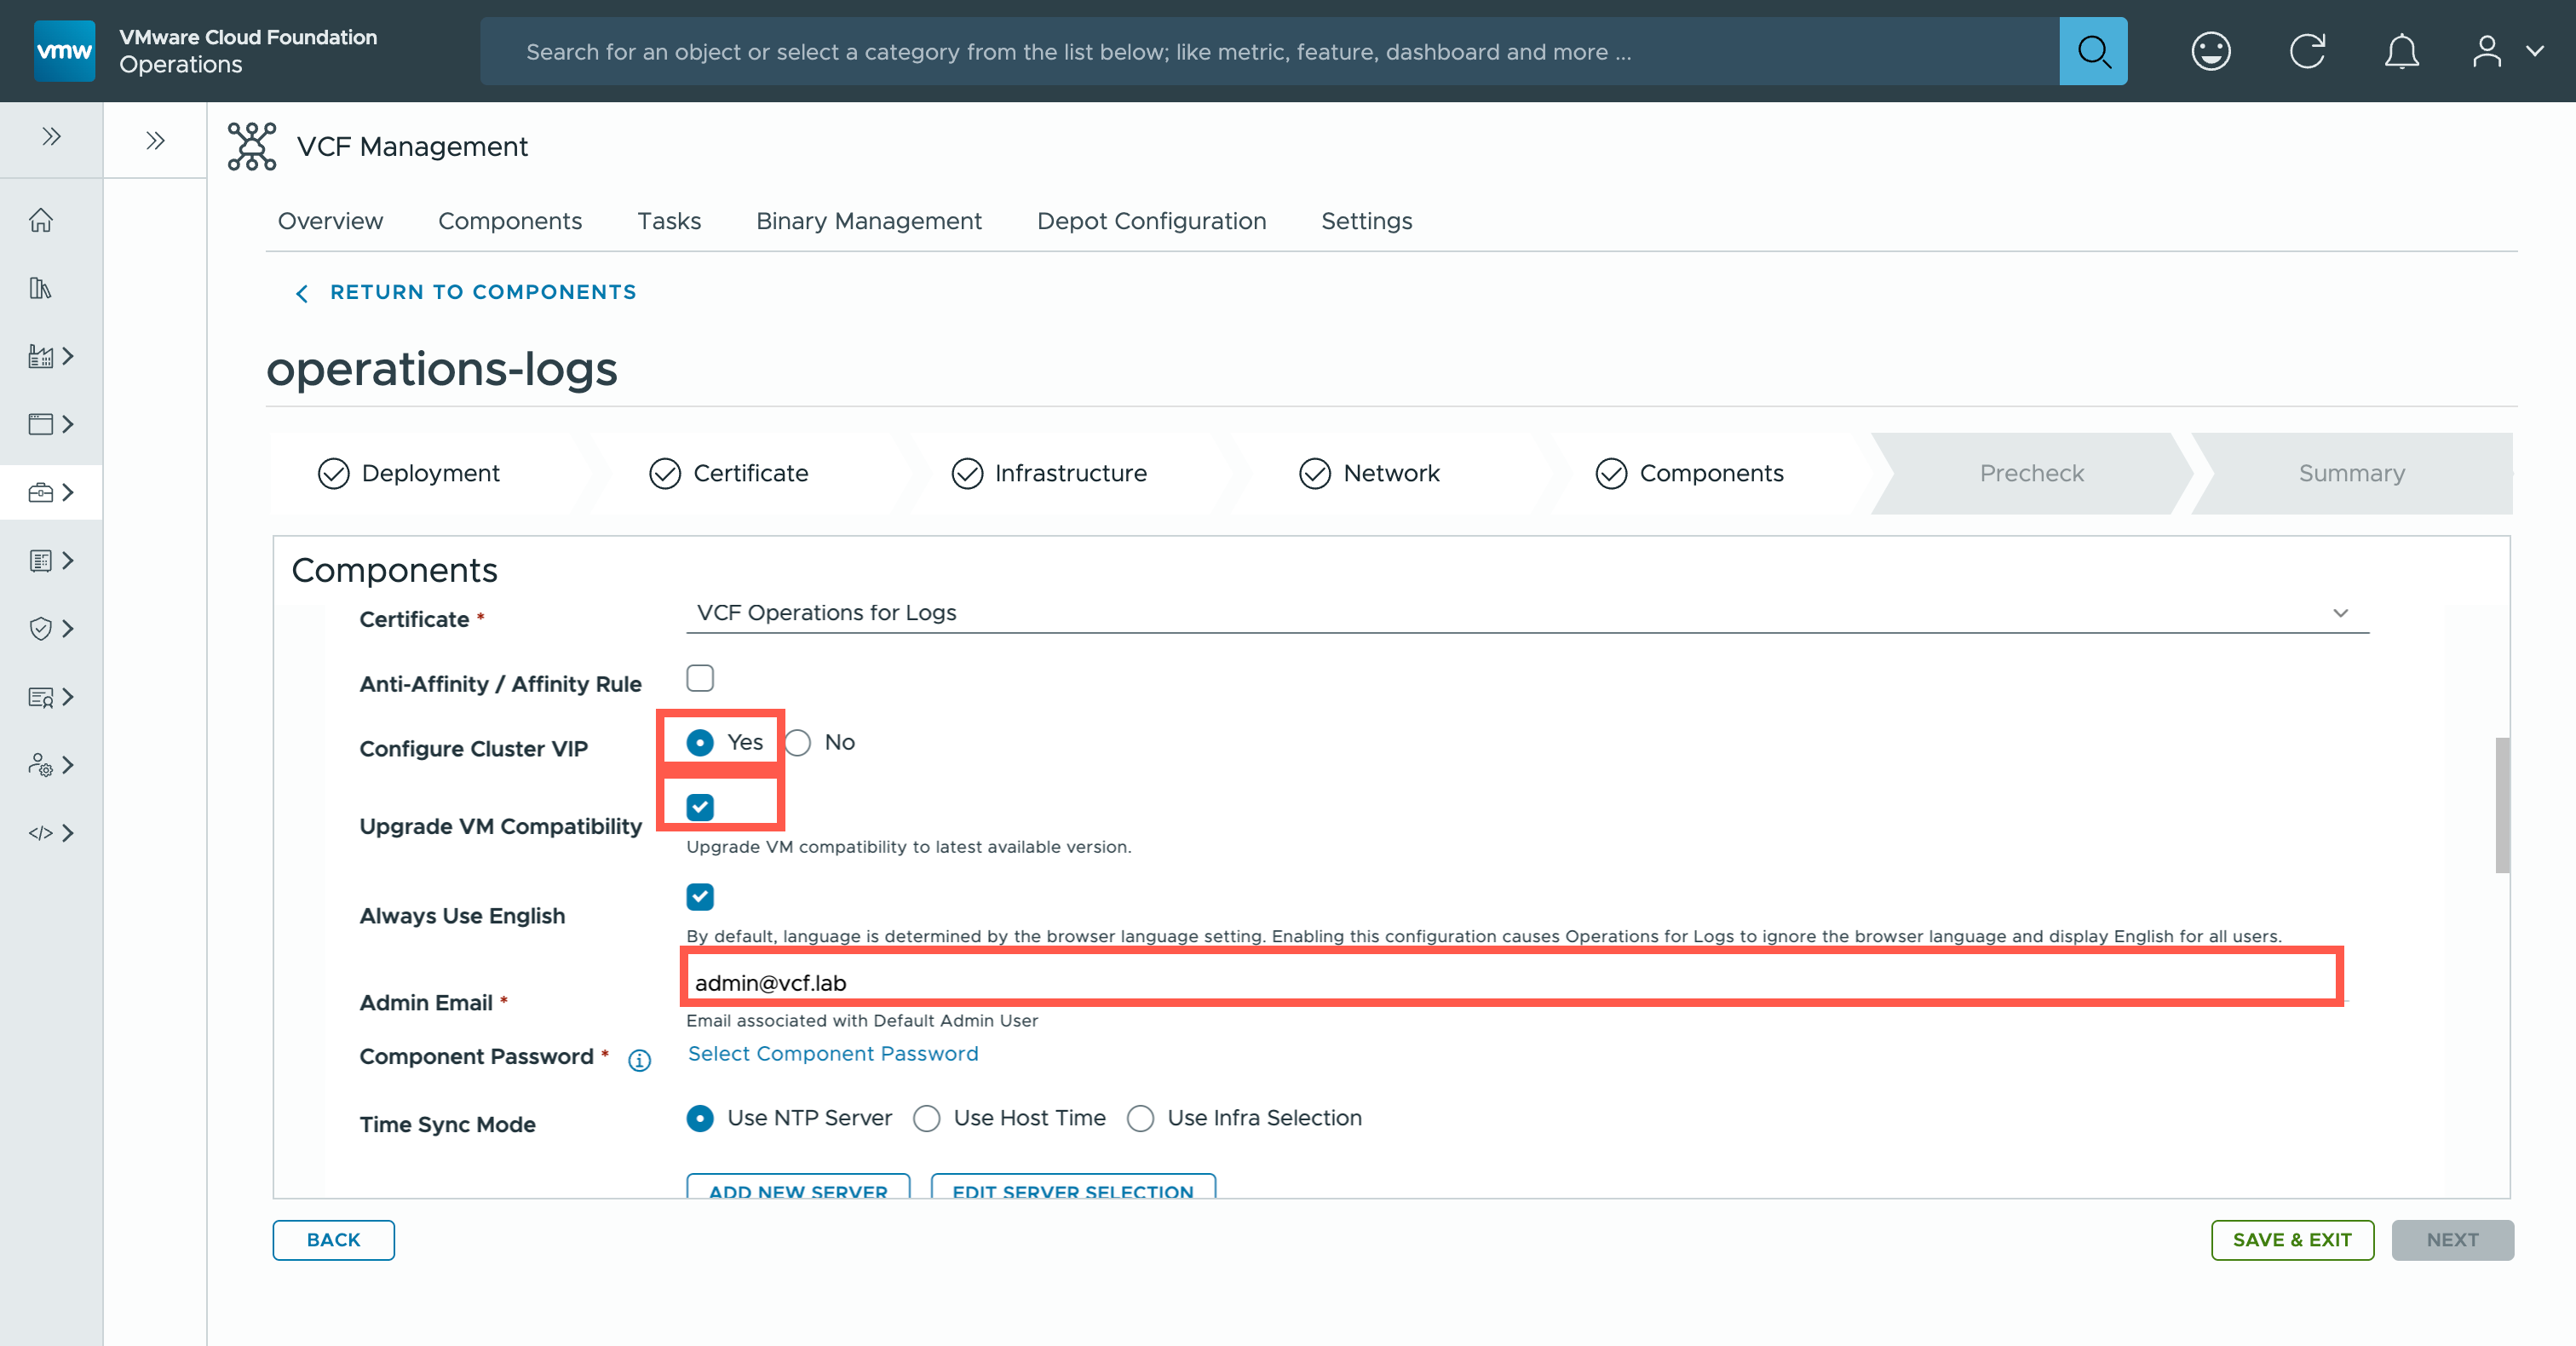
Note:For this deployment, we are going to select the following options:
- Cluster VIP
- Upgrade VM Compatibility
- Always Use English
These may differ across installations depending on requirements.
- At the Components page, click Select Component Password.
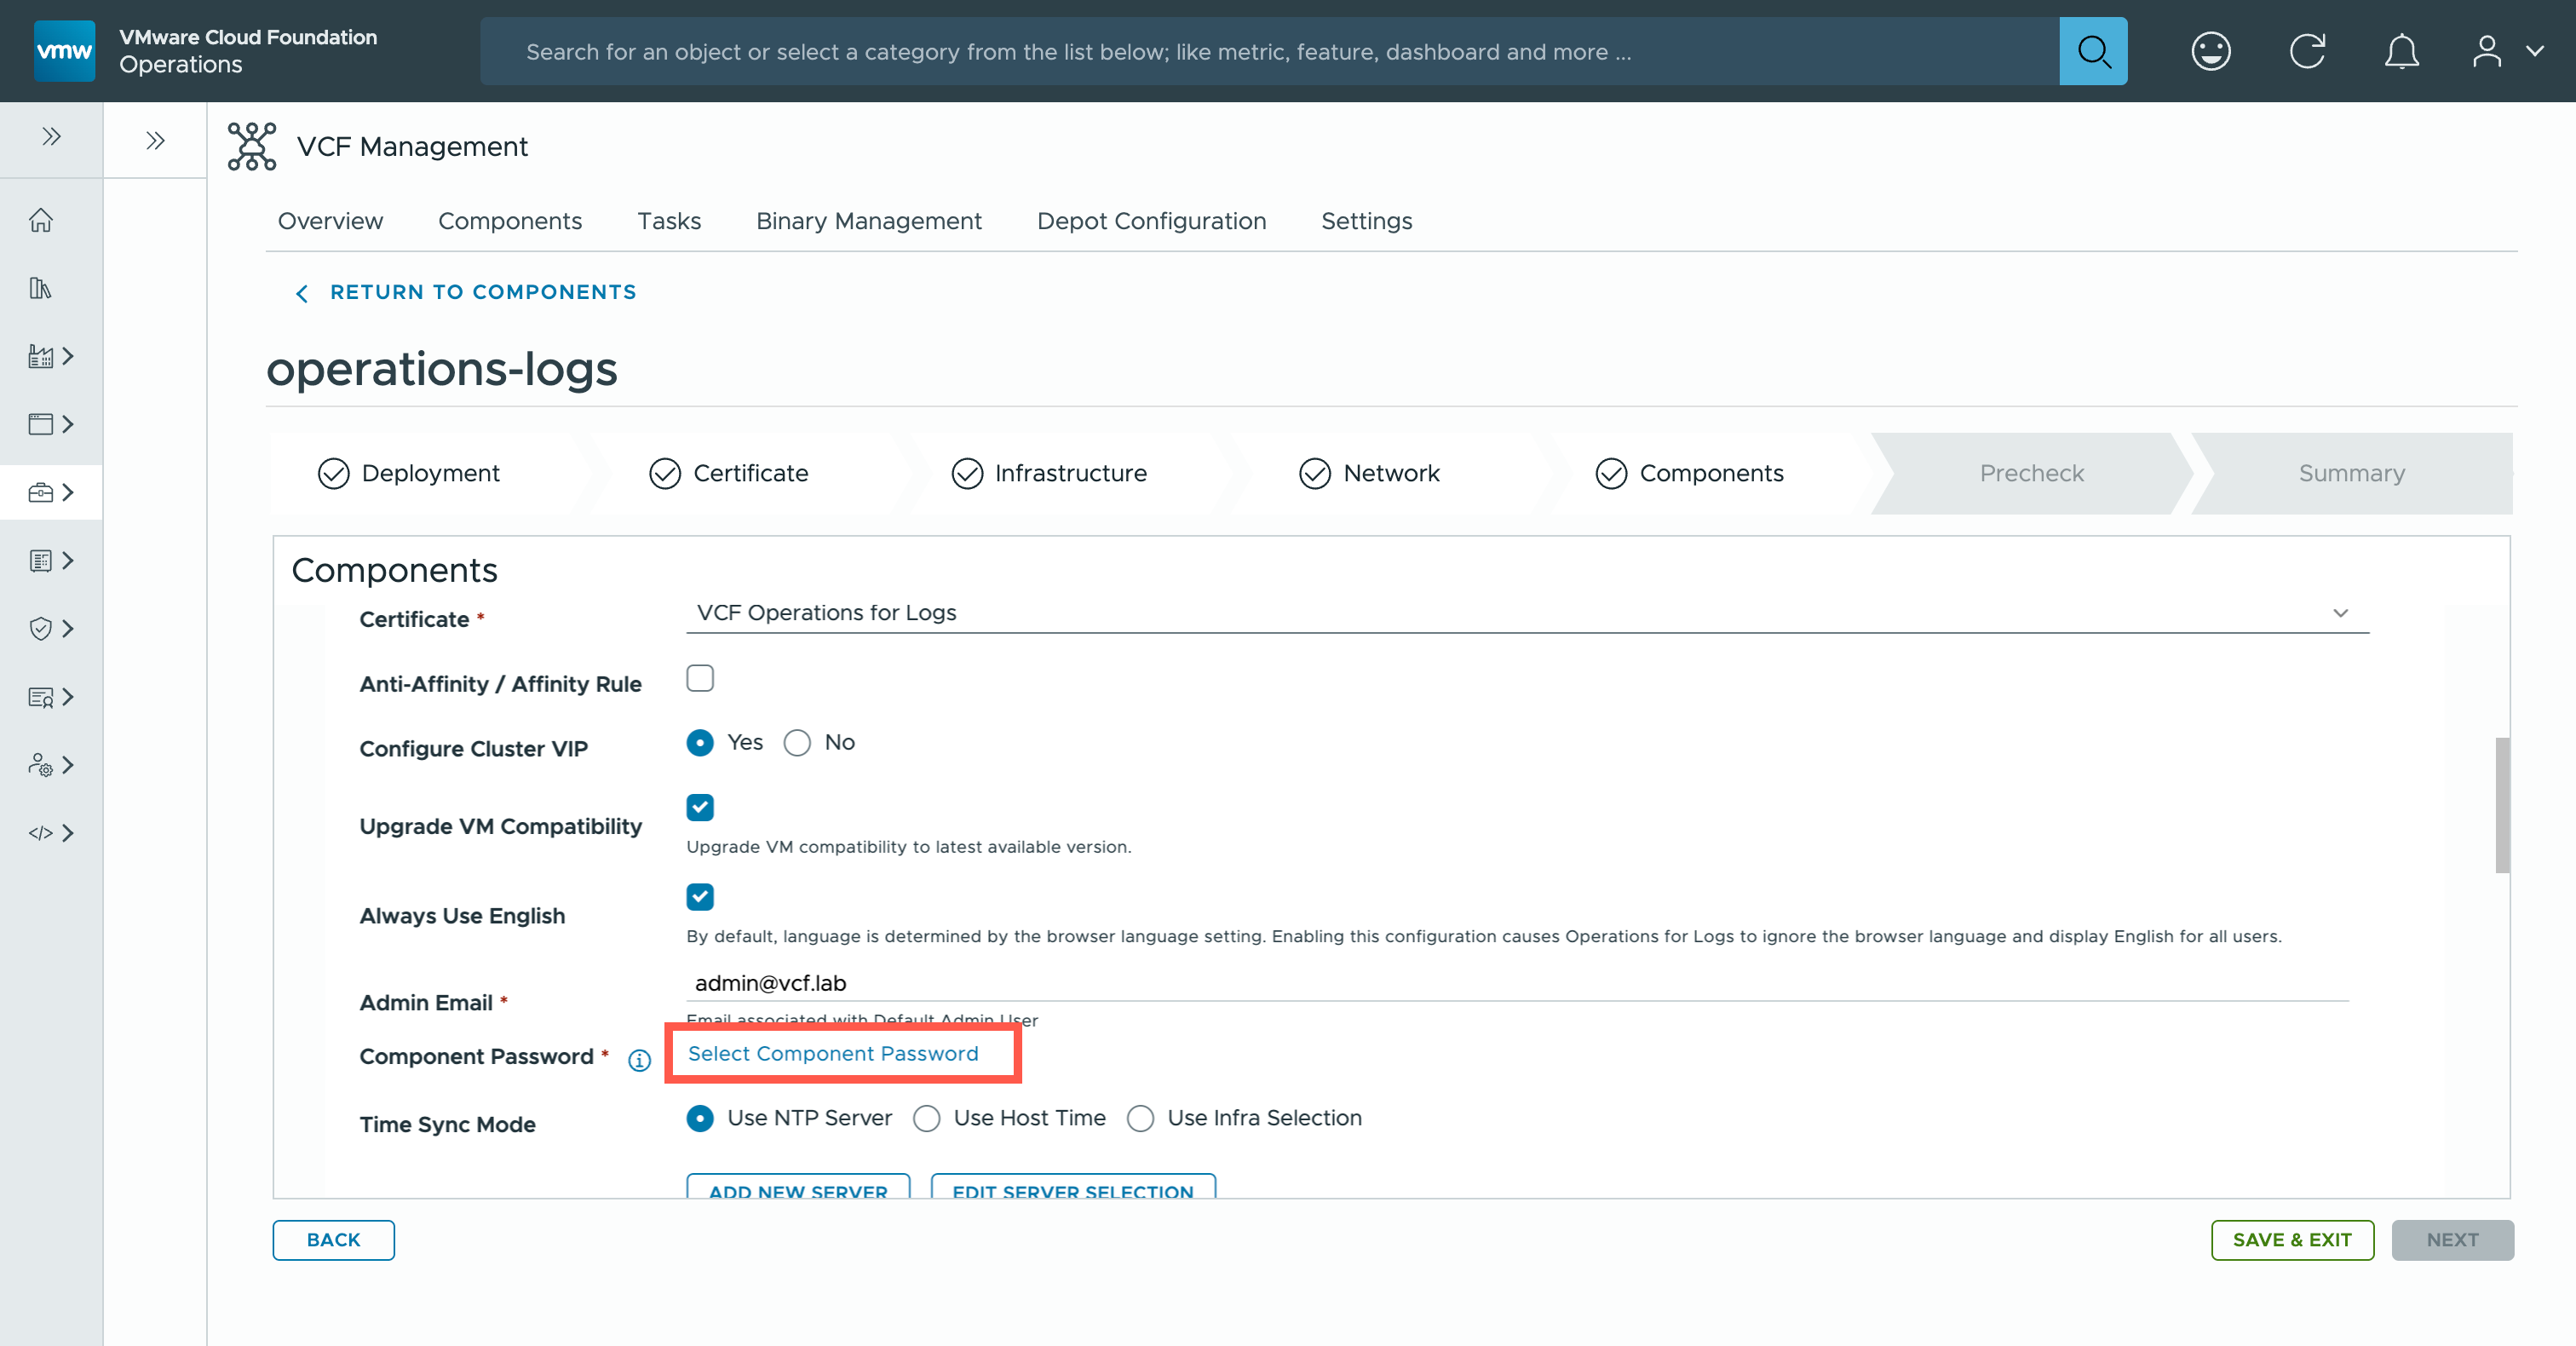
- At the Component Password dialog, click default.
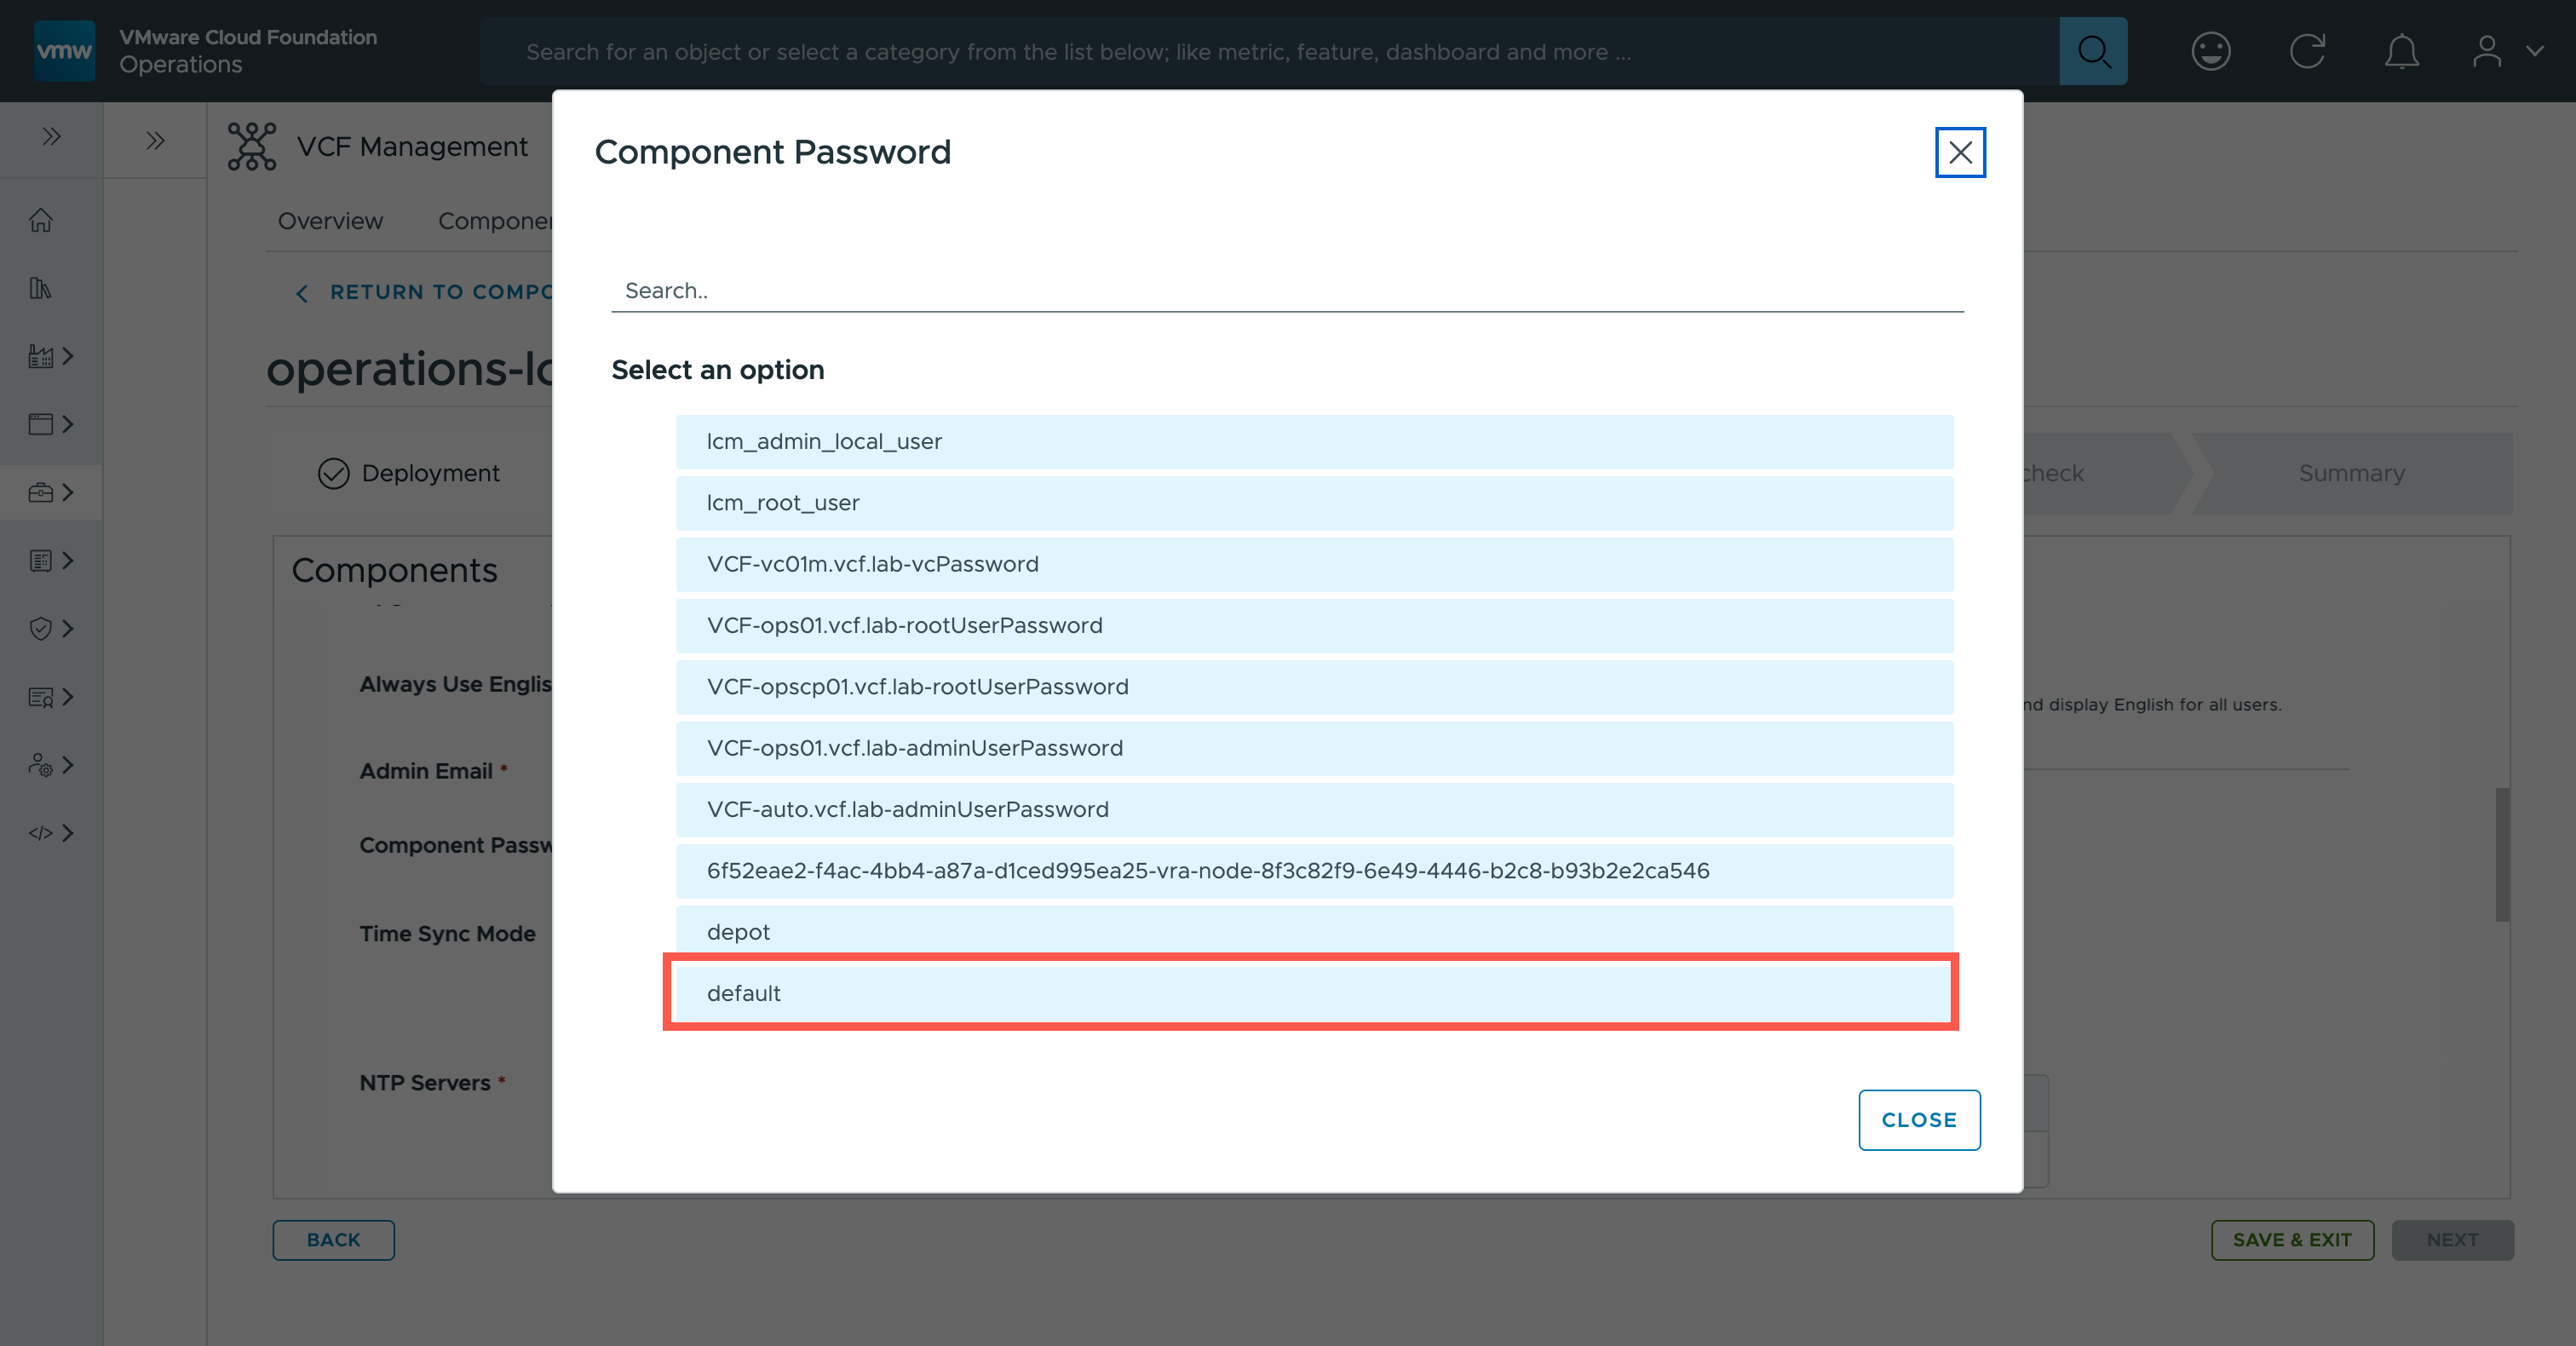
Note:For this deployment, I have created a credential called default but this may not be the case in your environment. - At the Components page, scroll down to the Cluster Virtual IP section.
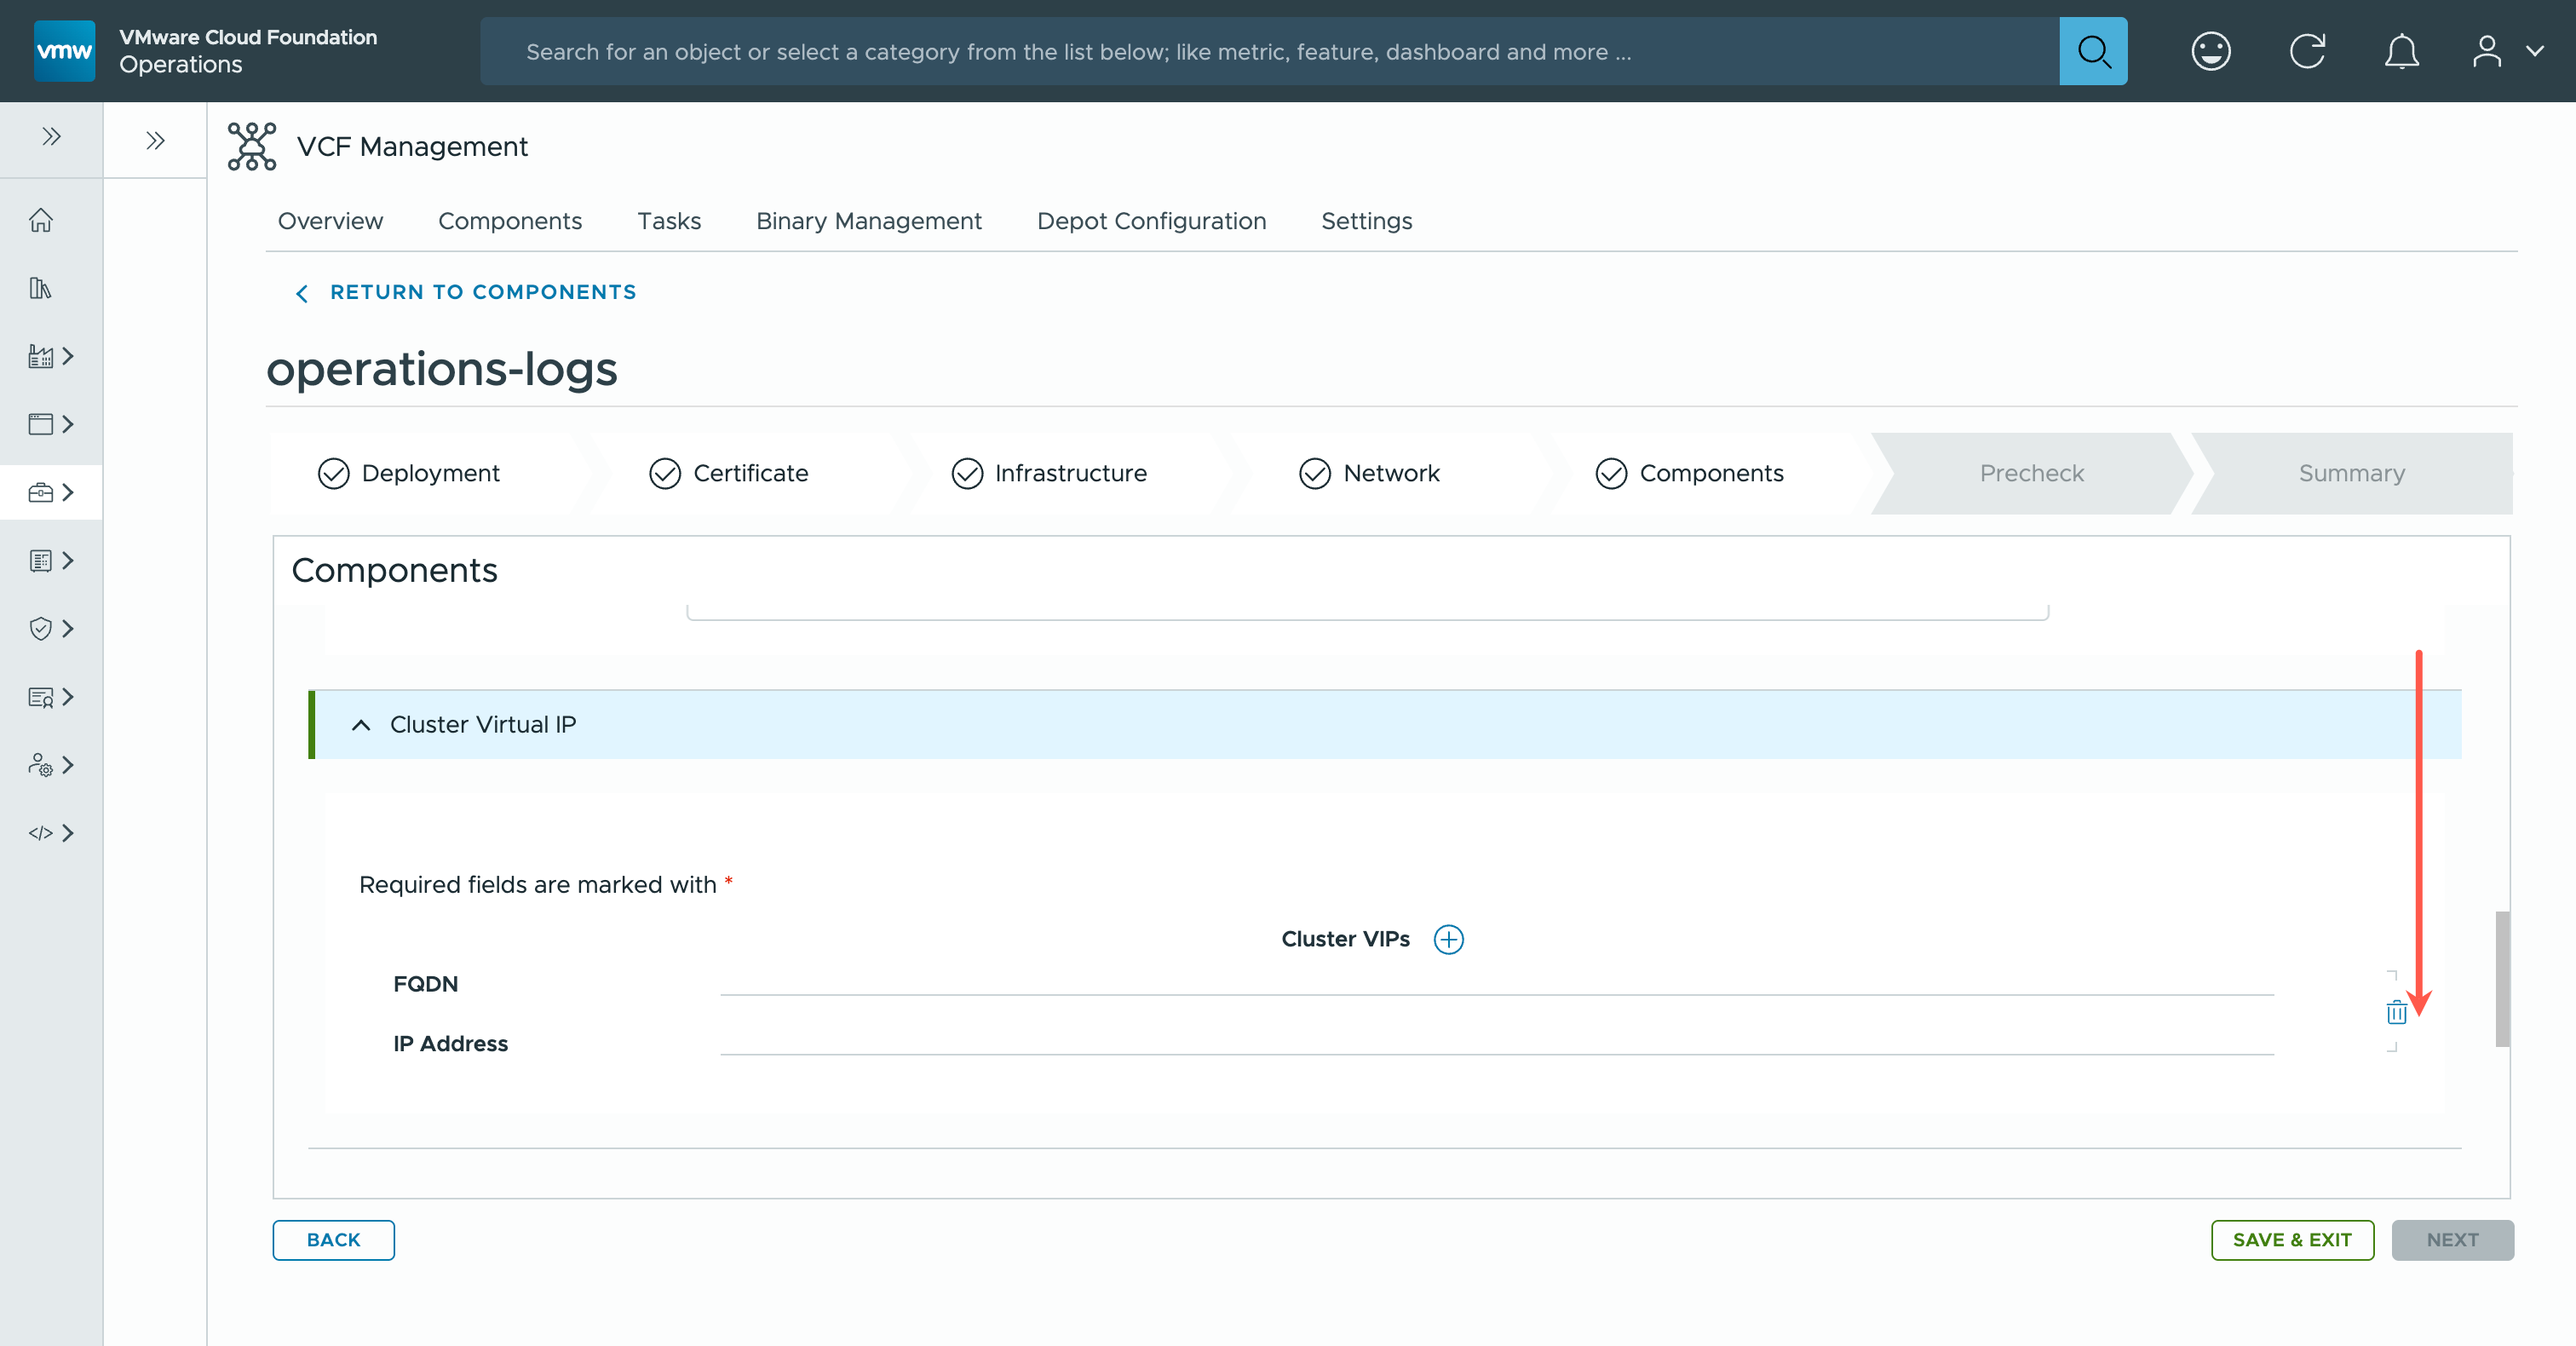
- At the Components page, type
<vip.fqdn>into the FQDN text field and the<vip.ip>into the IP Address field.
- At the Components page, scroll down to the
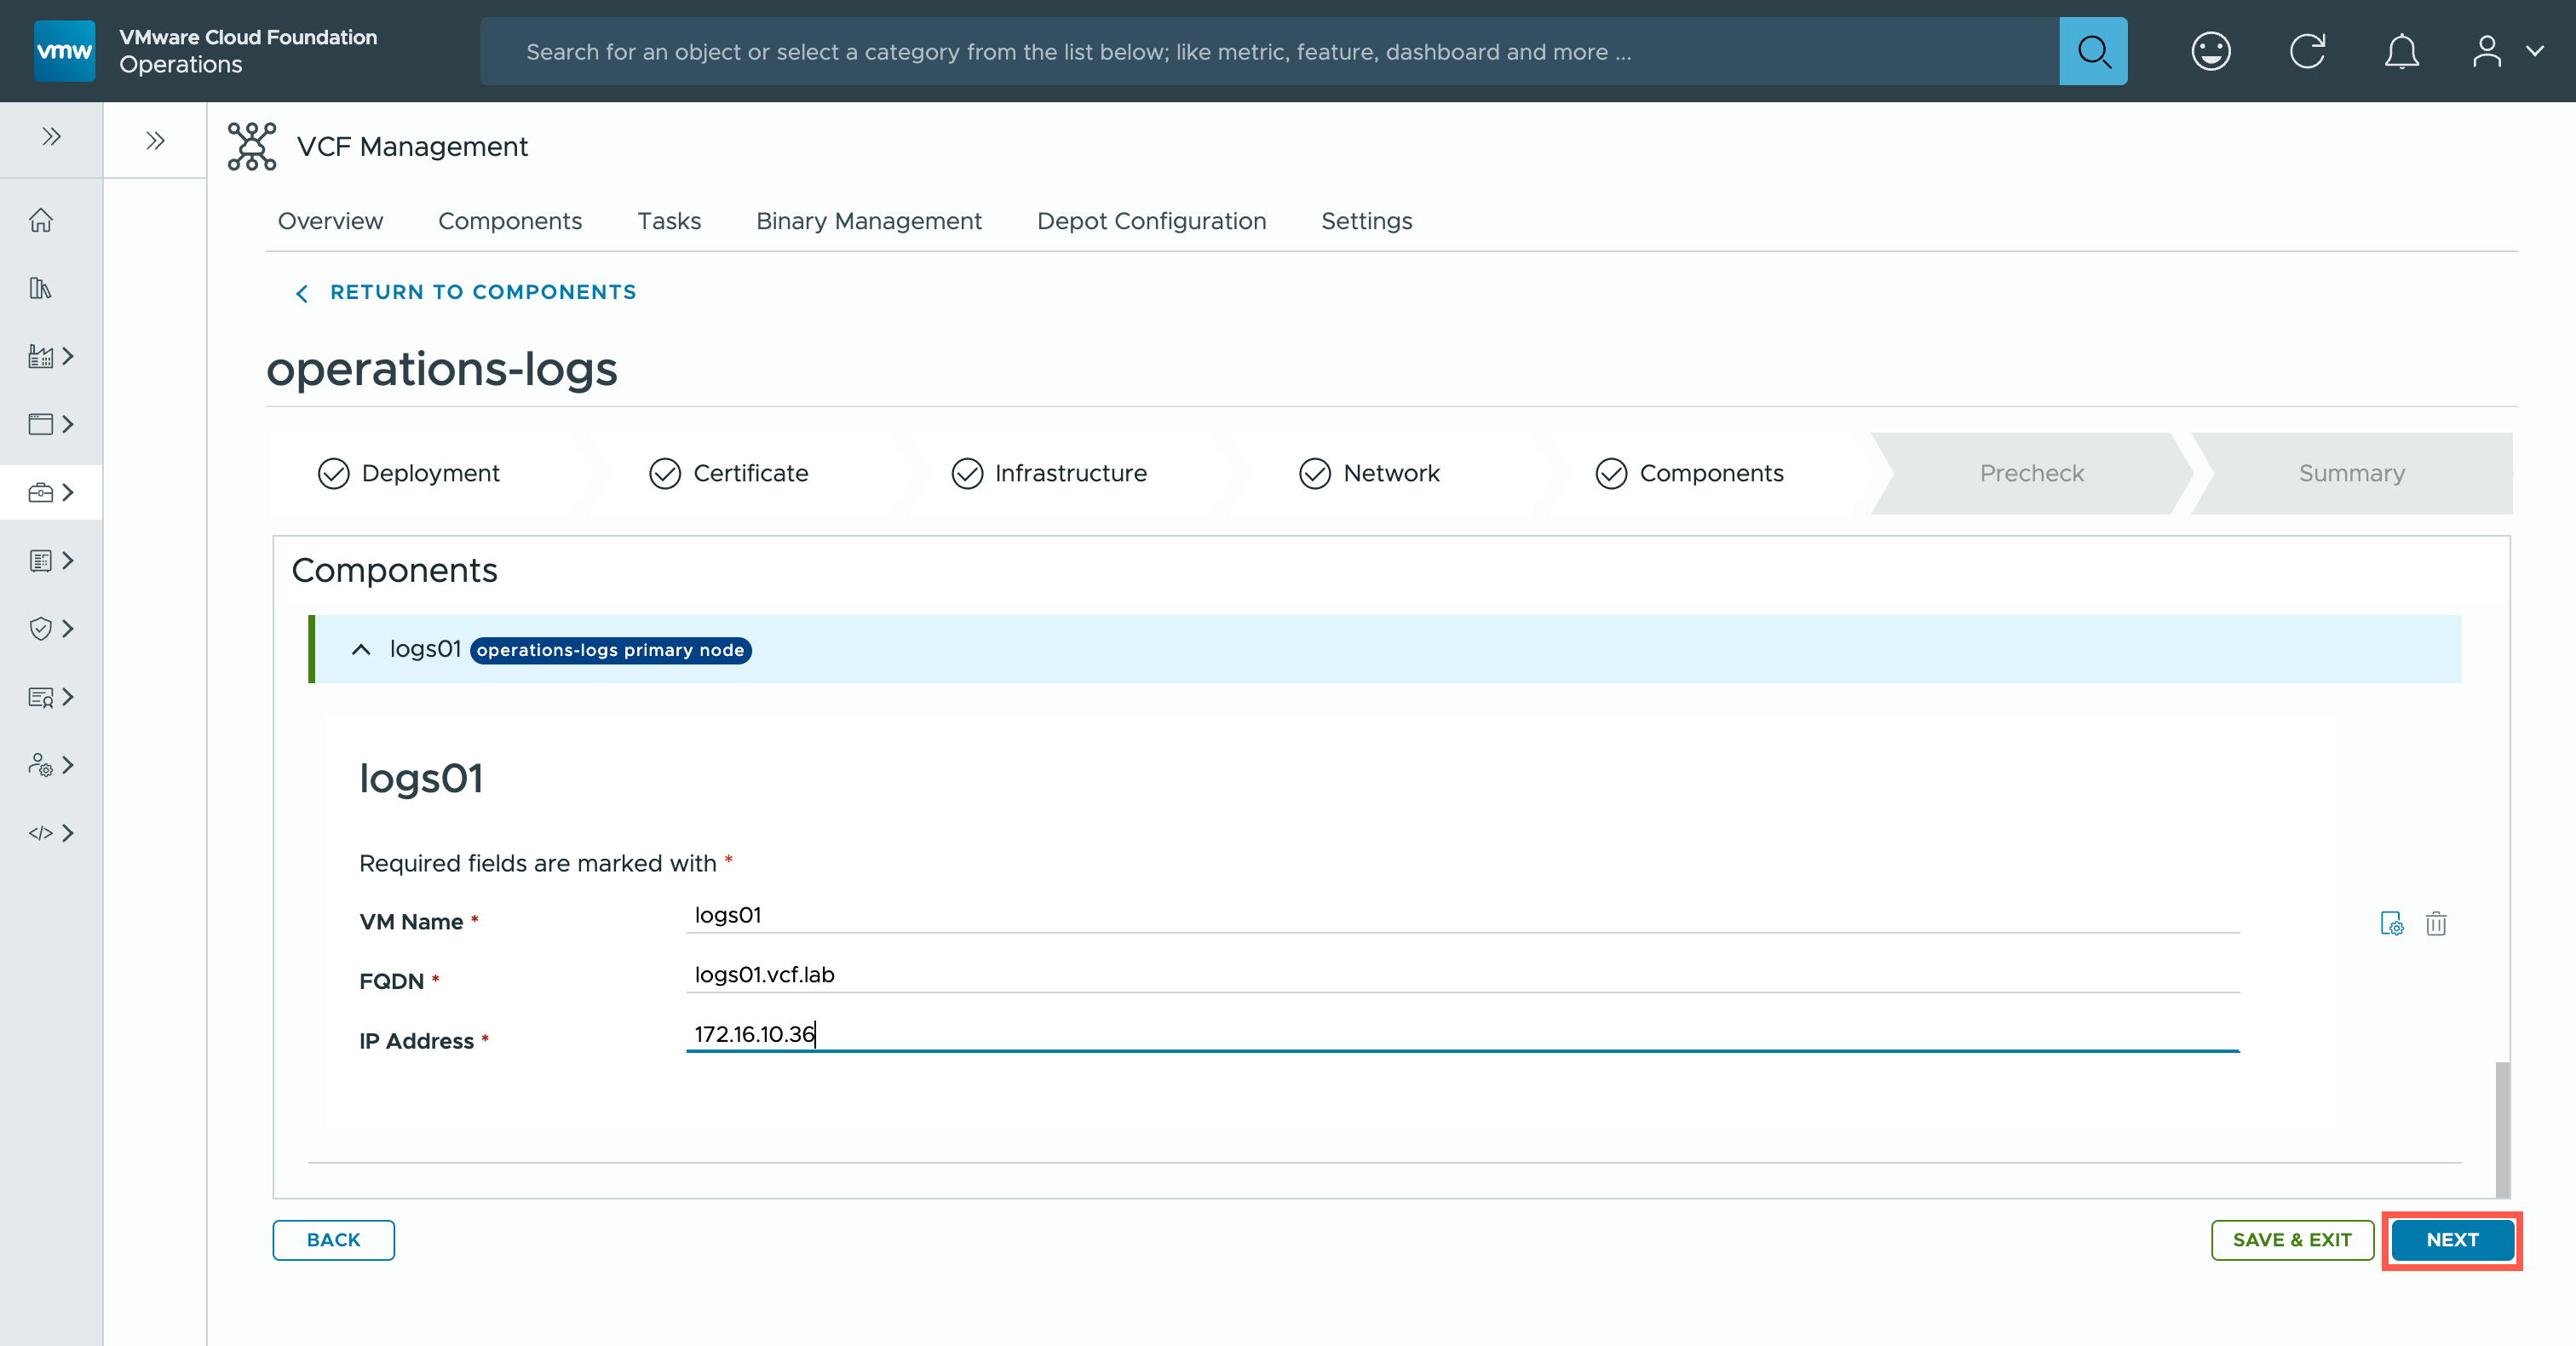
operations-logs primary node section.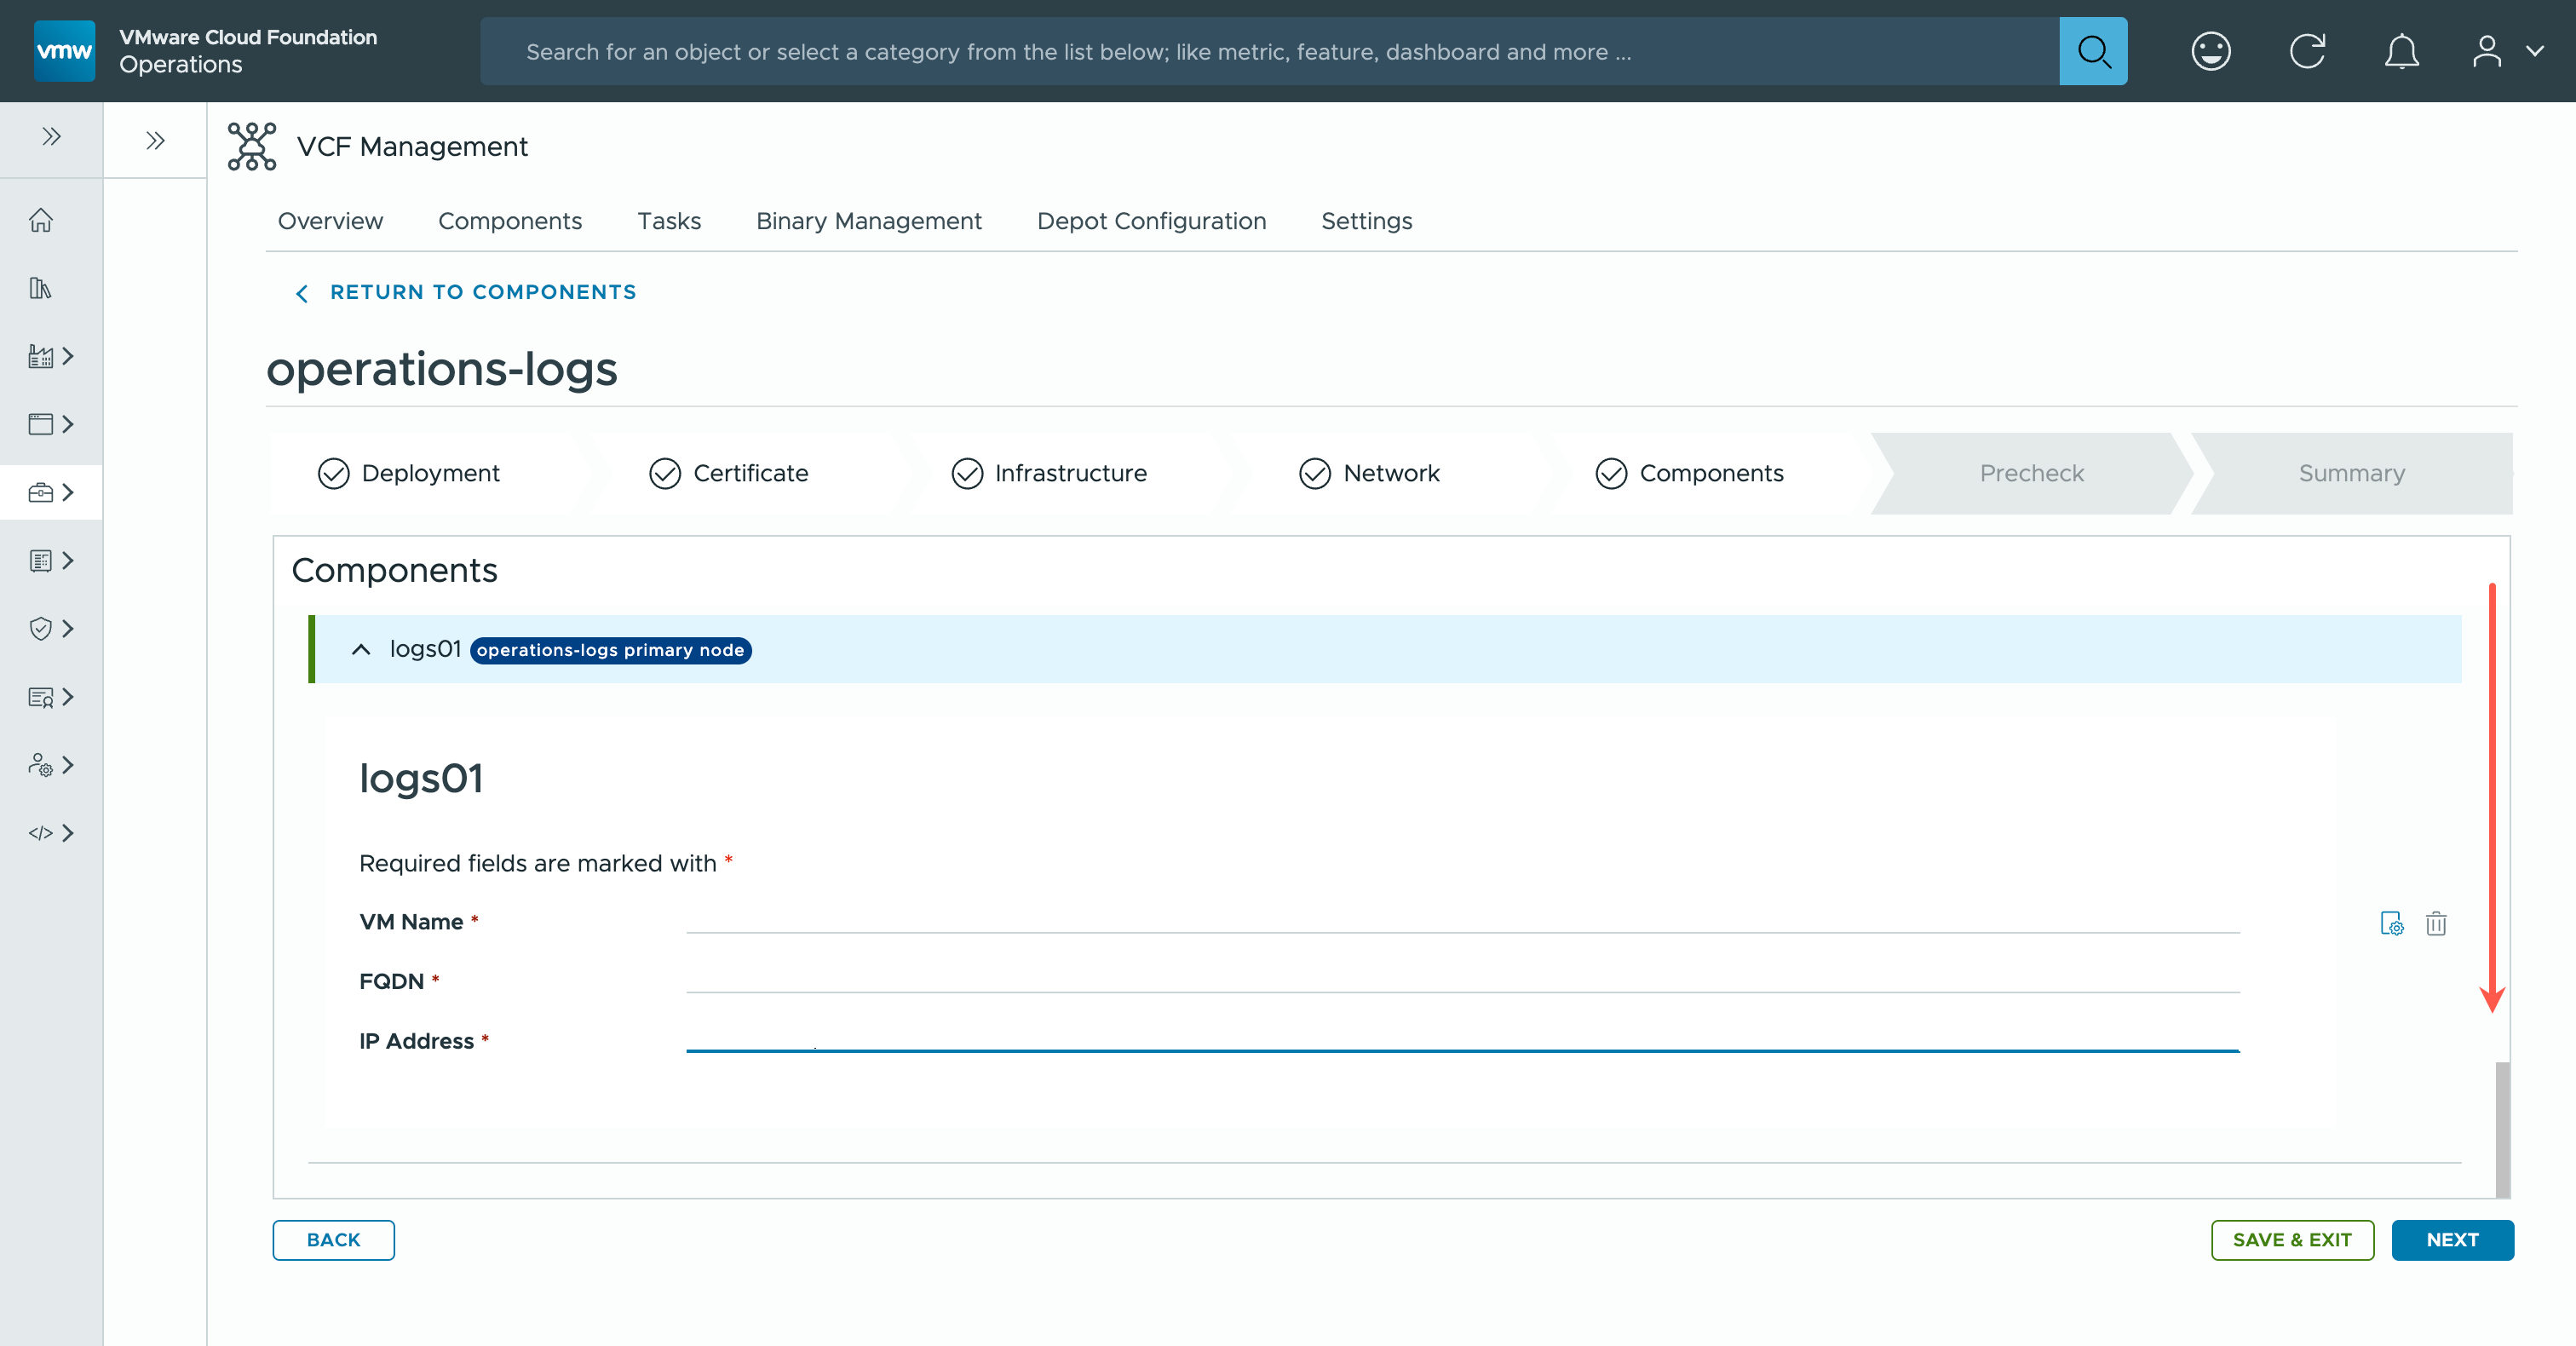
- At the Components page, for each of the appliances type the
<vm.name>into the VM Name field, type the<vm.fqdn>into the FQDN field and the<vm.ip>into the IP Address field.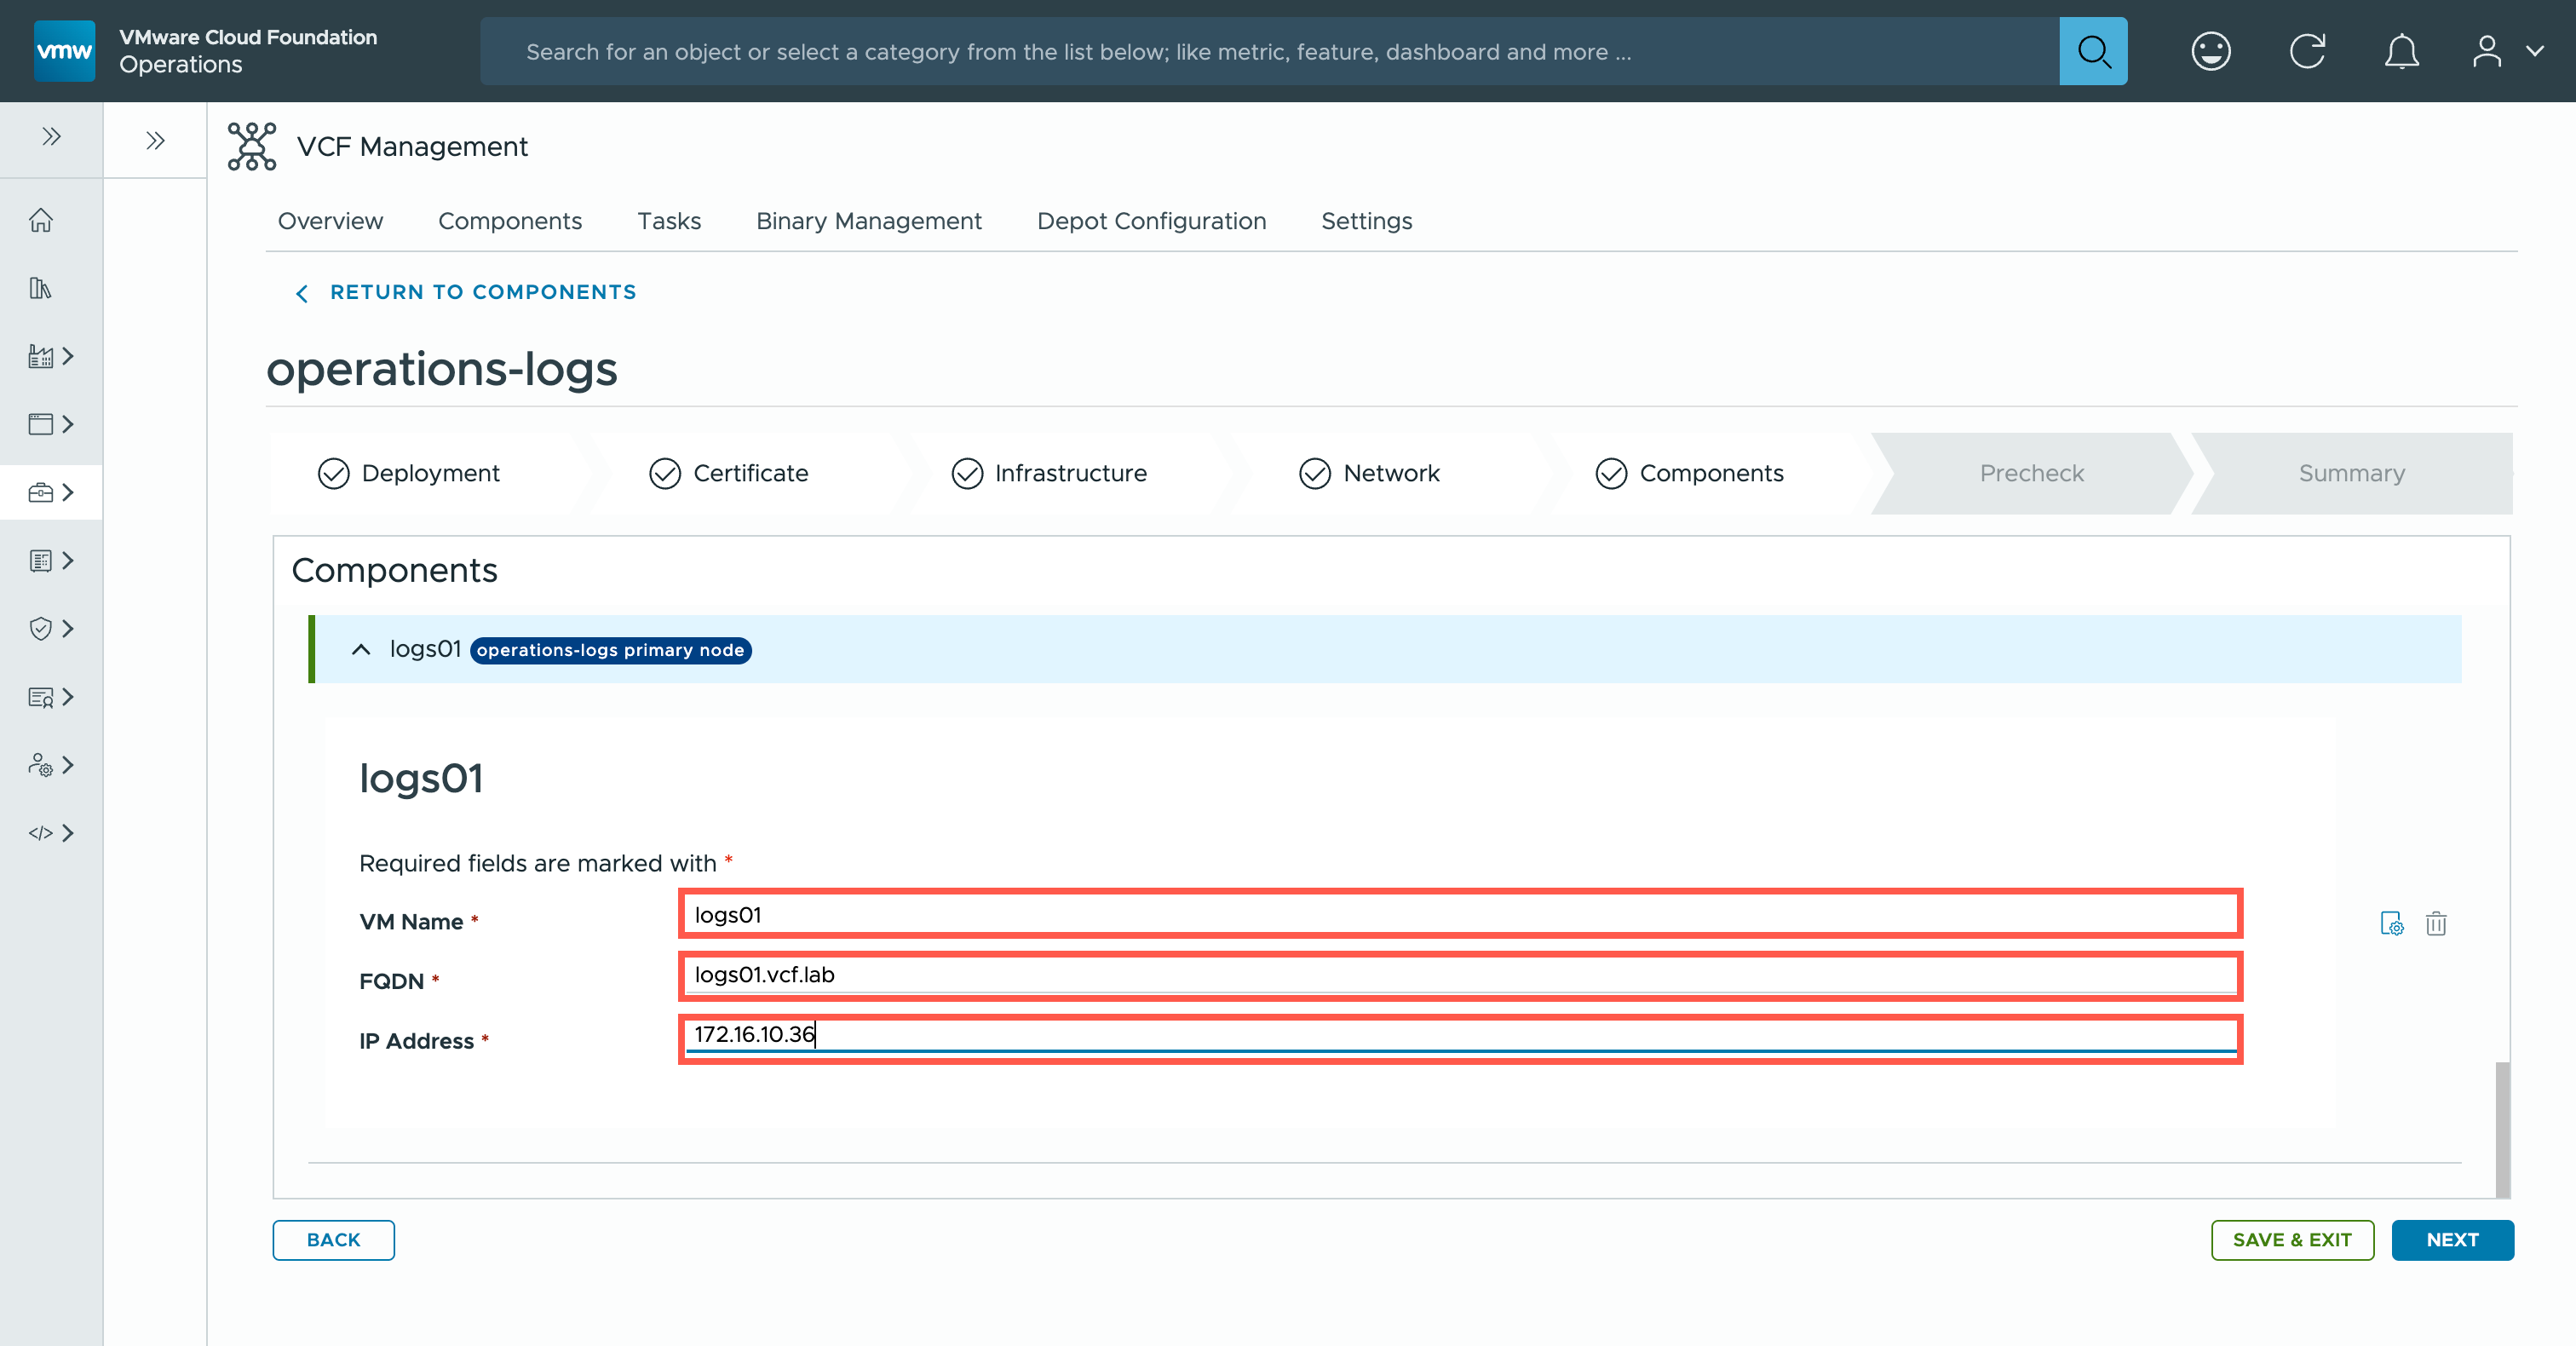
- At the Components page, click NEXT.
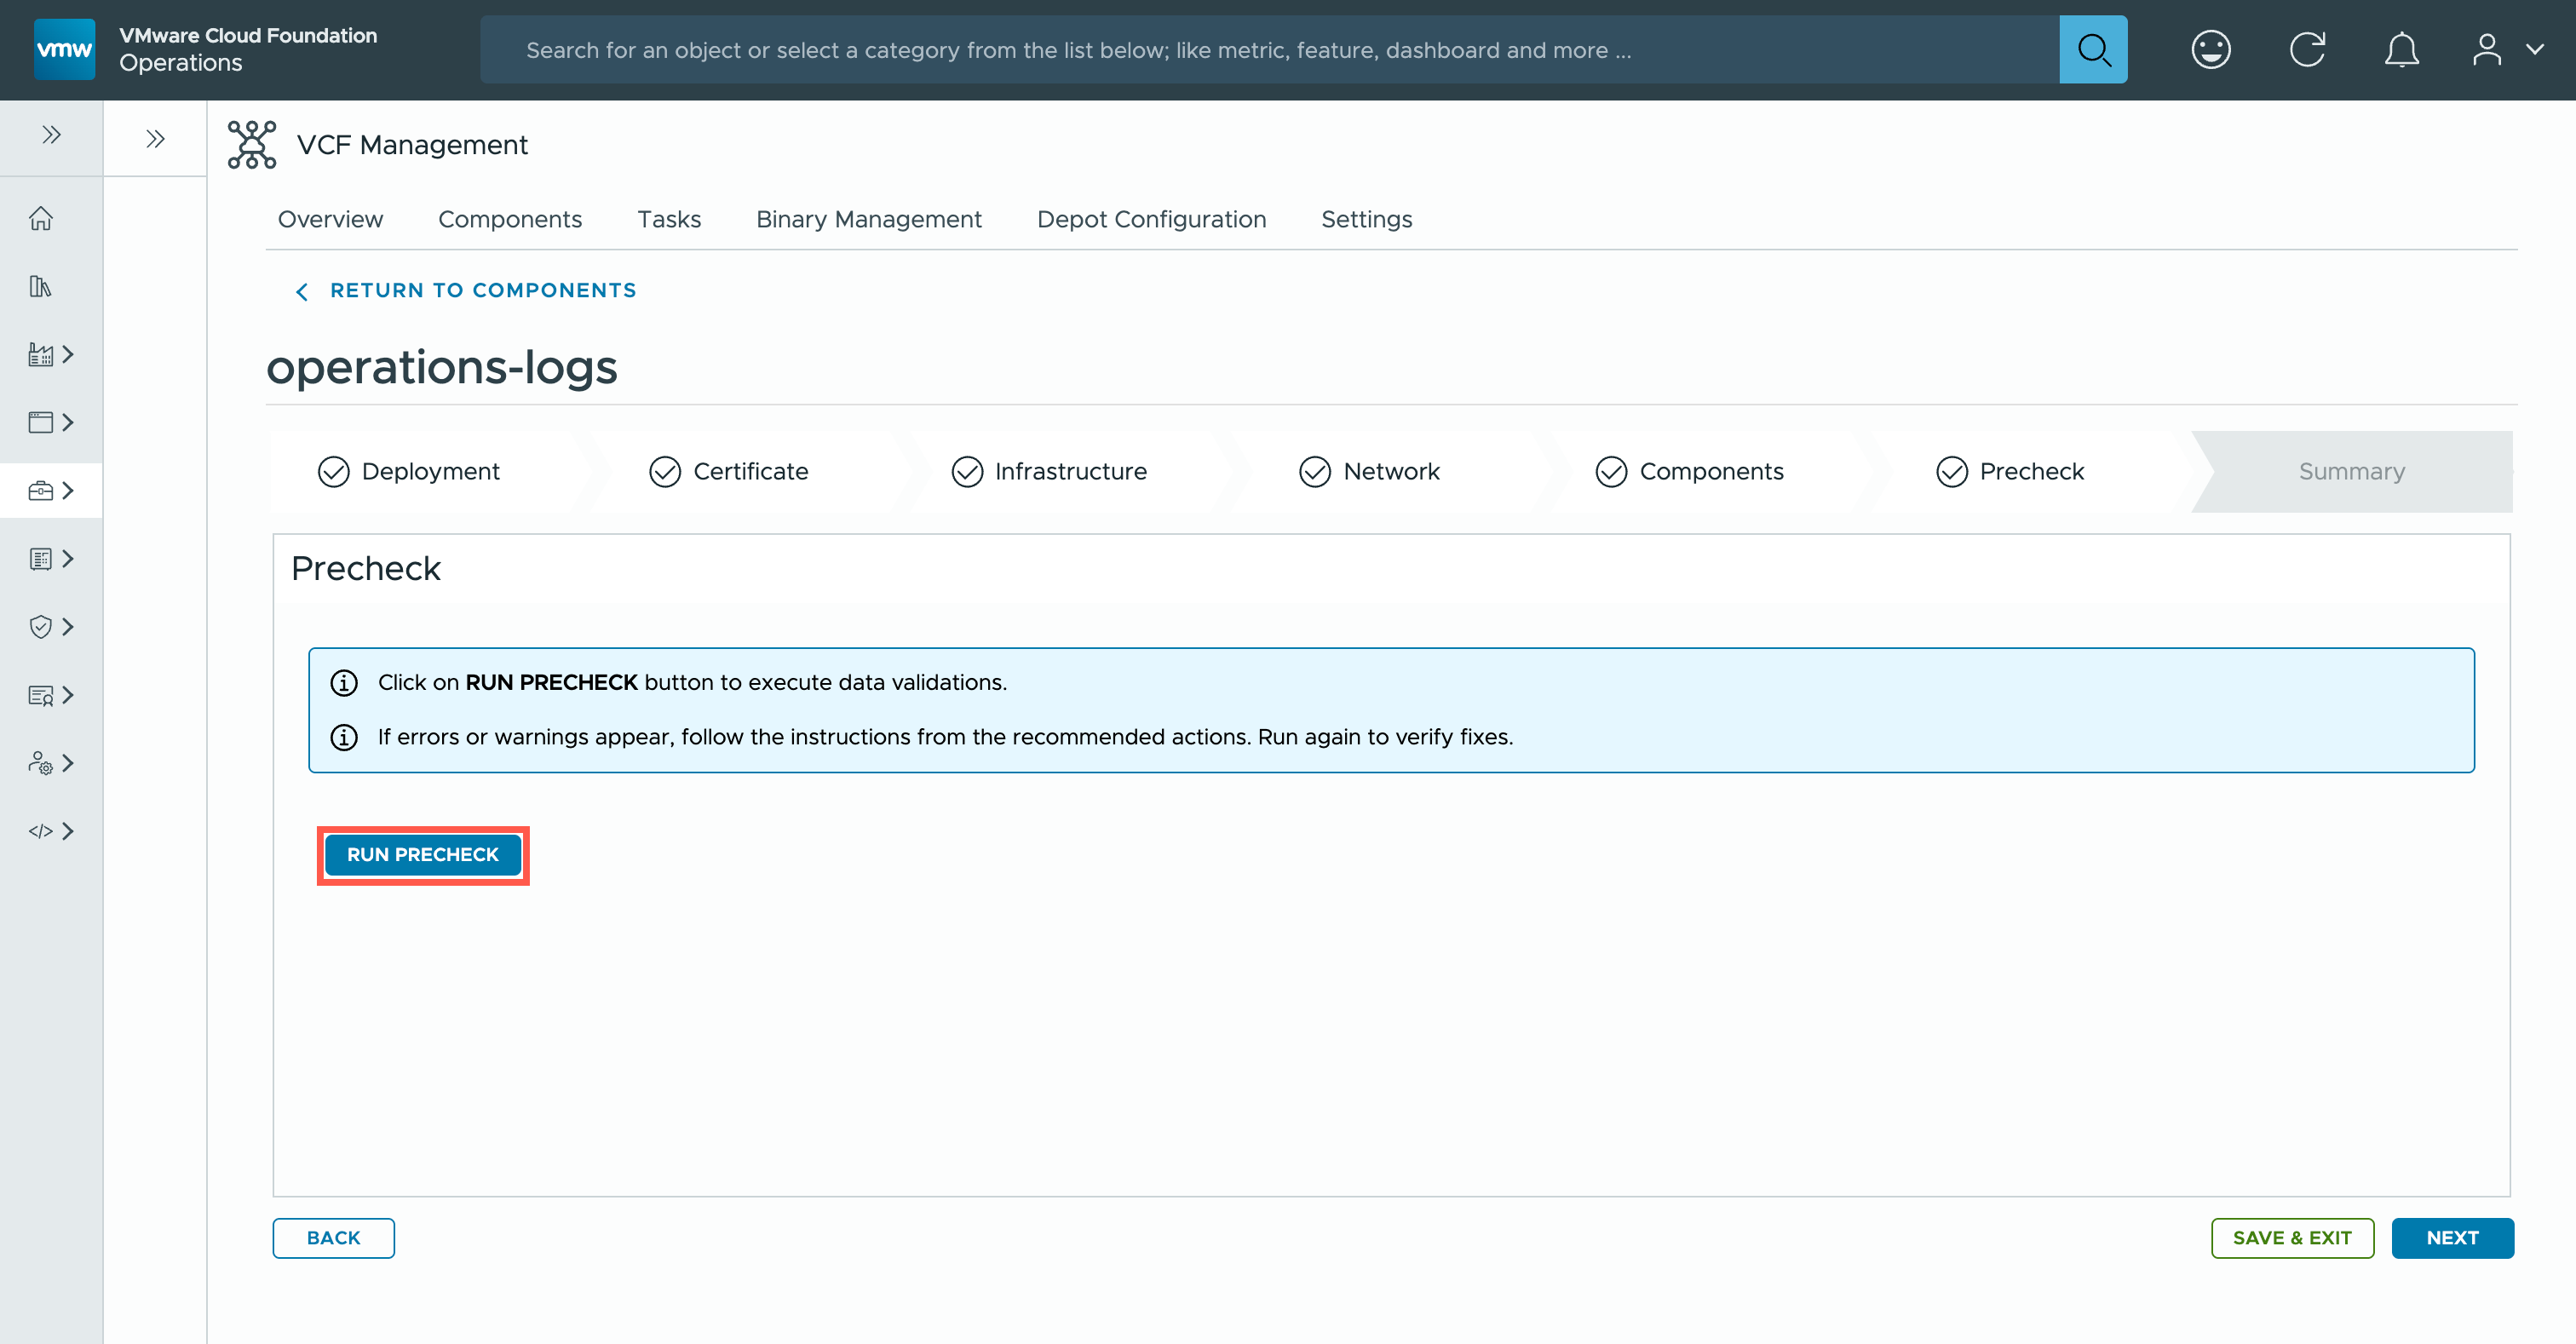
- At the Precheck page, click RUN PRECHECK.
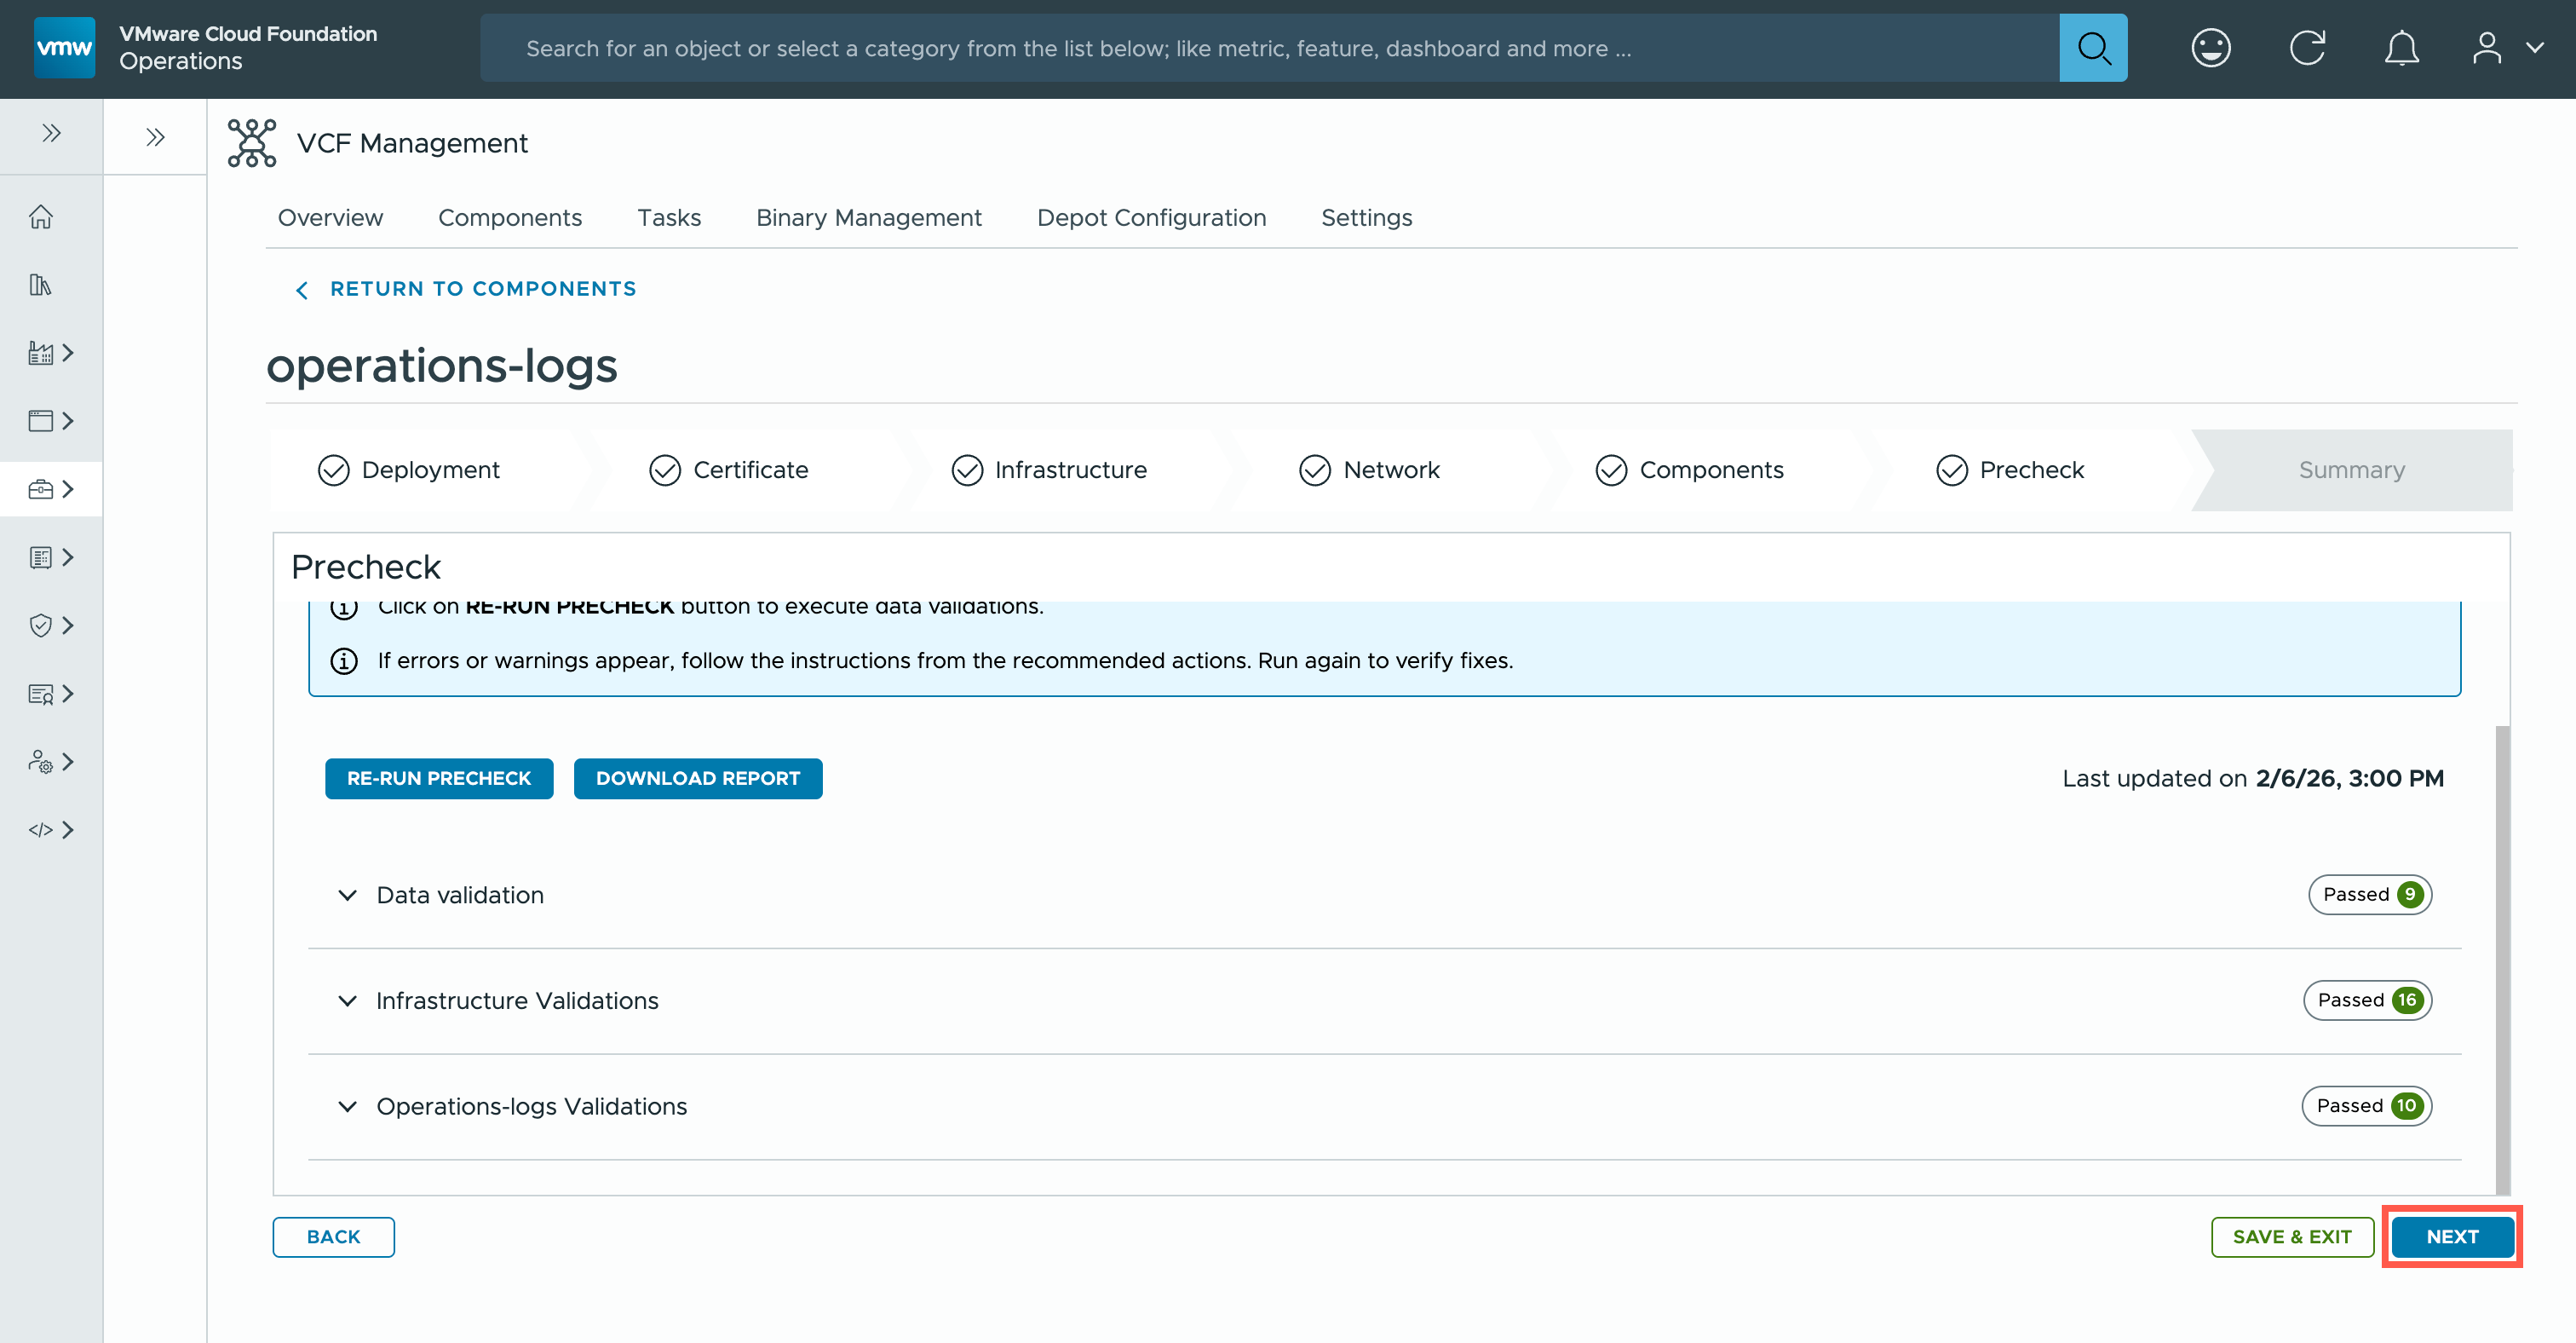
- At the Precheck page, assuming all pre-checks are passed, click NEXT.
- At the Summary page, click SUBMIT.
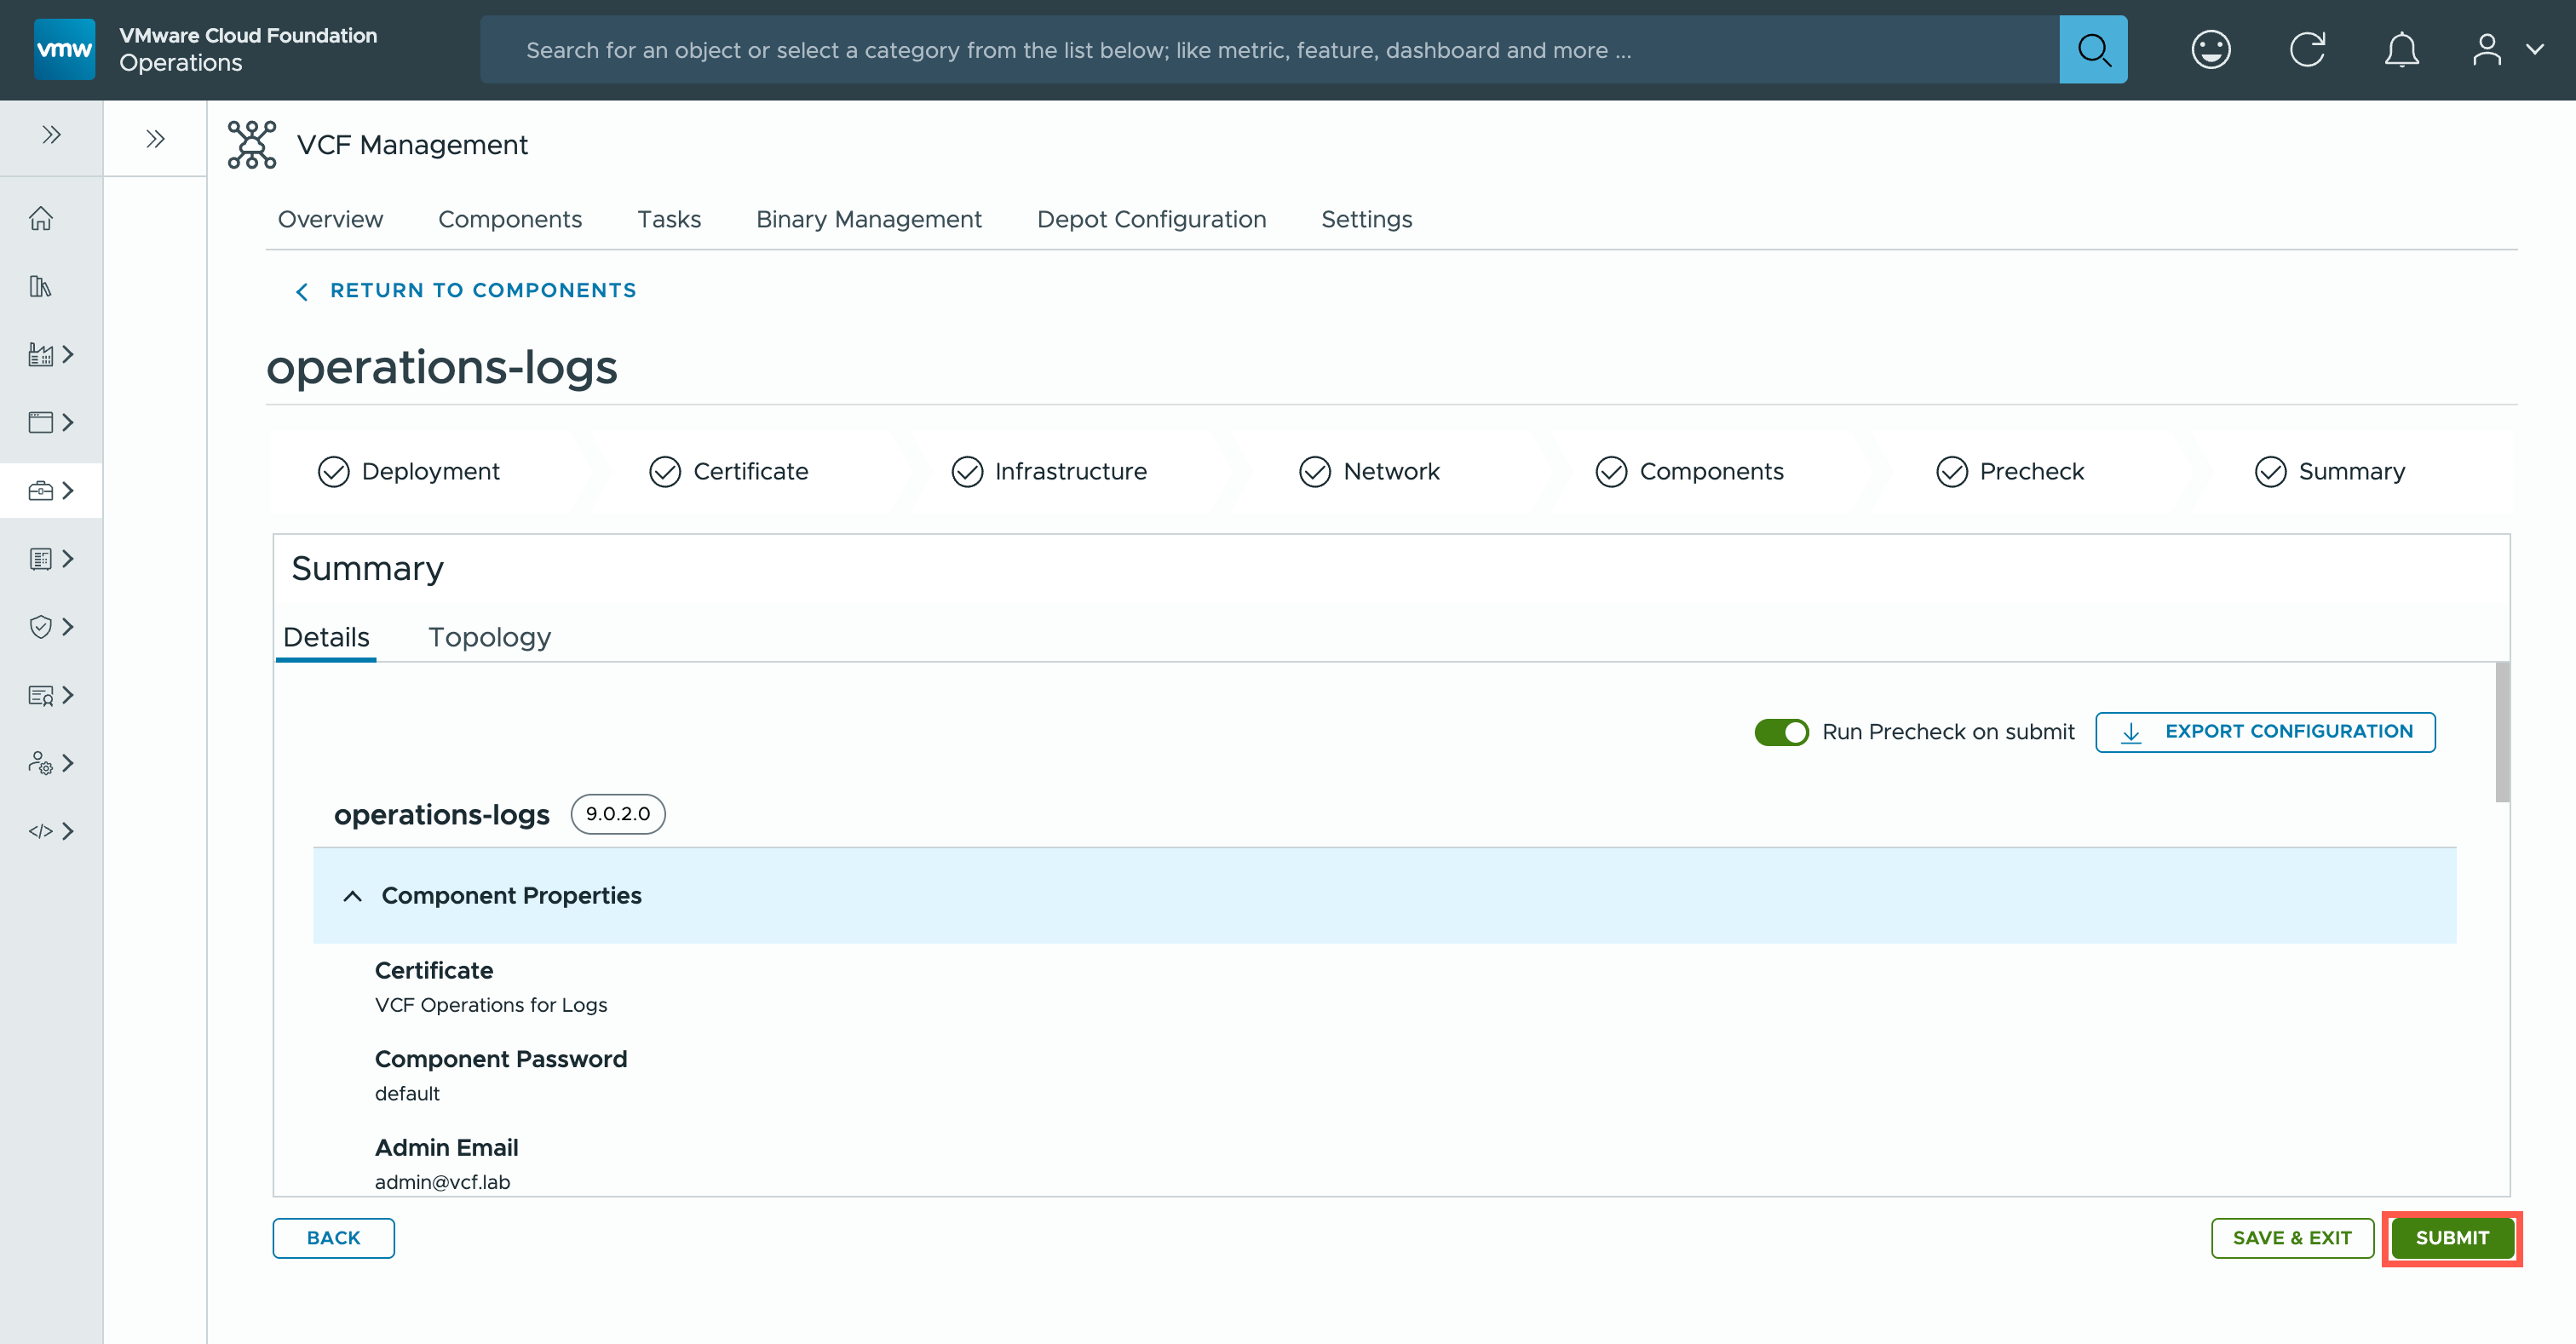
Note:This is where we can take a beverage break! This process can take a while depending on the number of nodes being deployed and the speed/capability of the hardware. - At the Task page, observe the process of the task!
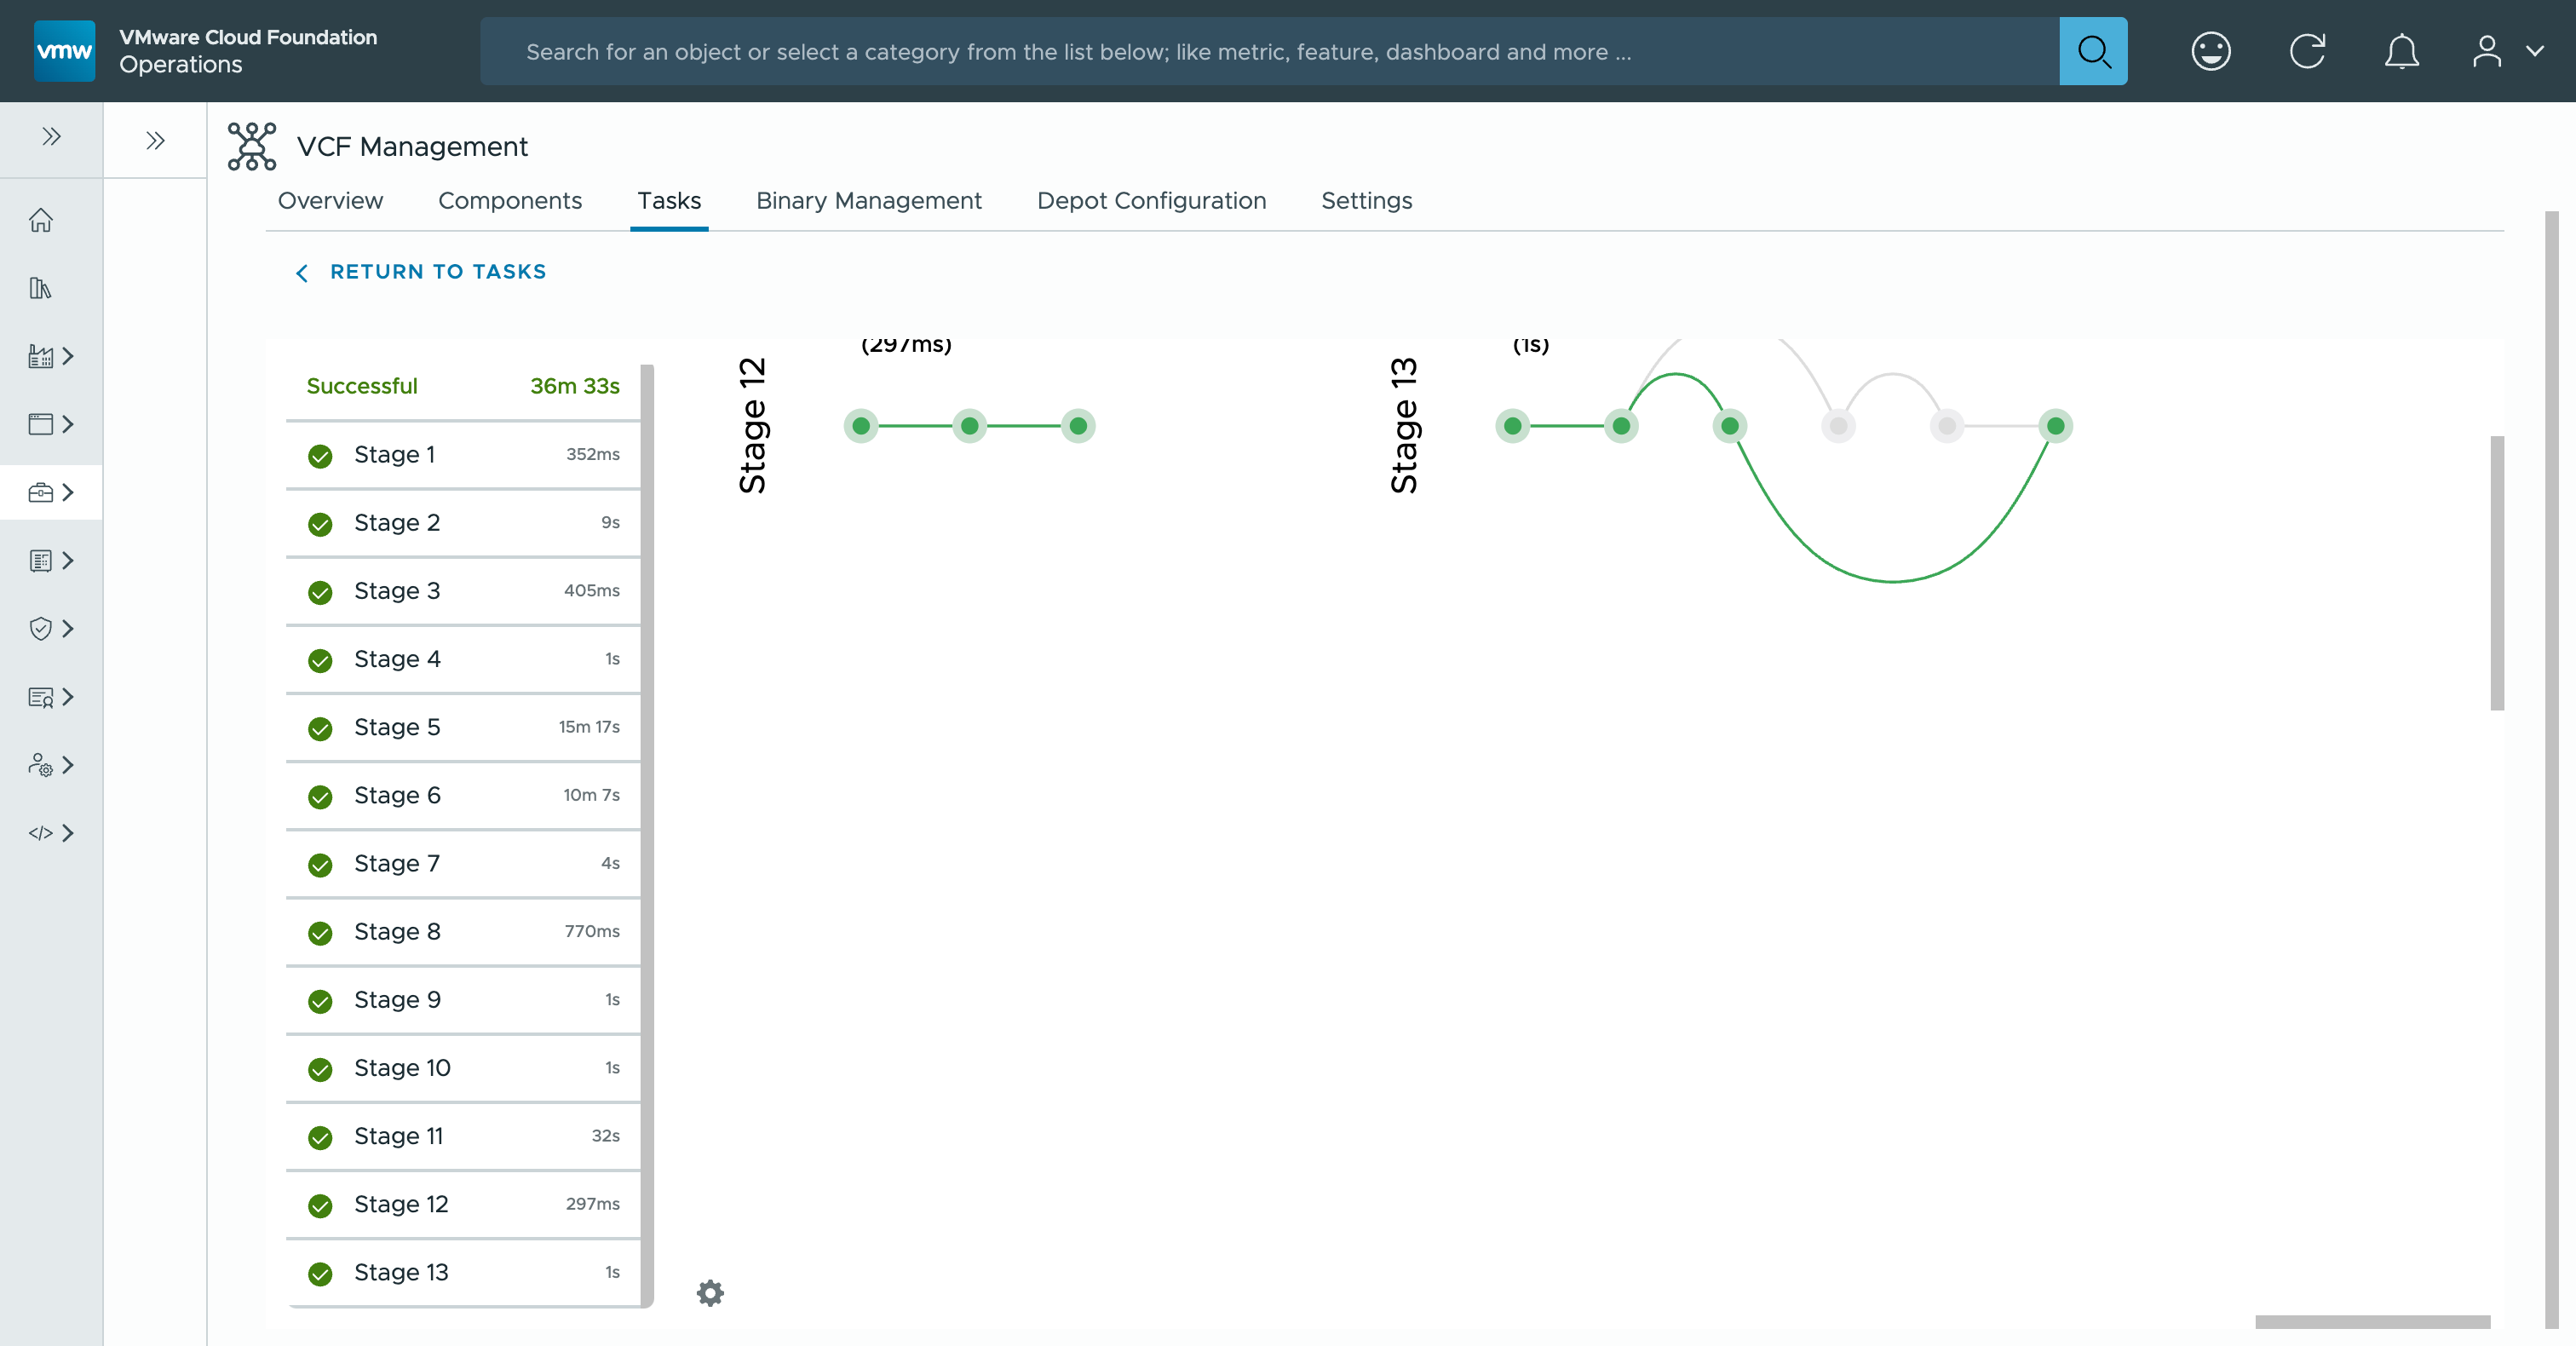
- The installation should now be completed!
Enabling Event capture for VCF
So VCF Operations for logs is installed, job done. Not quite. Before we can start collecting log events, we need to configure VCF to send logs to VCF Operations for logs.
- At the Task page, expand the navigation menu by clicking » and then click Administration and, finally, Integrations.

- At the Integrations page, expand VMware Cloud Foundation integrations by clicking > and then click
<wld.name>.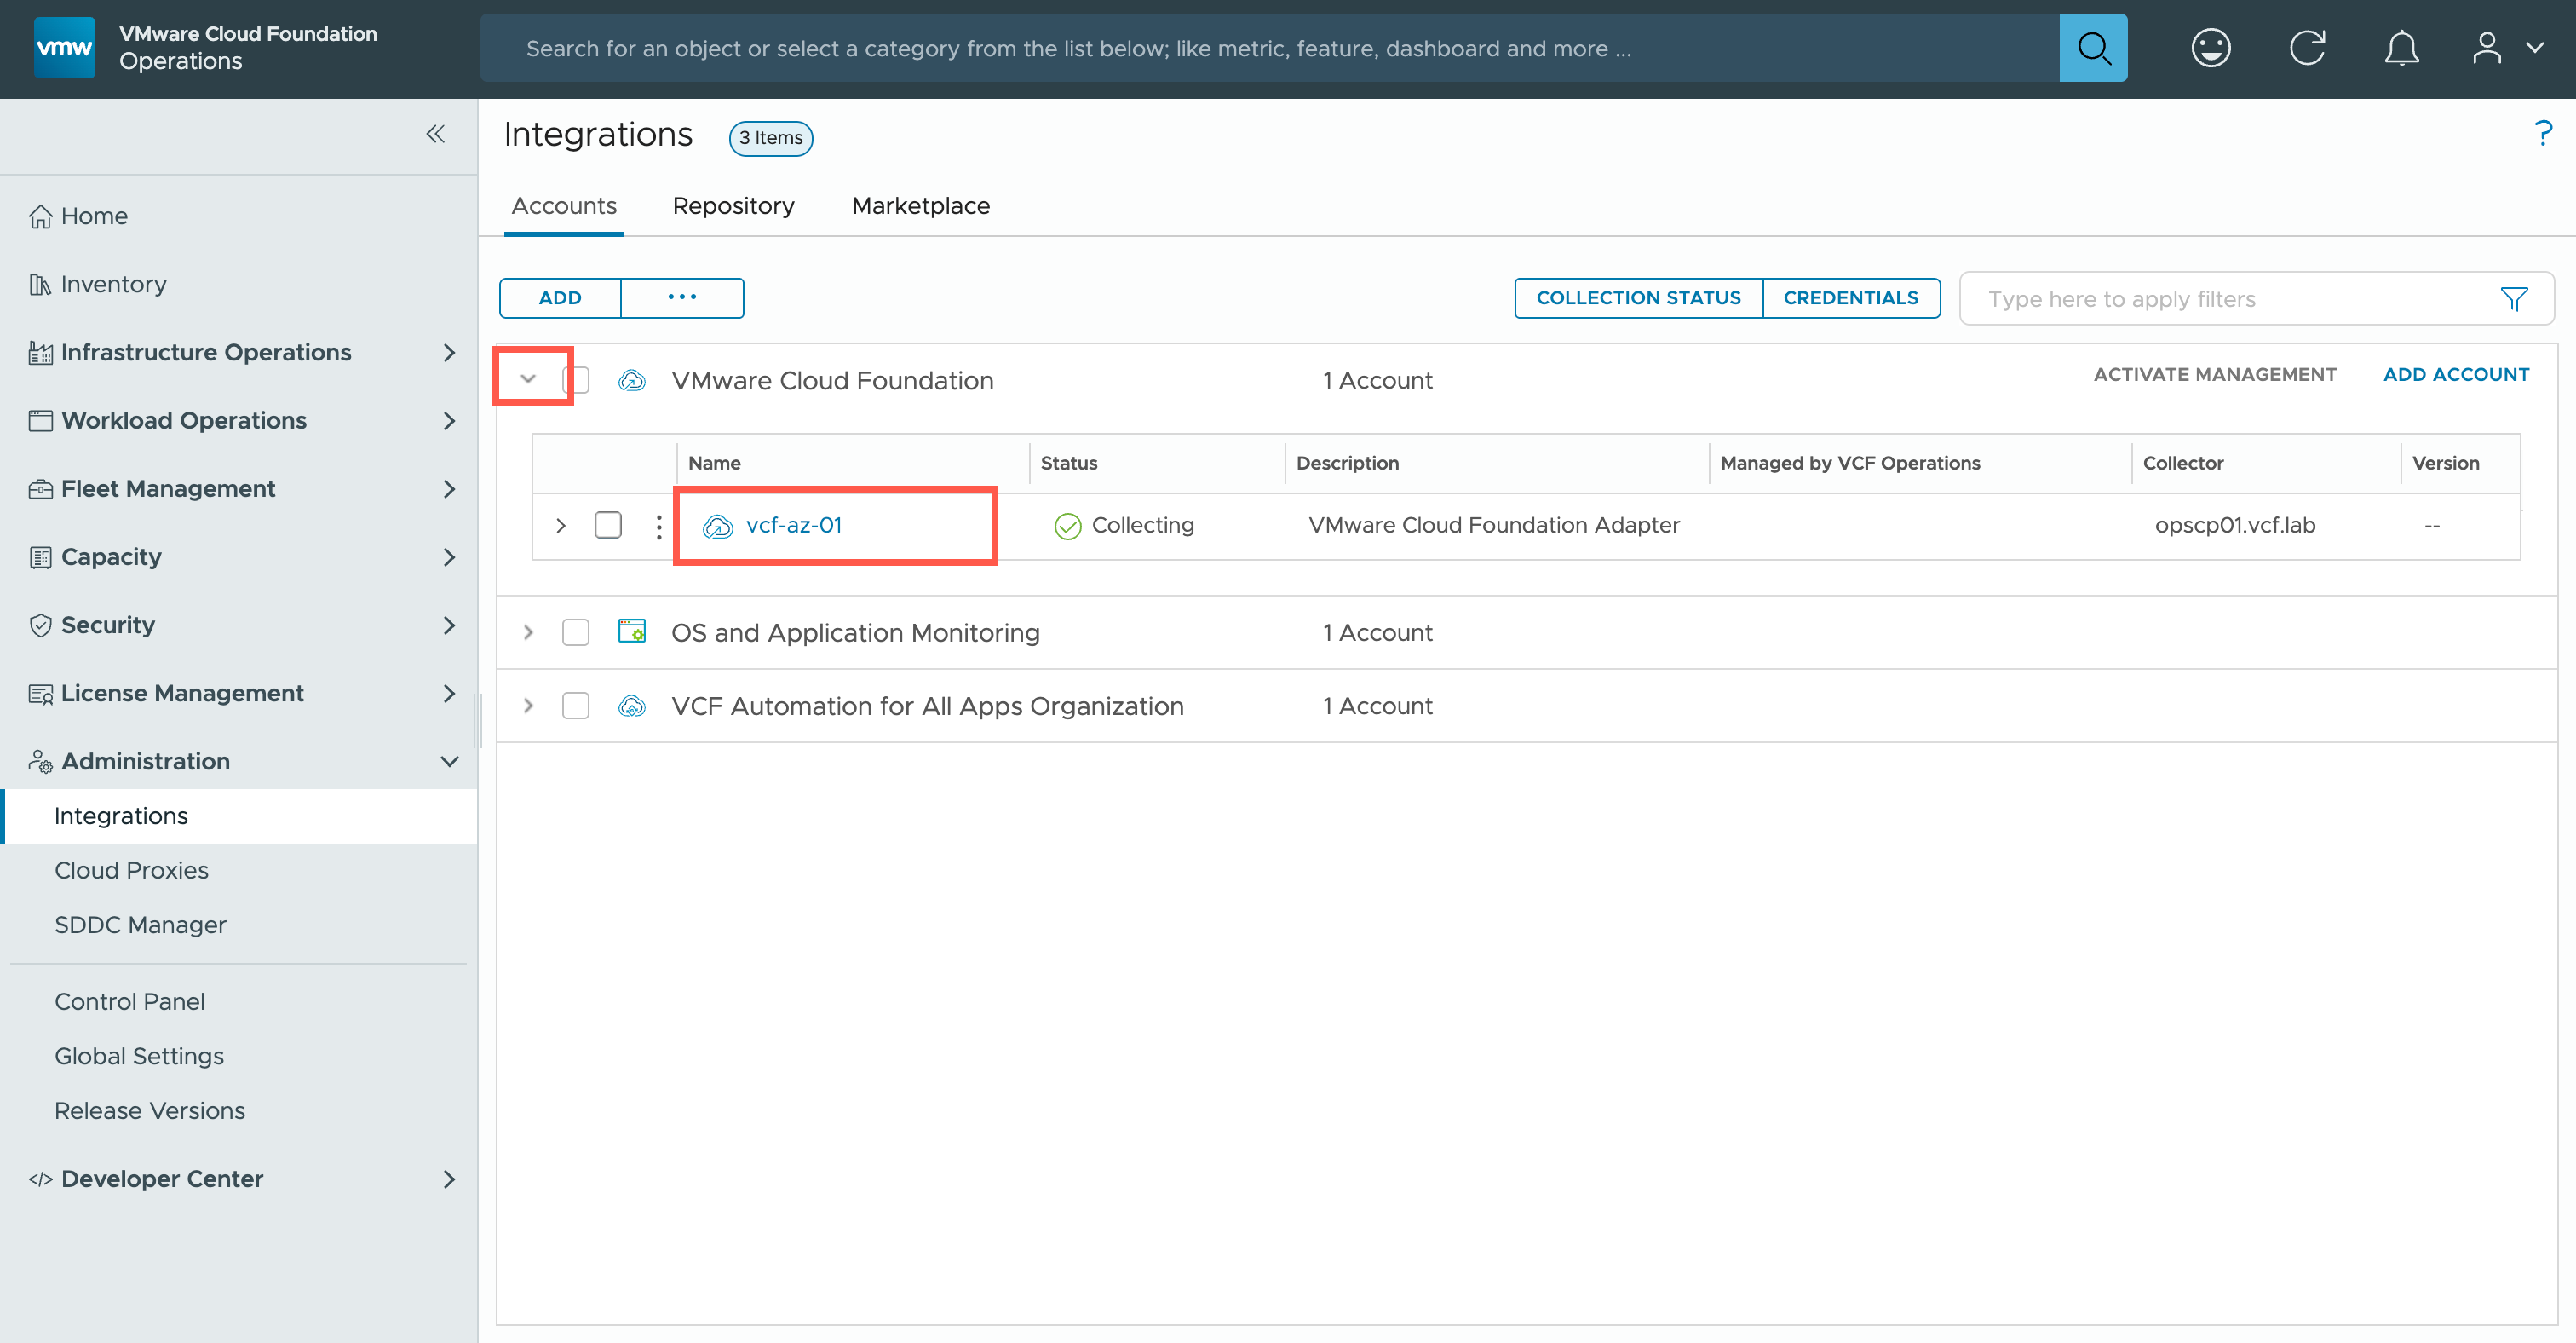
- At the
<wld.name>page, click Domains and then click vCenter.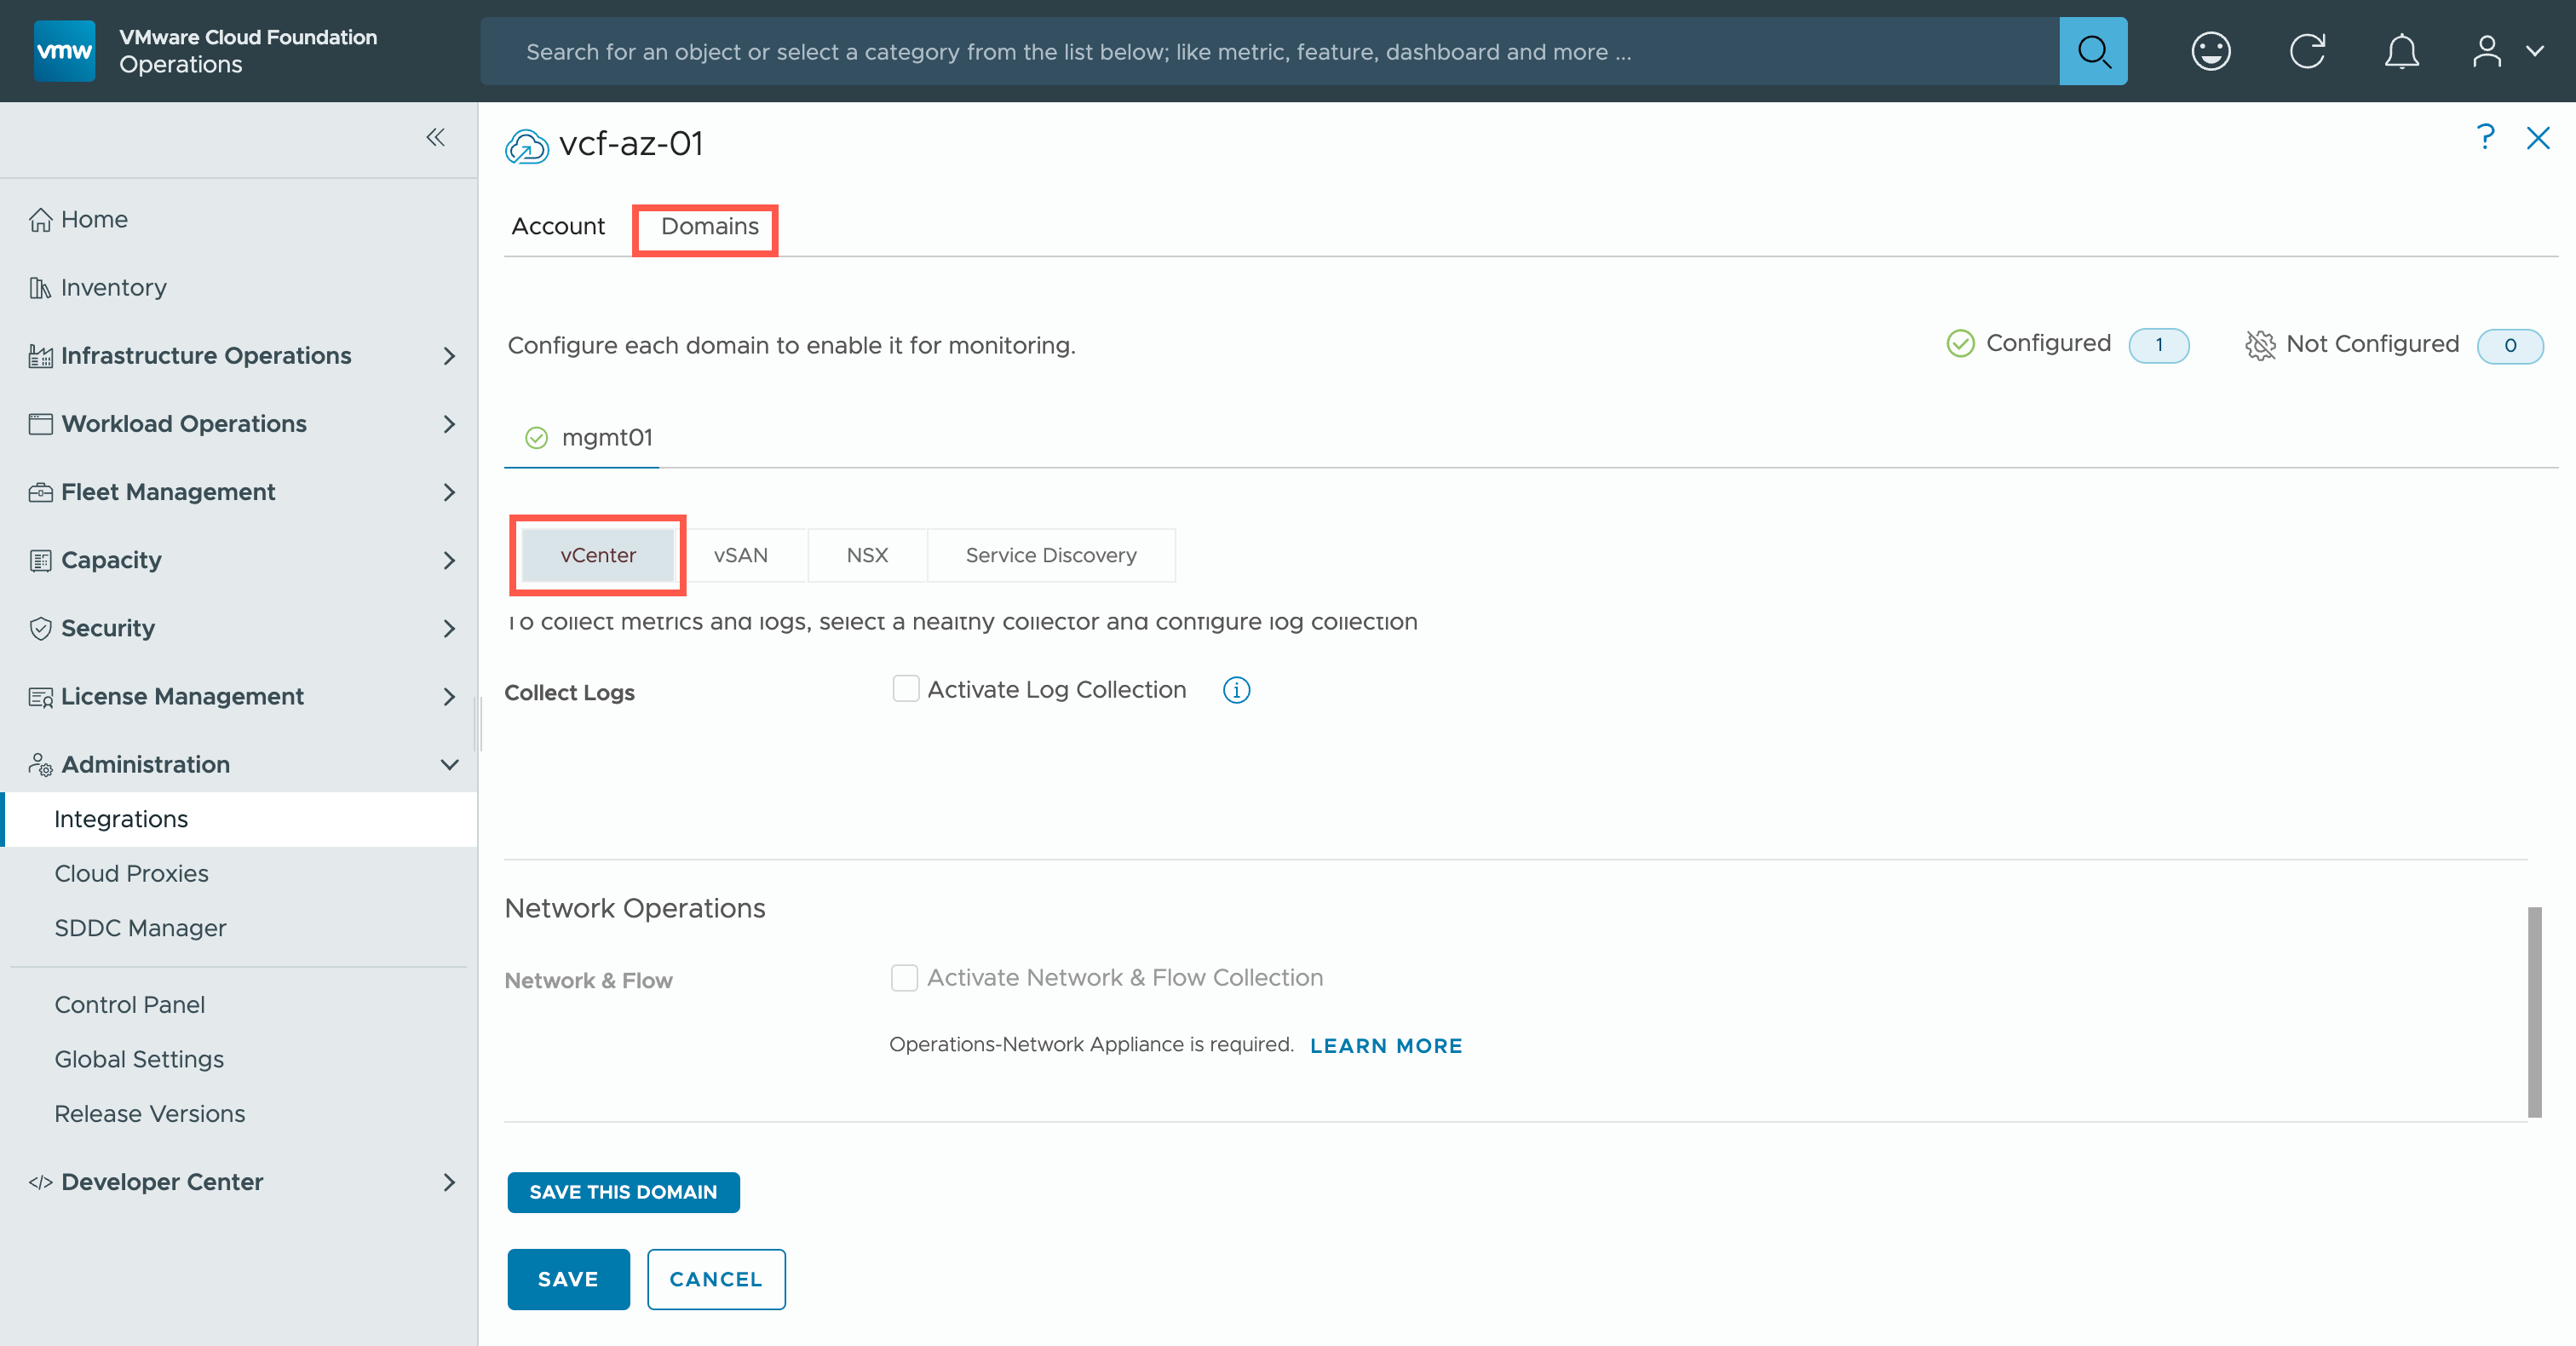
Note:At time of writing this article, I only have my Management Domain running. If there was a workload domain as well, there would be an additional step to choose the workload domain first. - At the
<wld.name>page, check the Activate Log Collection check box and select the Collect logs using the collector/group option.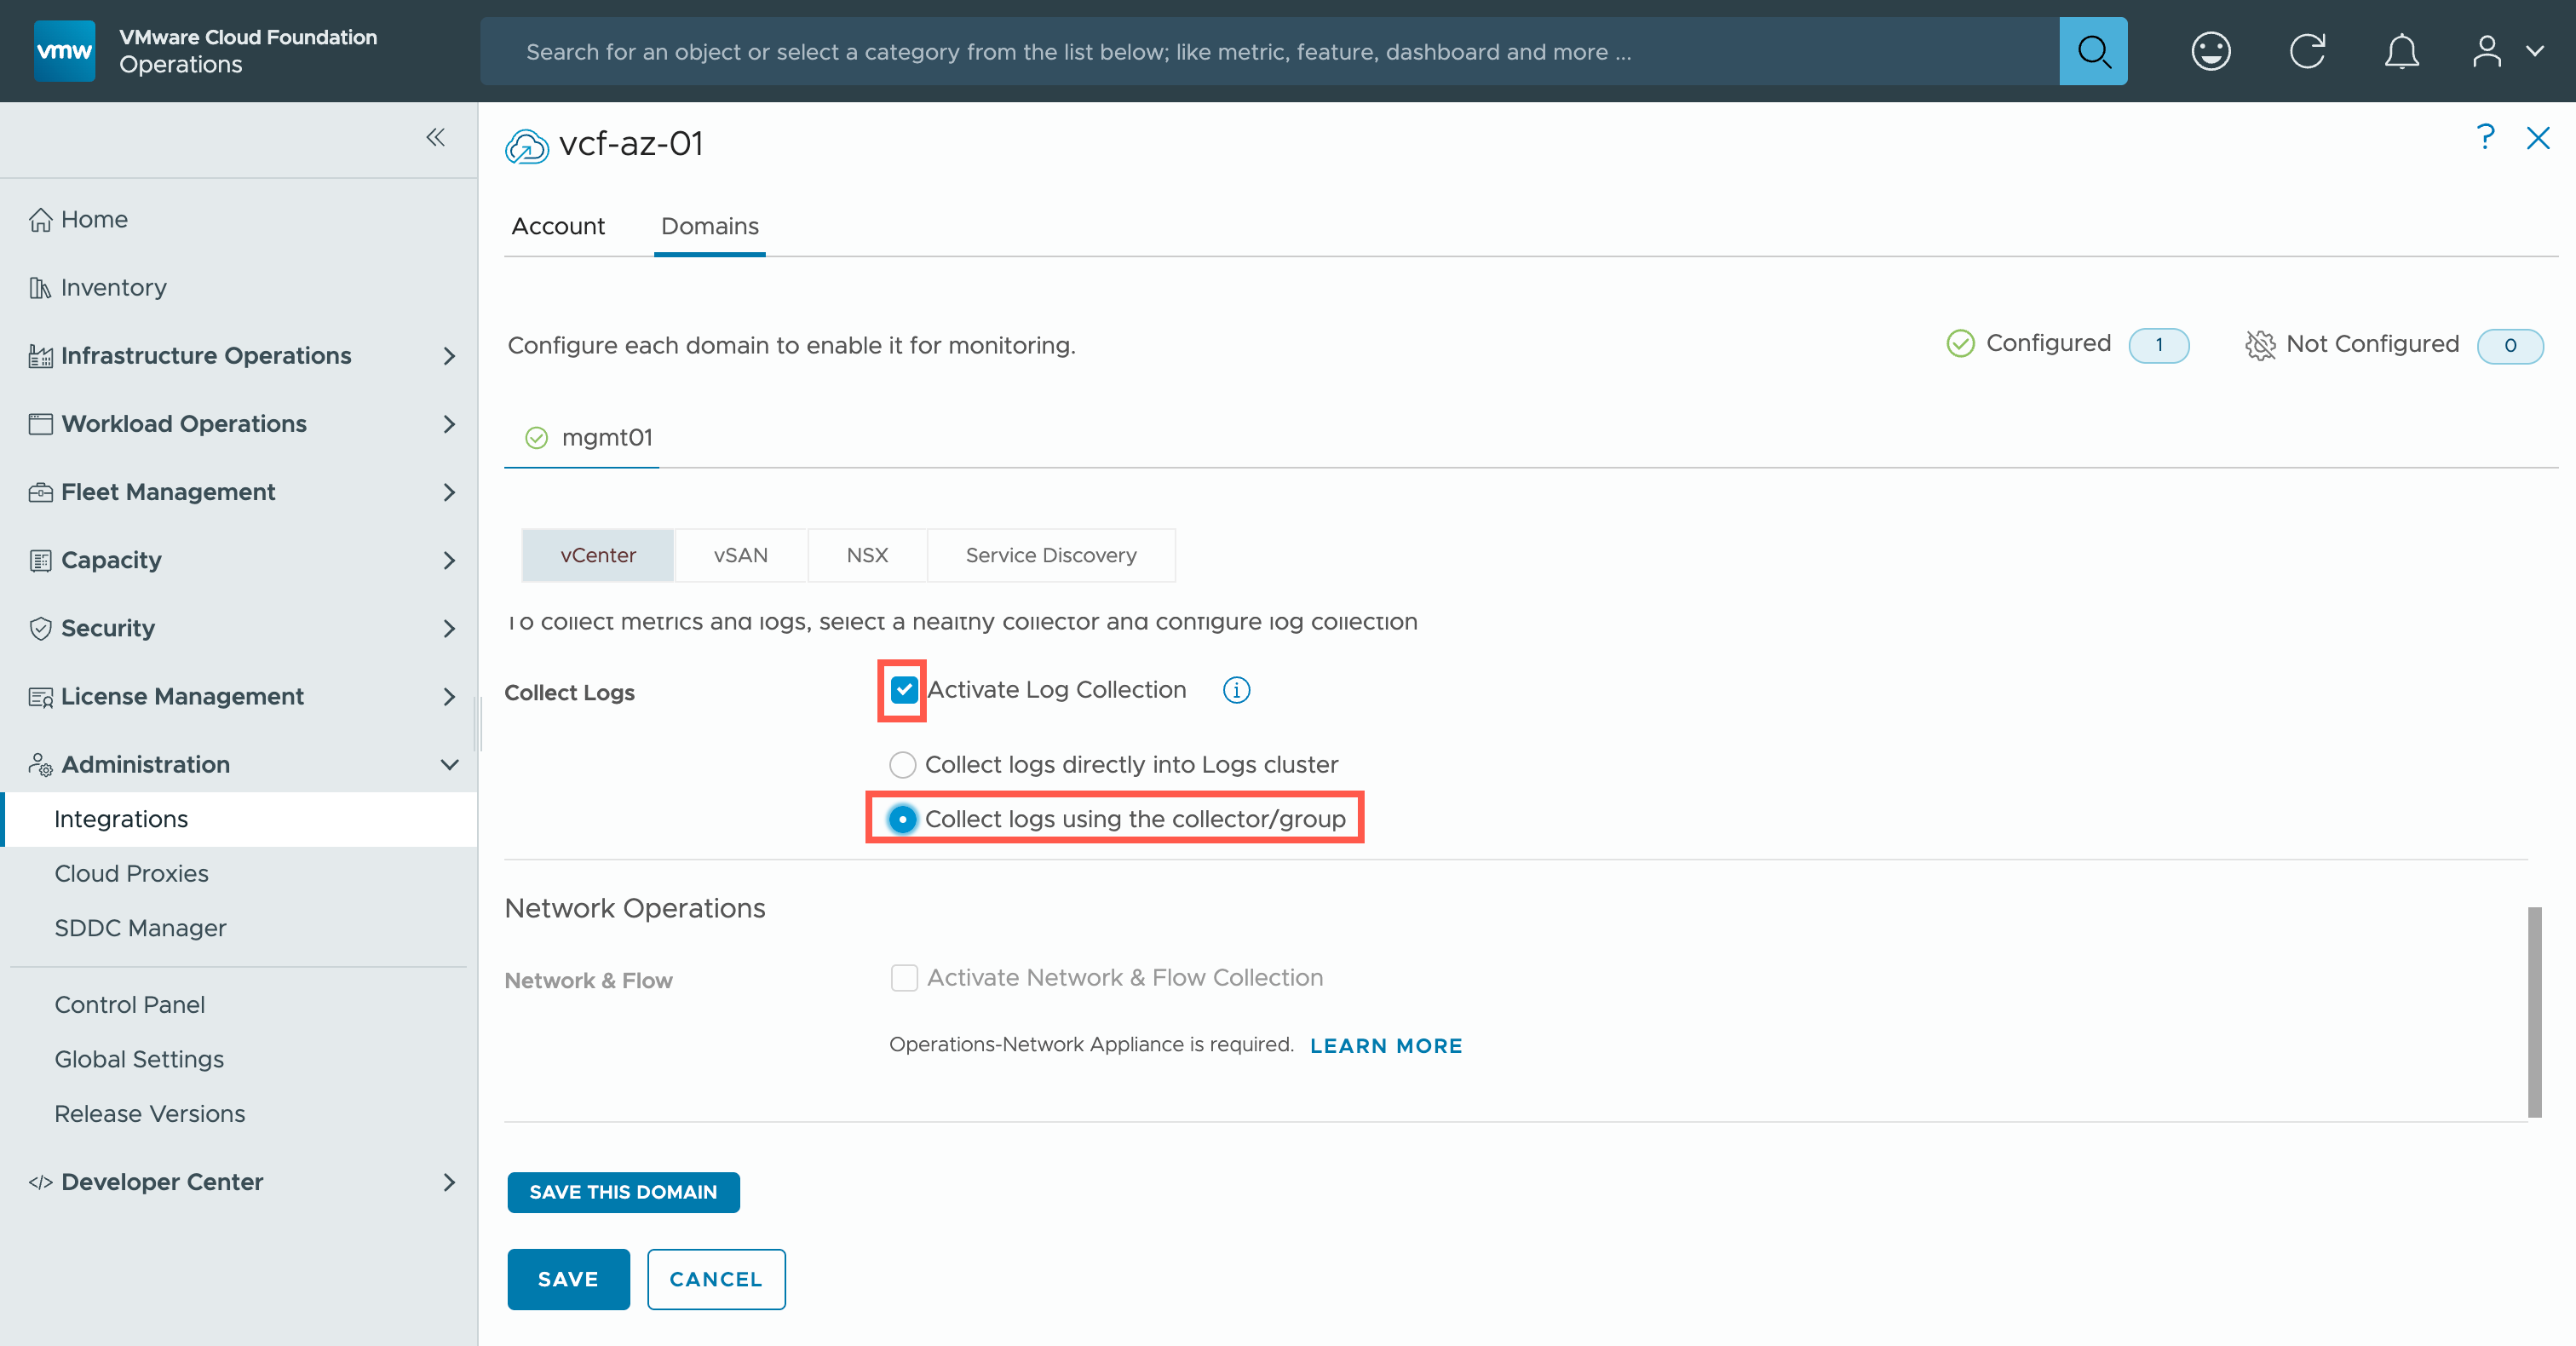
Note:My general recommended best practice is to always use a collector/cloud proxy rather than collect events directly on the logs appliance. - At the
<wld.name>page, click SAVE THIS DOMAIN and then click SAVE.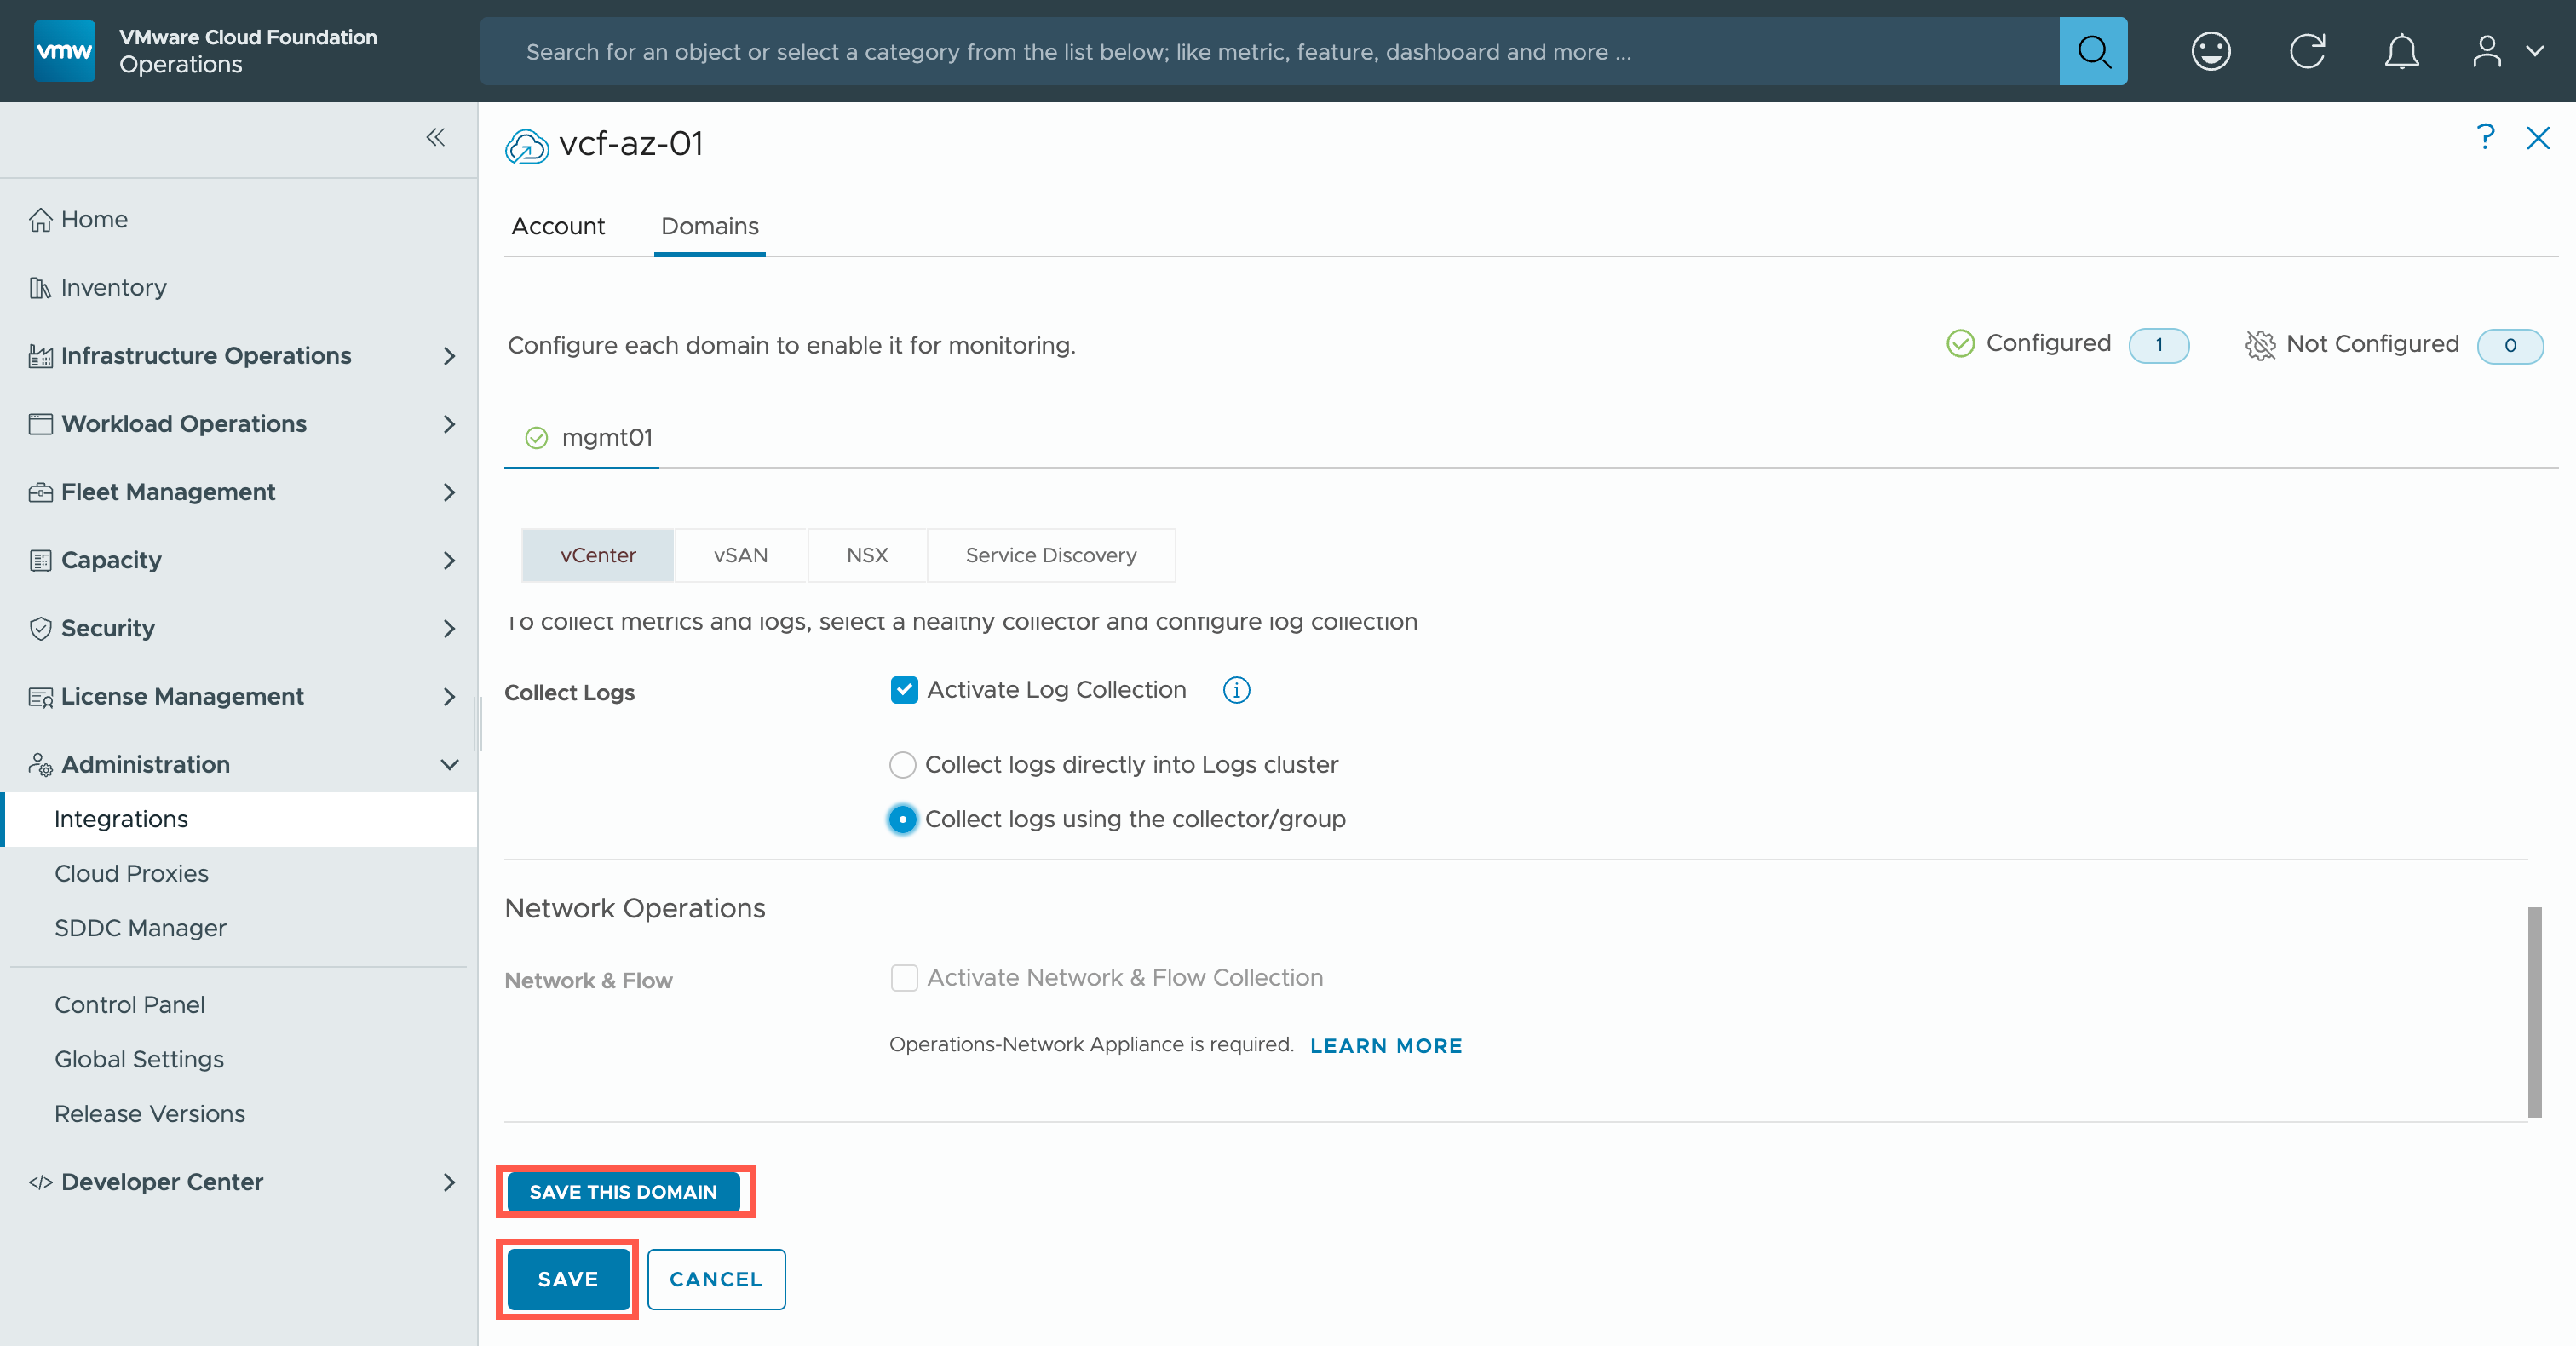
And there we have it!
Recap
In this article we installed VCF Operations for logs as a Day 2 Action and then we ensured that vCenter (and VMware ESX) was configured to send log events to the Operations for logs collector group.
Published on 6 February 2026 by Christopher Lewis. Words: 963. Reading Time: 5 mins.
- New Homelab - Who dis? ()
- The Top 6 Reasons to Visit the Hands-on Labs @ VMware Explore Barcelona 2023 ()
- Top 10 Things to Know Before You Go @ VMware Explore Barcelona 2023 ()
- VMware Aria Automation Advanced Workload Placement using Allocation-based Capacity Metrics ()
- Multiple Achievements Unlocked! ()