VCF 9 Day 2 - Adding a new Workload Domain
VMware VCF
Published on 13 March 2026 by Christopher Lewis. Words: 1370. Reading Time: 7 mins.
Adding a new VCF Workload Domain is now completed via a wizard within VCF Operations. Let us walk through how to install and configure a new Workload Domain a Day 2 activity.
Step By Step Guide
Official Tech Docs
The official Broadcom Tech Document is located under Create a New Workload Domain Using VCF Operations .
Prerequisites
To complete the step by step guide, you will need have completed the following:
- Successfully deployed an instance of VCF 9.
- Configured either an online or offline depot and downloaded the VCF Operations for logs install binaries.
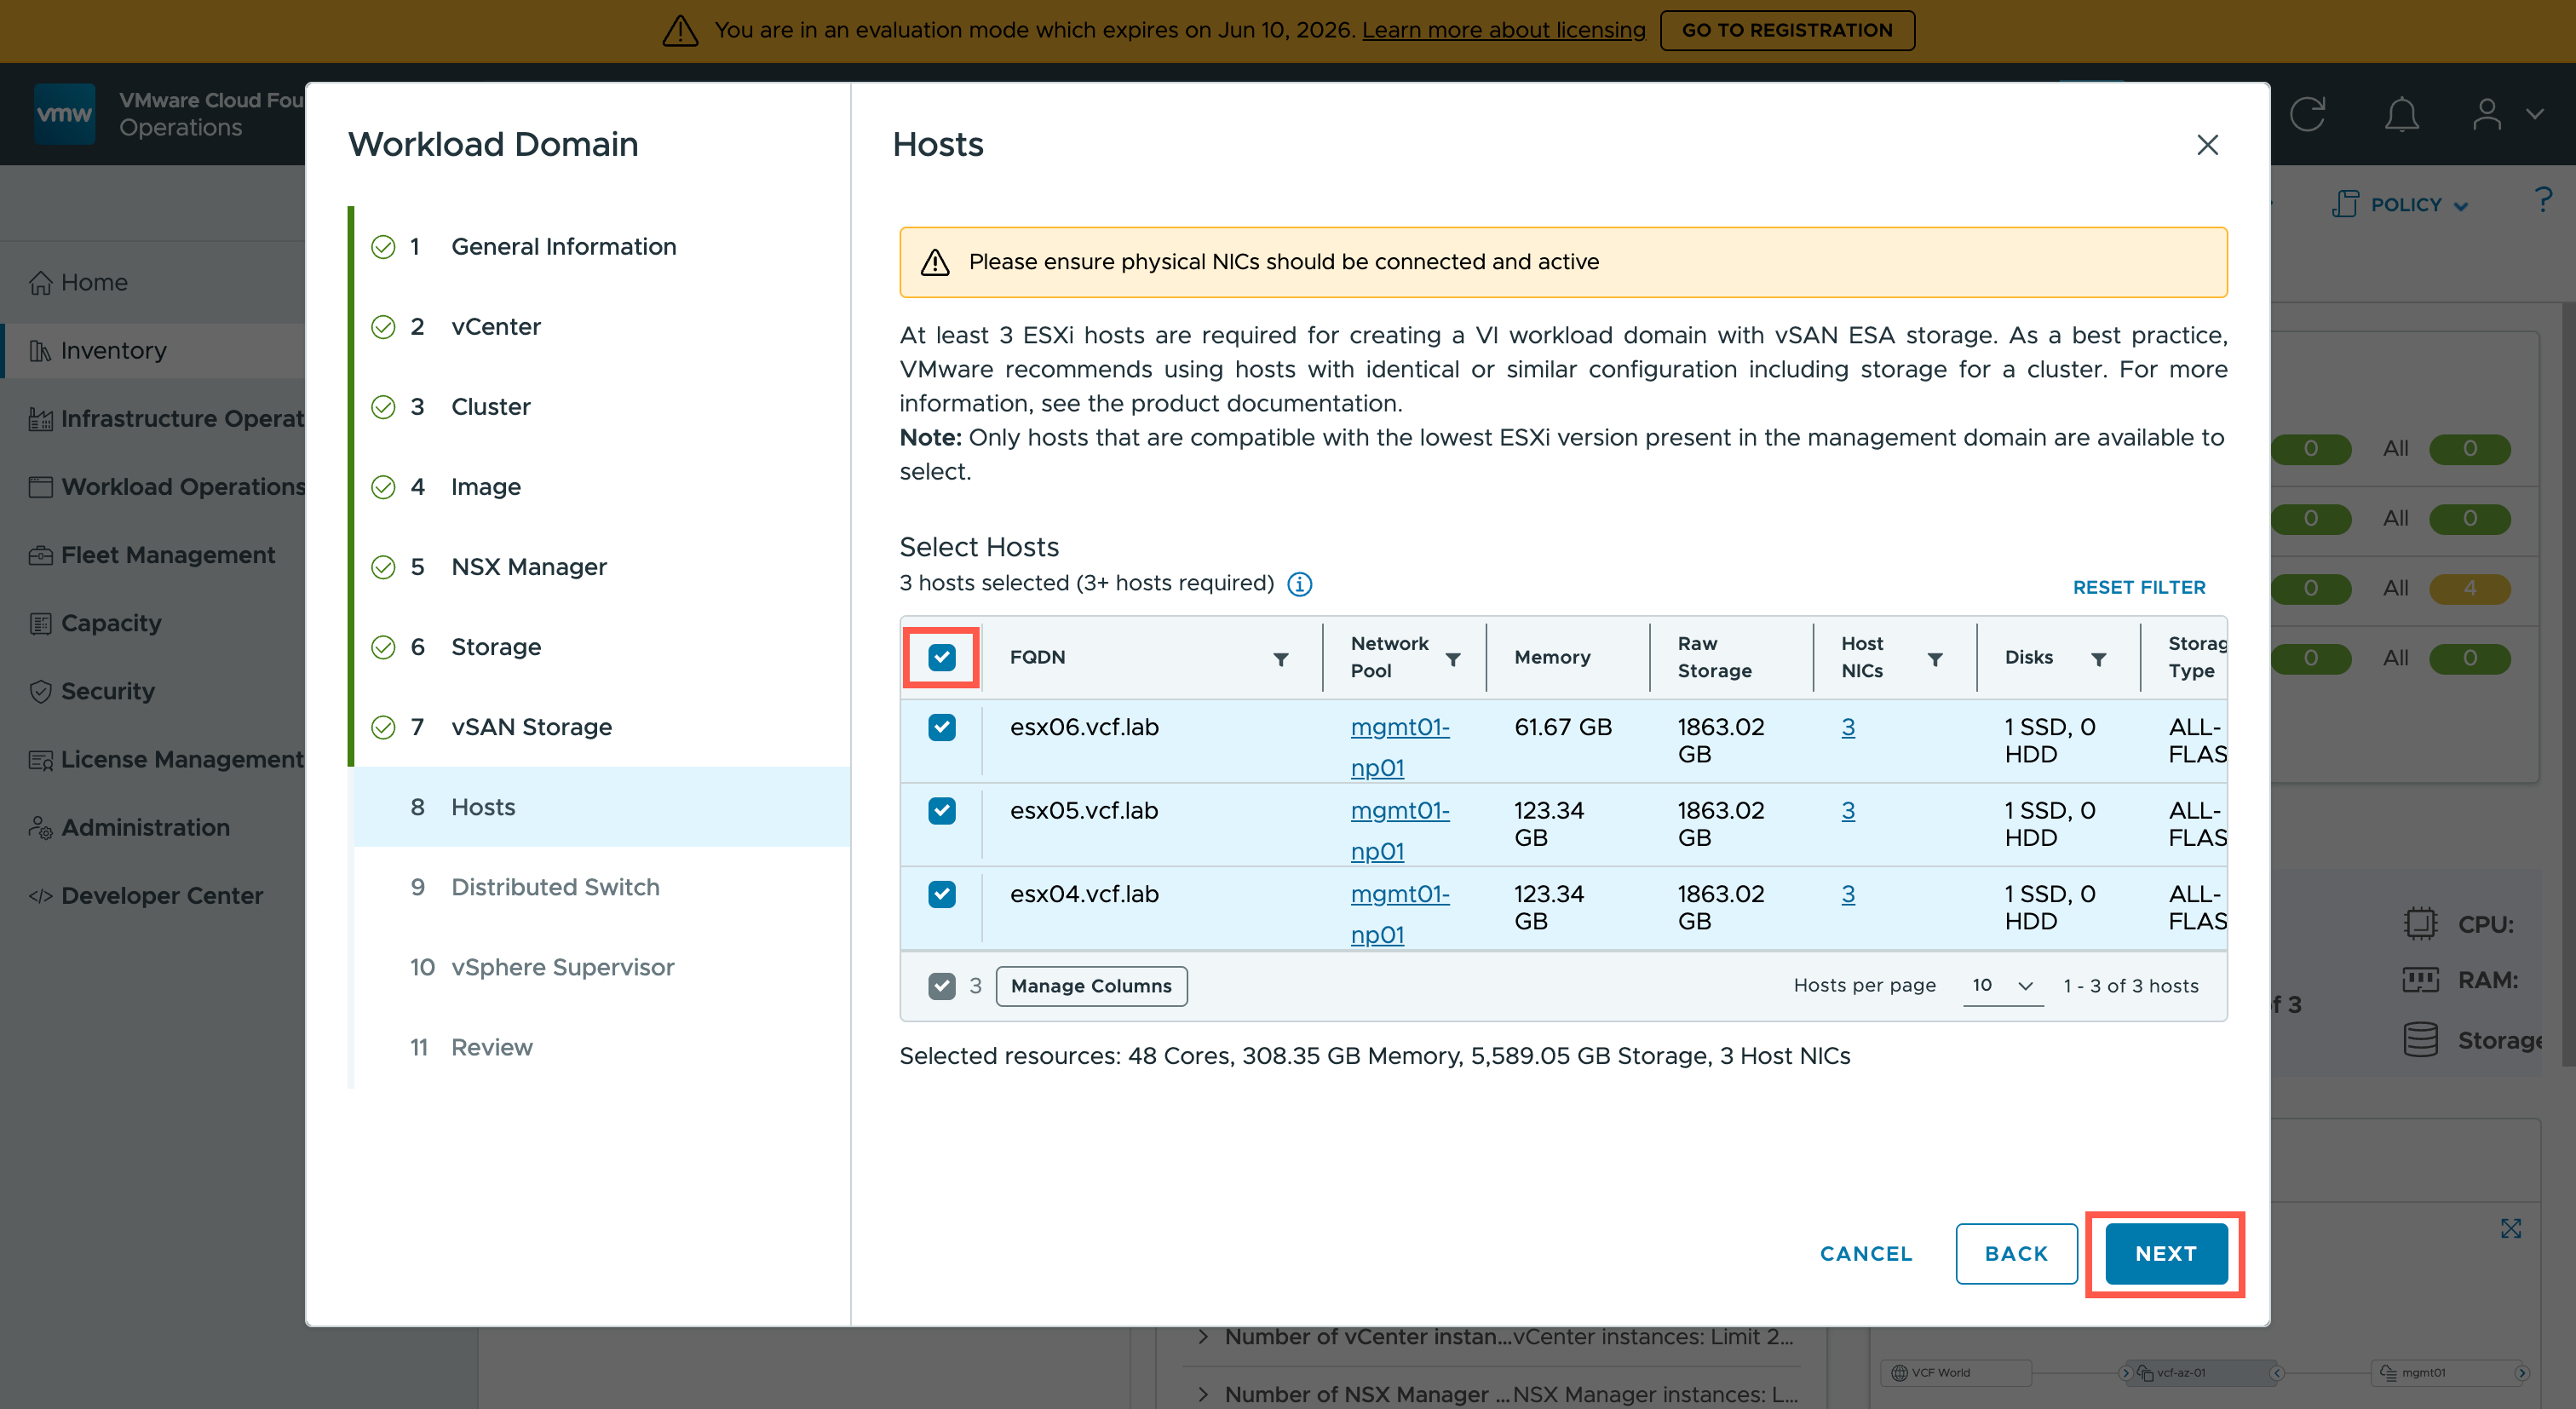
- Have X number of hosts that have been commissioned and are visible in the Global Inventory lists in the VCF Management Domain vCenter Server.
- Created DNS records for the number of appliances being deployed, i.e. vCenter and NSX.
There are also a number of prerequisites listed in the Tech Doc article above that we are not going to repeat here!
Walkthrough
Create a New VCF Workload Domain
- Navigate to the VCF Operations url (i.e.
https://<ops.fqdn>) in the web browser.
- From the Login Method dropdown, select Local Account and then, in the Username field, type
admin, enter the admin password into the Password field and click LOG IN.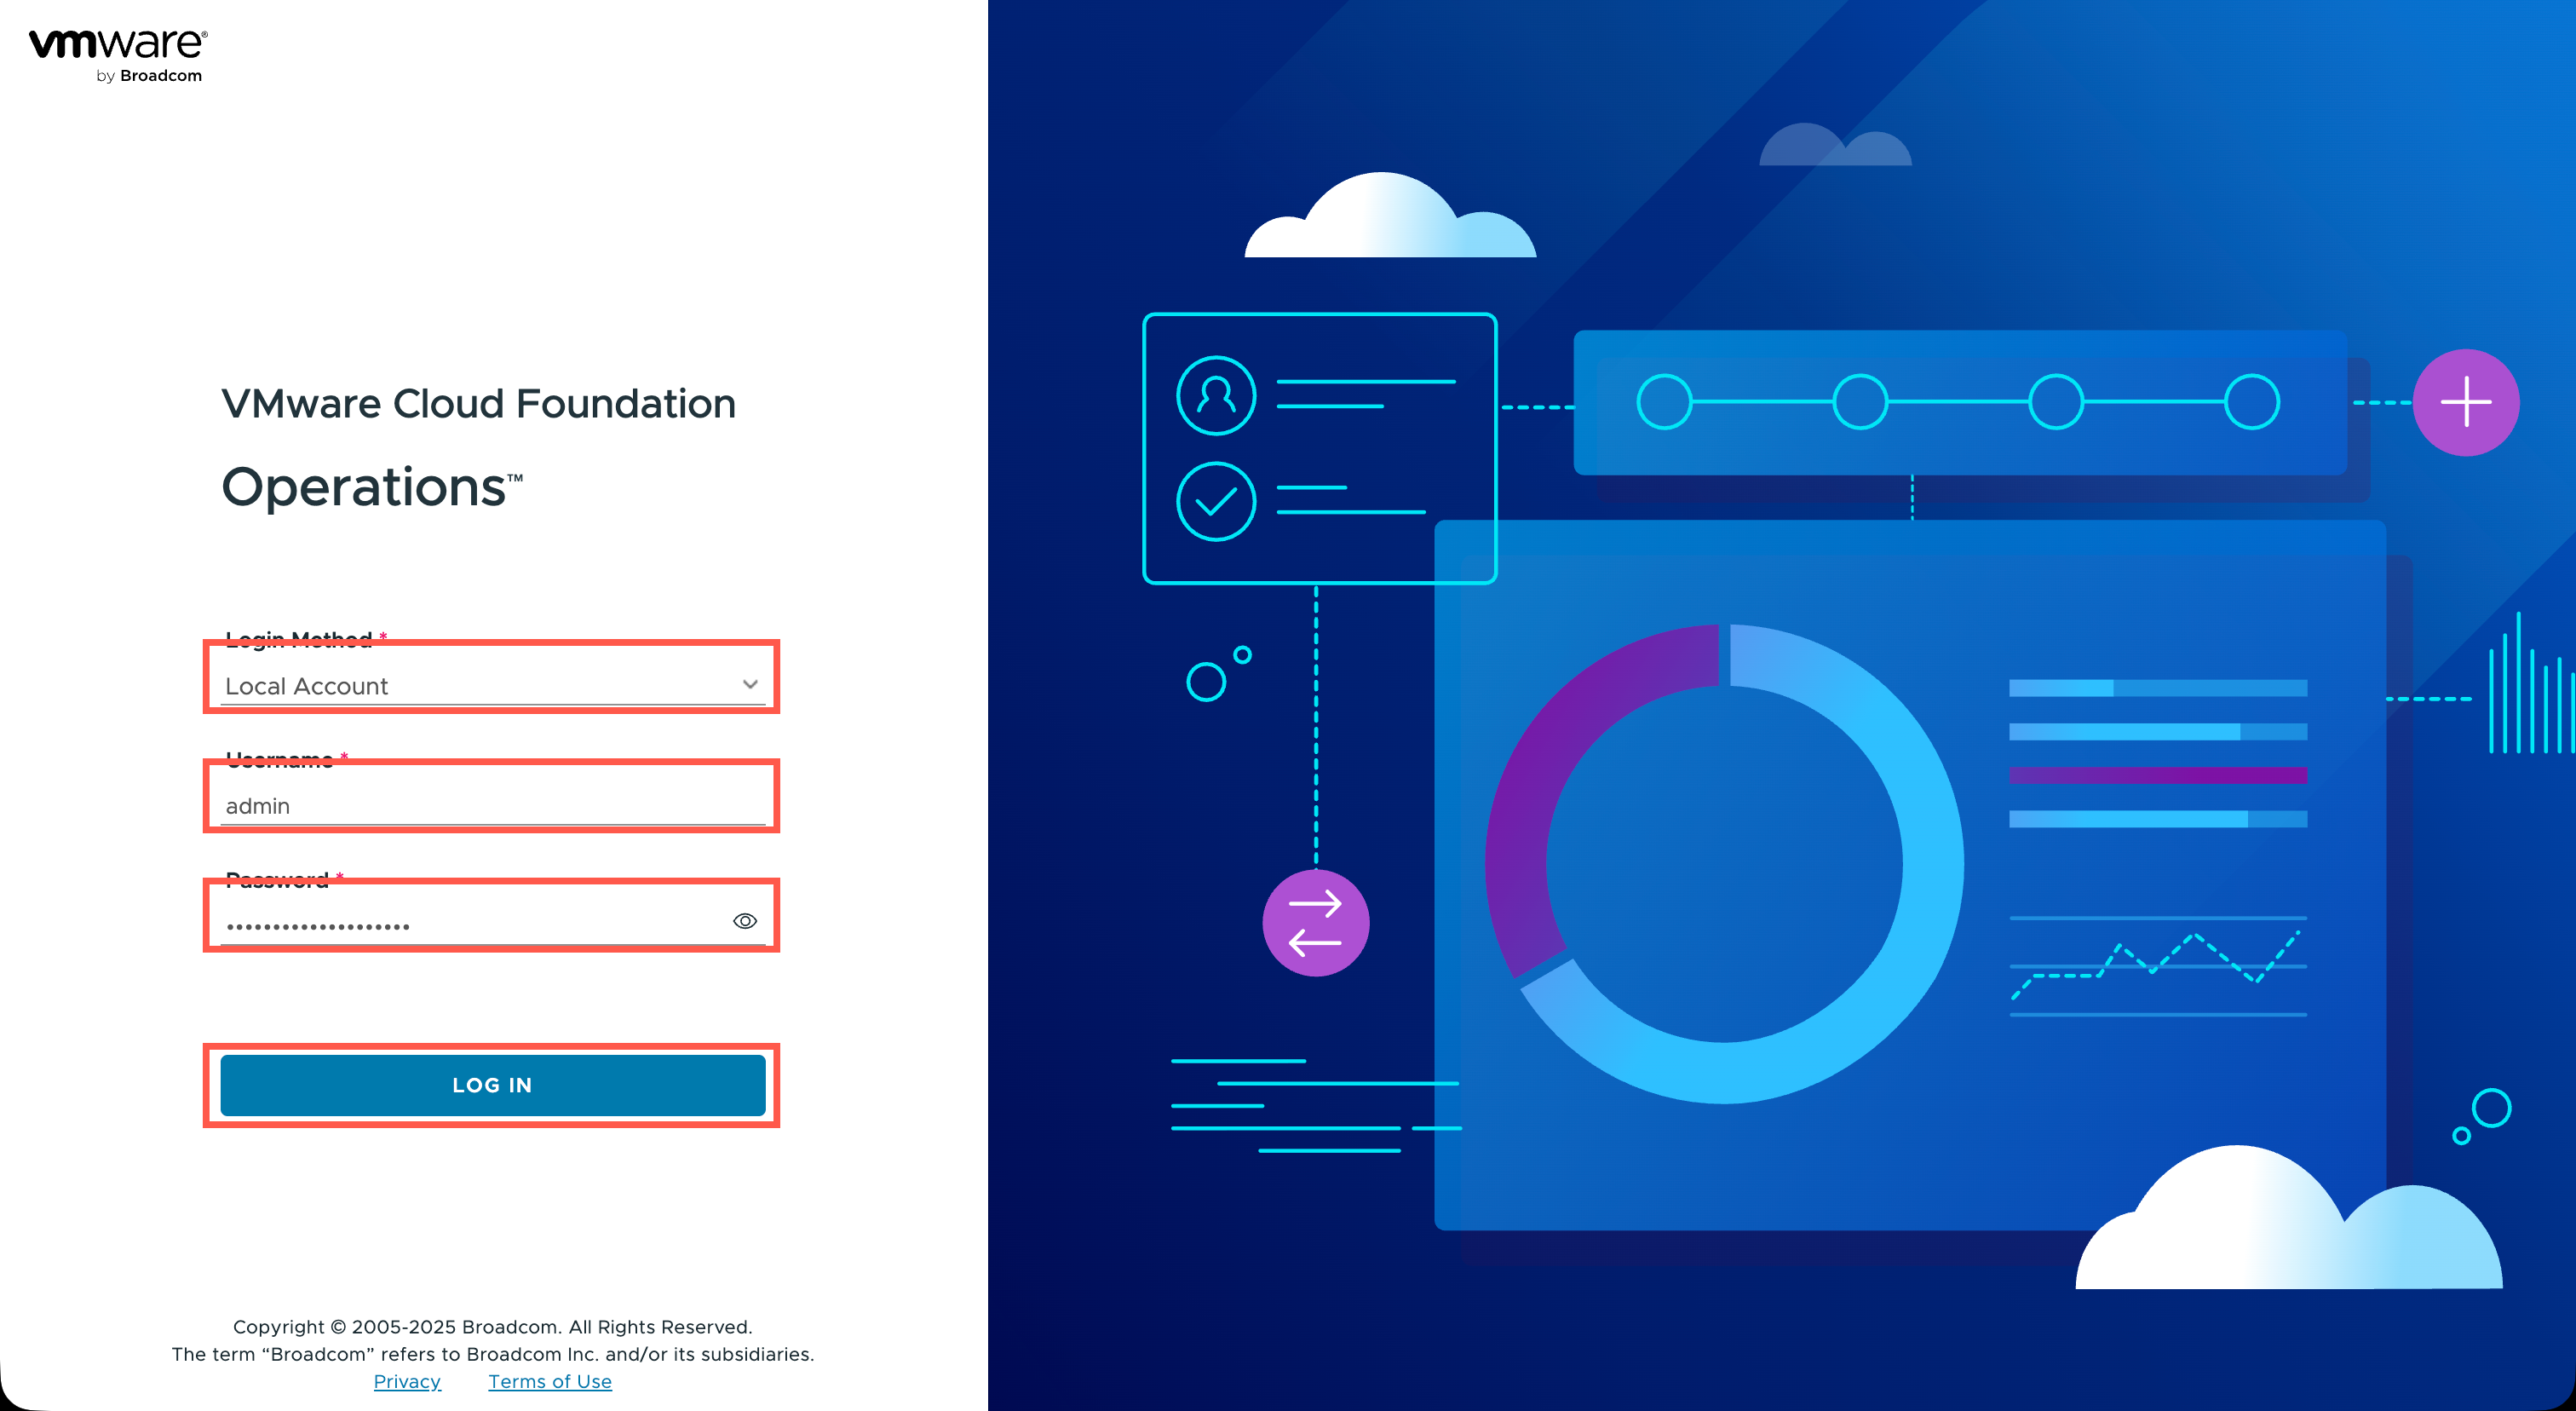
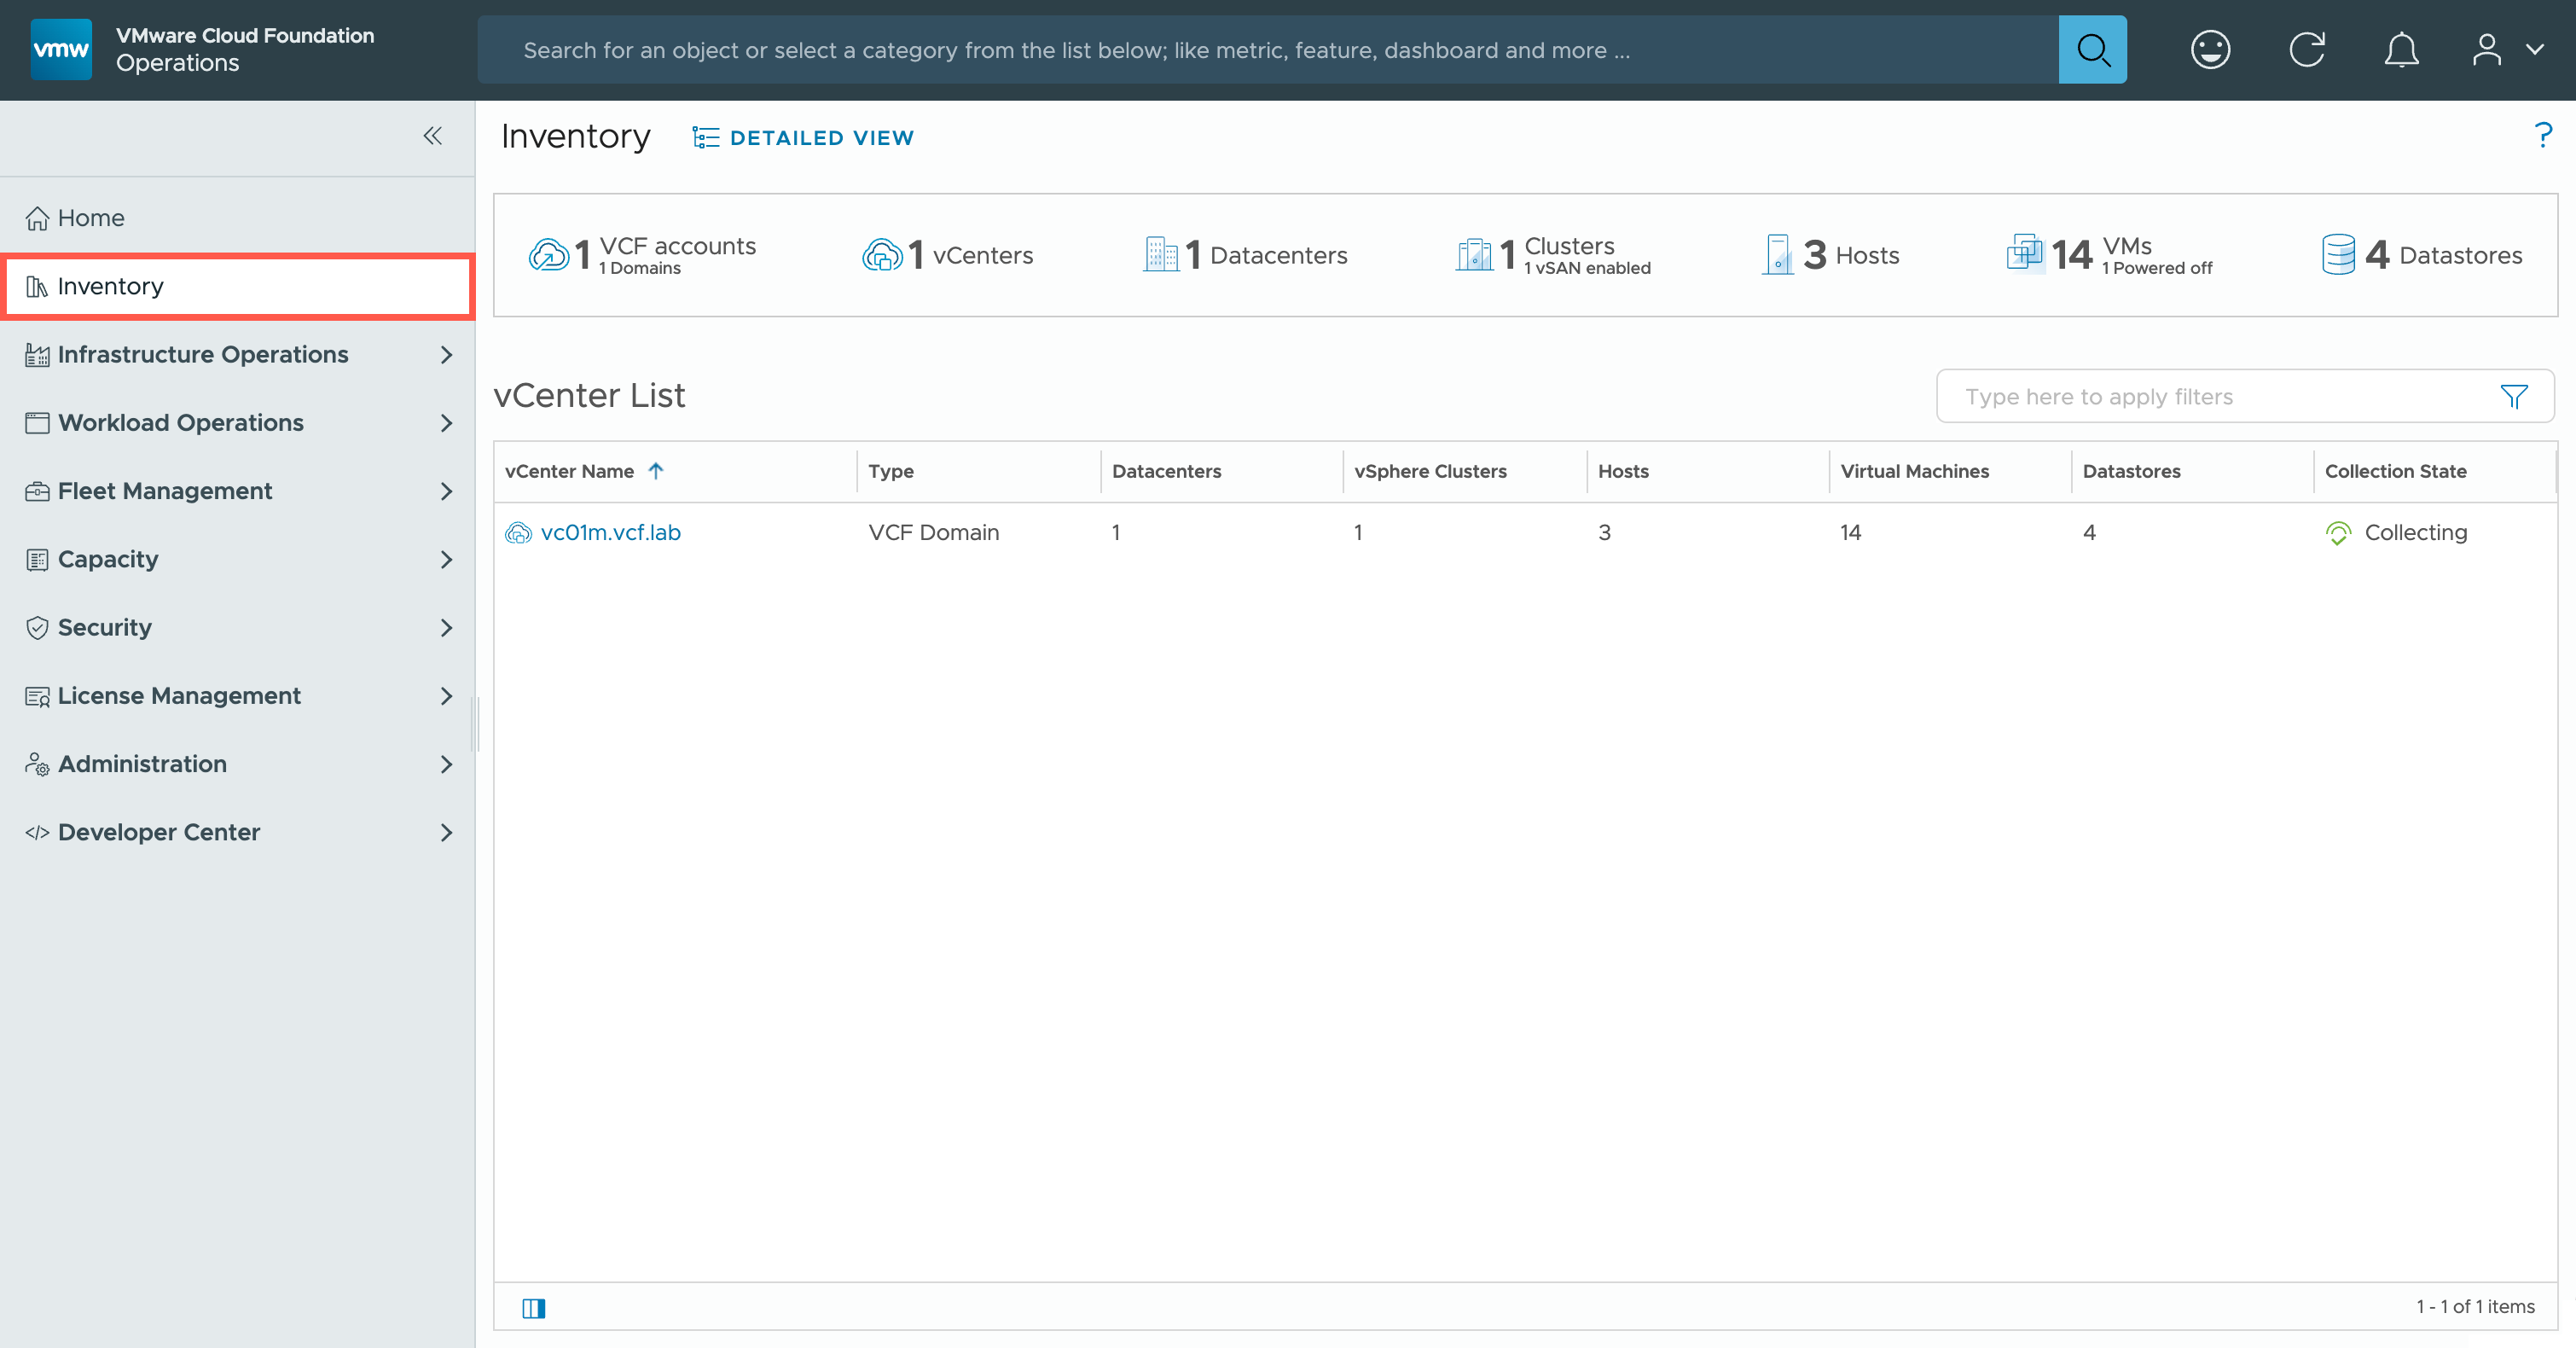
- Click on Inventory.
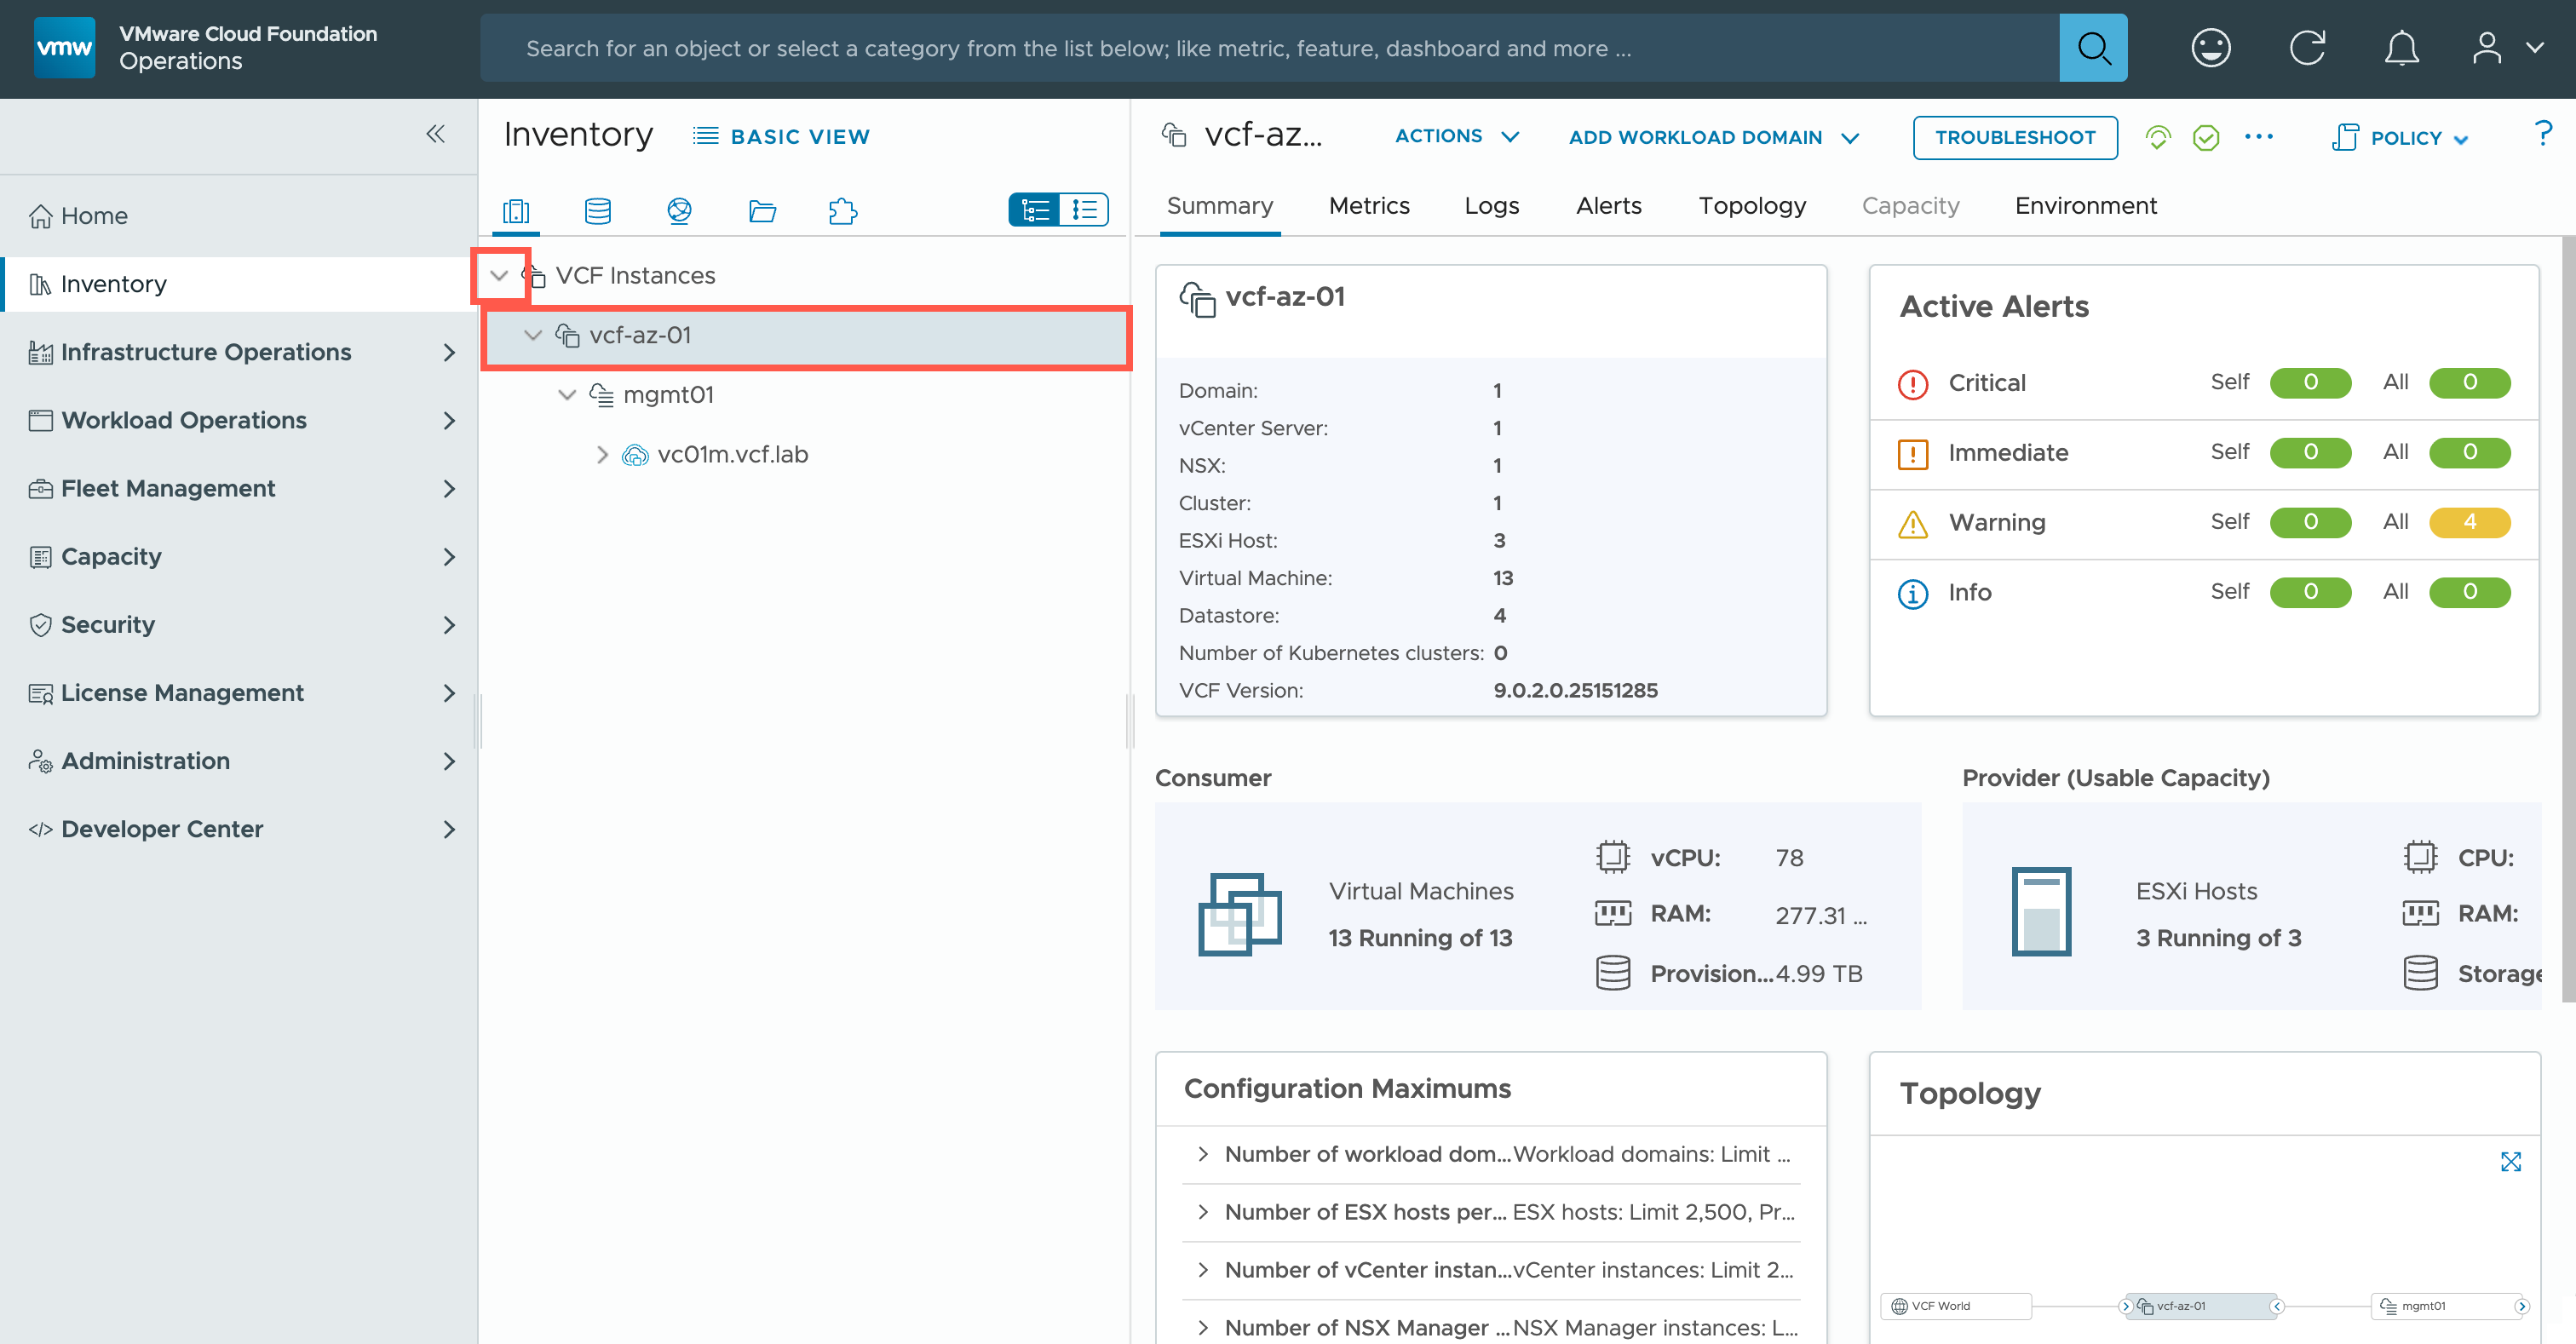
- Click on DETAILED VIEW.

- Under Inventory, click > to expand the VCF Instances and click on the target VCF instance.
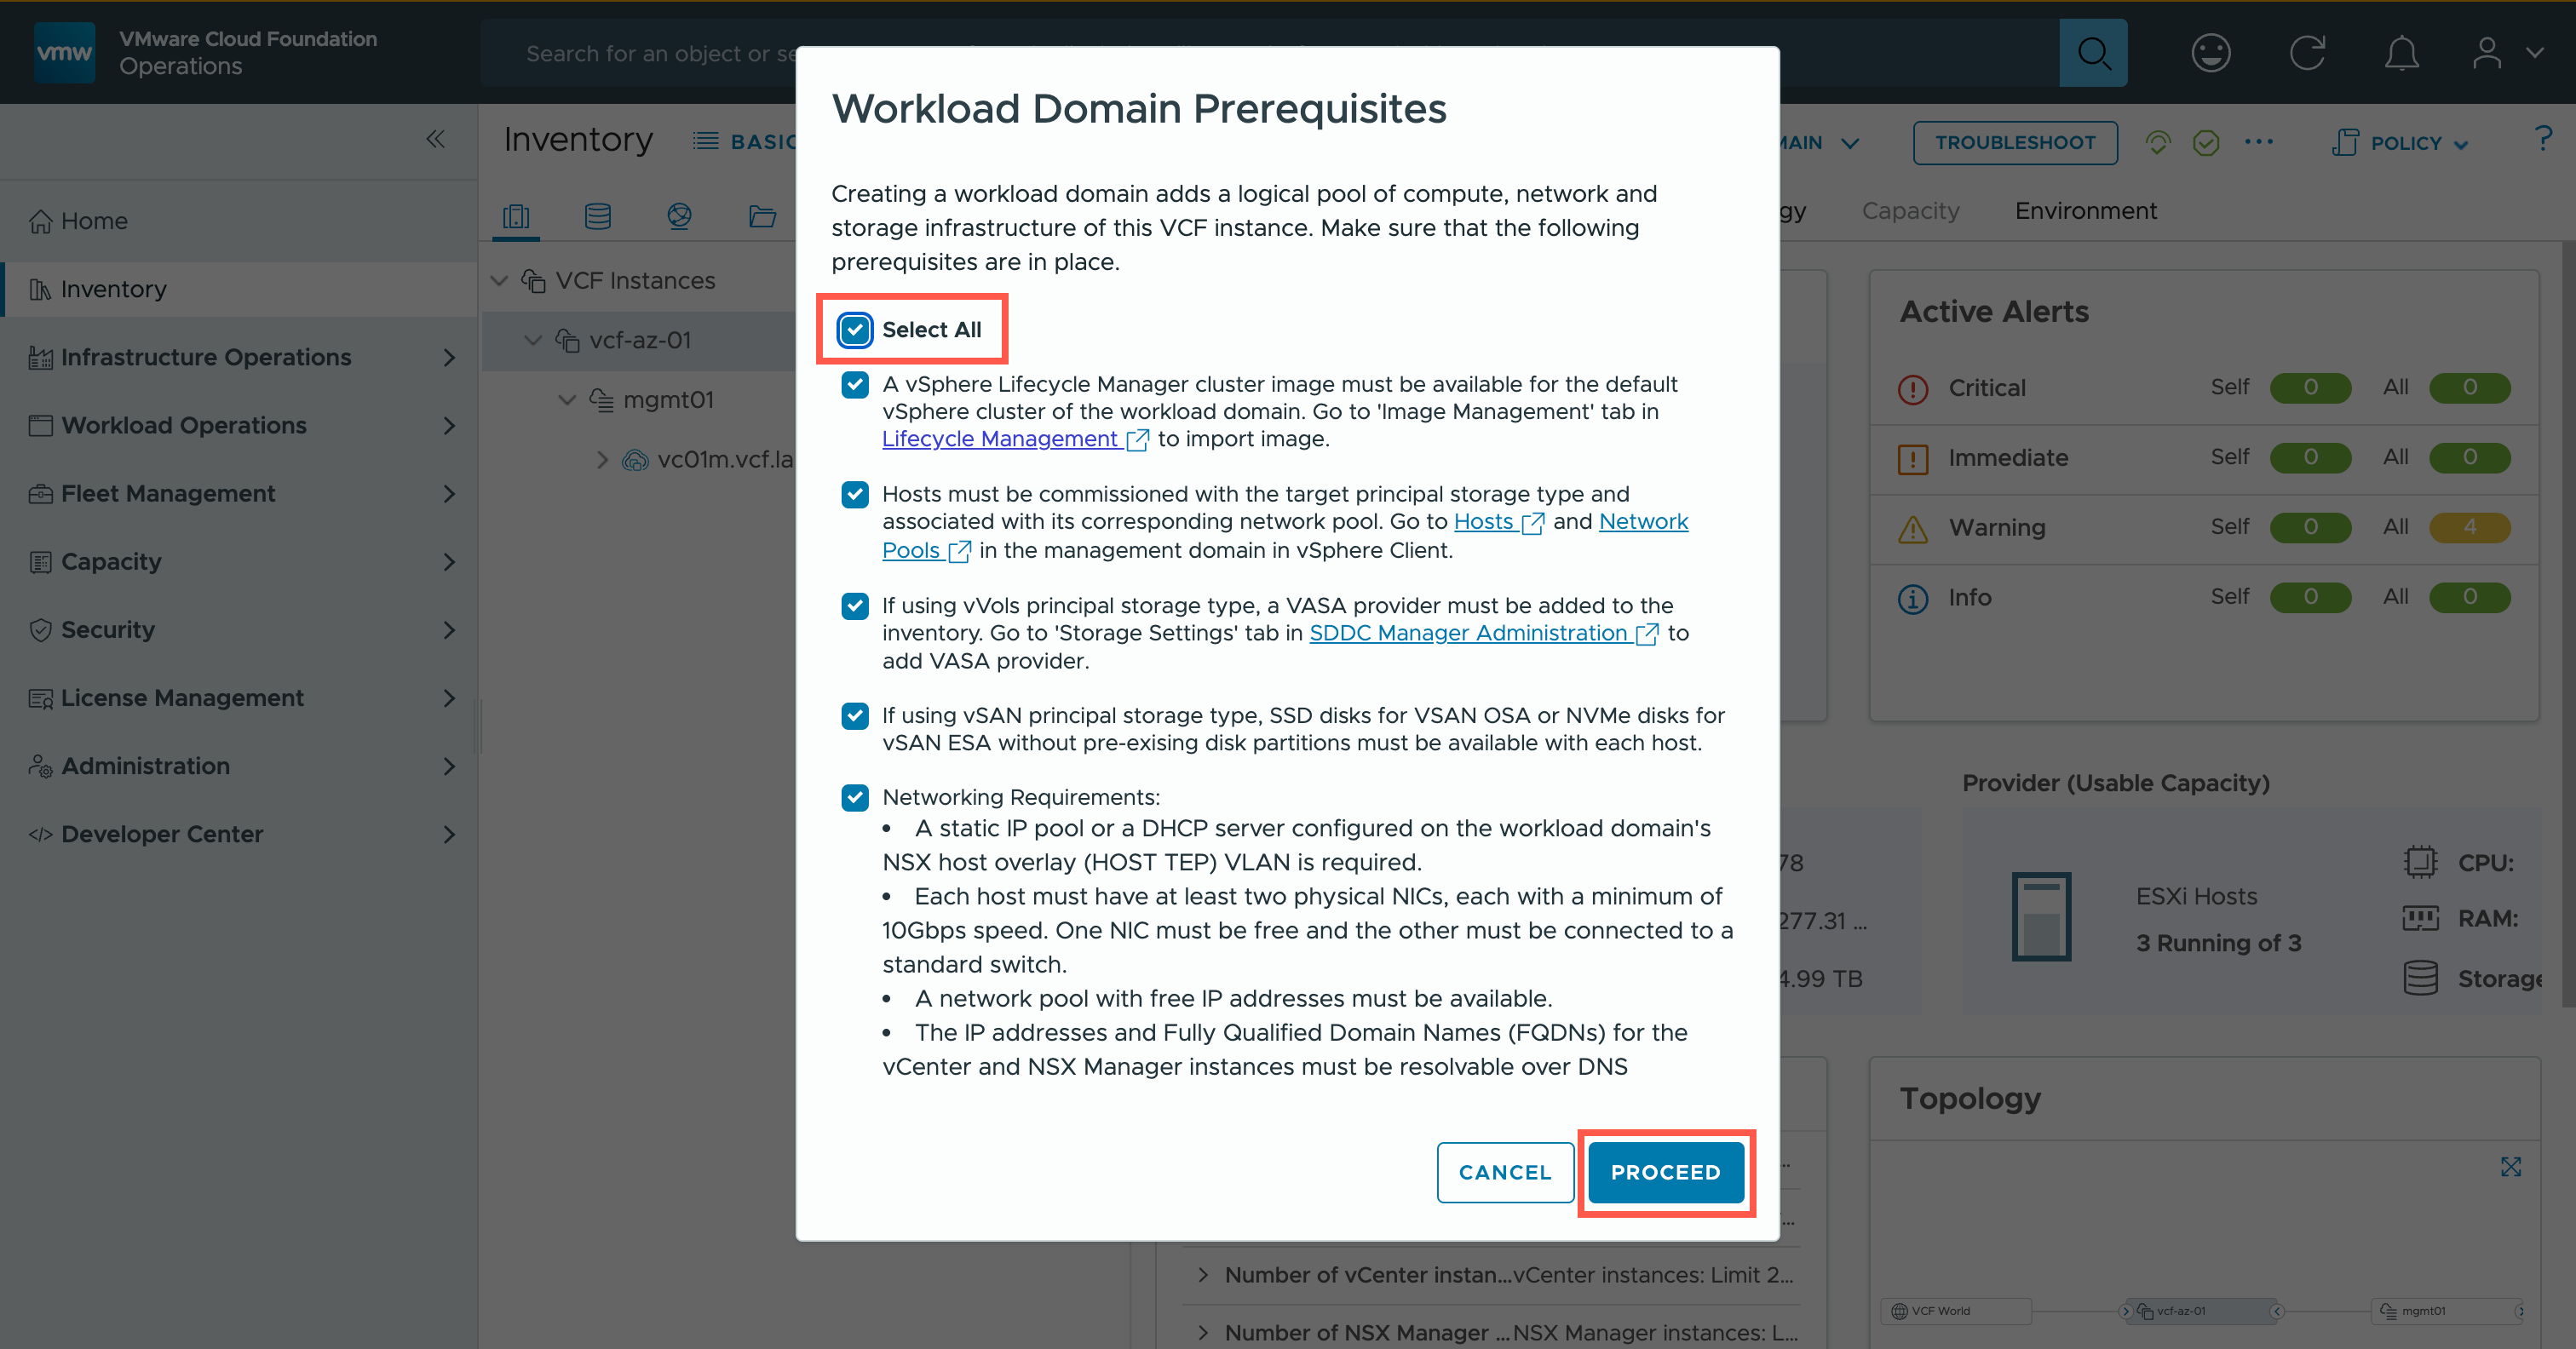
- Click ADD WORKLOAD DOMAIN and then click Create New….
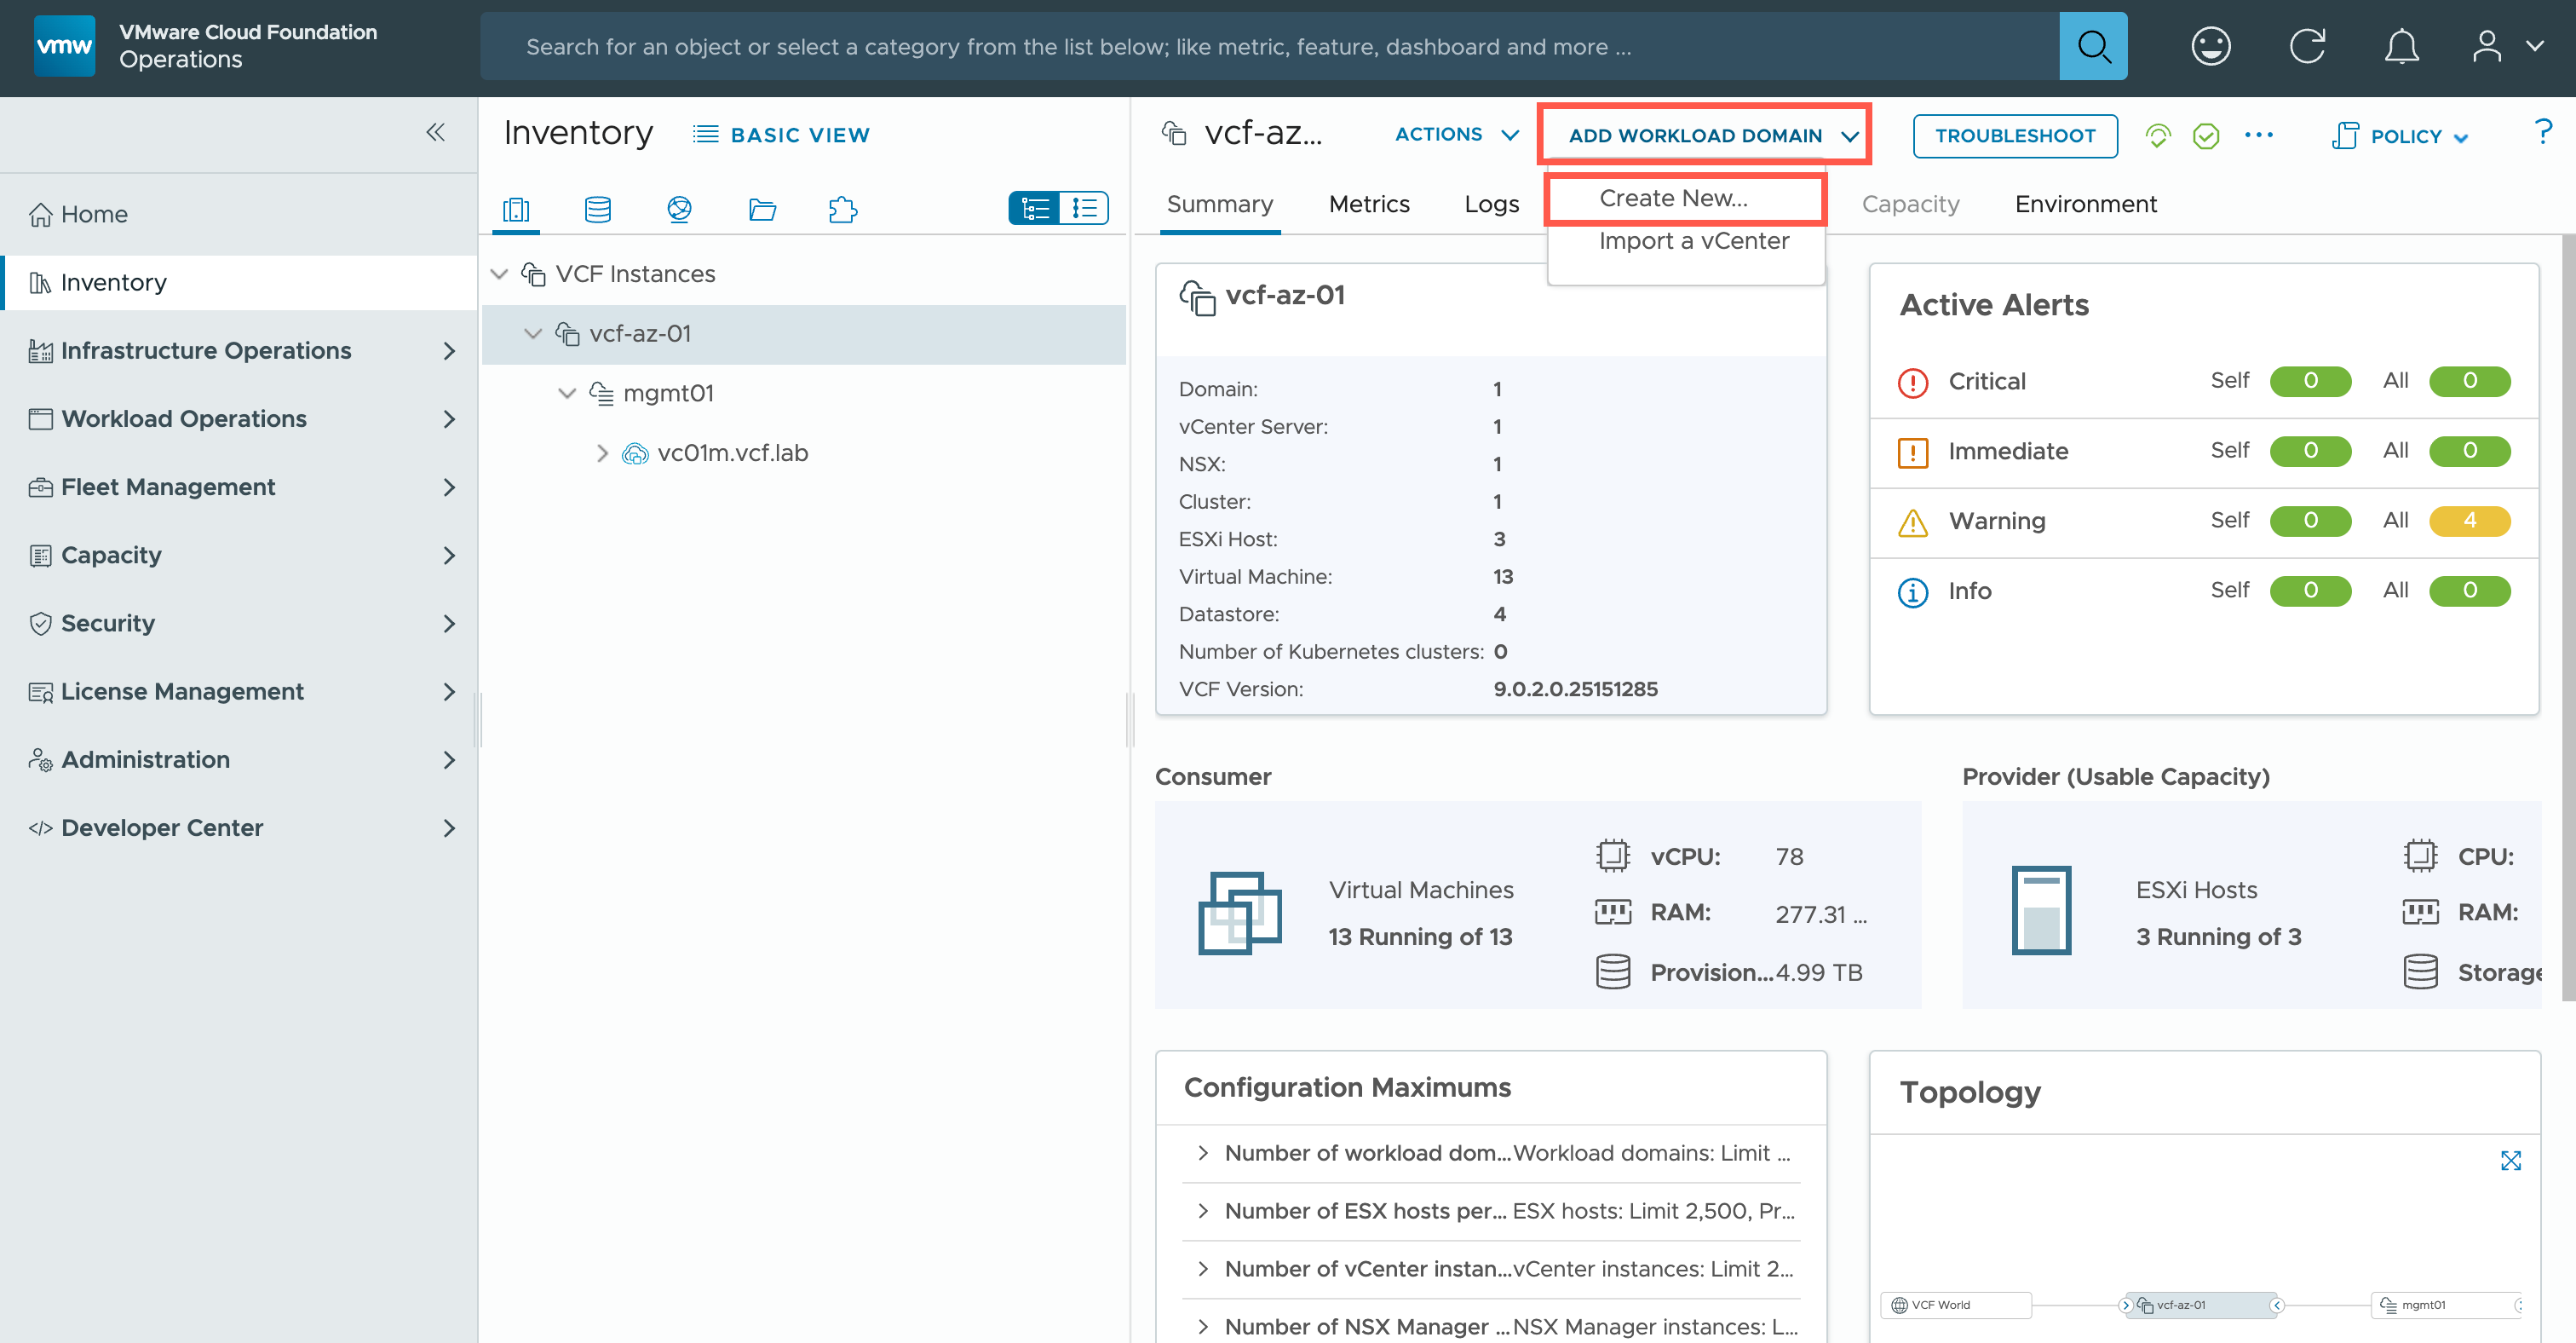
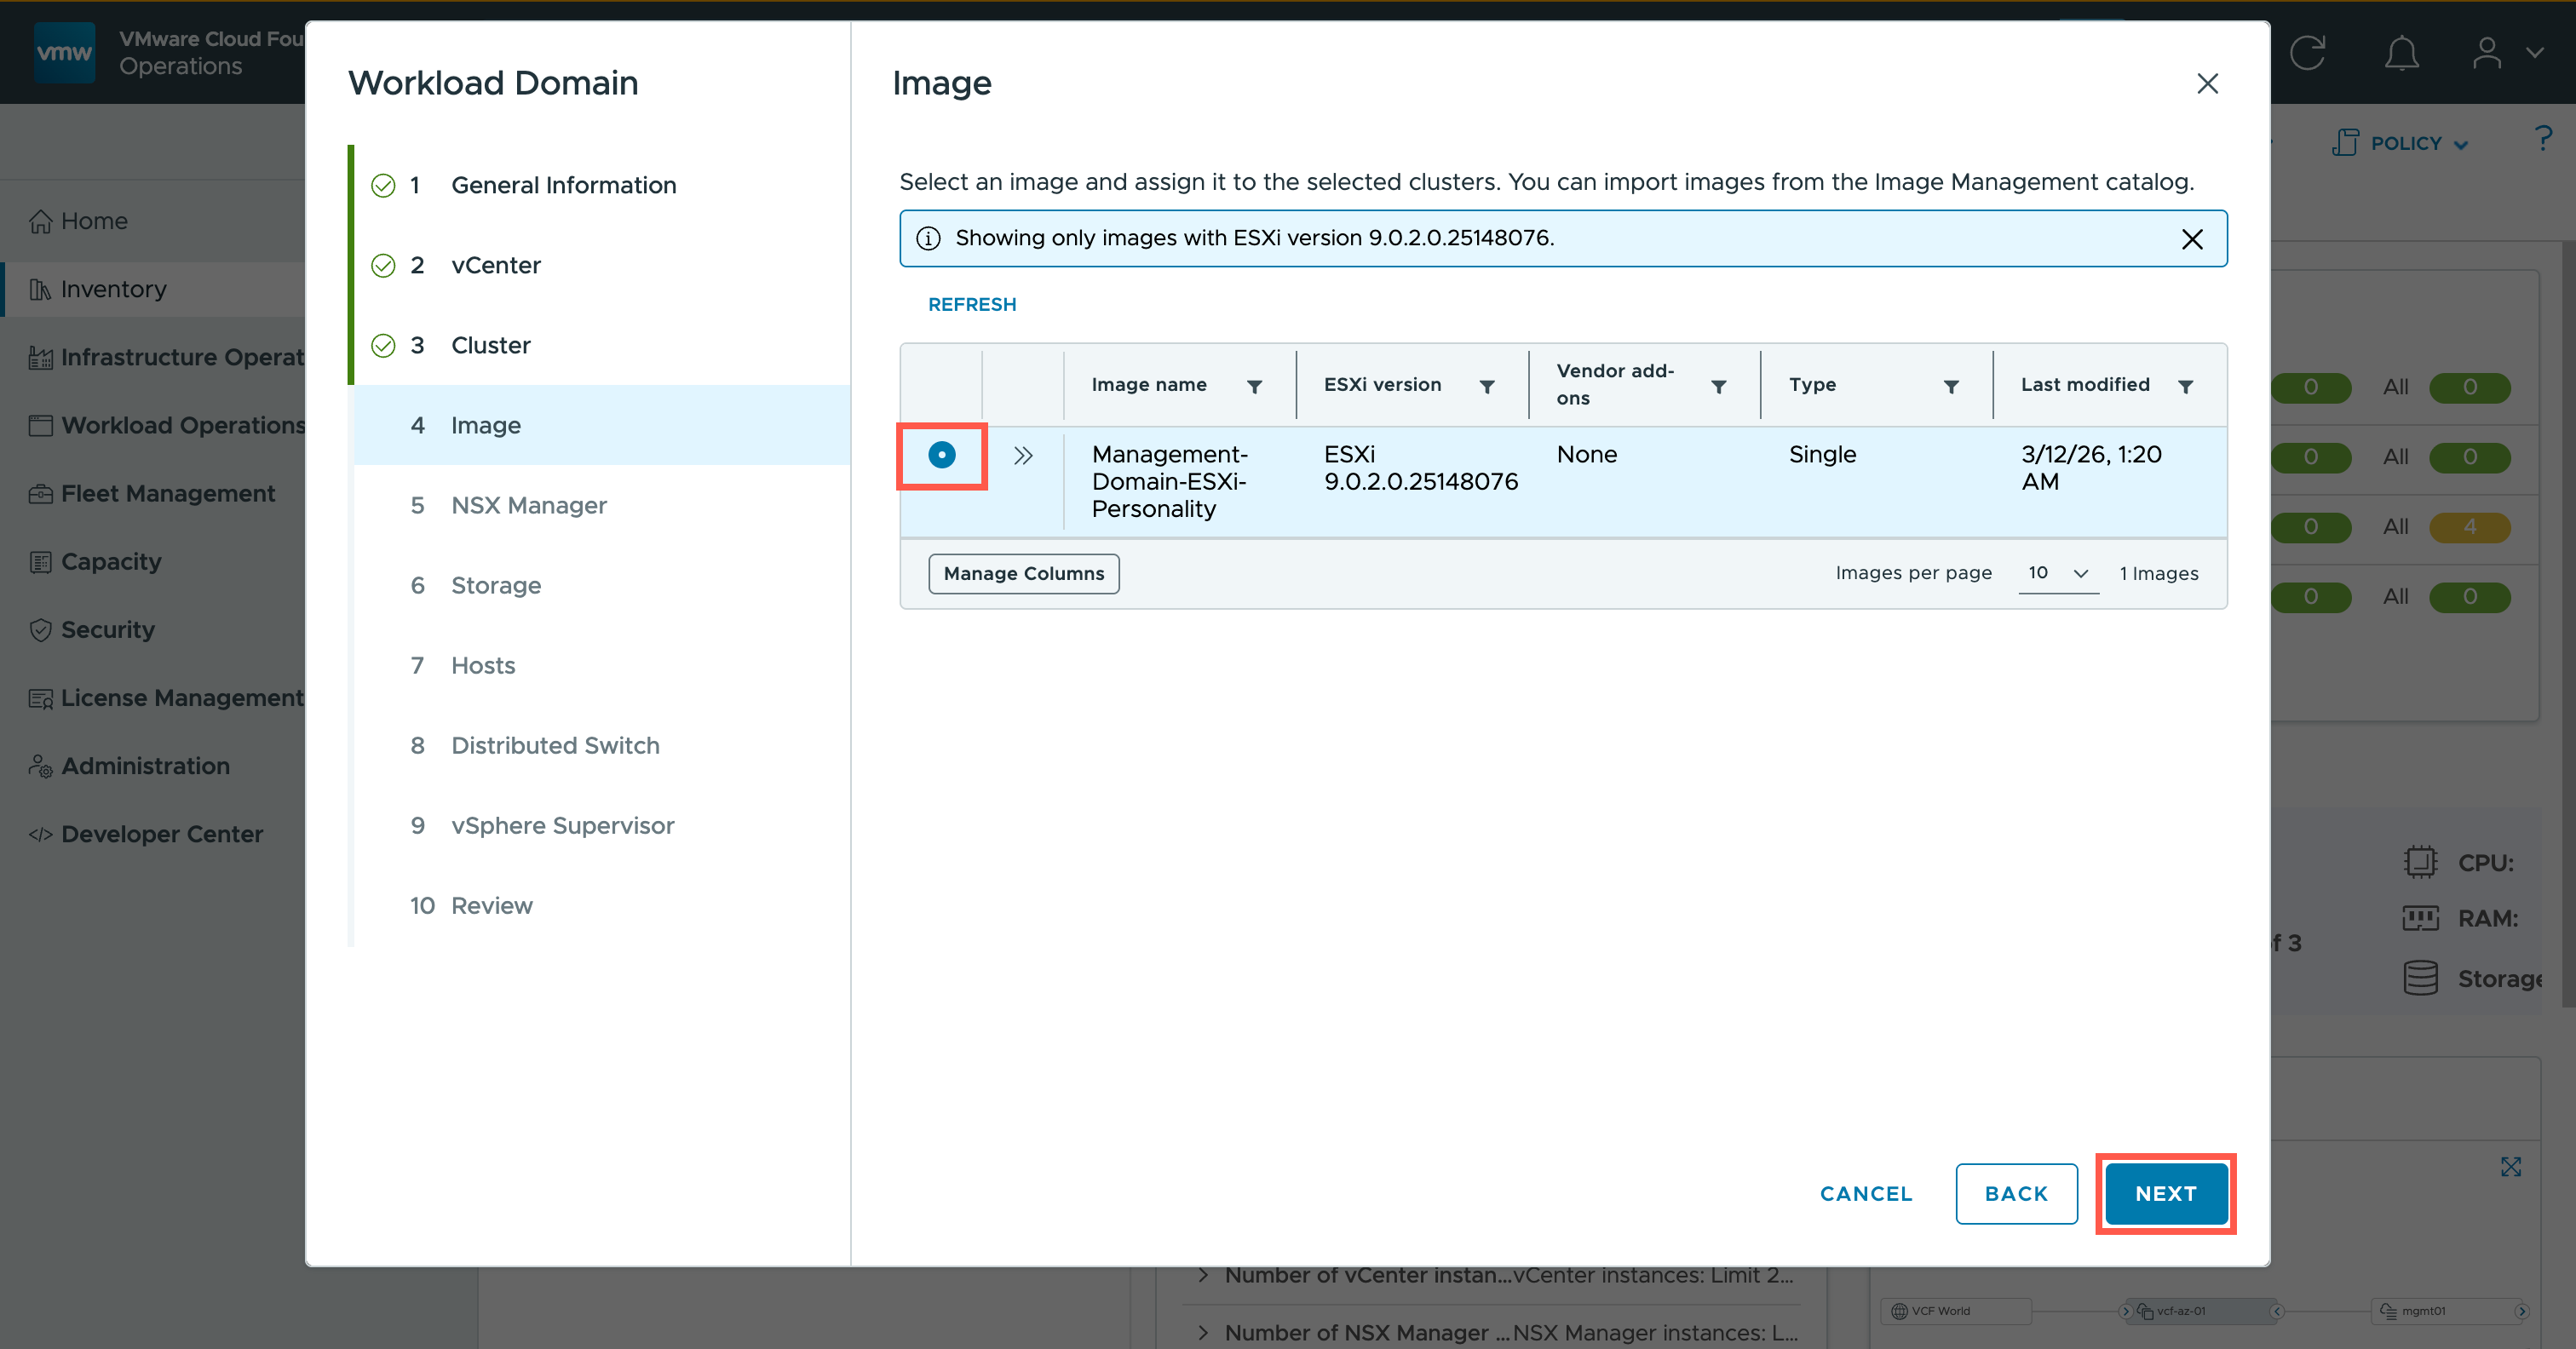
- At the Workload Domain Prerequisites dialog, click Select All and then click PROCEED.
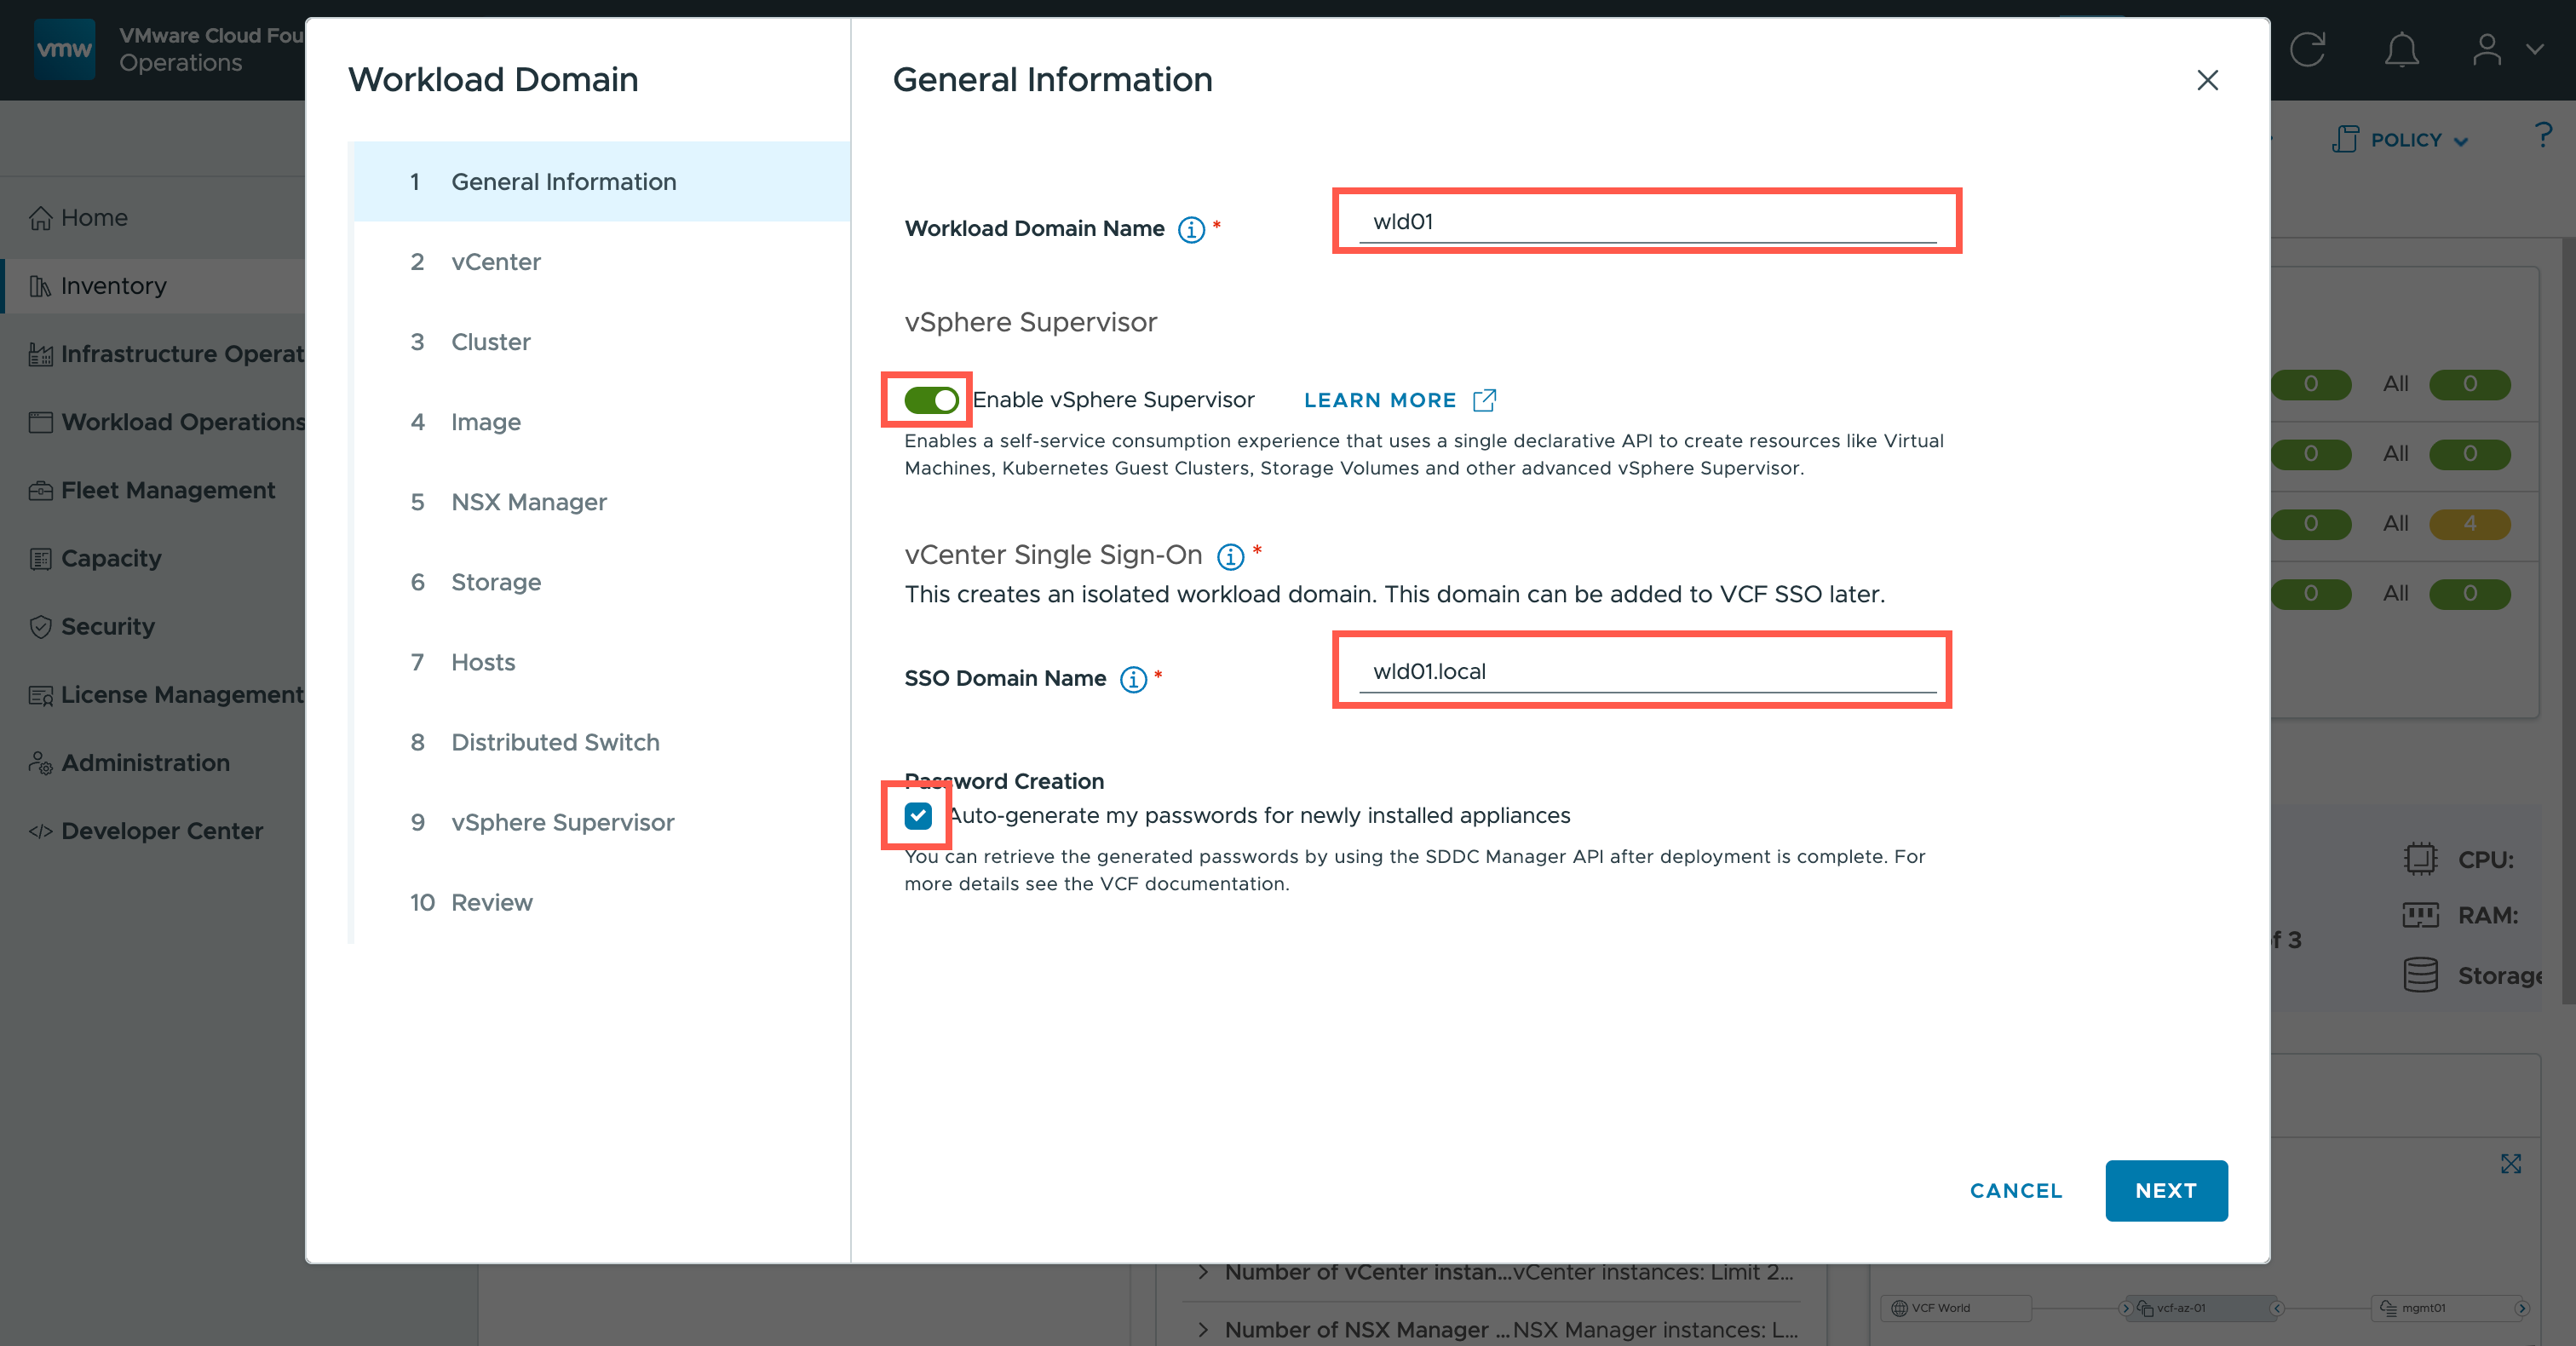
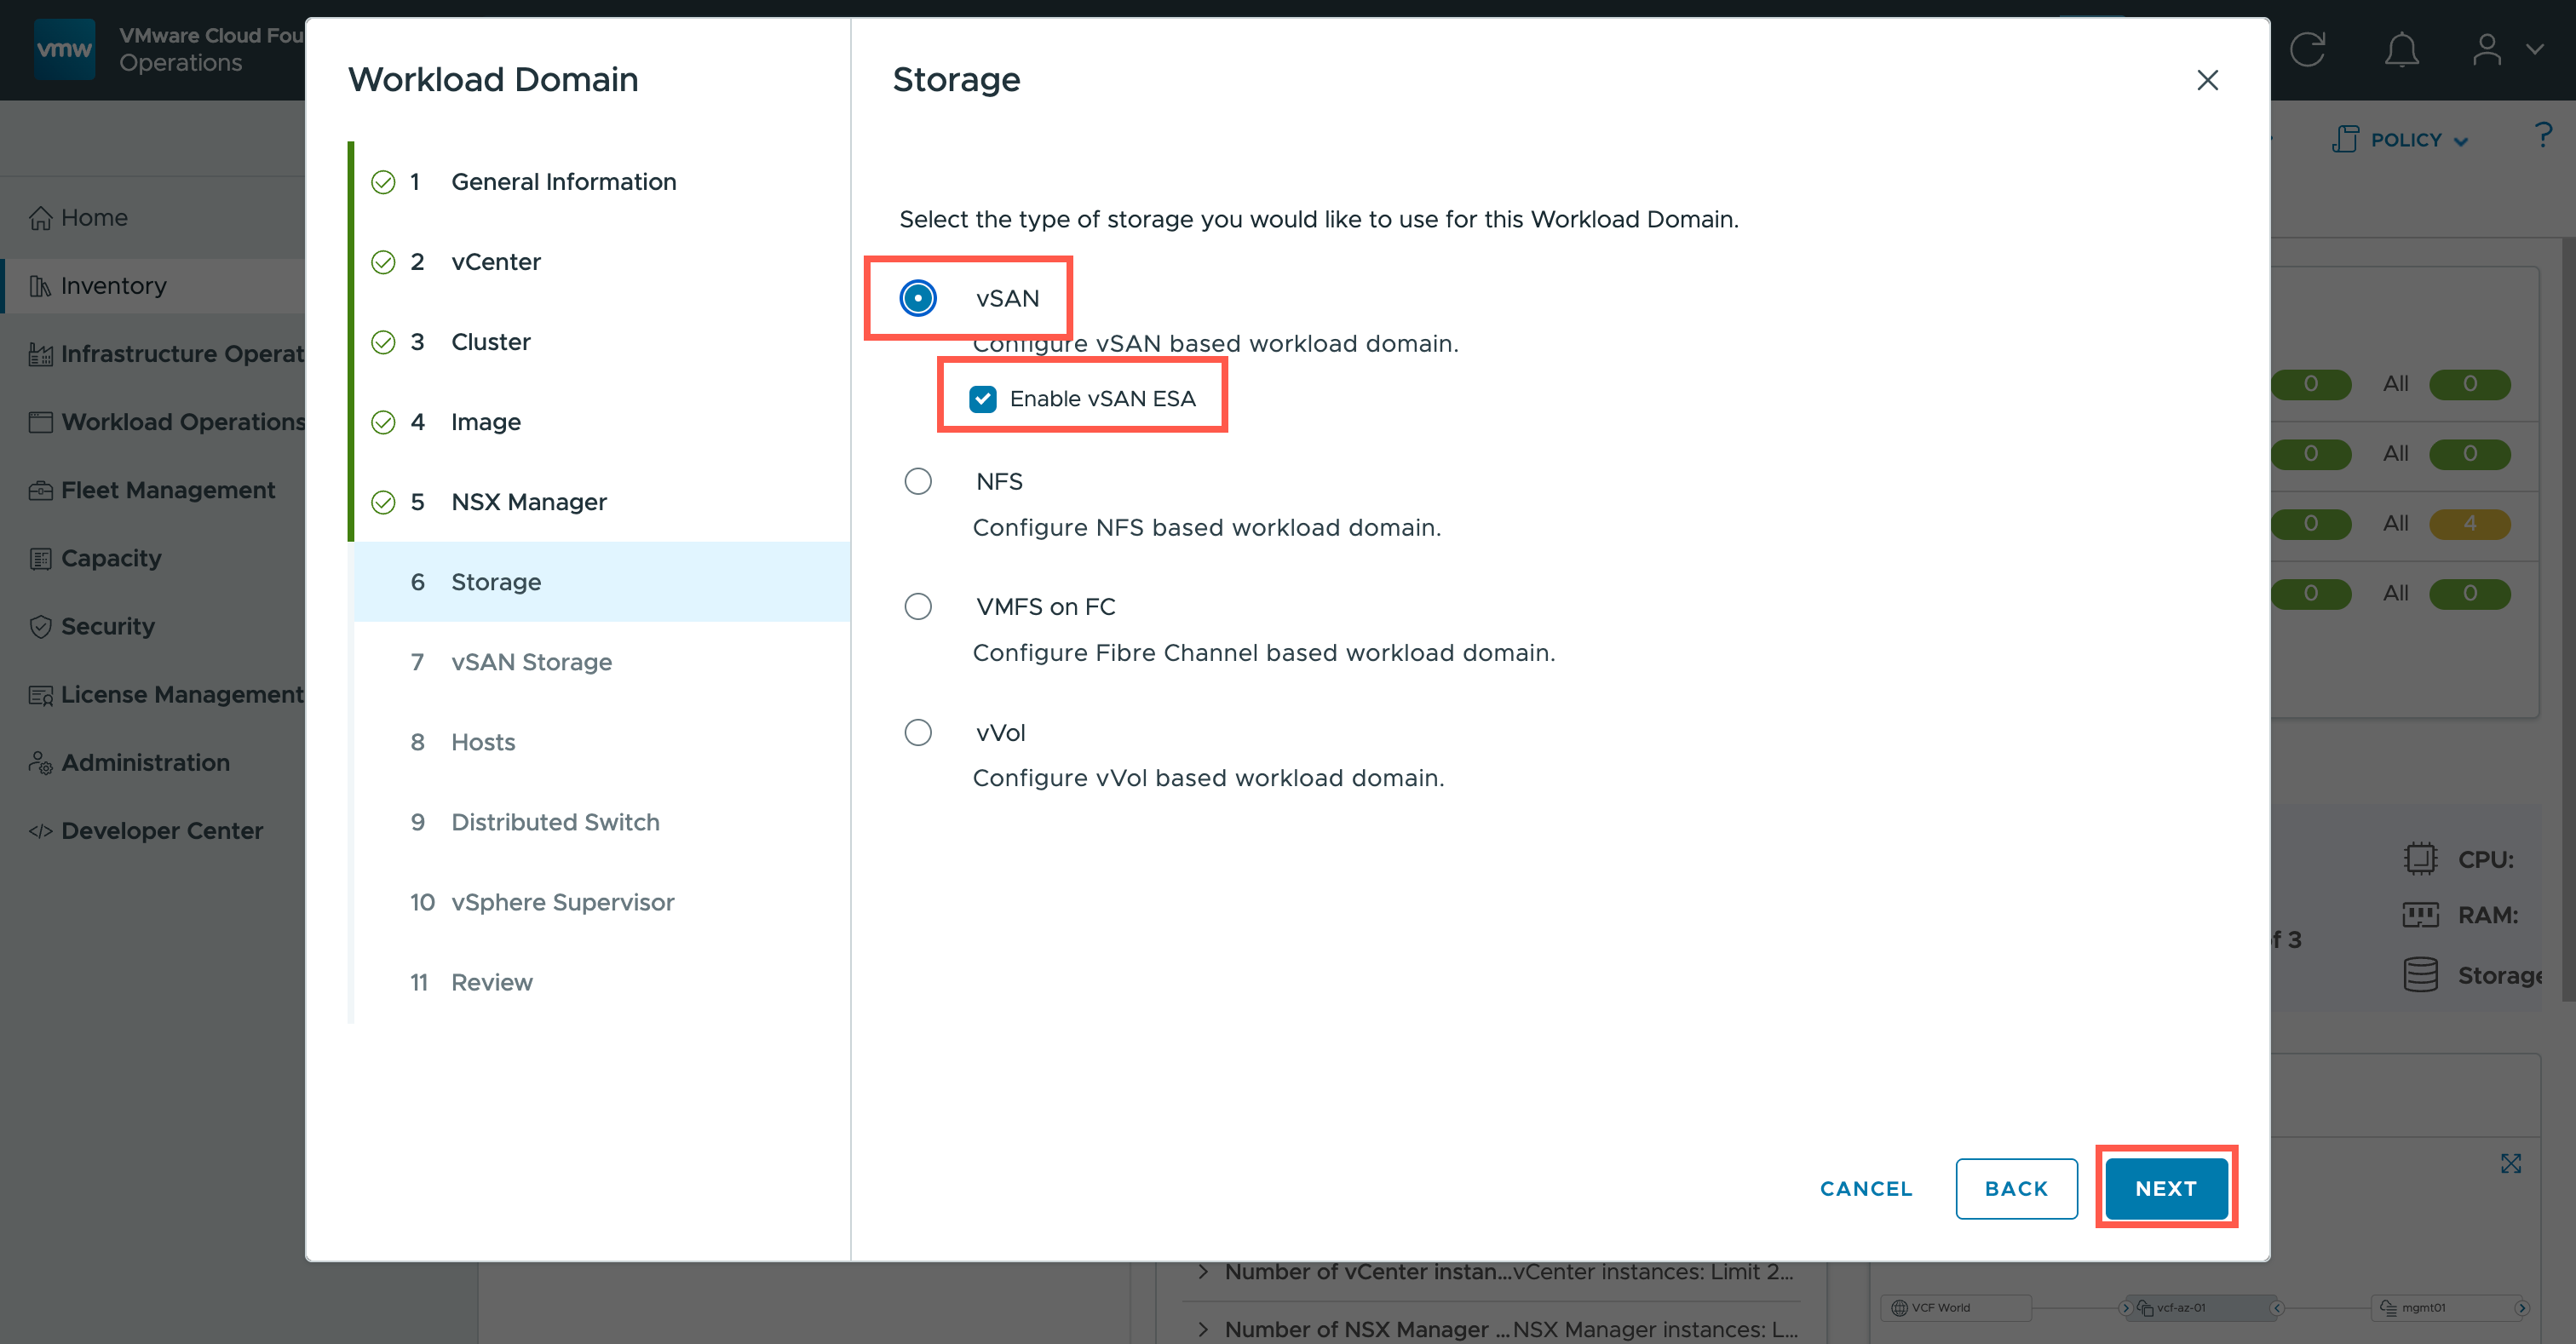
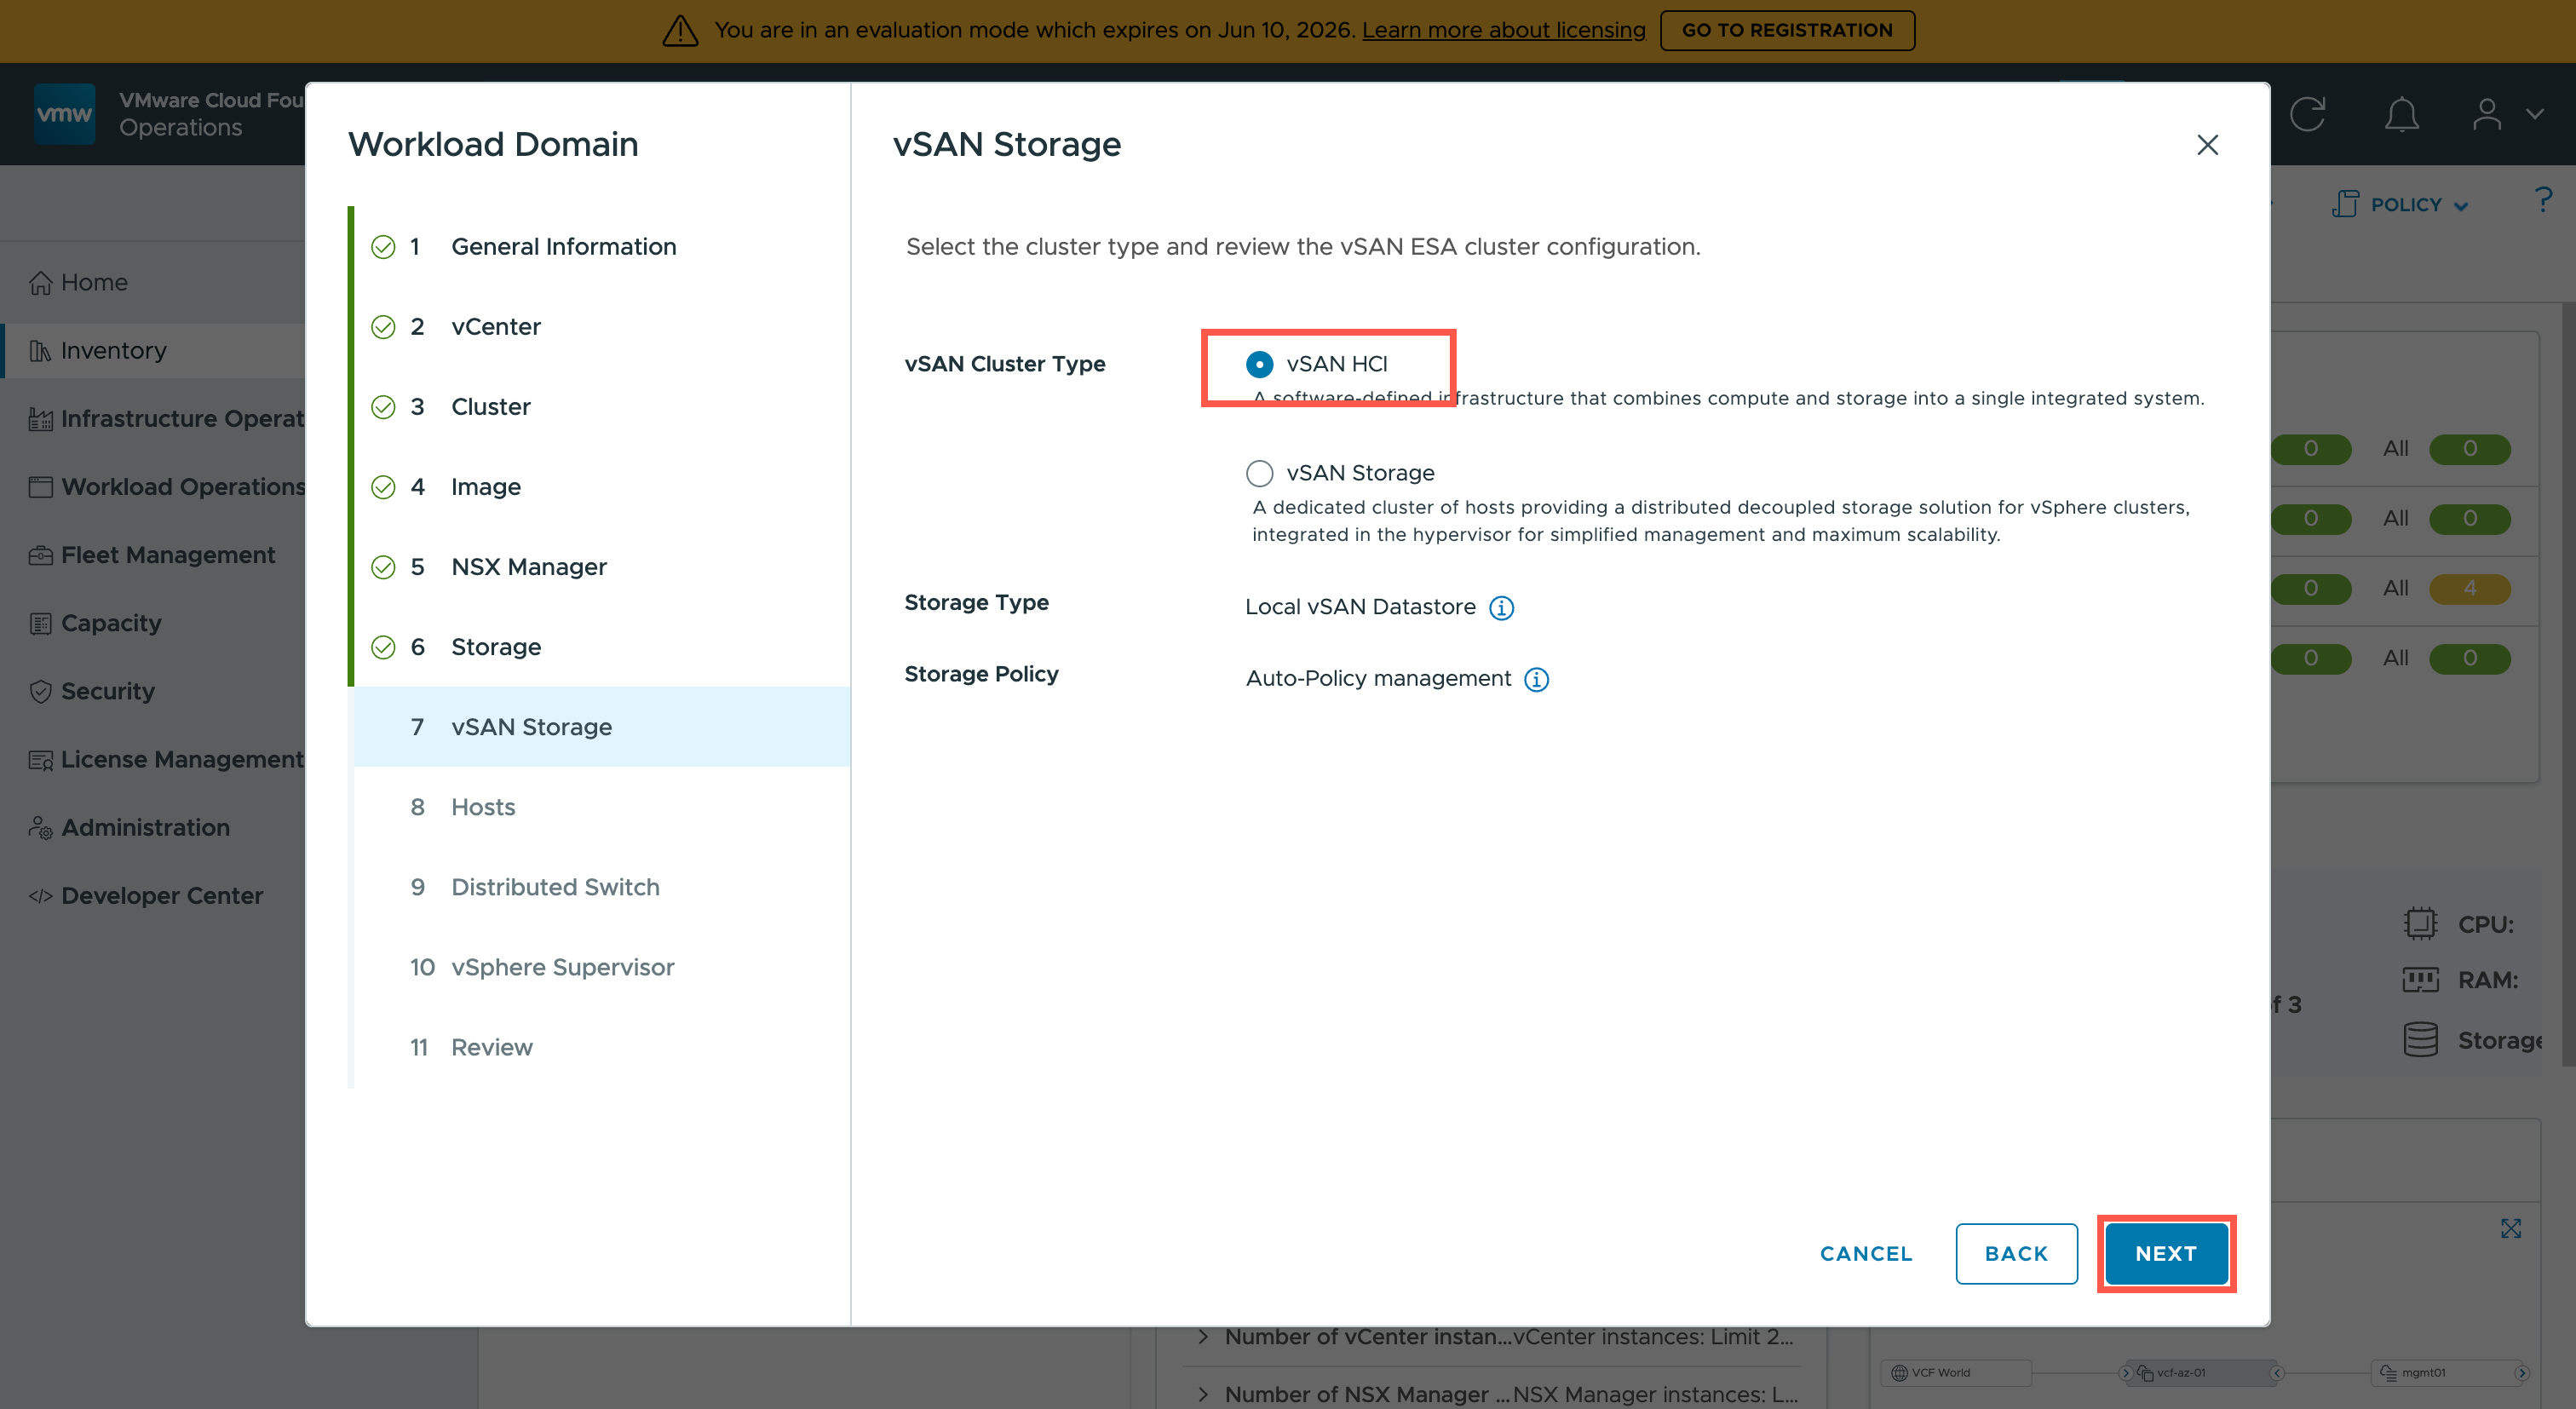
- At the Workload Domain wizard, under General Information, complete the following:
- At the Workload Domain Name field, type
wld01.- At the vSphere Supervisor section, change the Enabled vSphere Supervisor toggle to ON.
- At the SSO Domain Name field, type
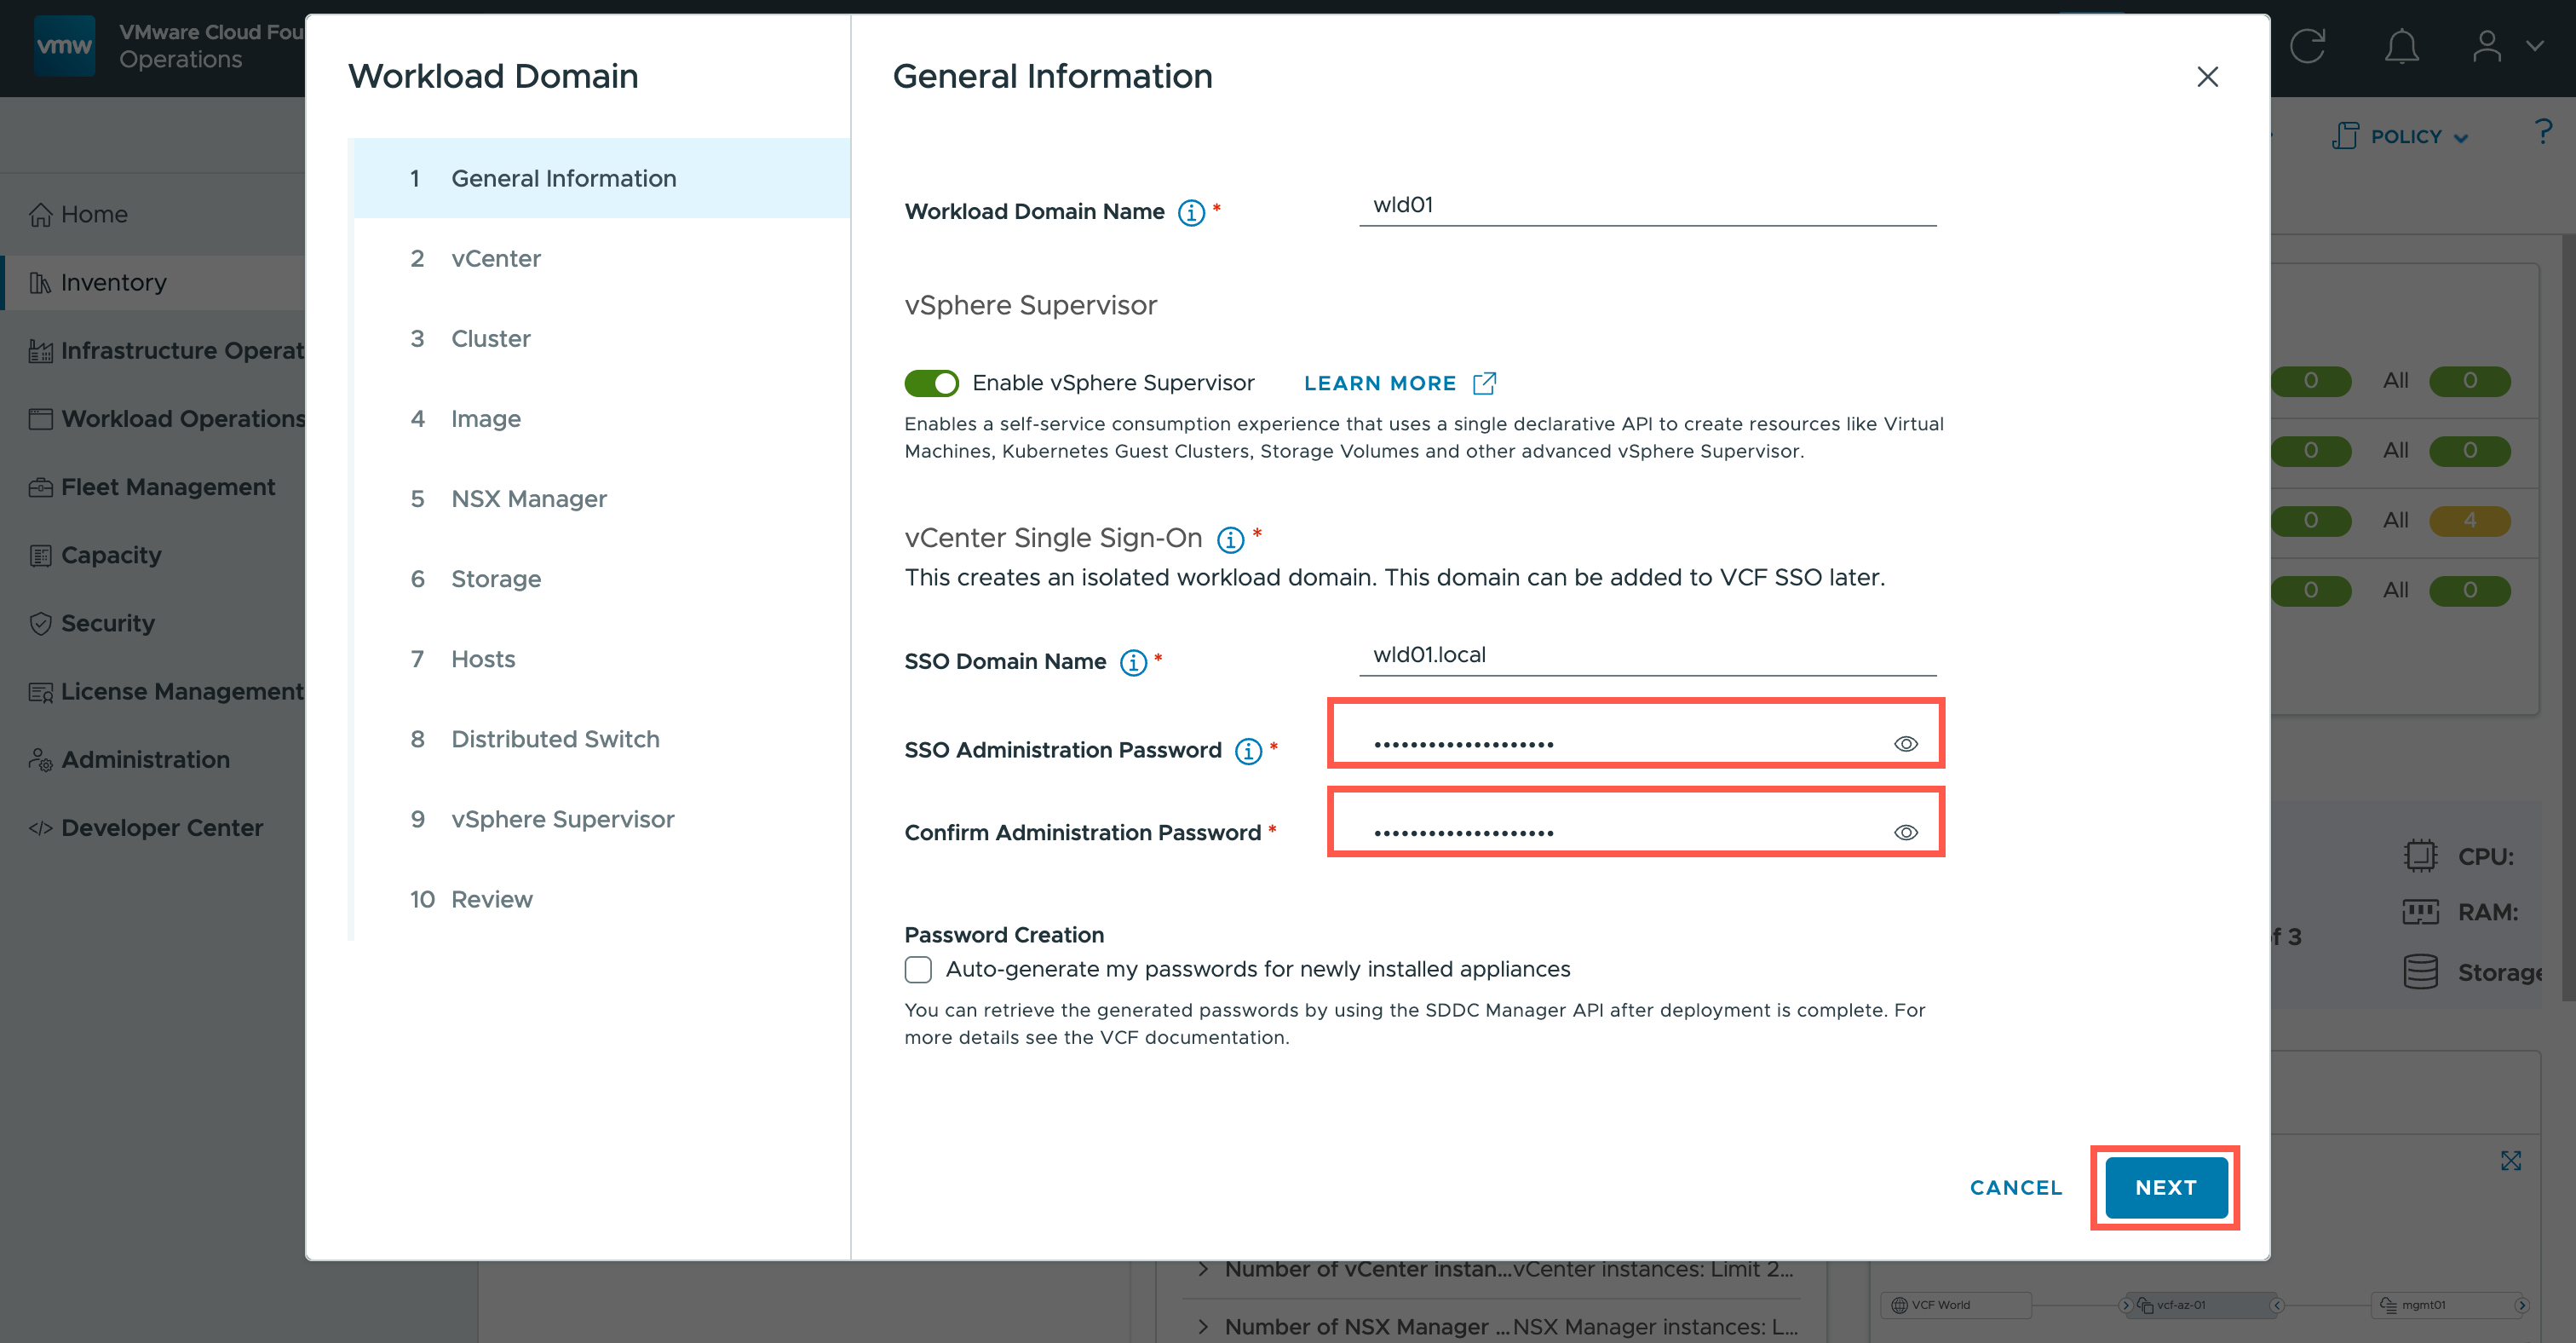
wld01.sso.- At the Password Creation section, uncheck the Auto-generate my passwords for newly installed appliances checkbox.
- At the SSO Administration Password field, type
<super-strong-password>.- At the Confirm Administration Password field, type
<super-strong-password>.- Click NEXT.
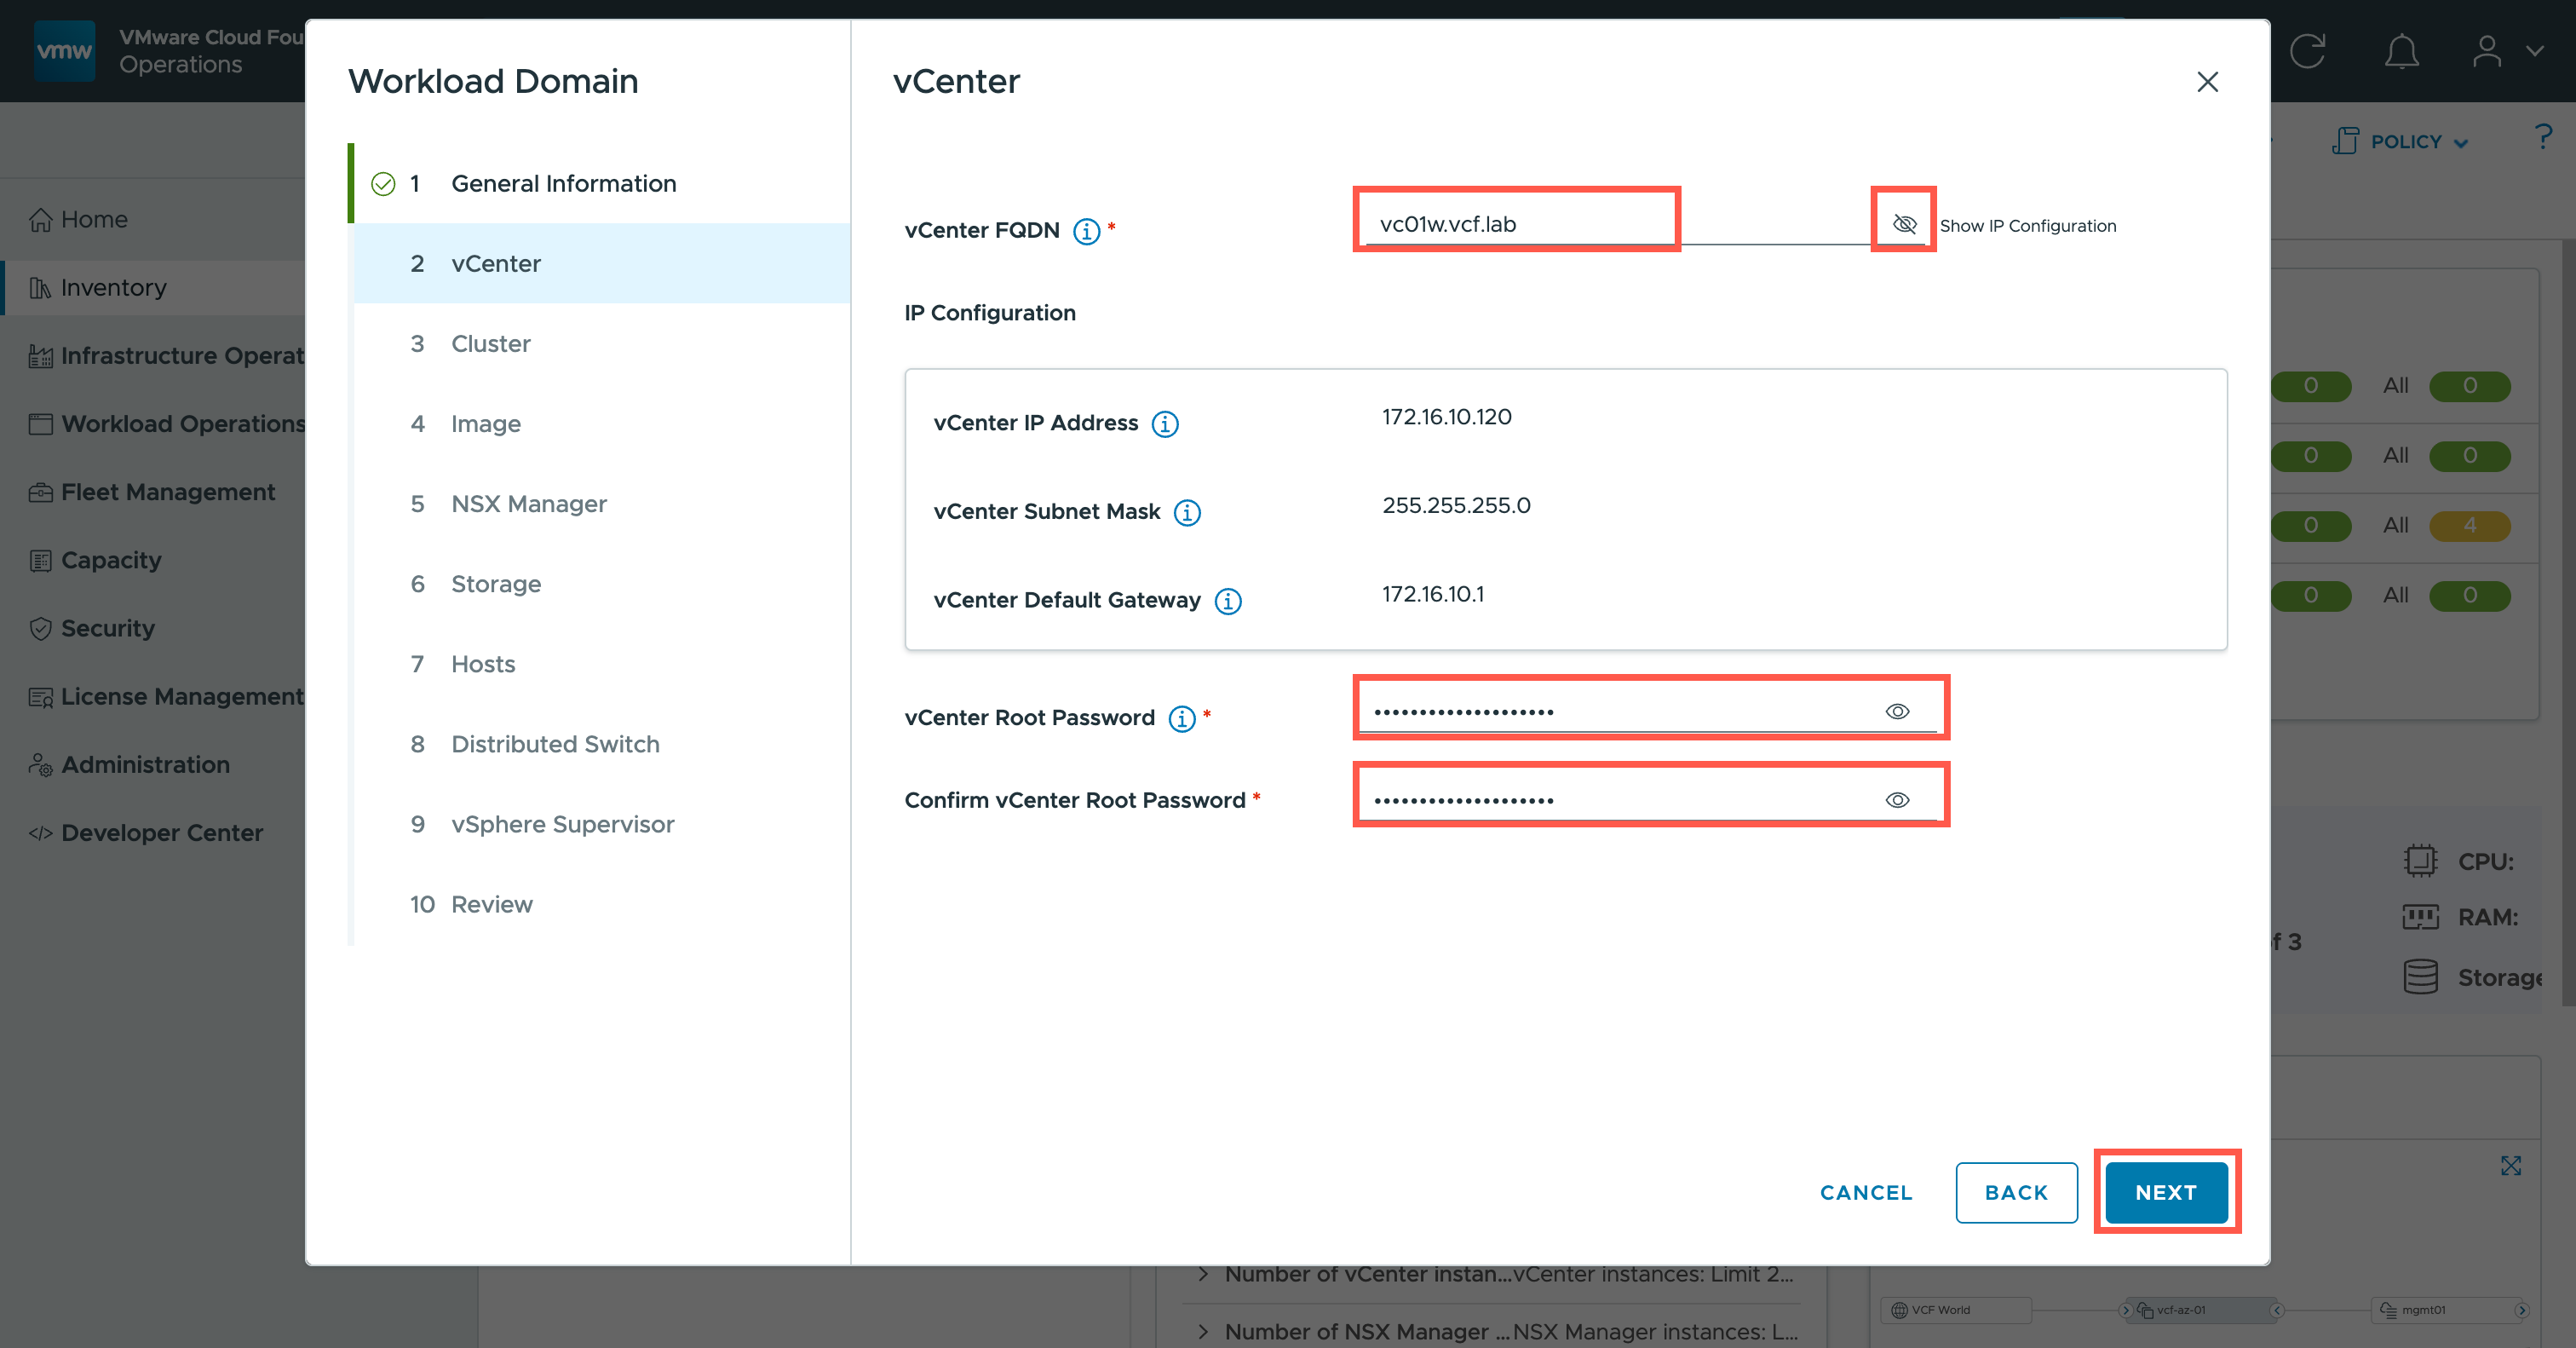
- At the vCenter FQDN field, type
<wld-vc.fqdn>.- Click the eye to Show the IP Configuration of the vCenter FQDN to make sure name resolution is working.
- At the vCenter Root Password field, type
<super-strong-password>.- At the Confirm vCenter Root Password field, type
<super-strong-password>.- Click NEXT.
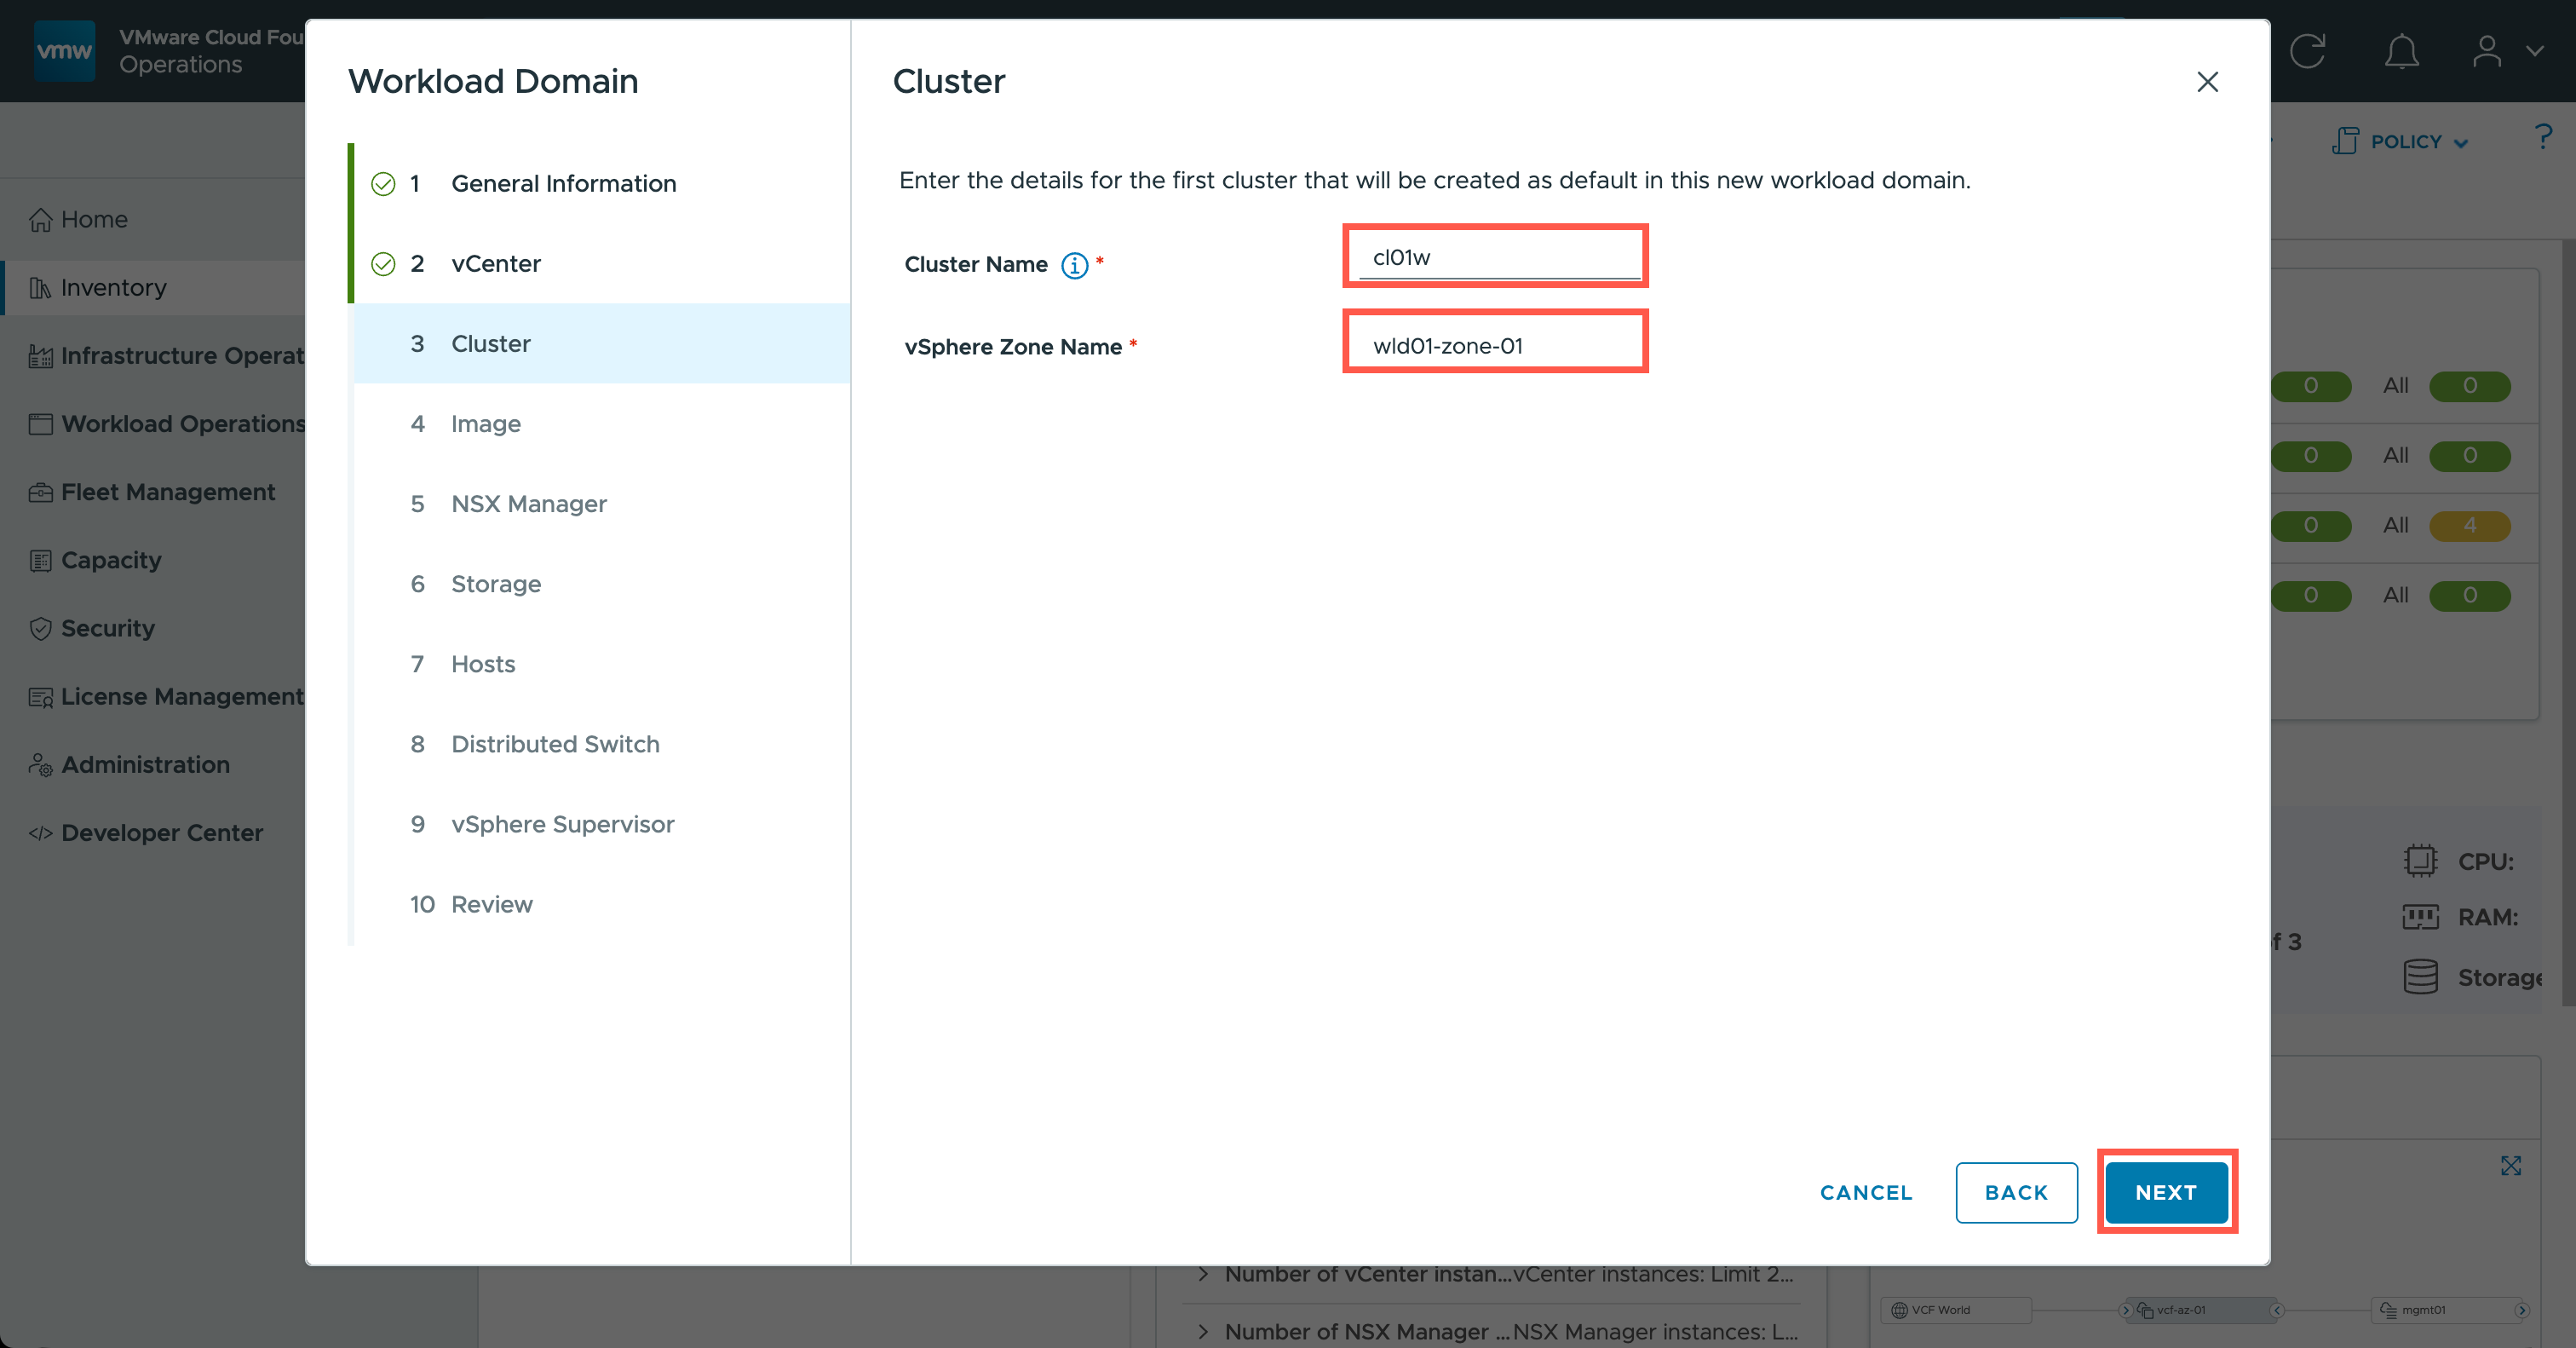
- At the Cluster Name field, type
<cluster name>.- At the vSphere Zone Name field, type
<zone name>.- Click NEXT.
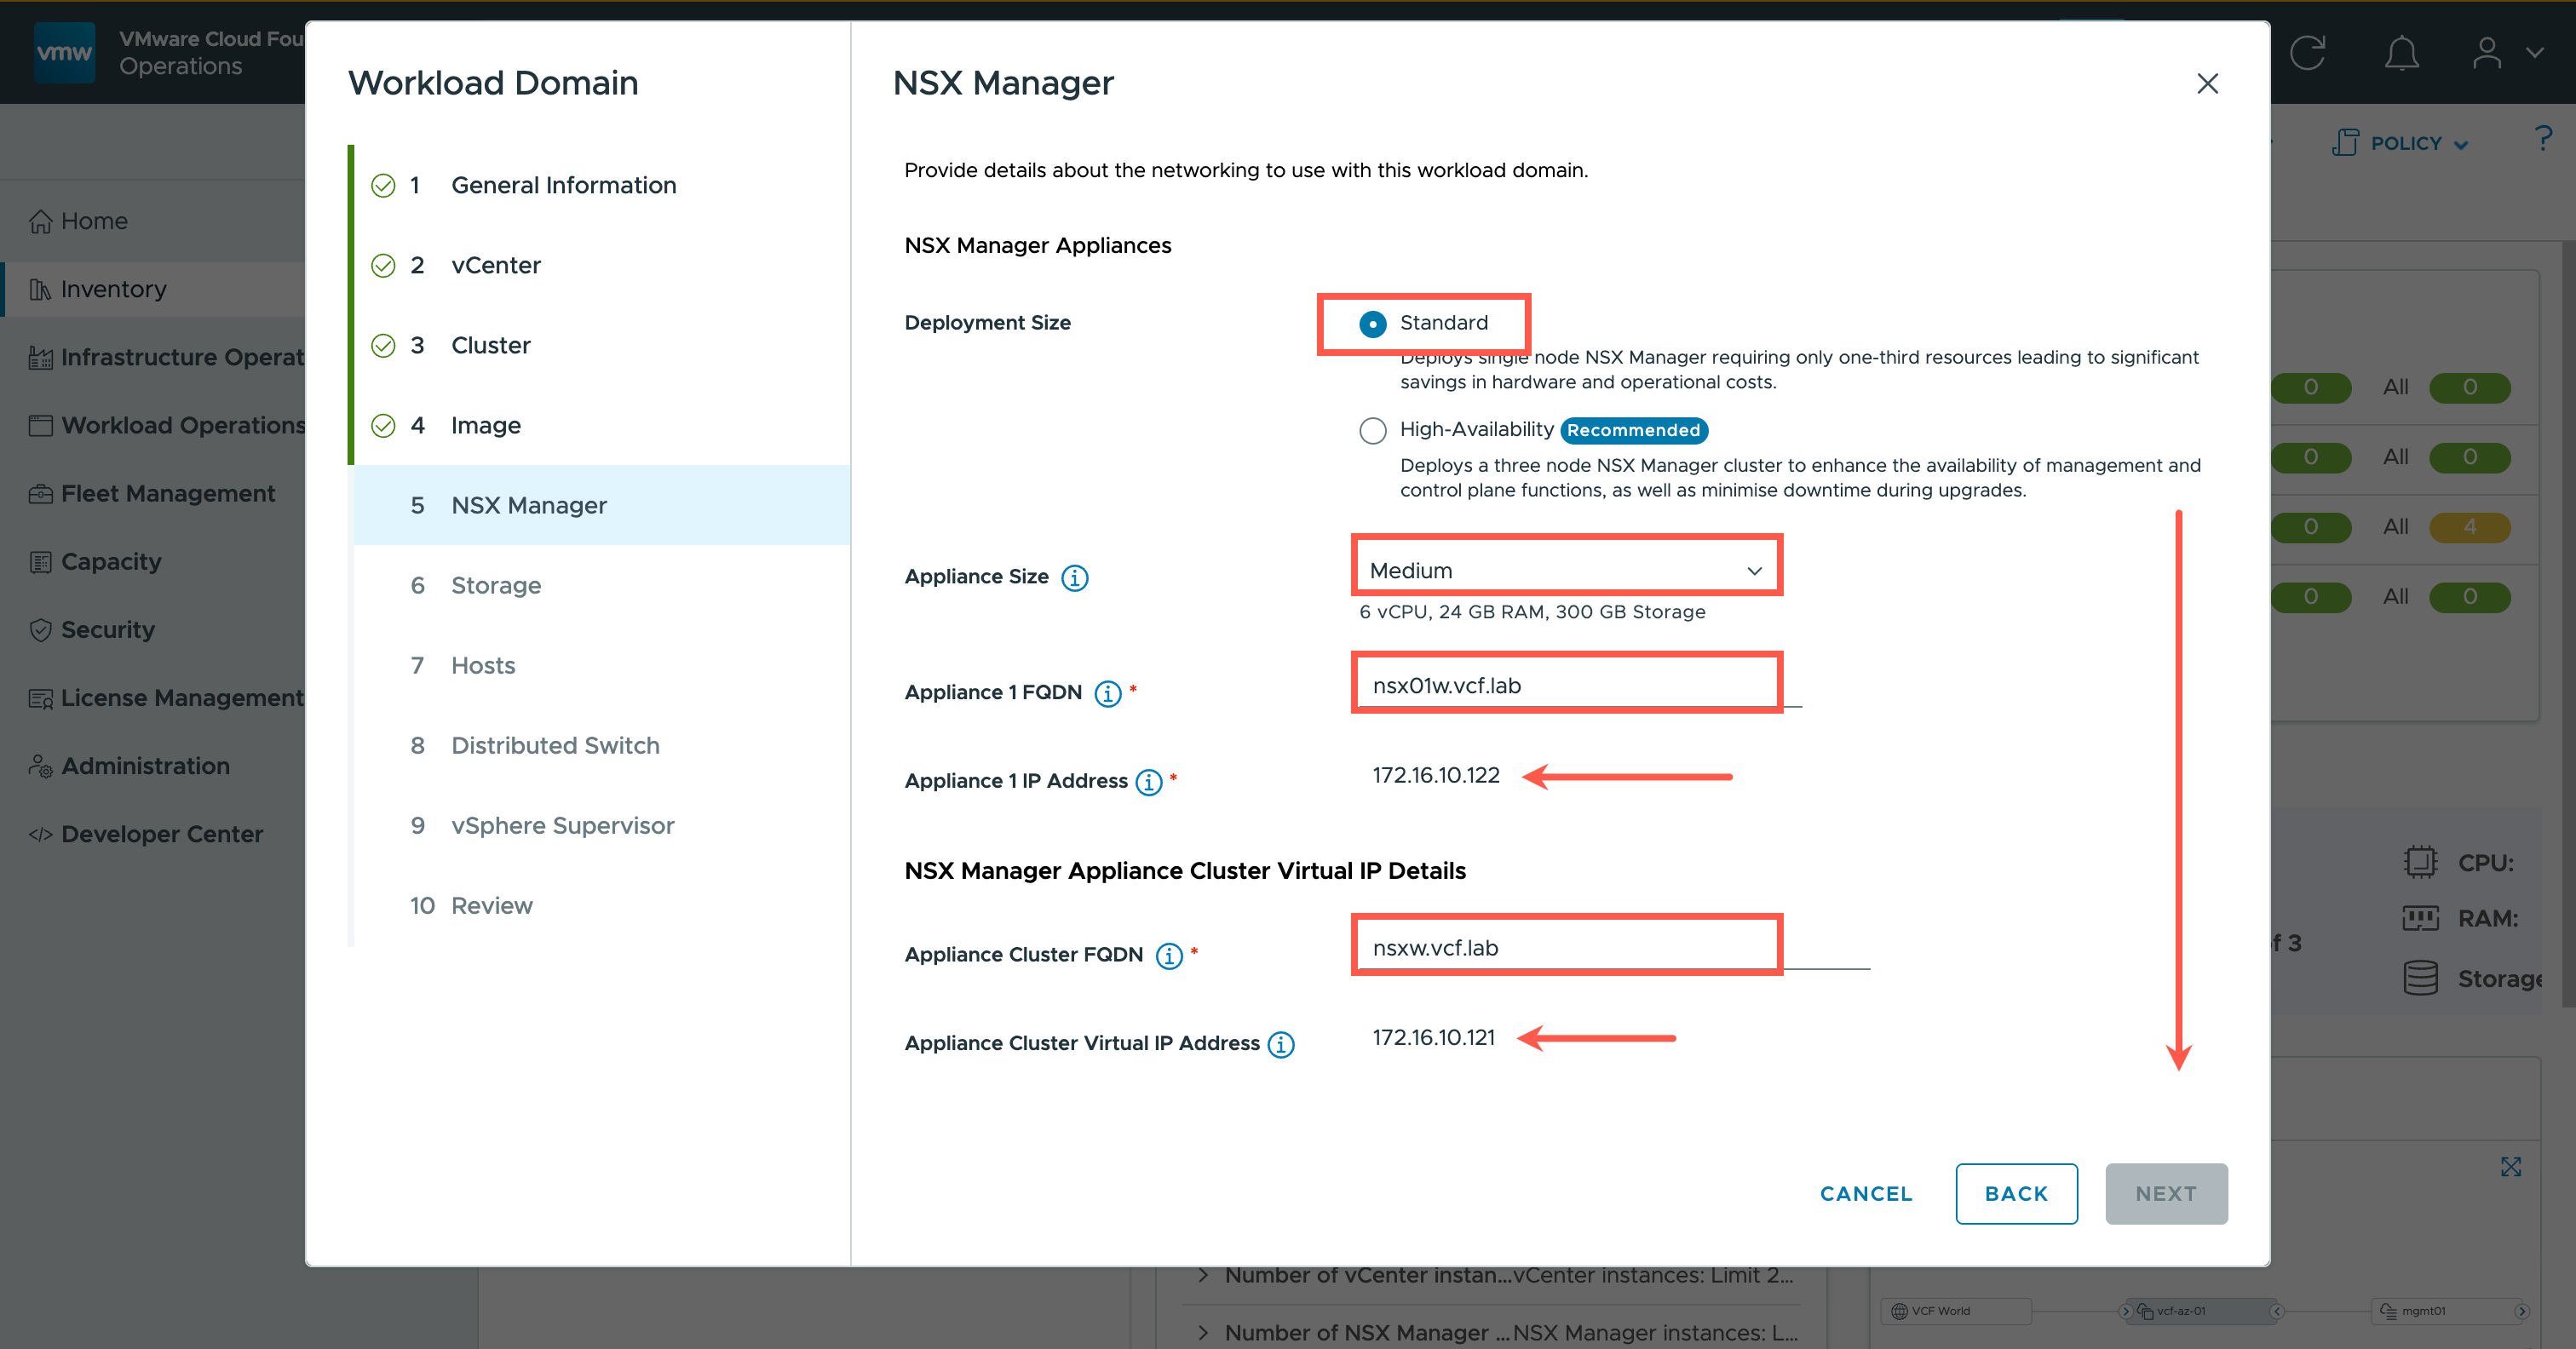
- At the Deployment Size dropdown, select Standard.
- At the Appliance Size dropdown, select medium from the list of available options.
- At the Appliance 1 FQDN field, type
<wld-nsx.fqdn>>.- The Appliance 1 Address field should automatically populate as it is a read-only field.
- At the Appliance Cluster FQDN field, type
<wld-nsx-cluster.fqdn>>.- Scroll down.
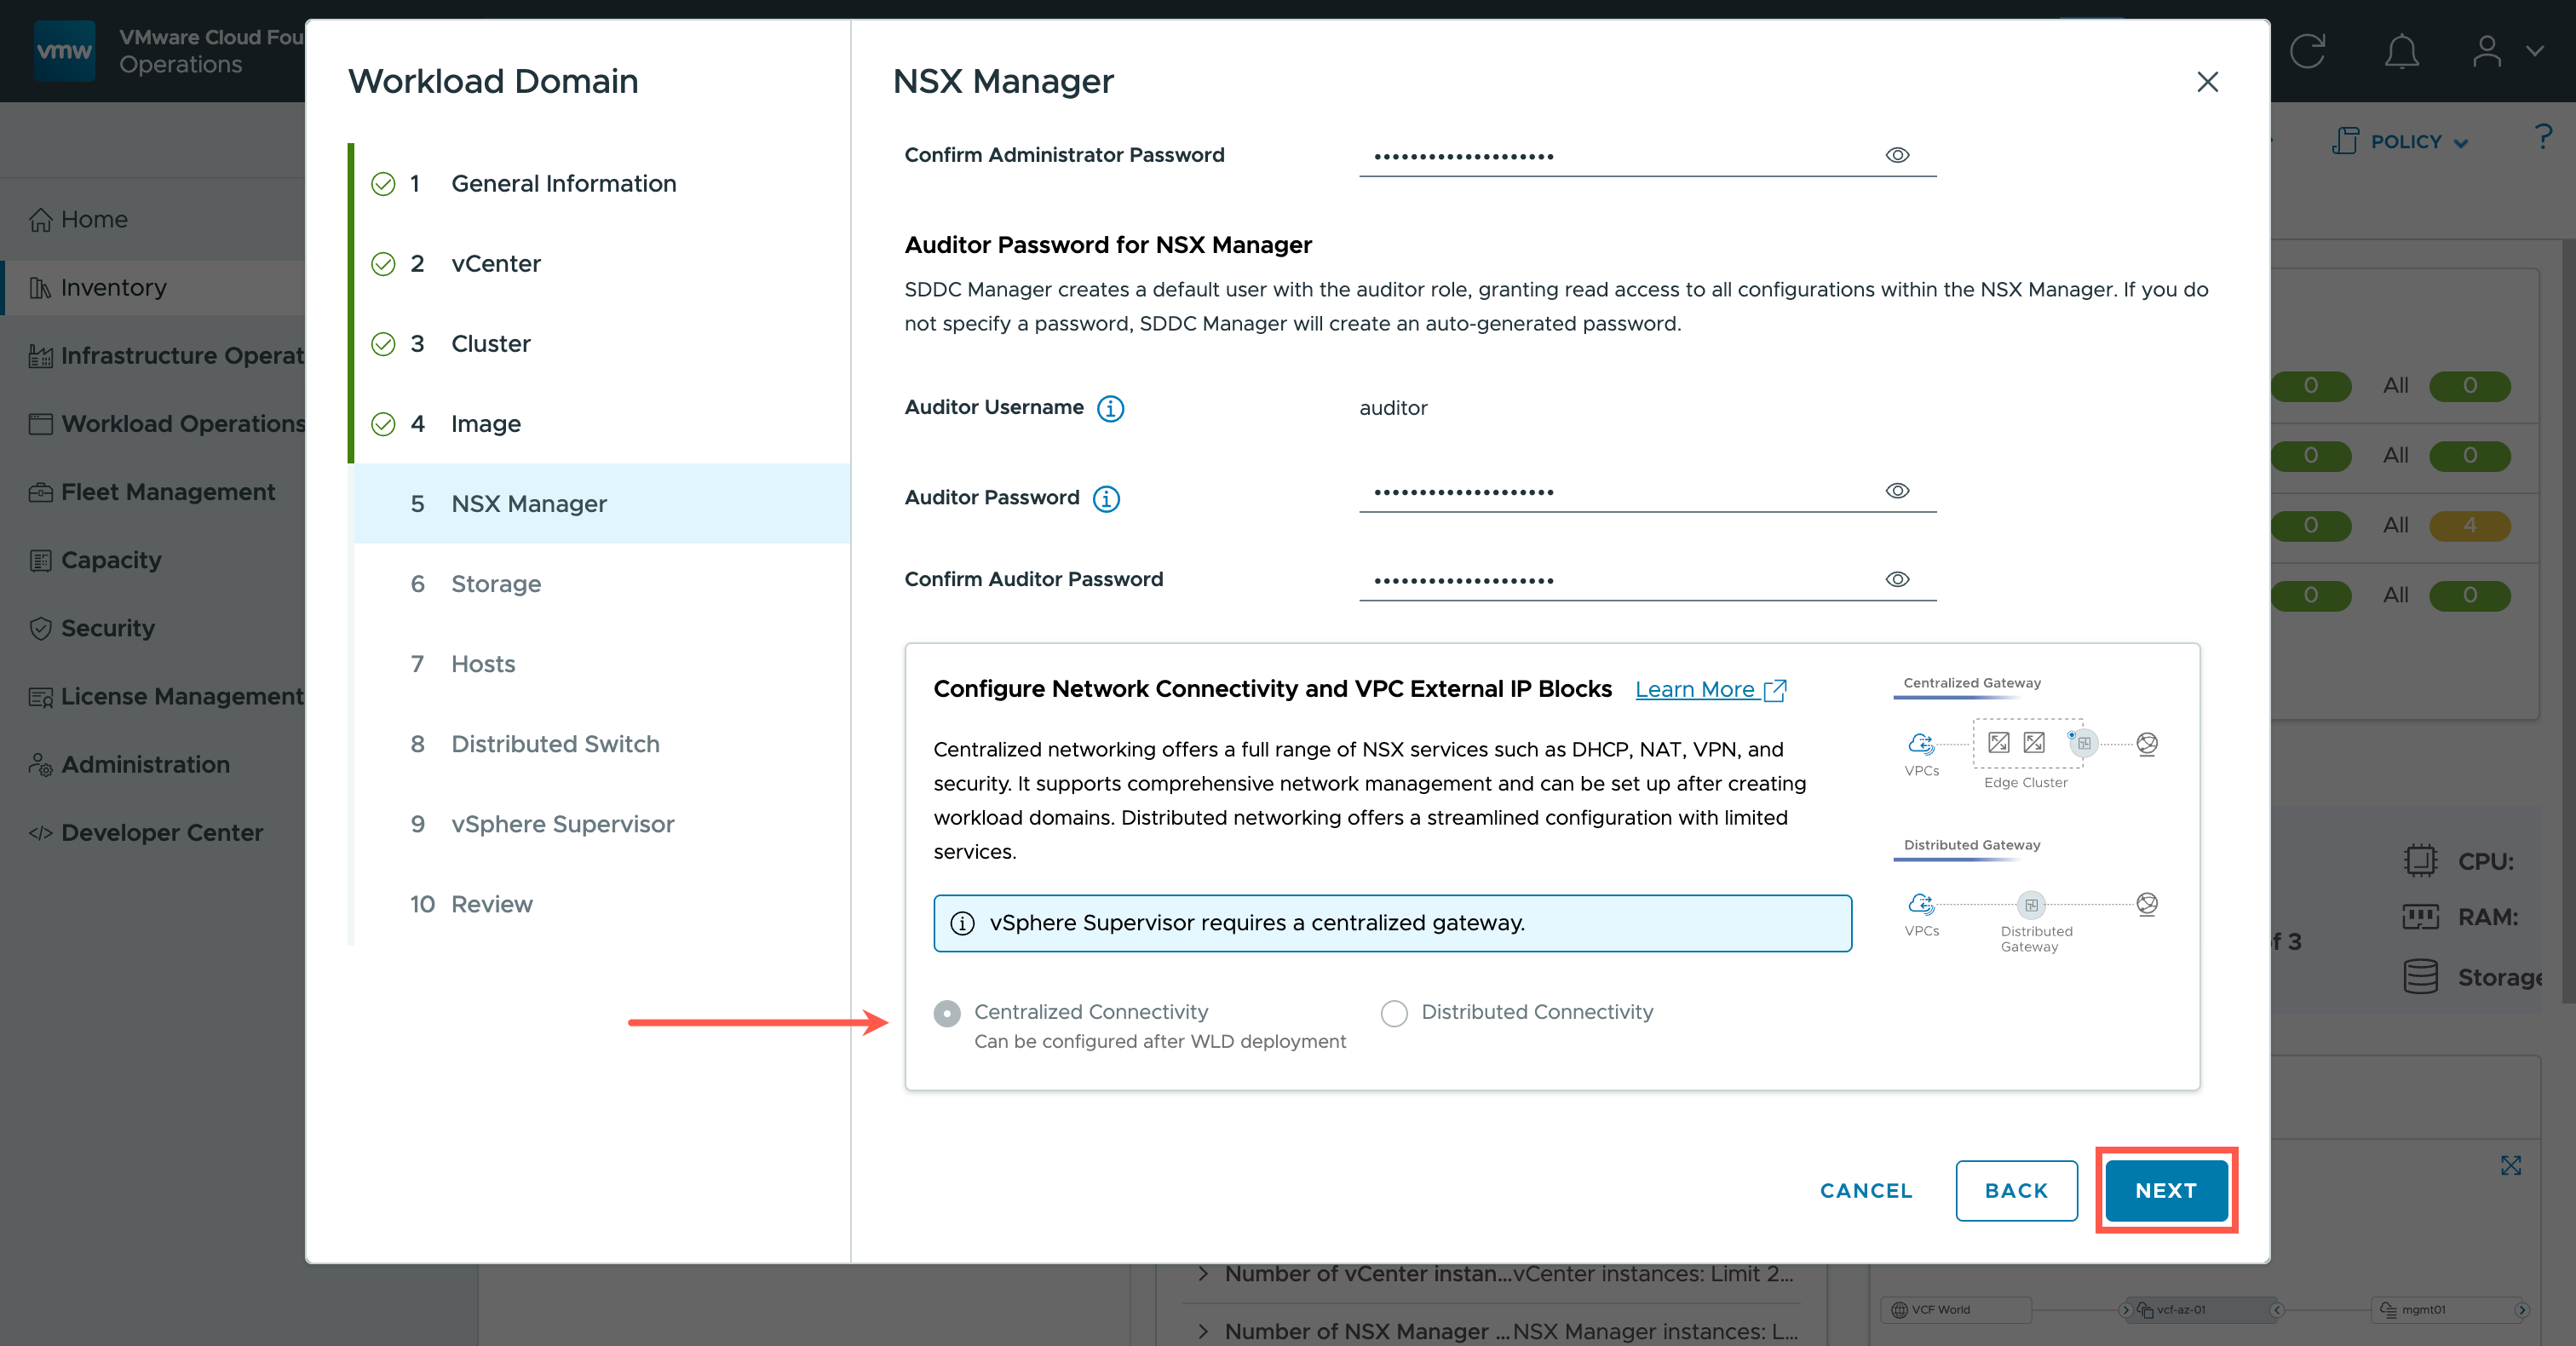
- At the Administrator Password field, type
<super-strong-password>.- At the Confirm Administrator Password field, type
<super-strong-password>.- At the Auditor Password field, type
<super-strong-password>.- At the Confirm Auditor Password field, type
<super-strong-password>.- Scroll down.
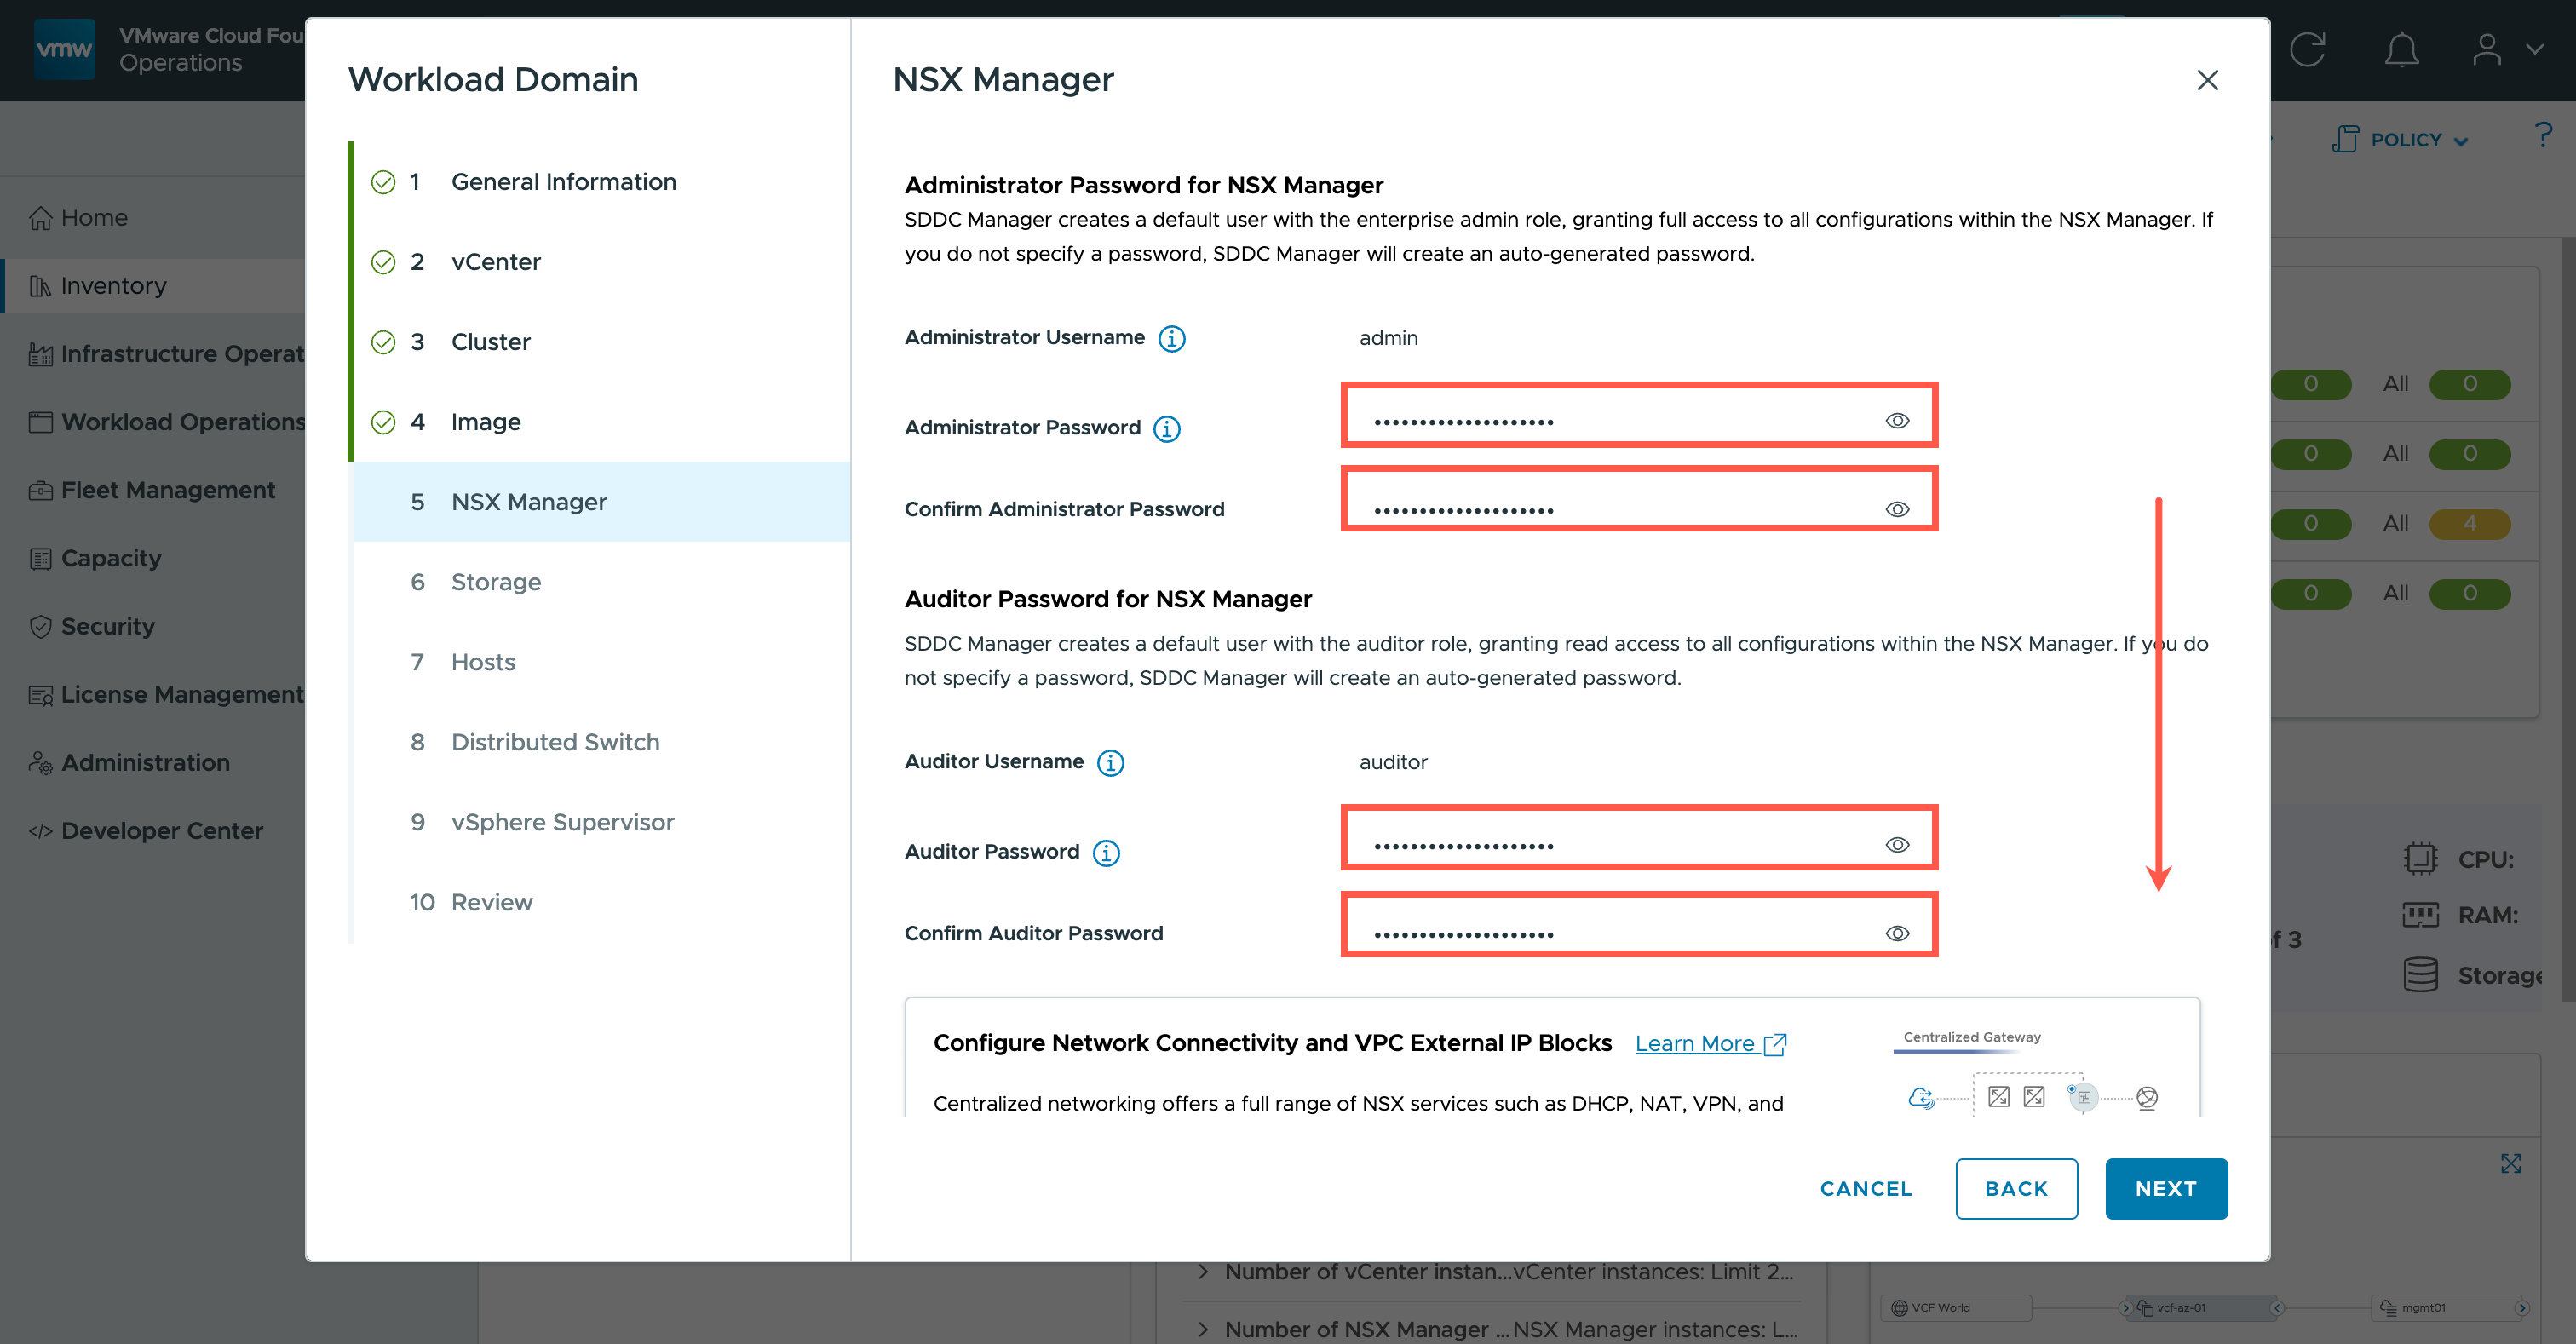
- Observe Centralized Gateway option is selected by default and the Distributed Gateway option is disabled.
- Click NEXT.
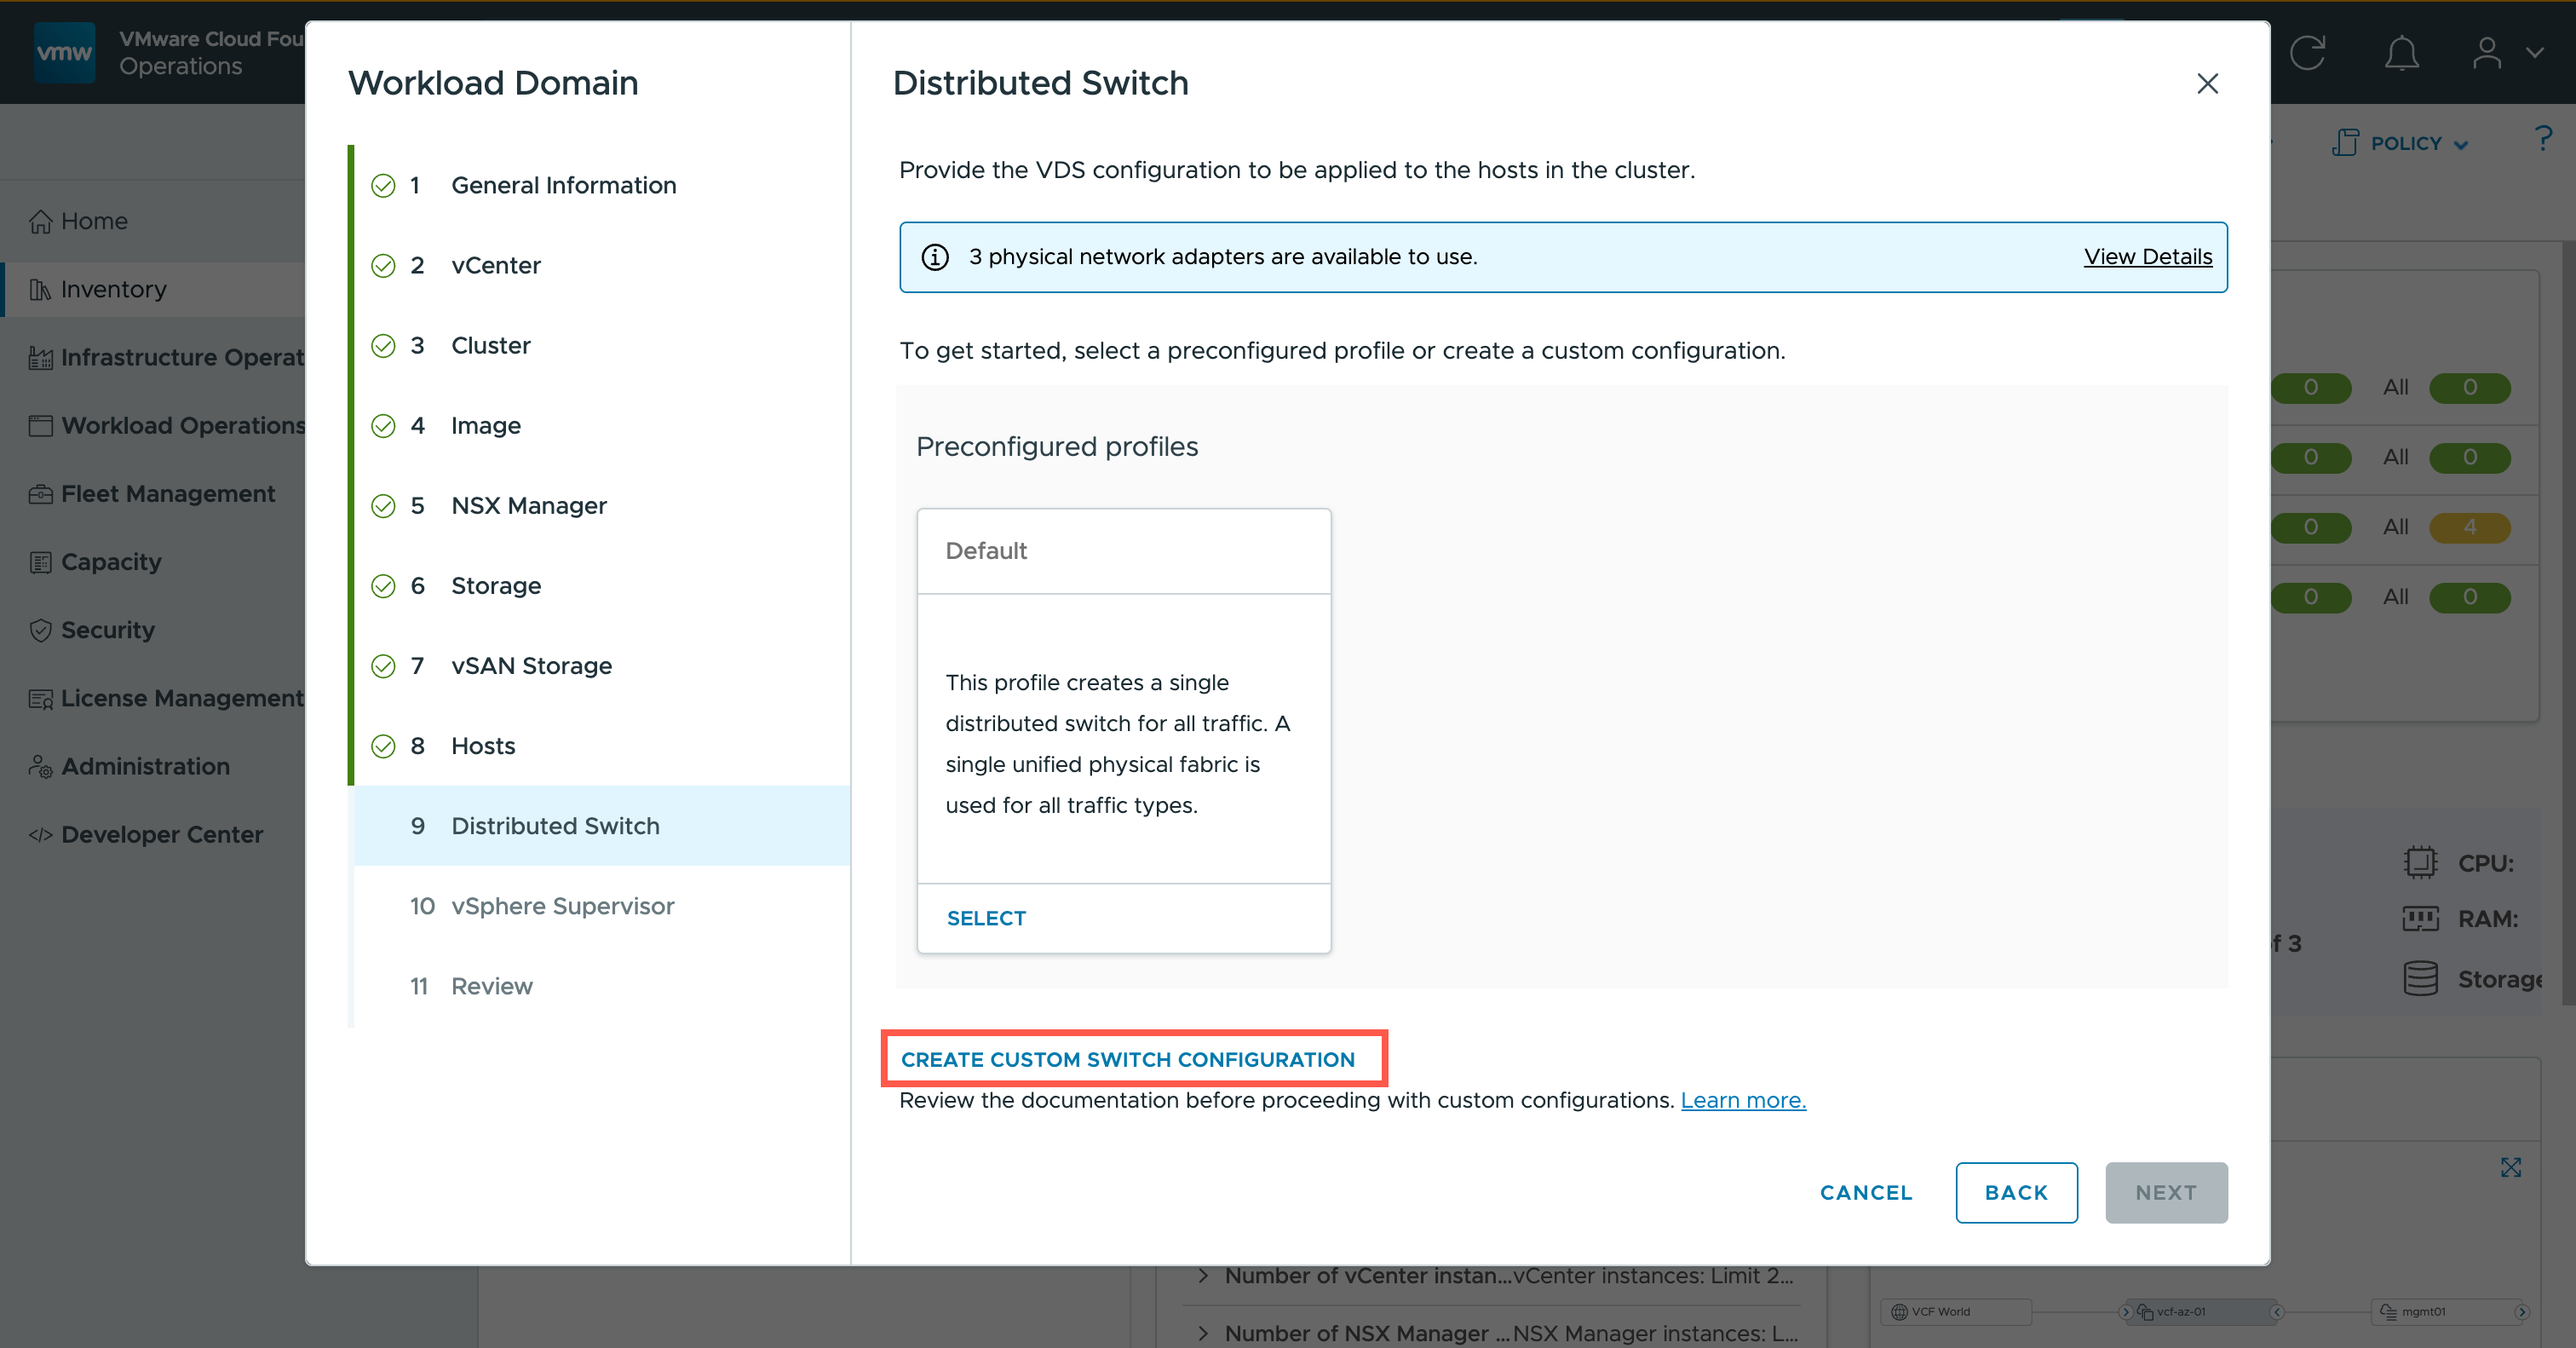
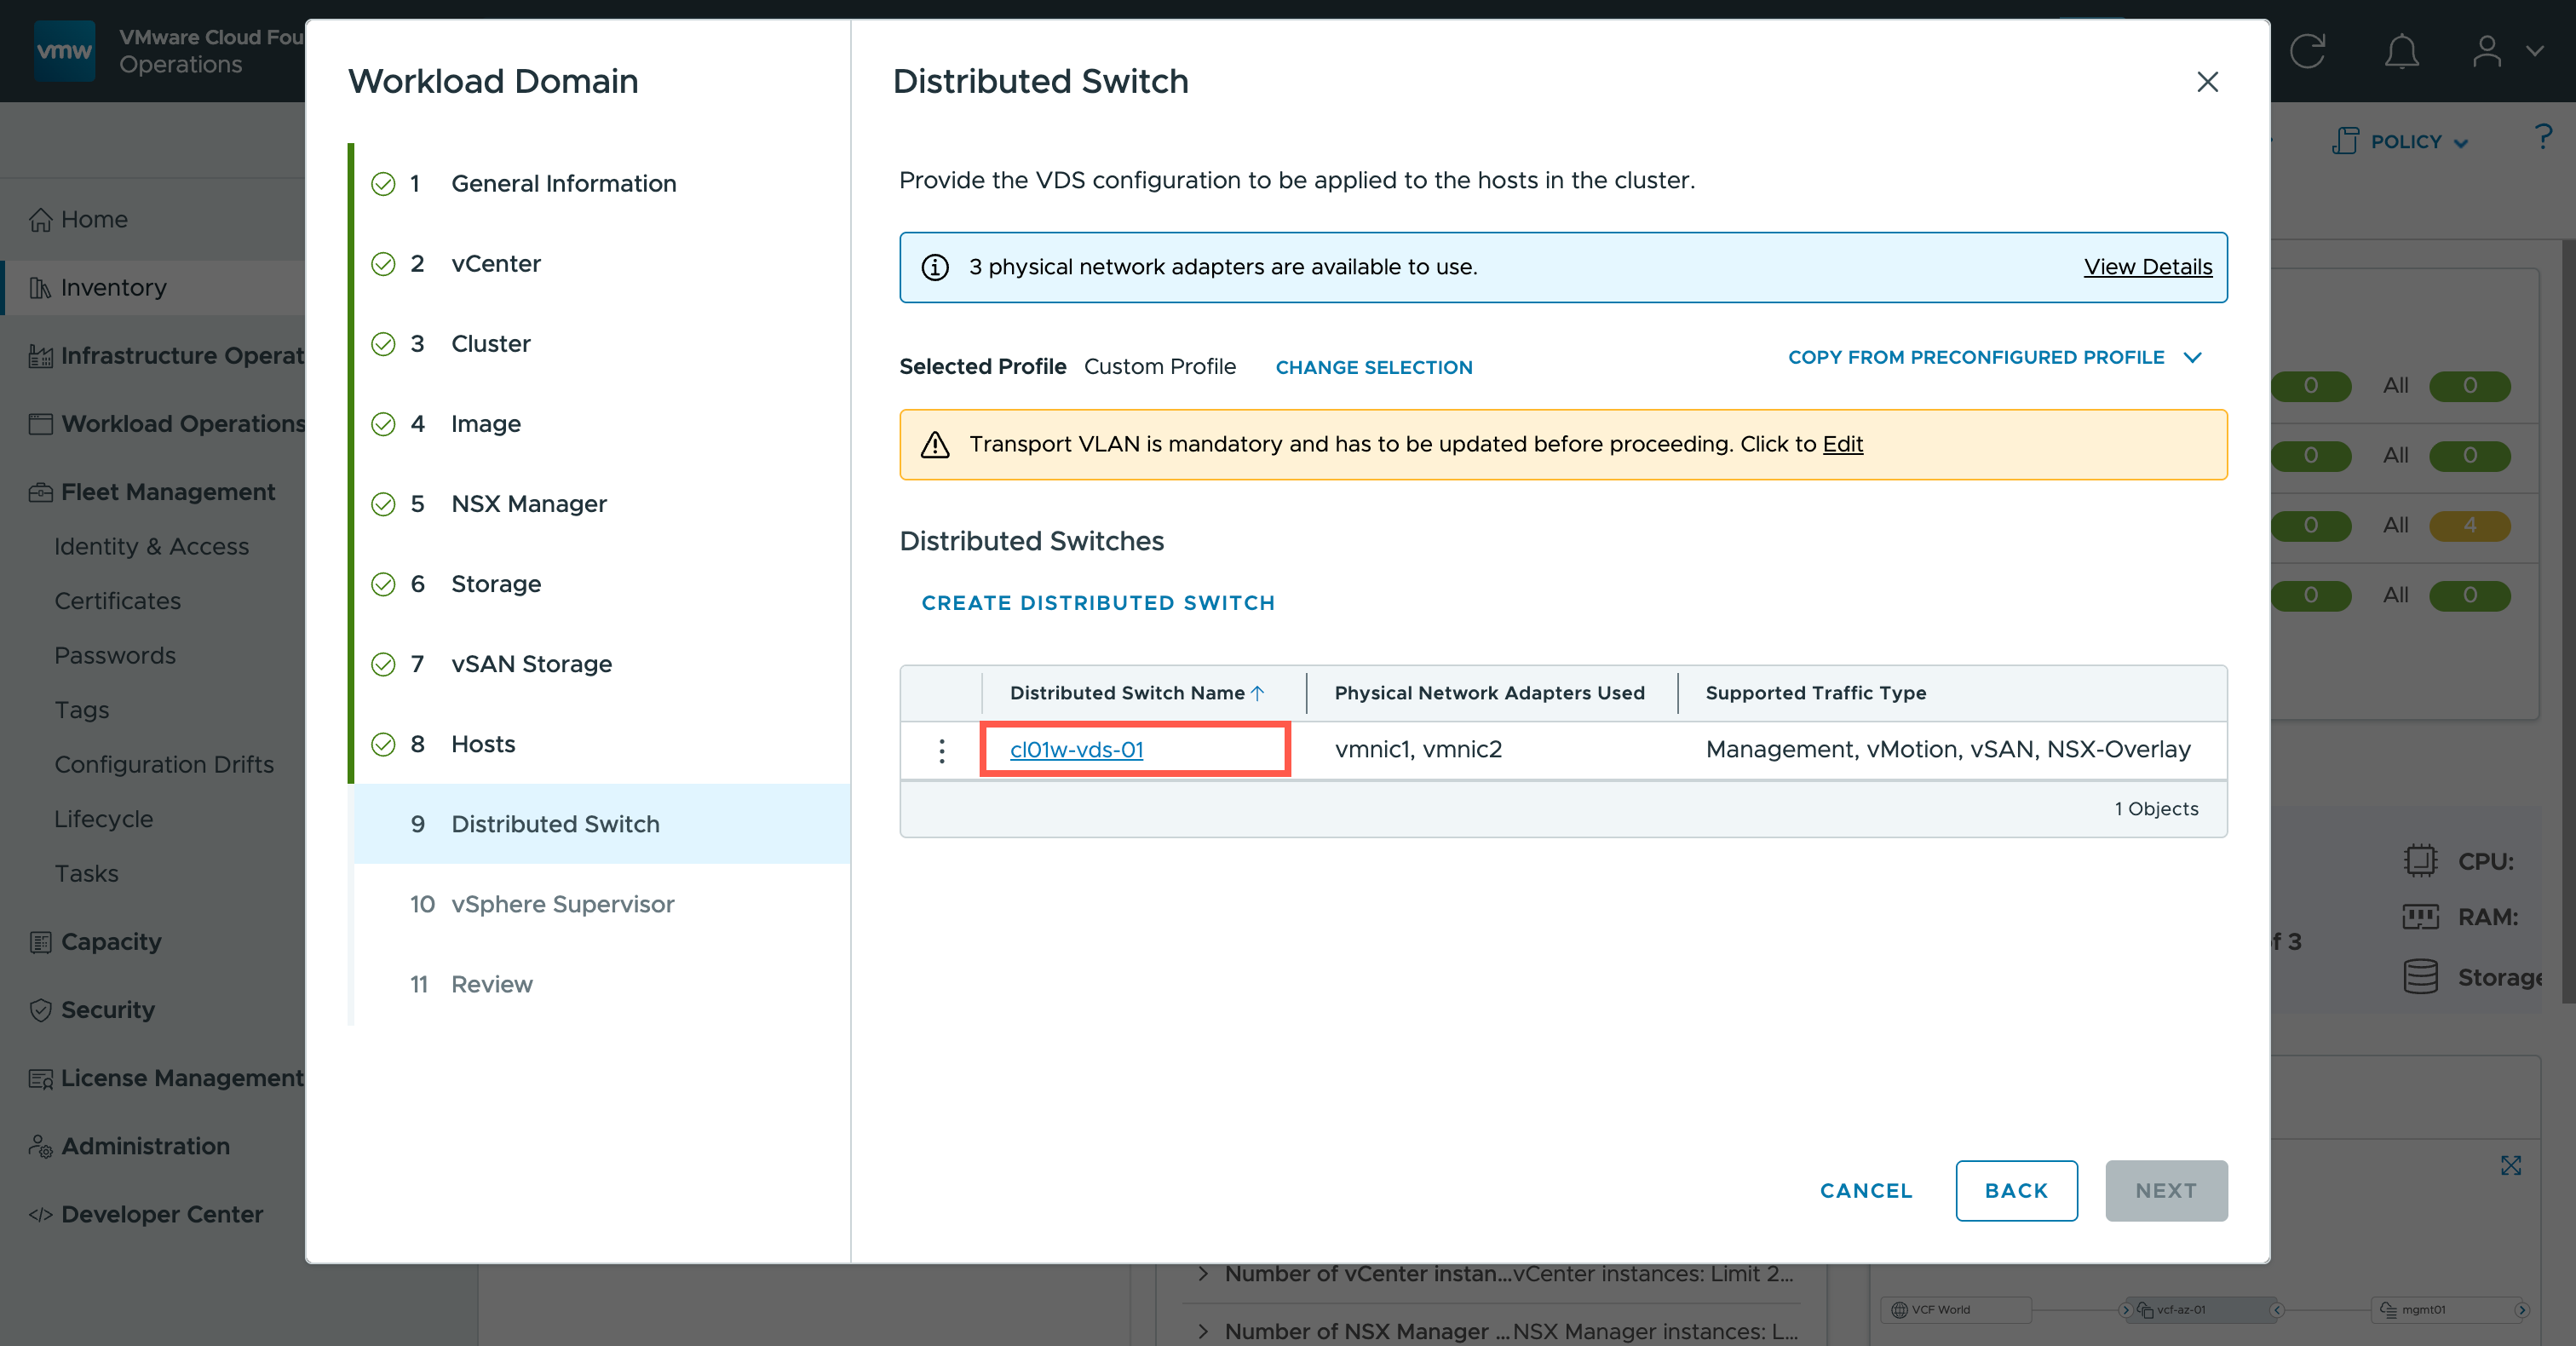
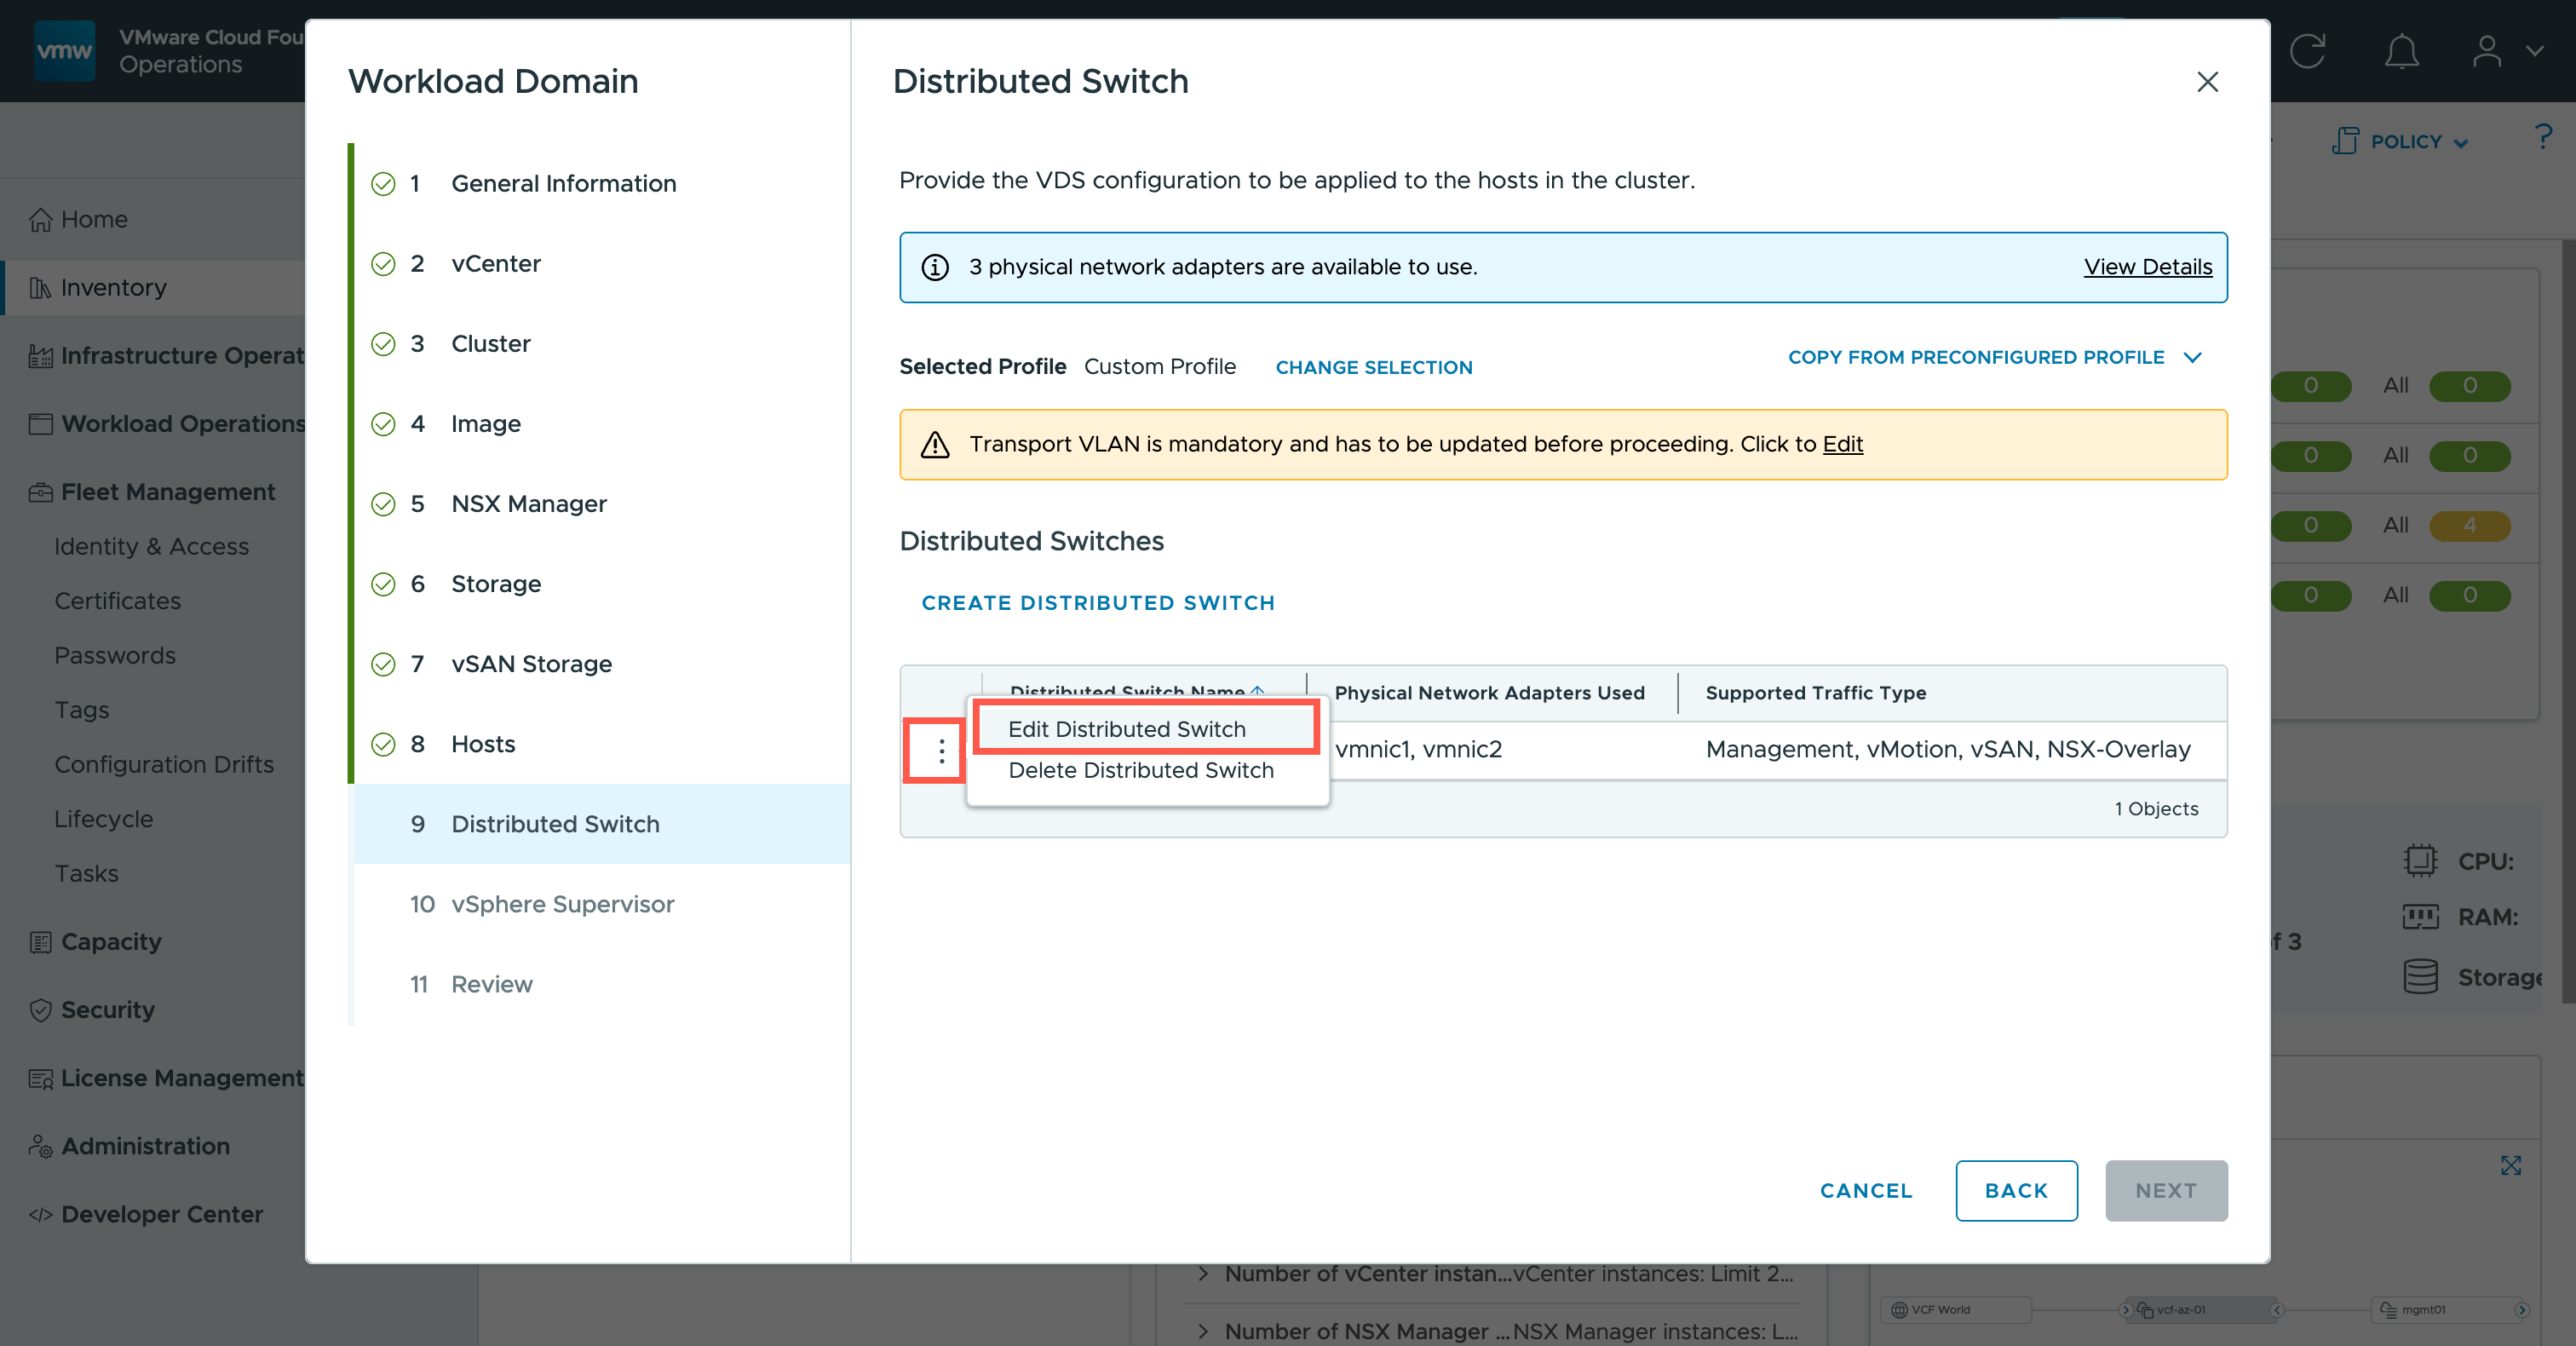
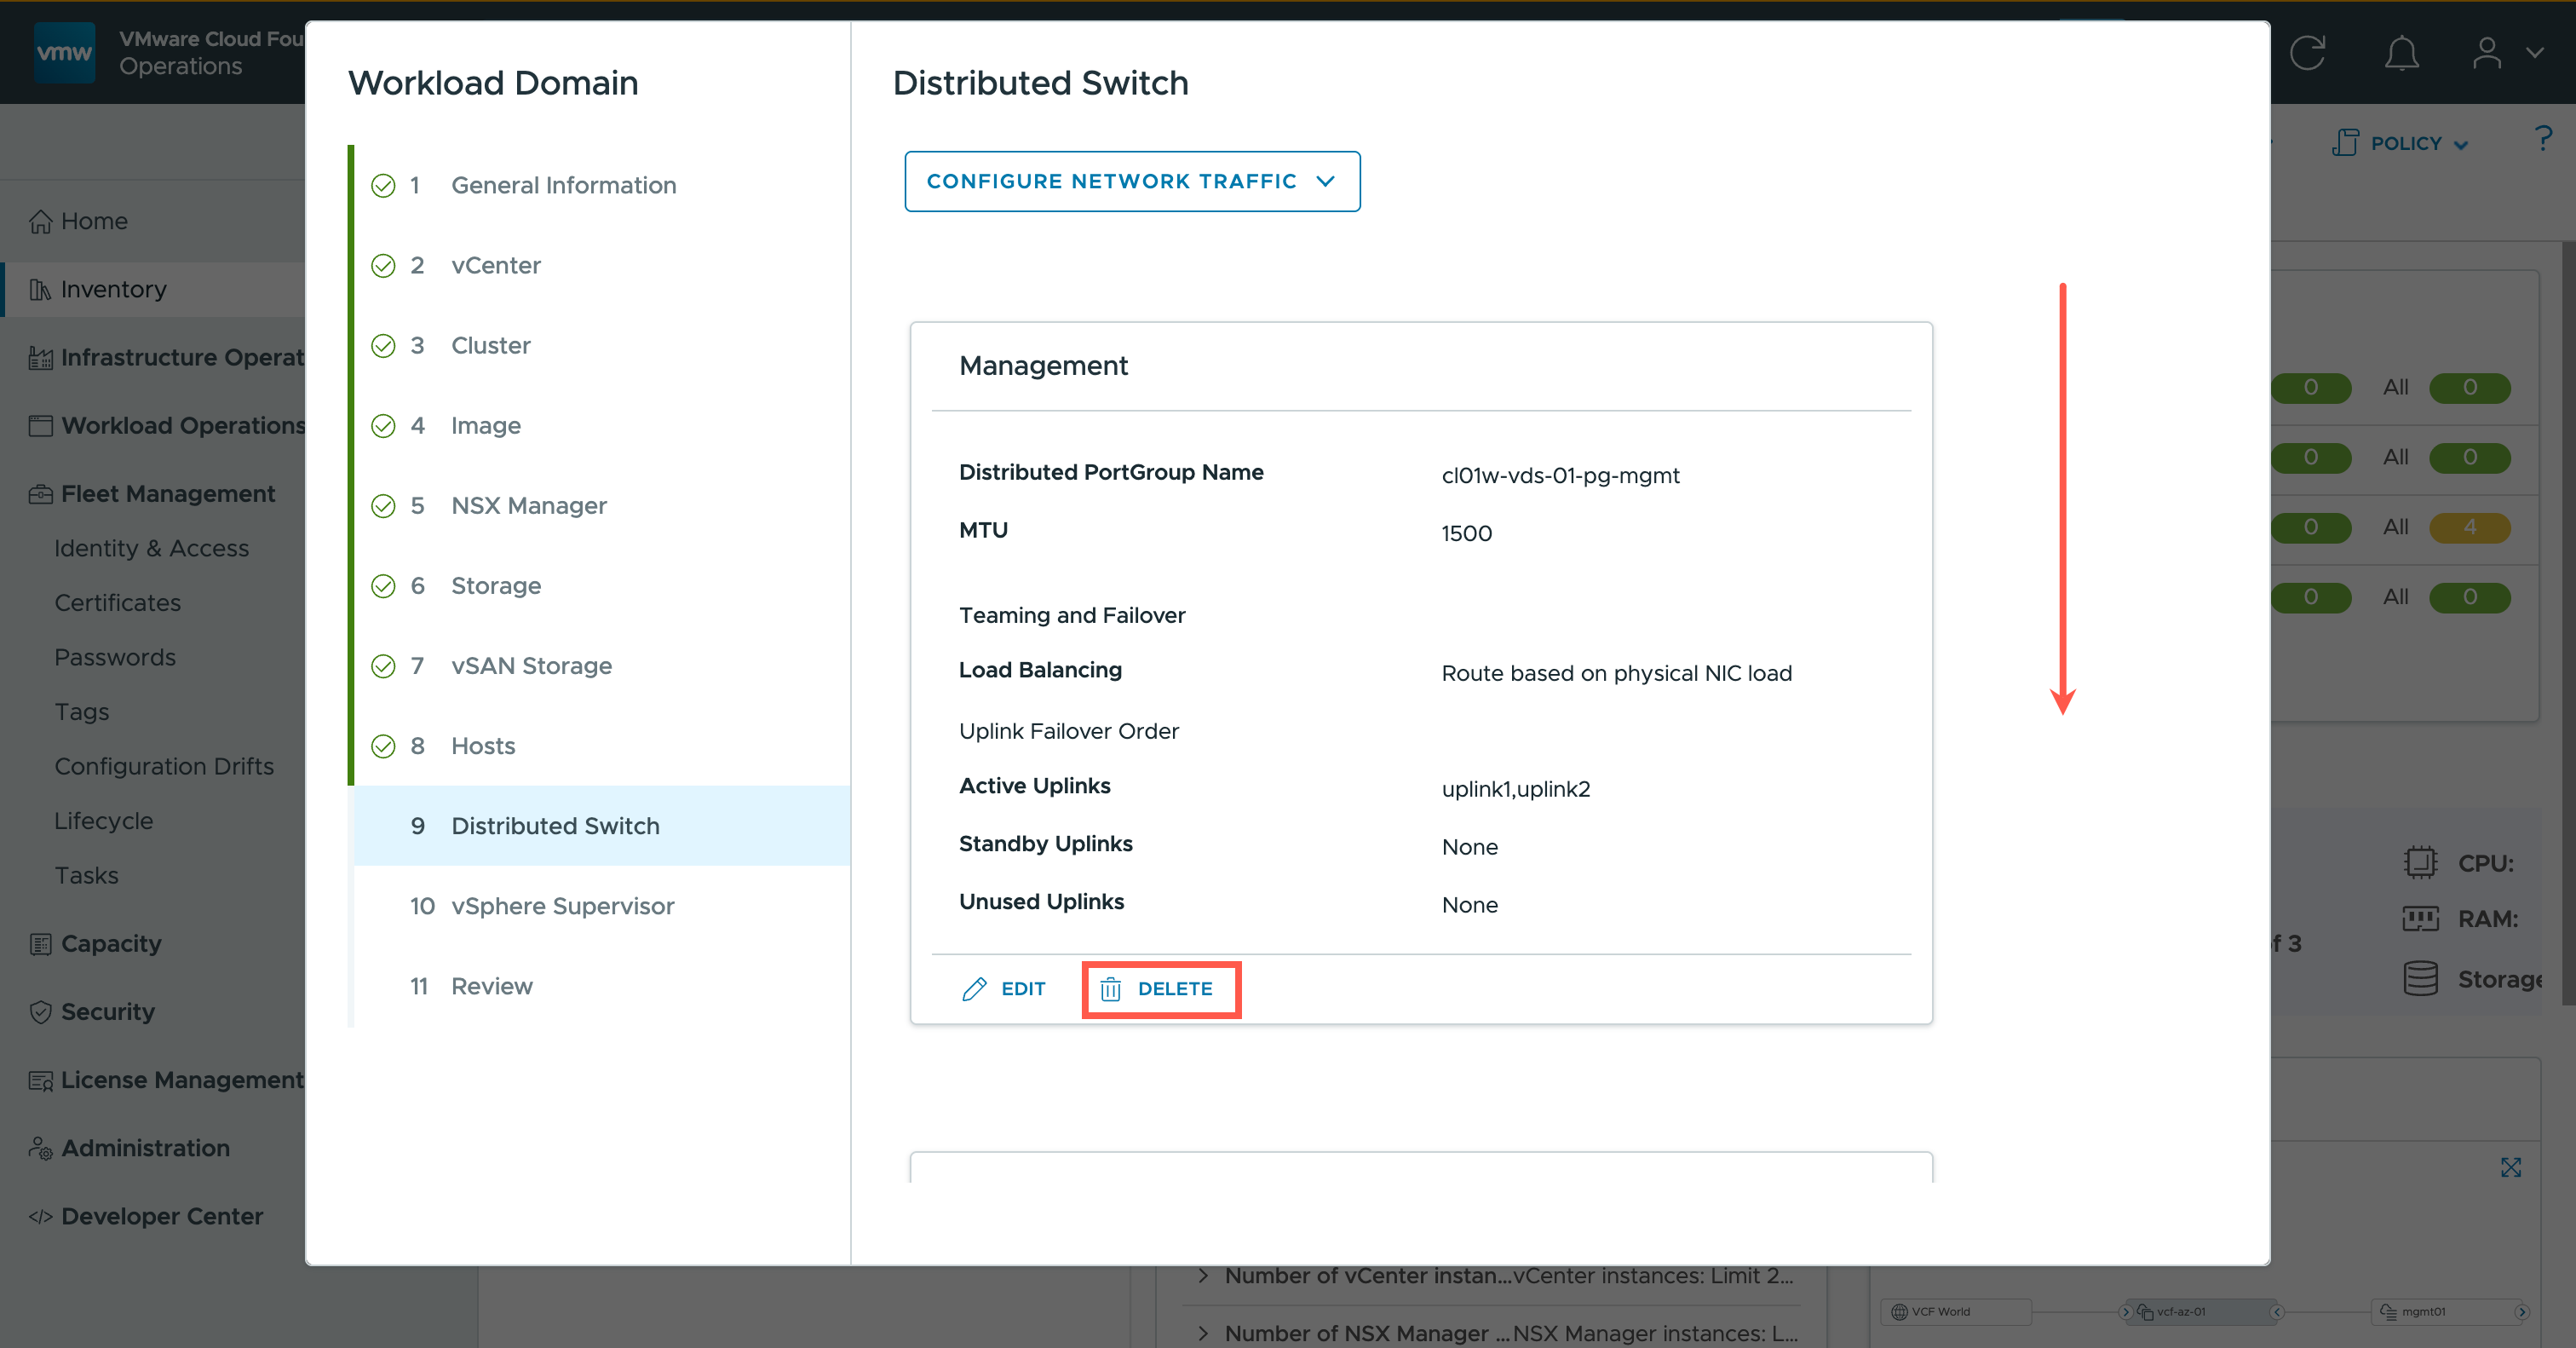
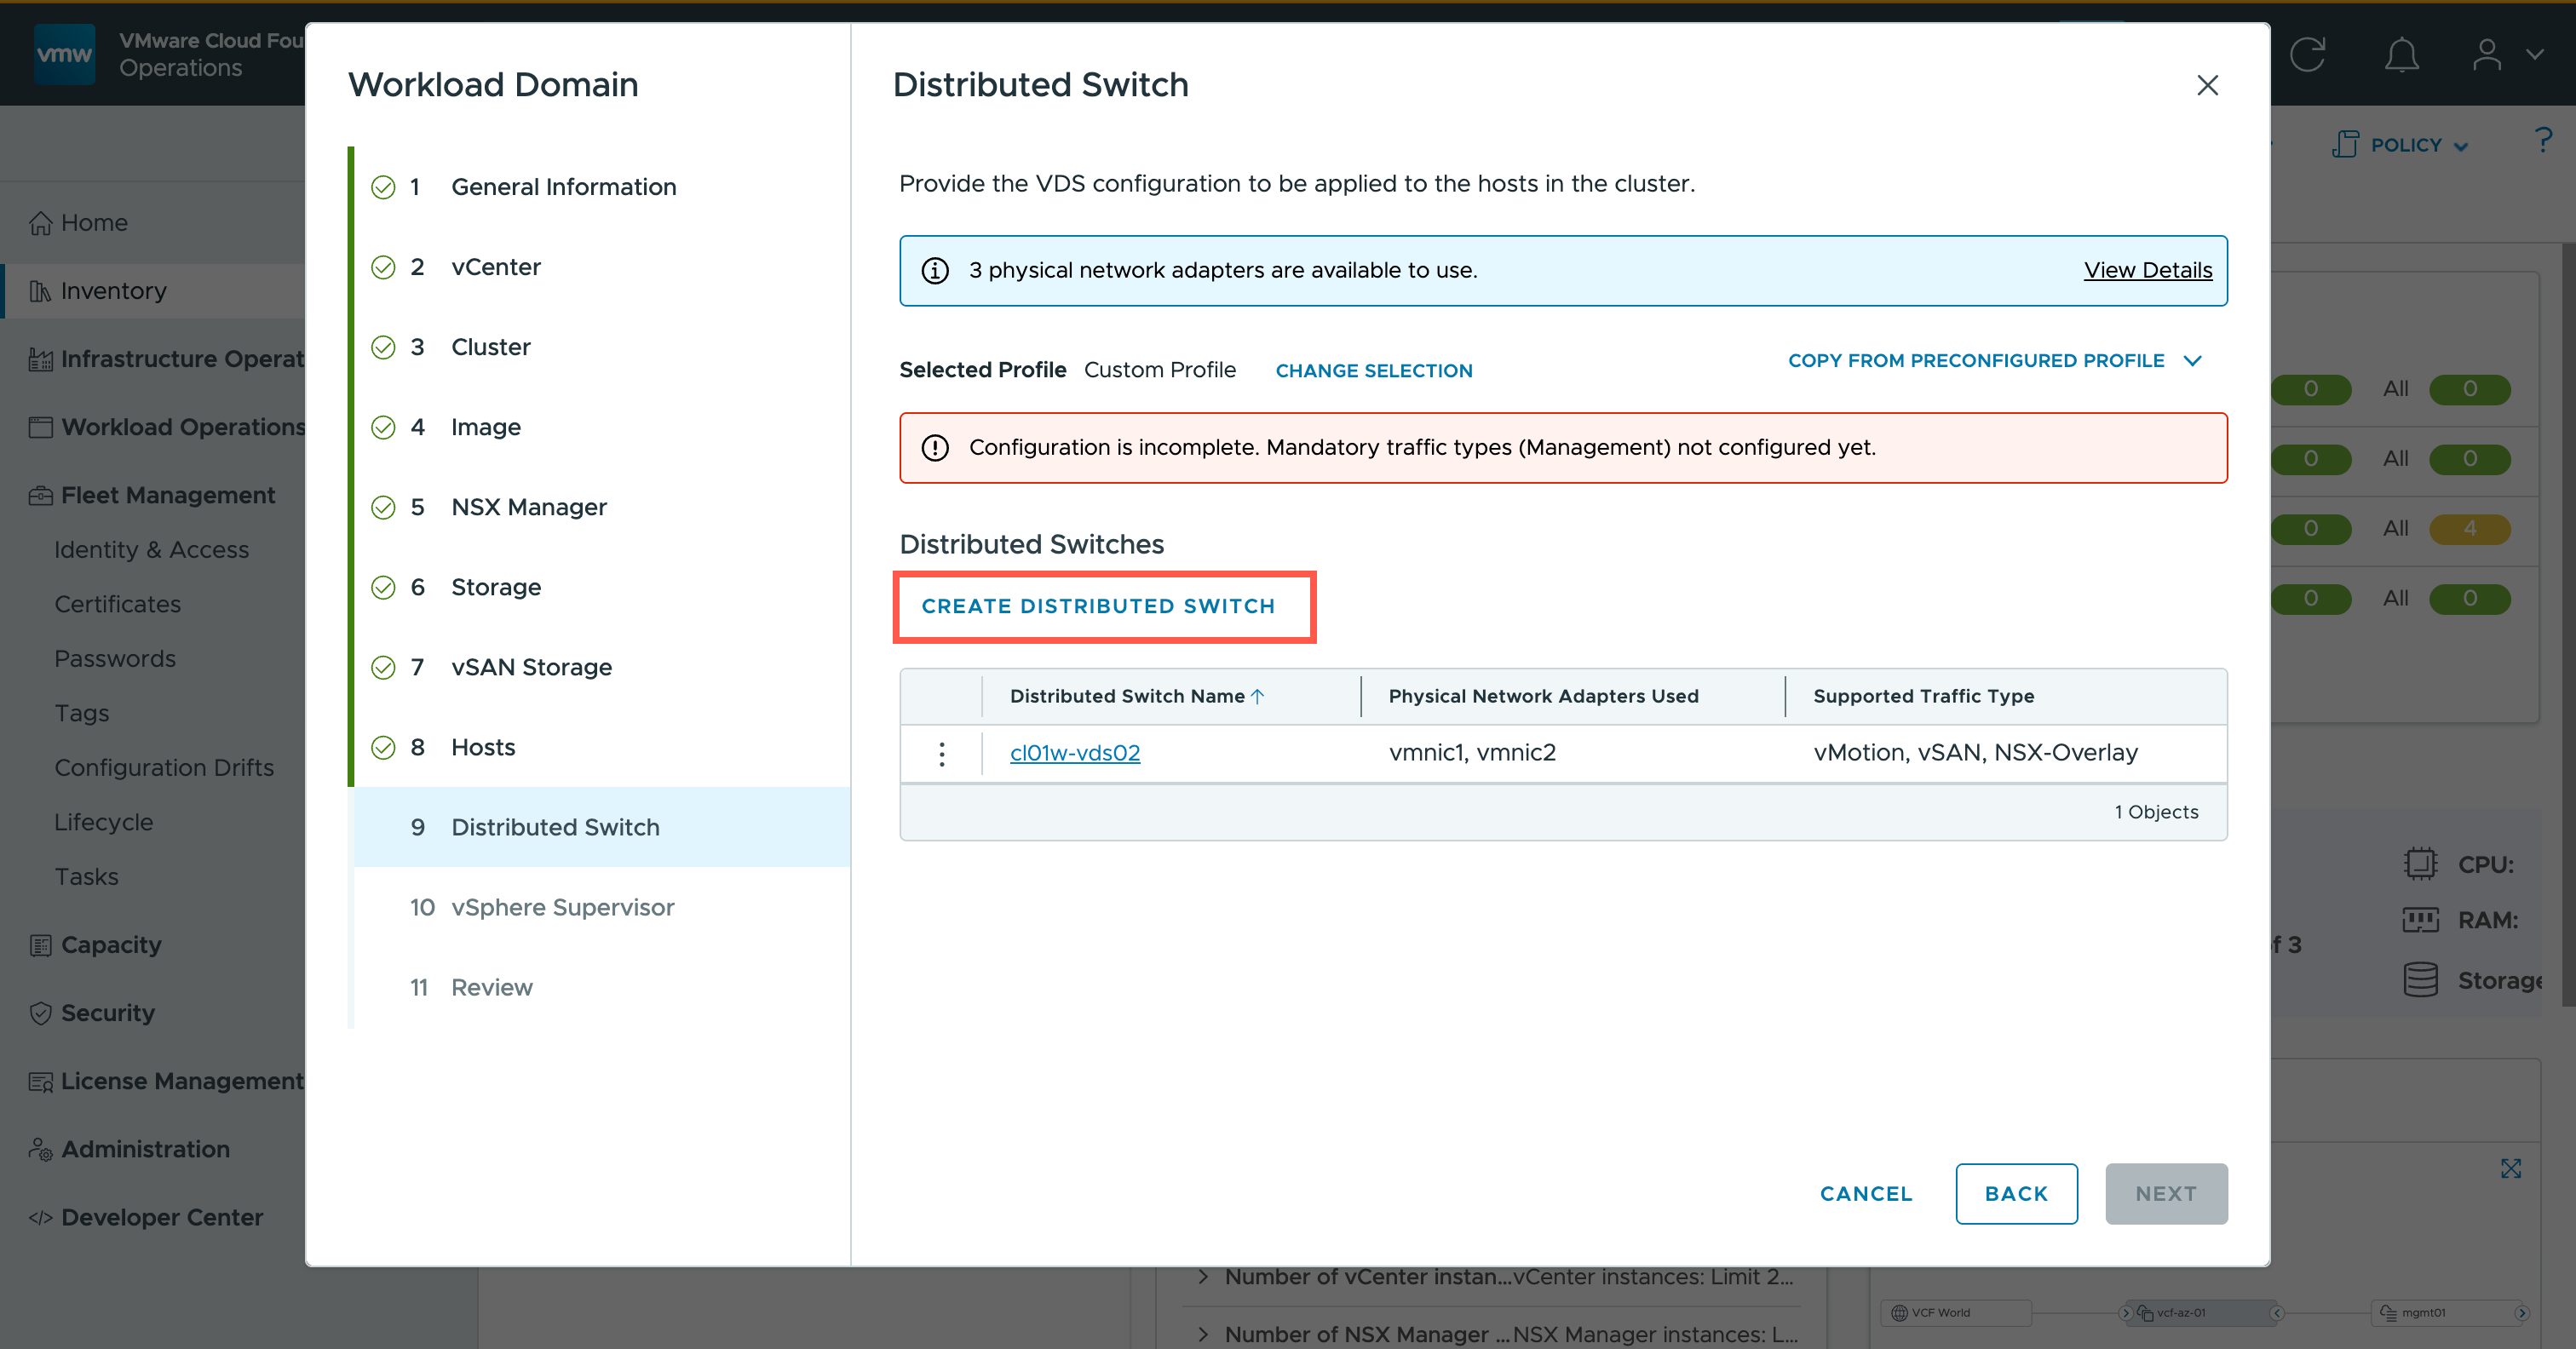
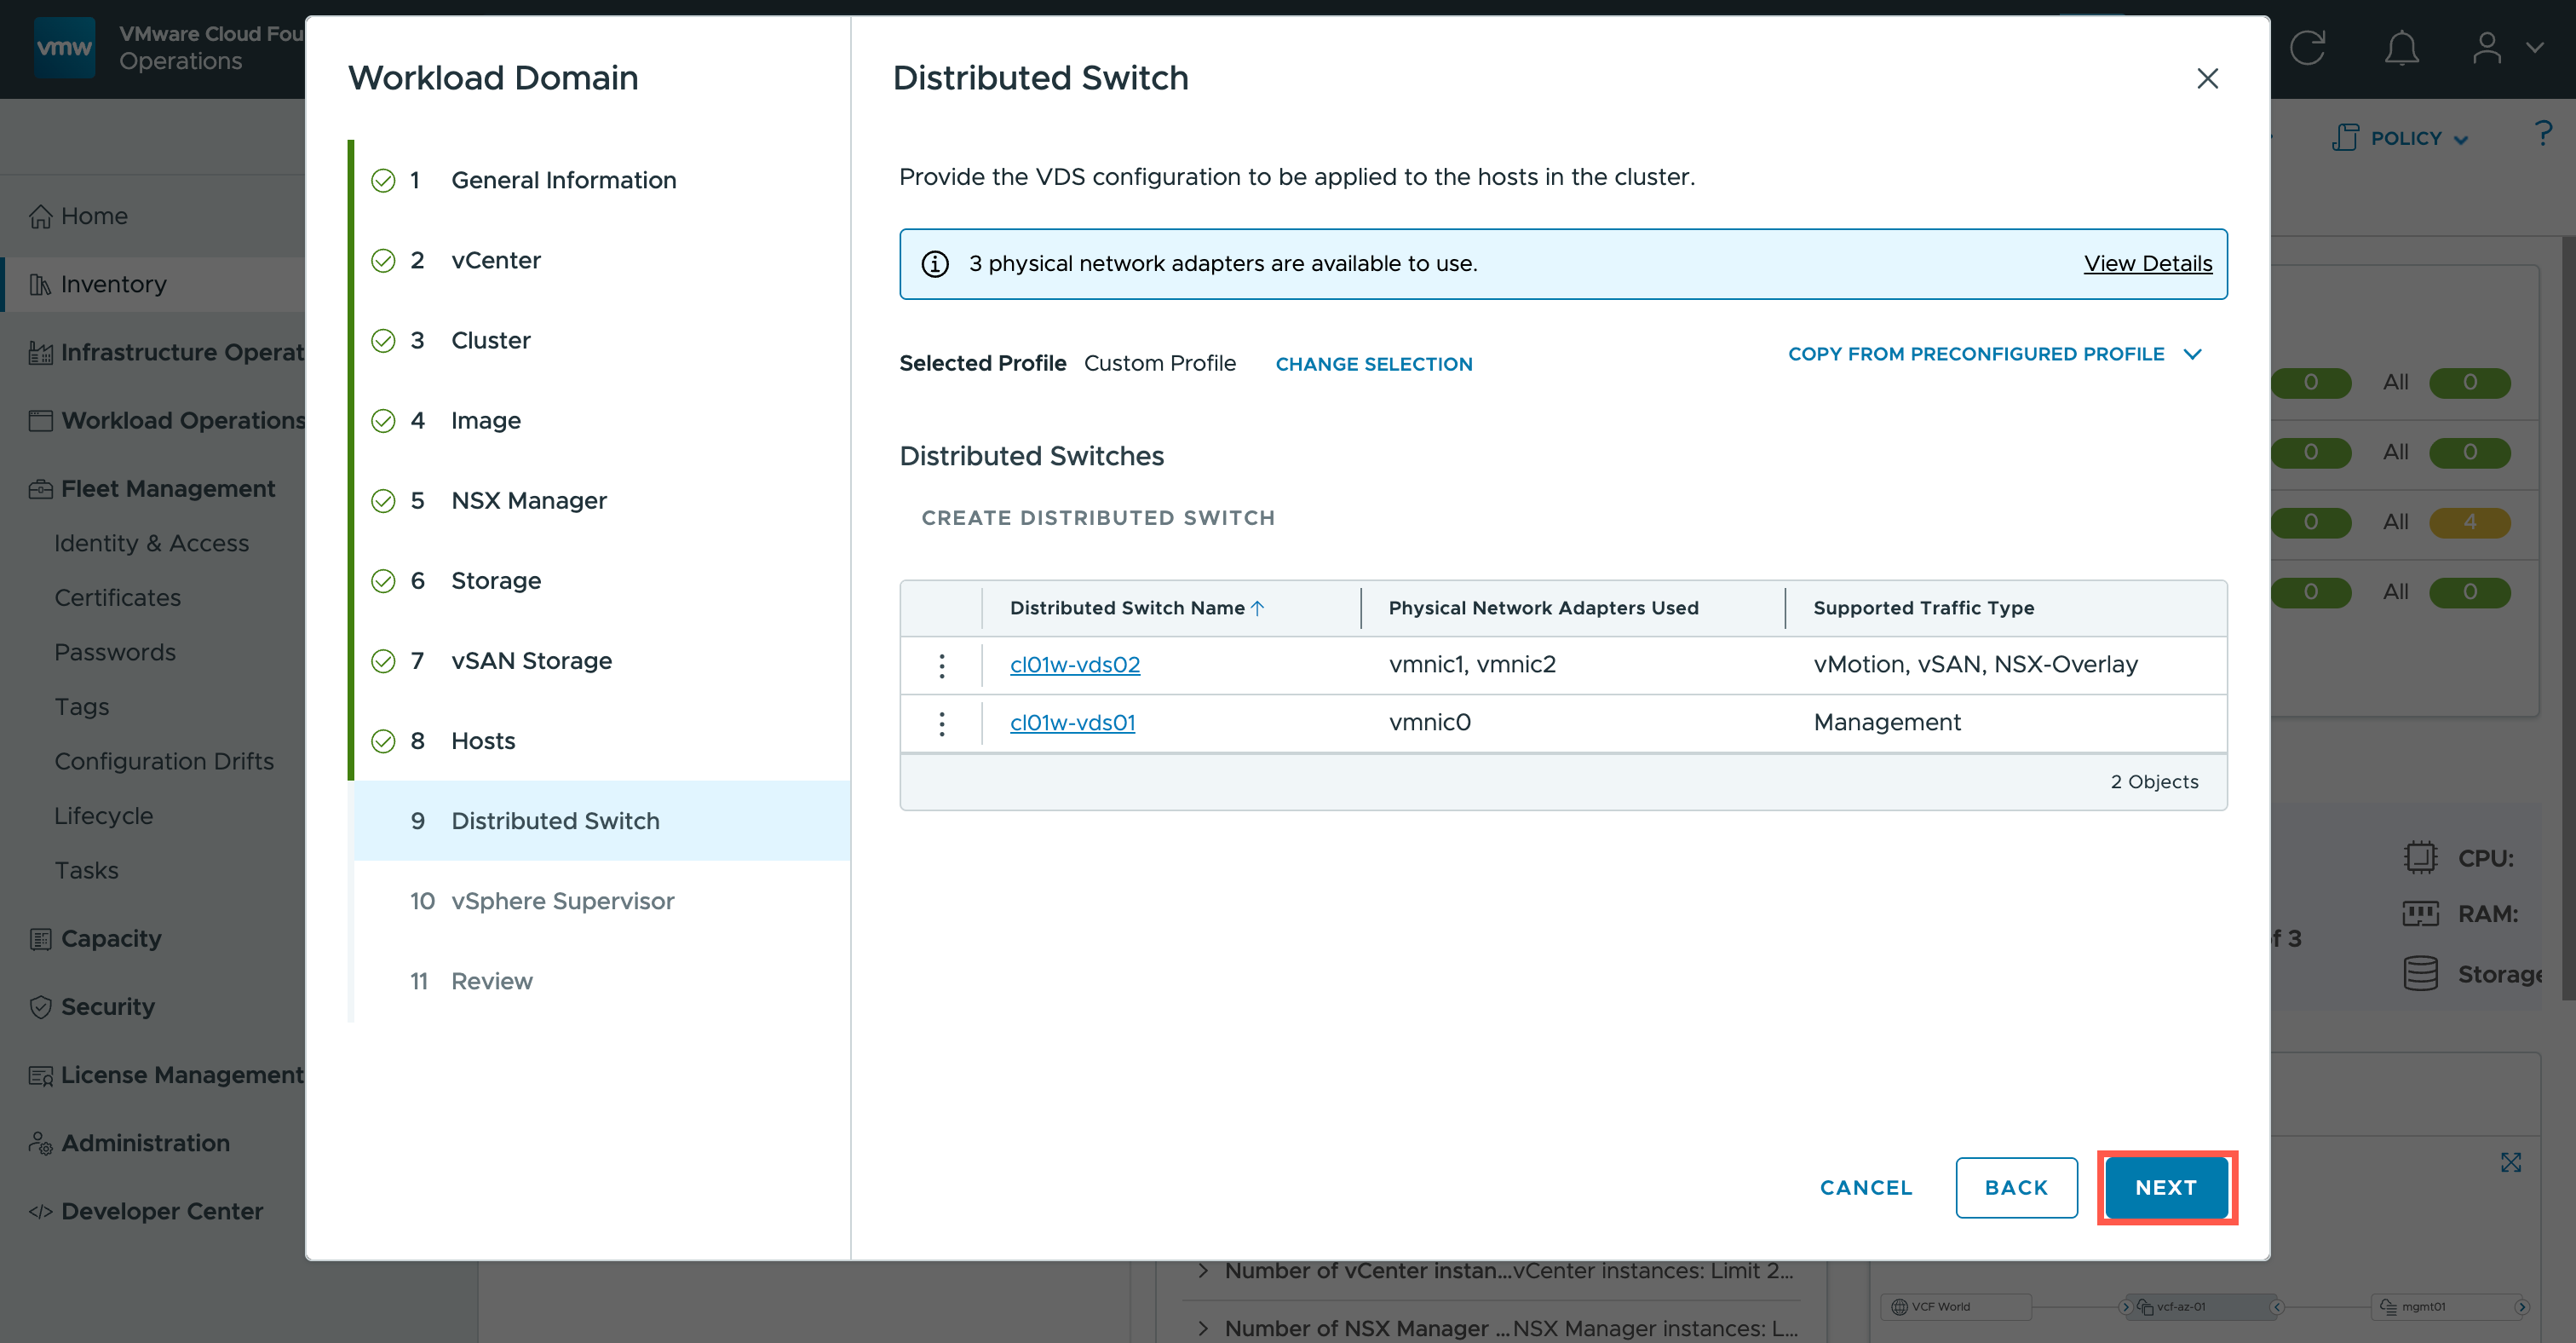
<Distributed Switch Name> and click Edit Distributed Switch.
cl01w-vds02.
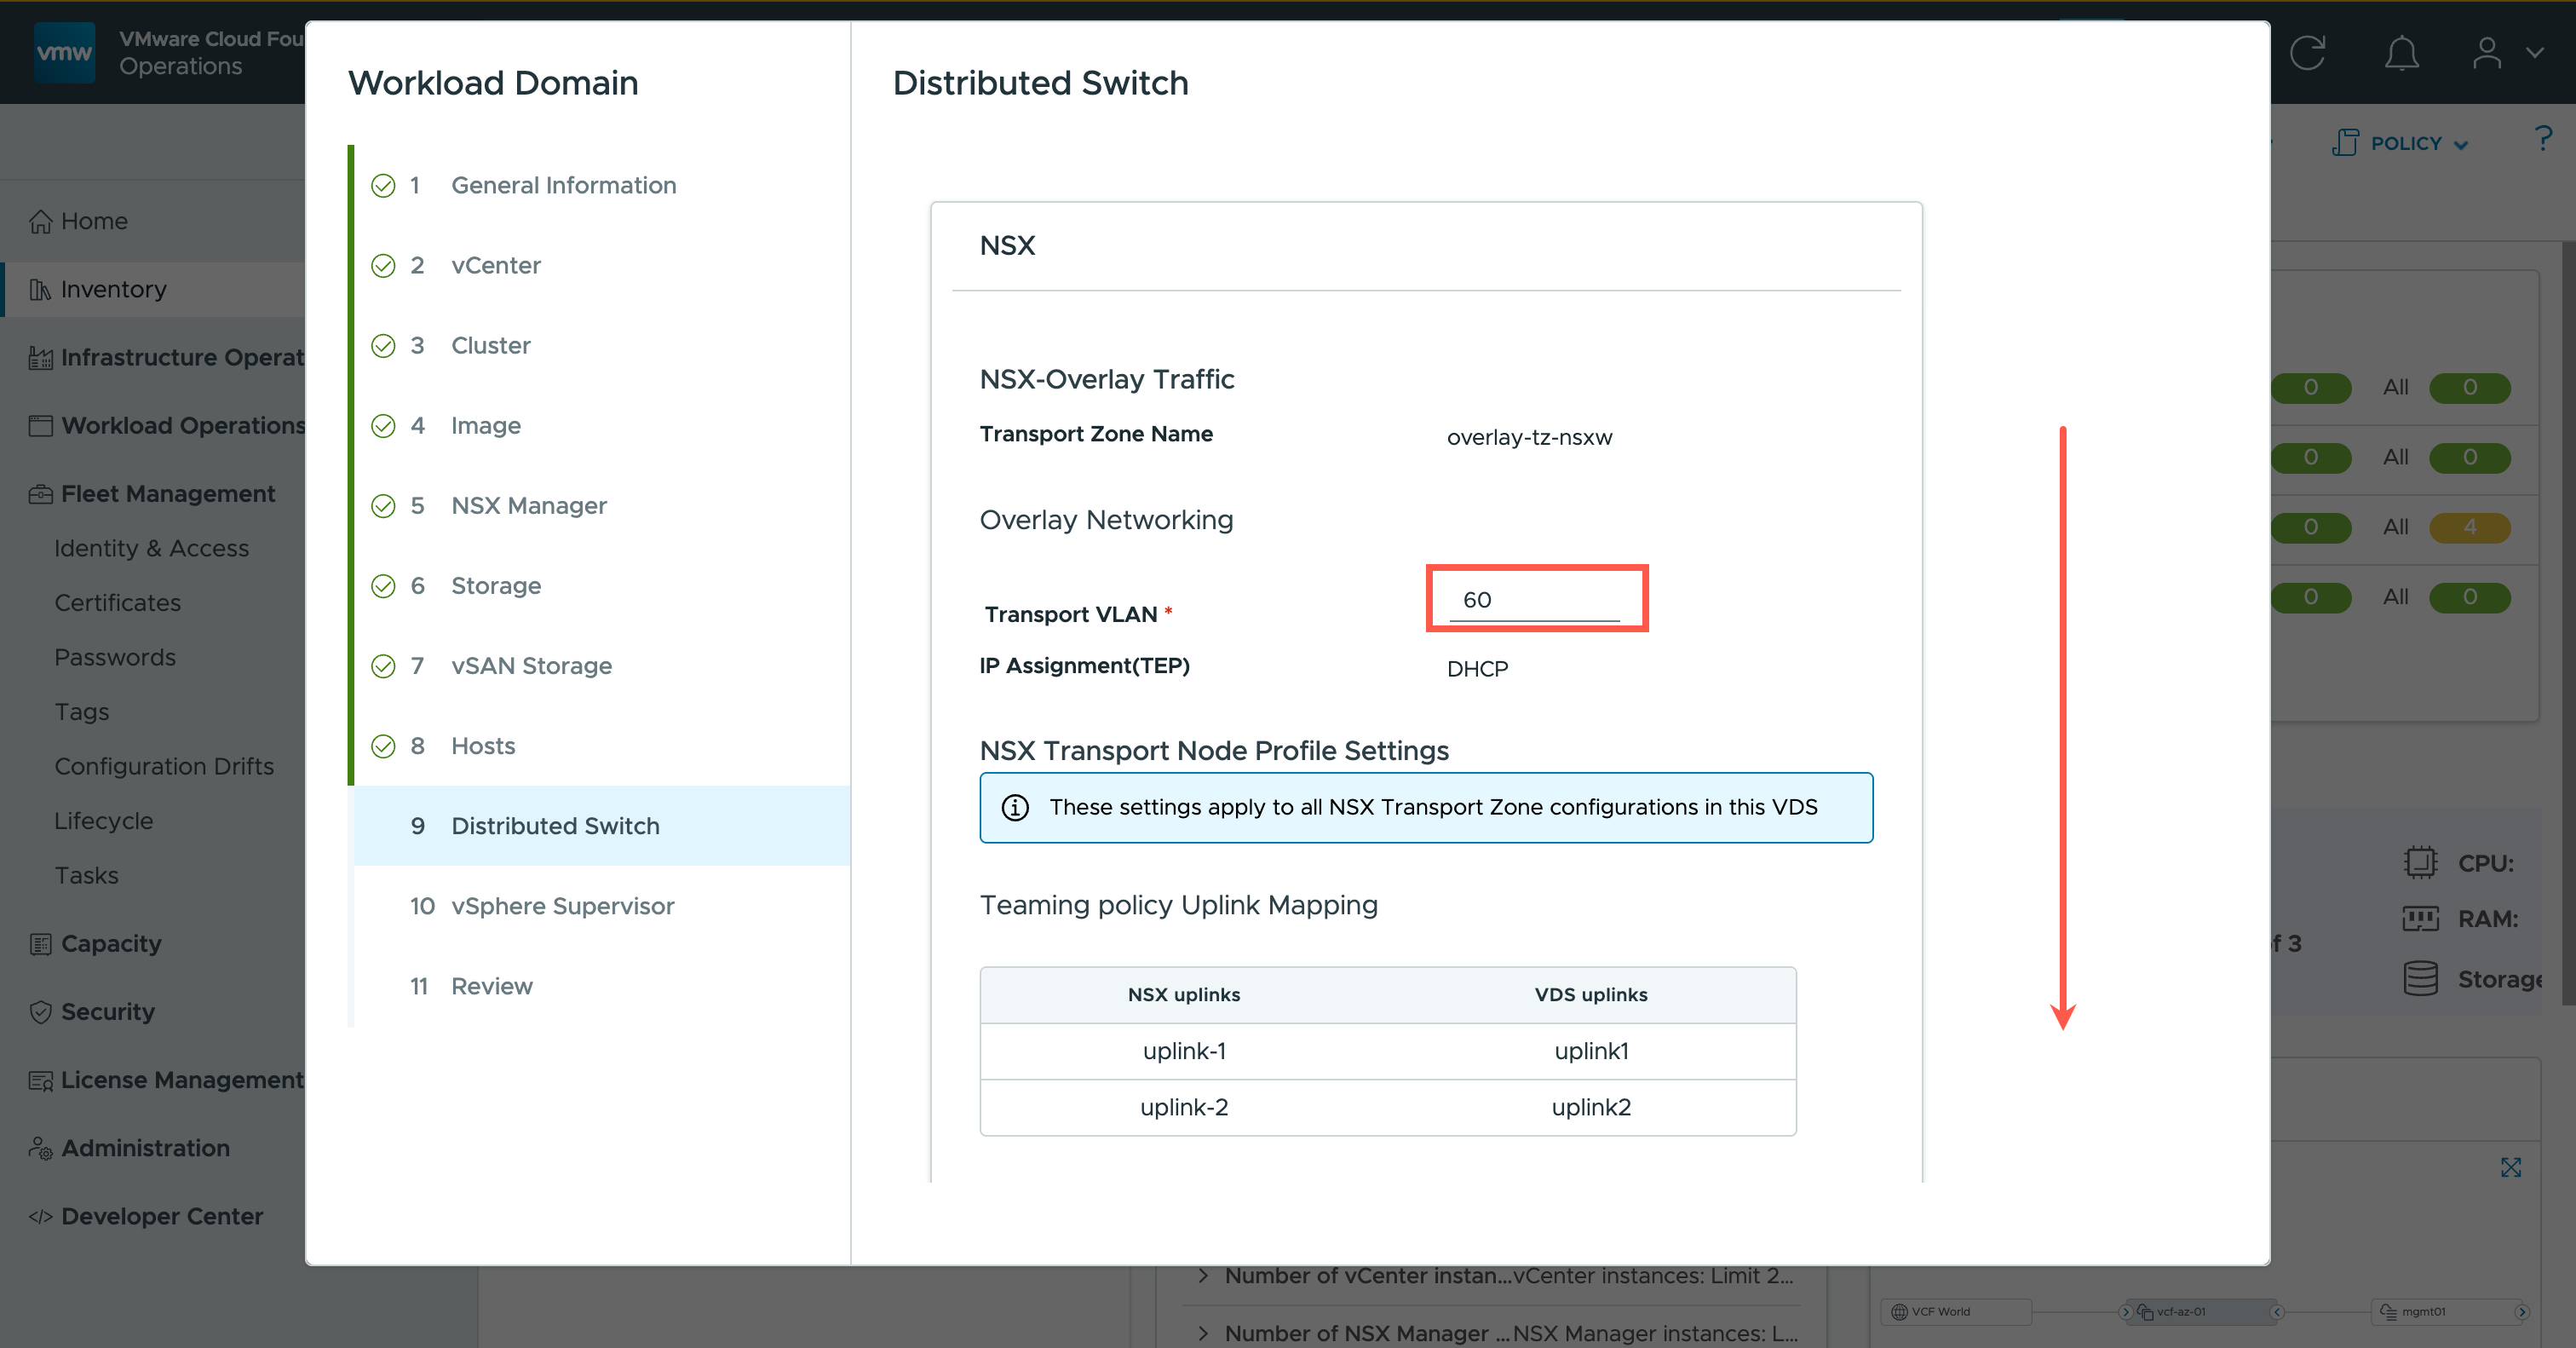
60.
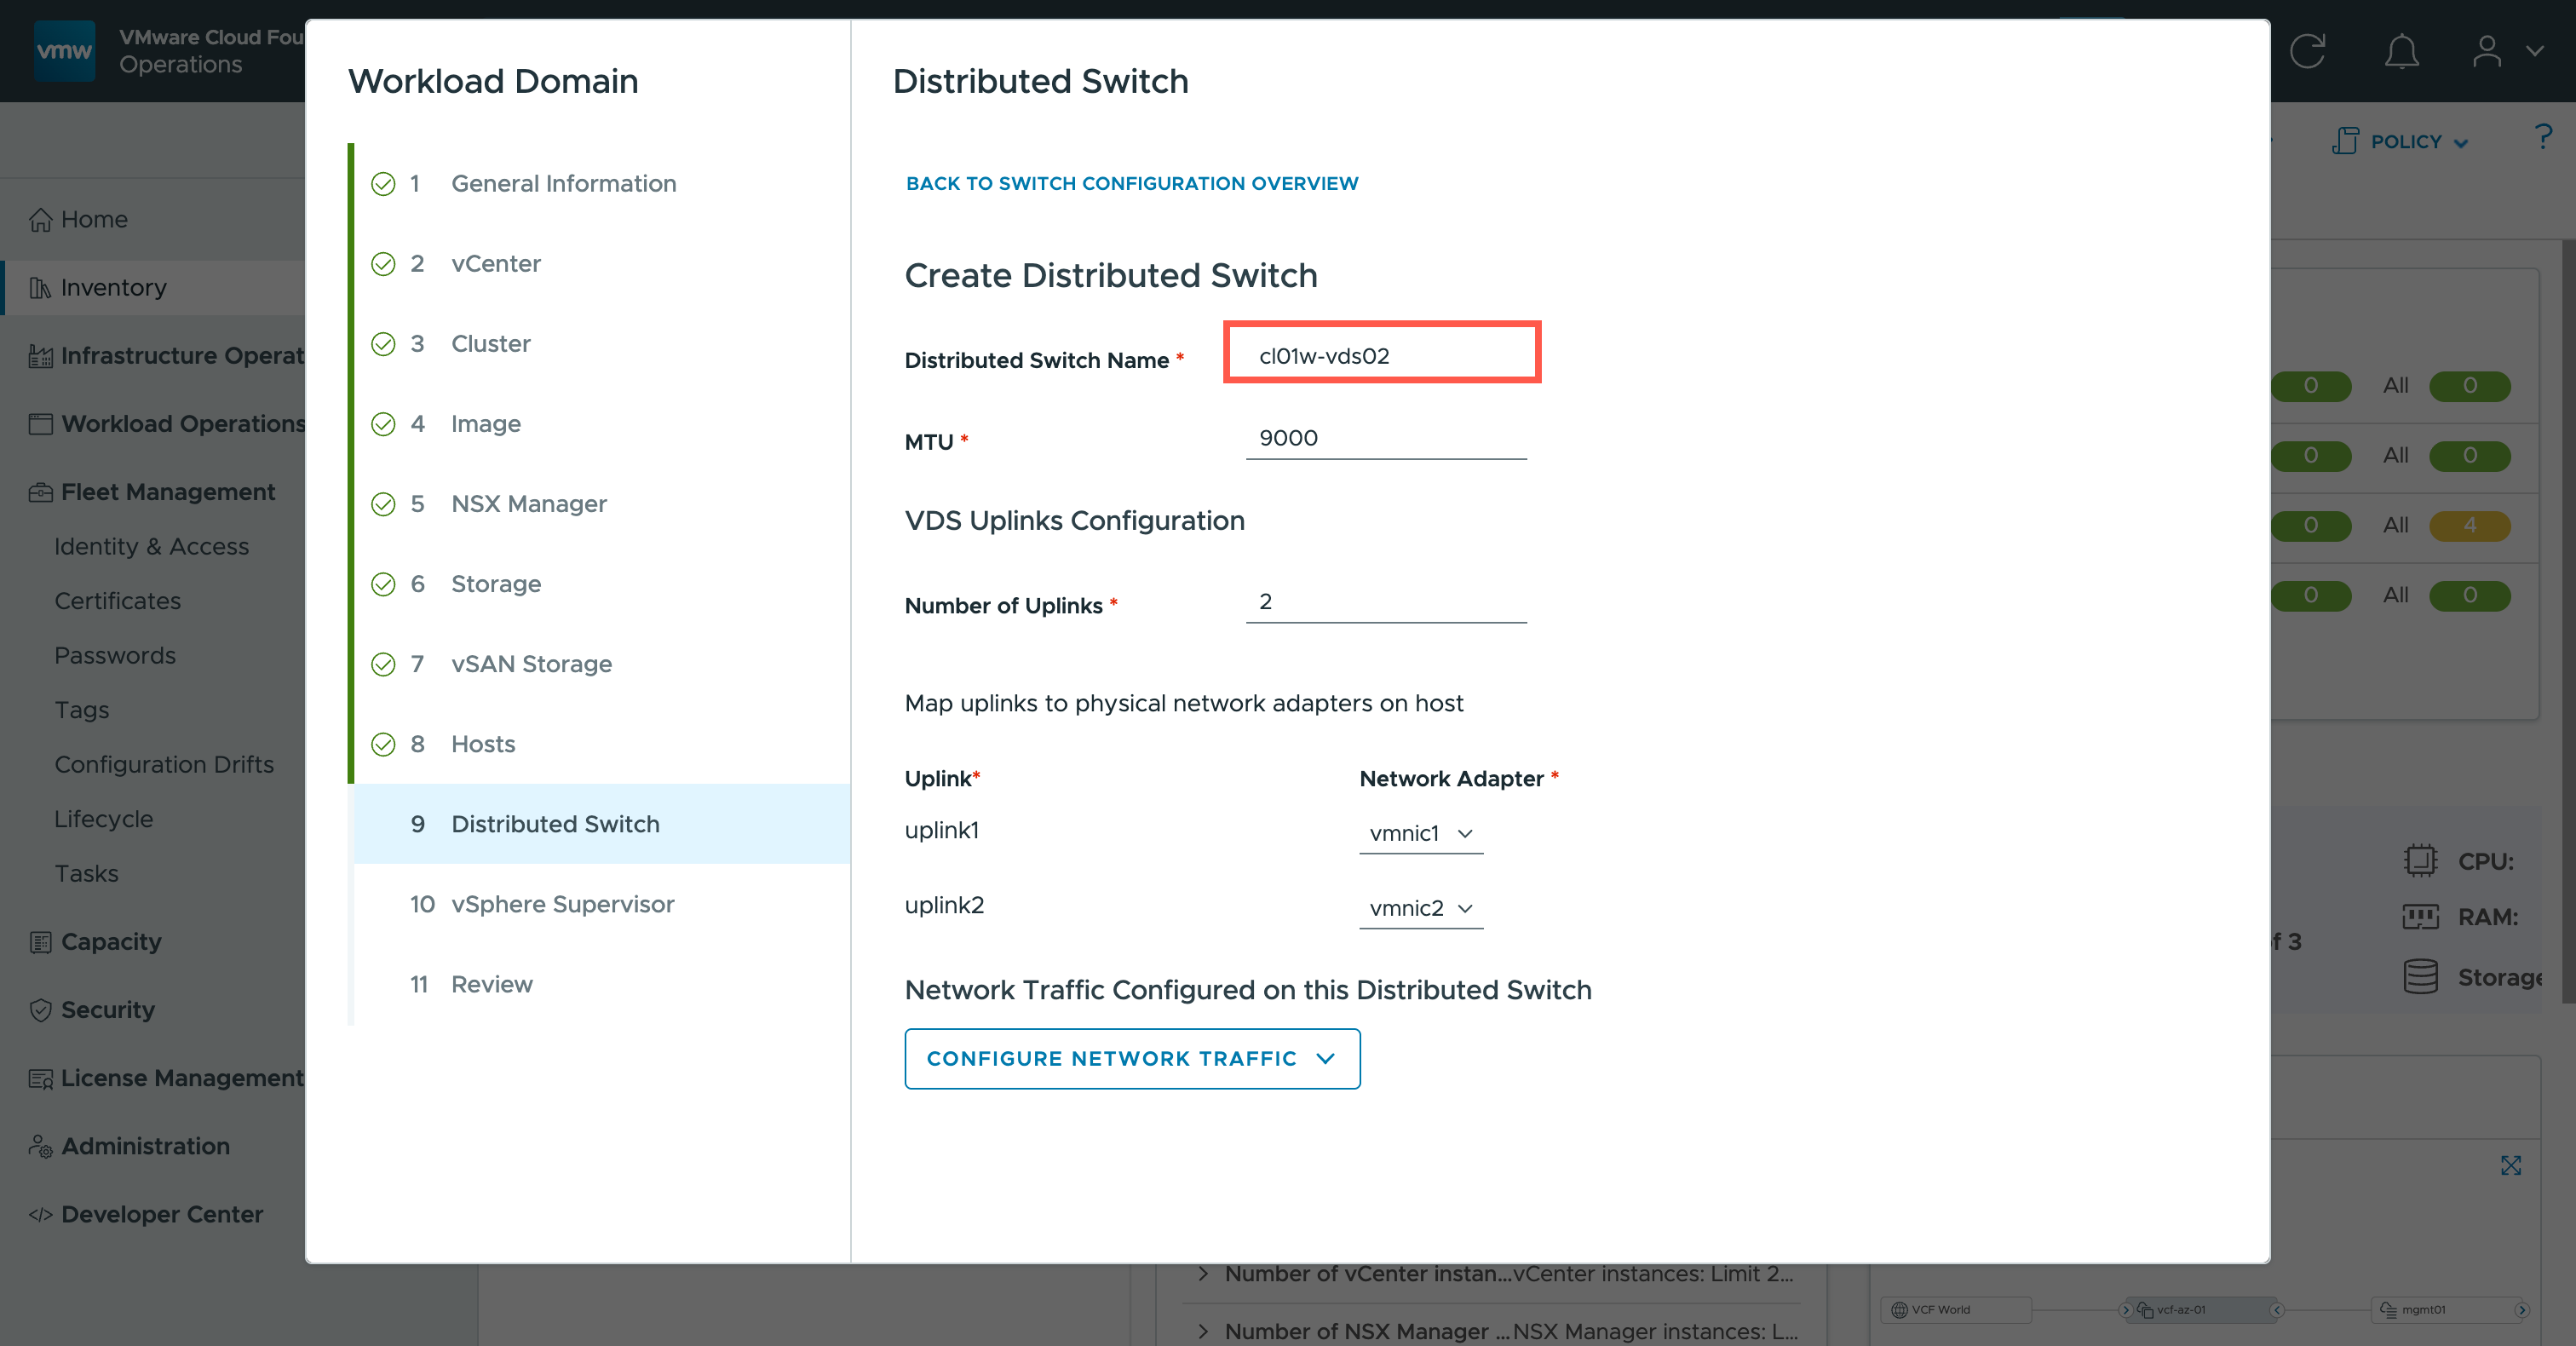
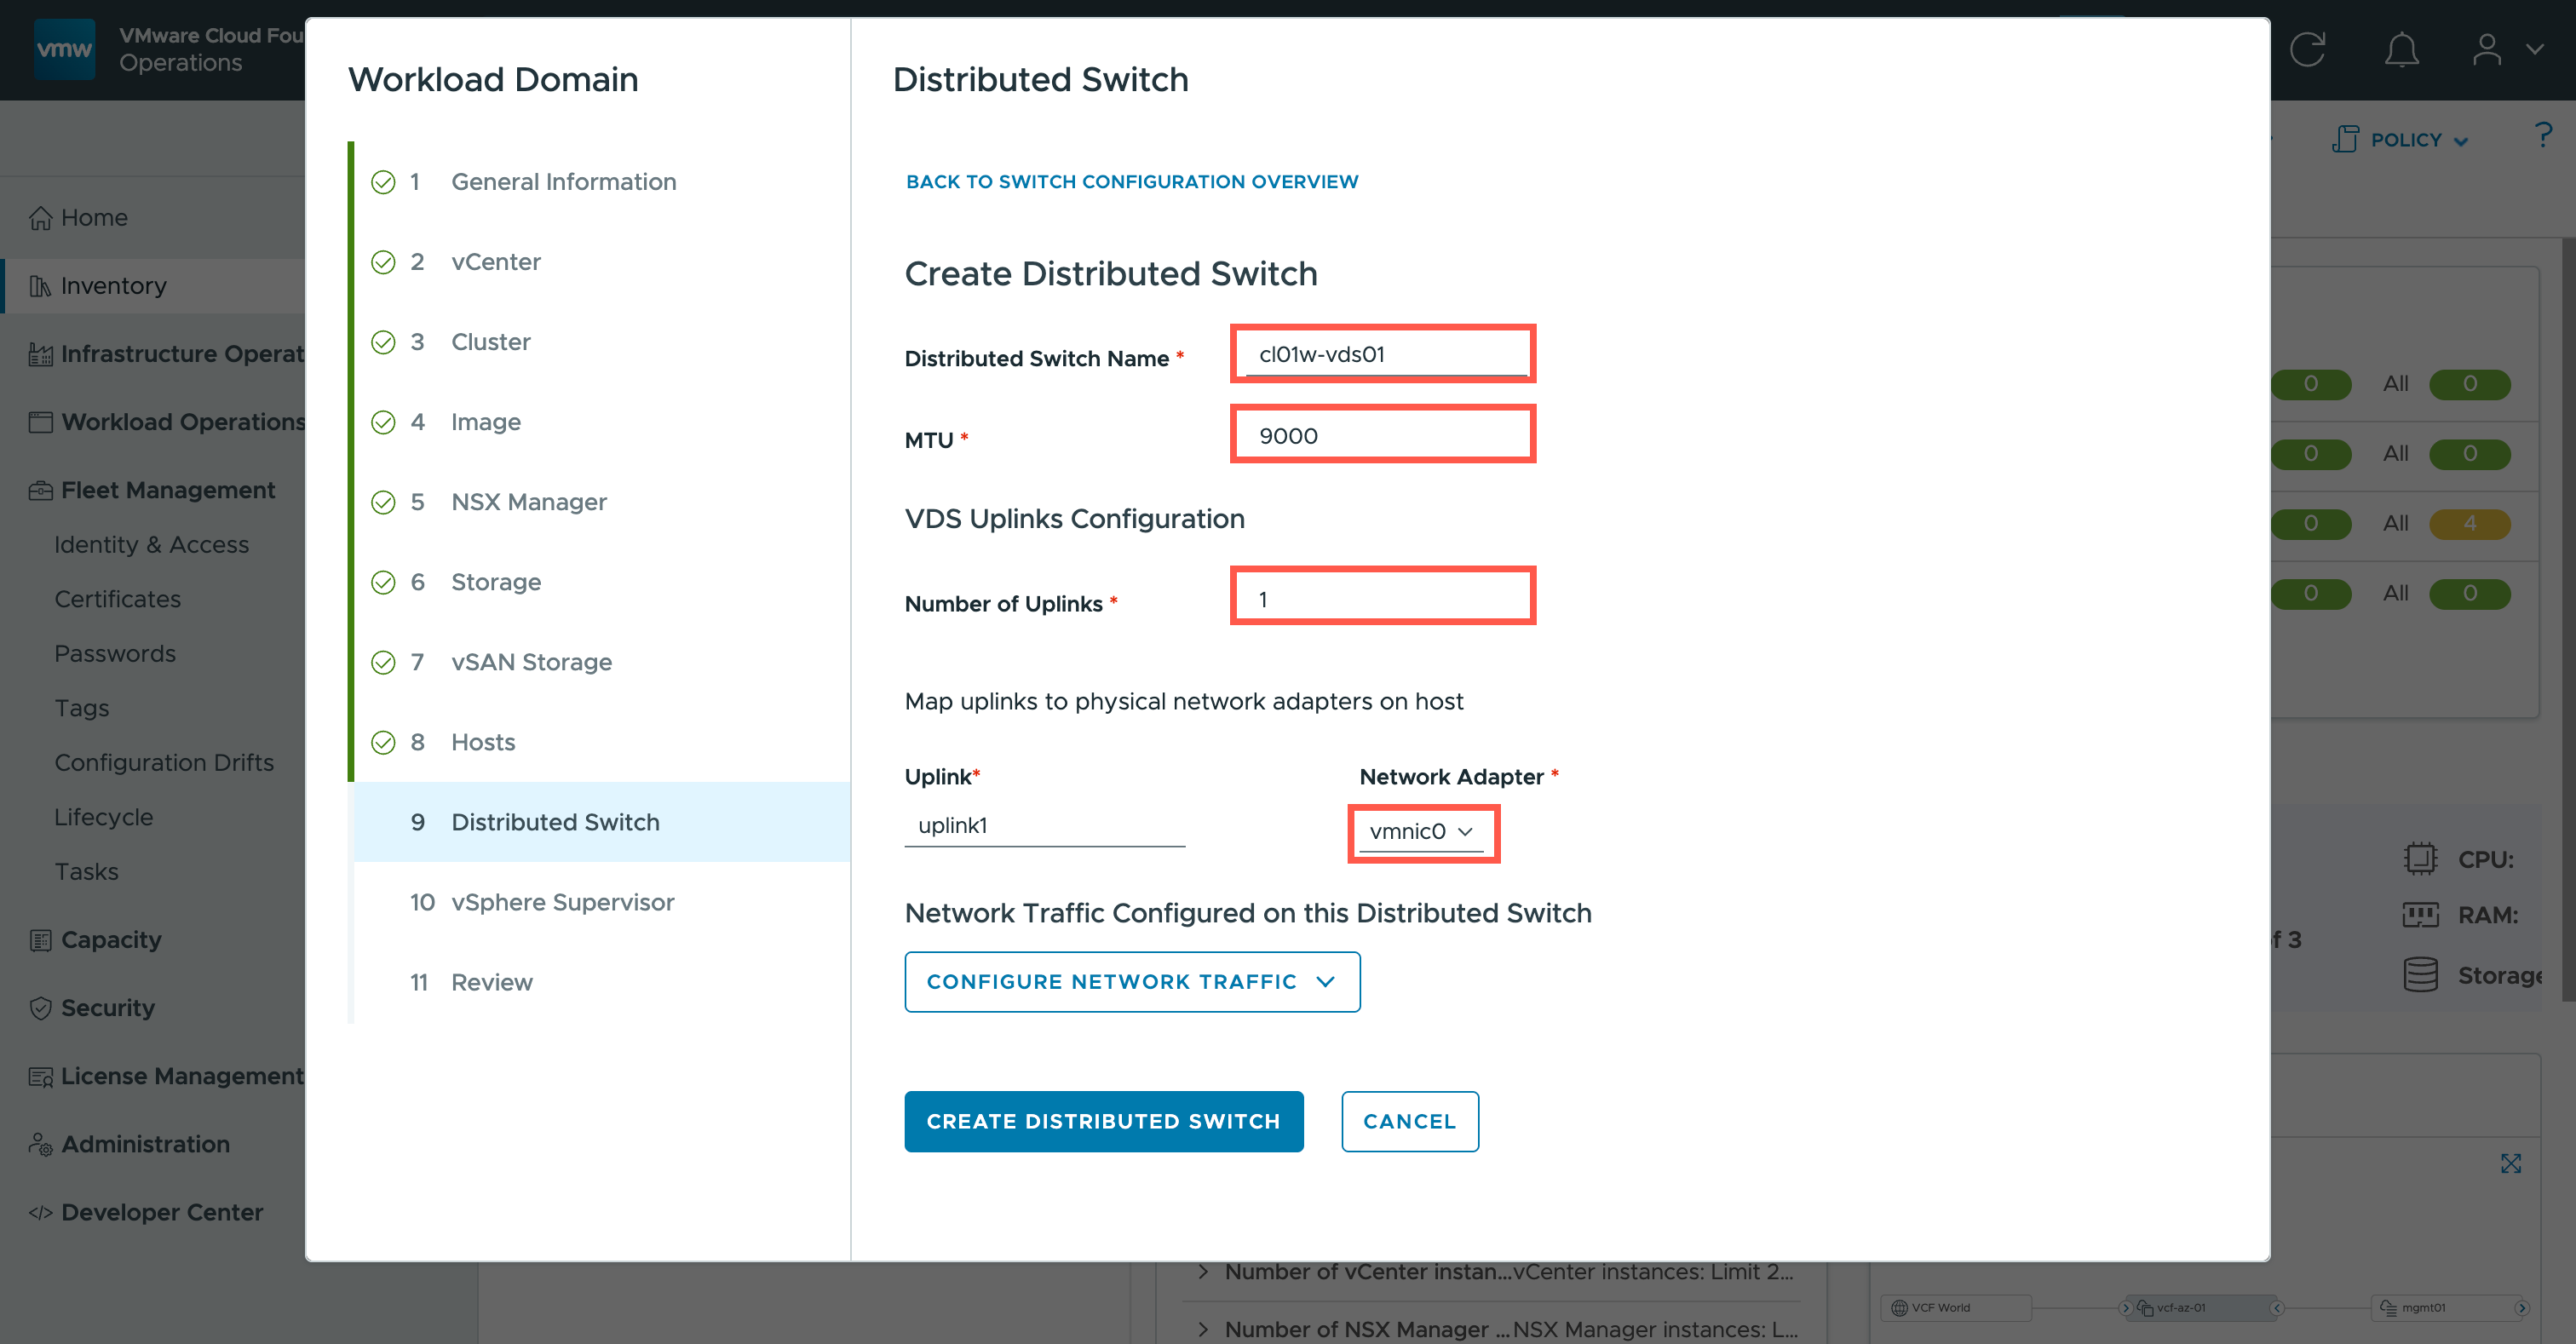
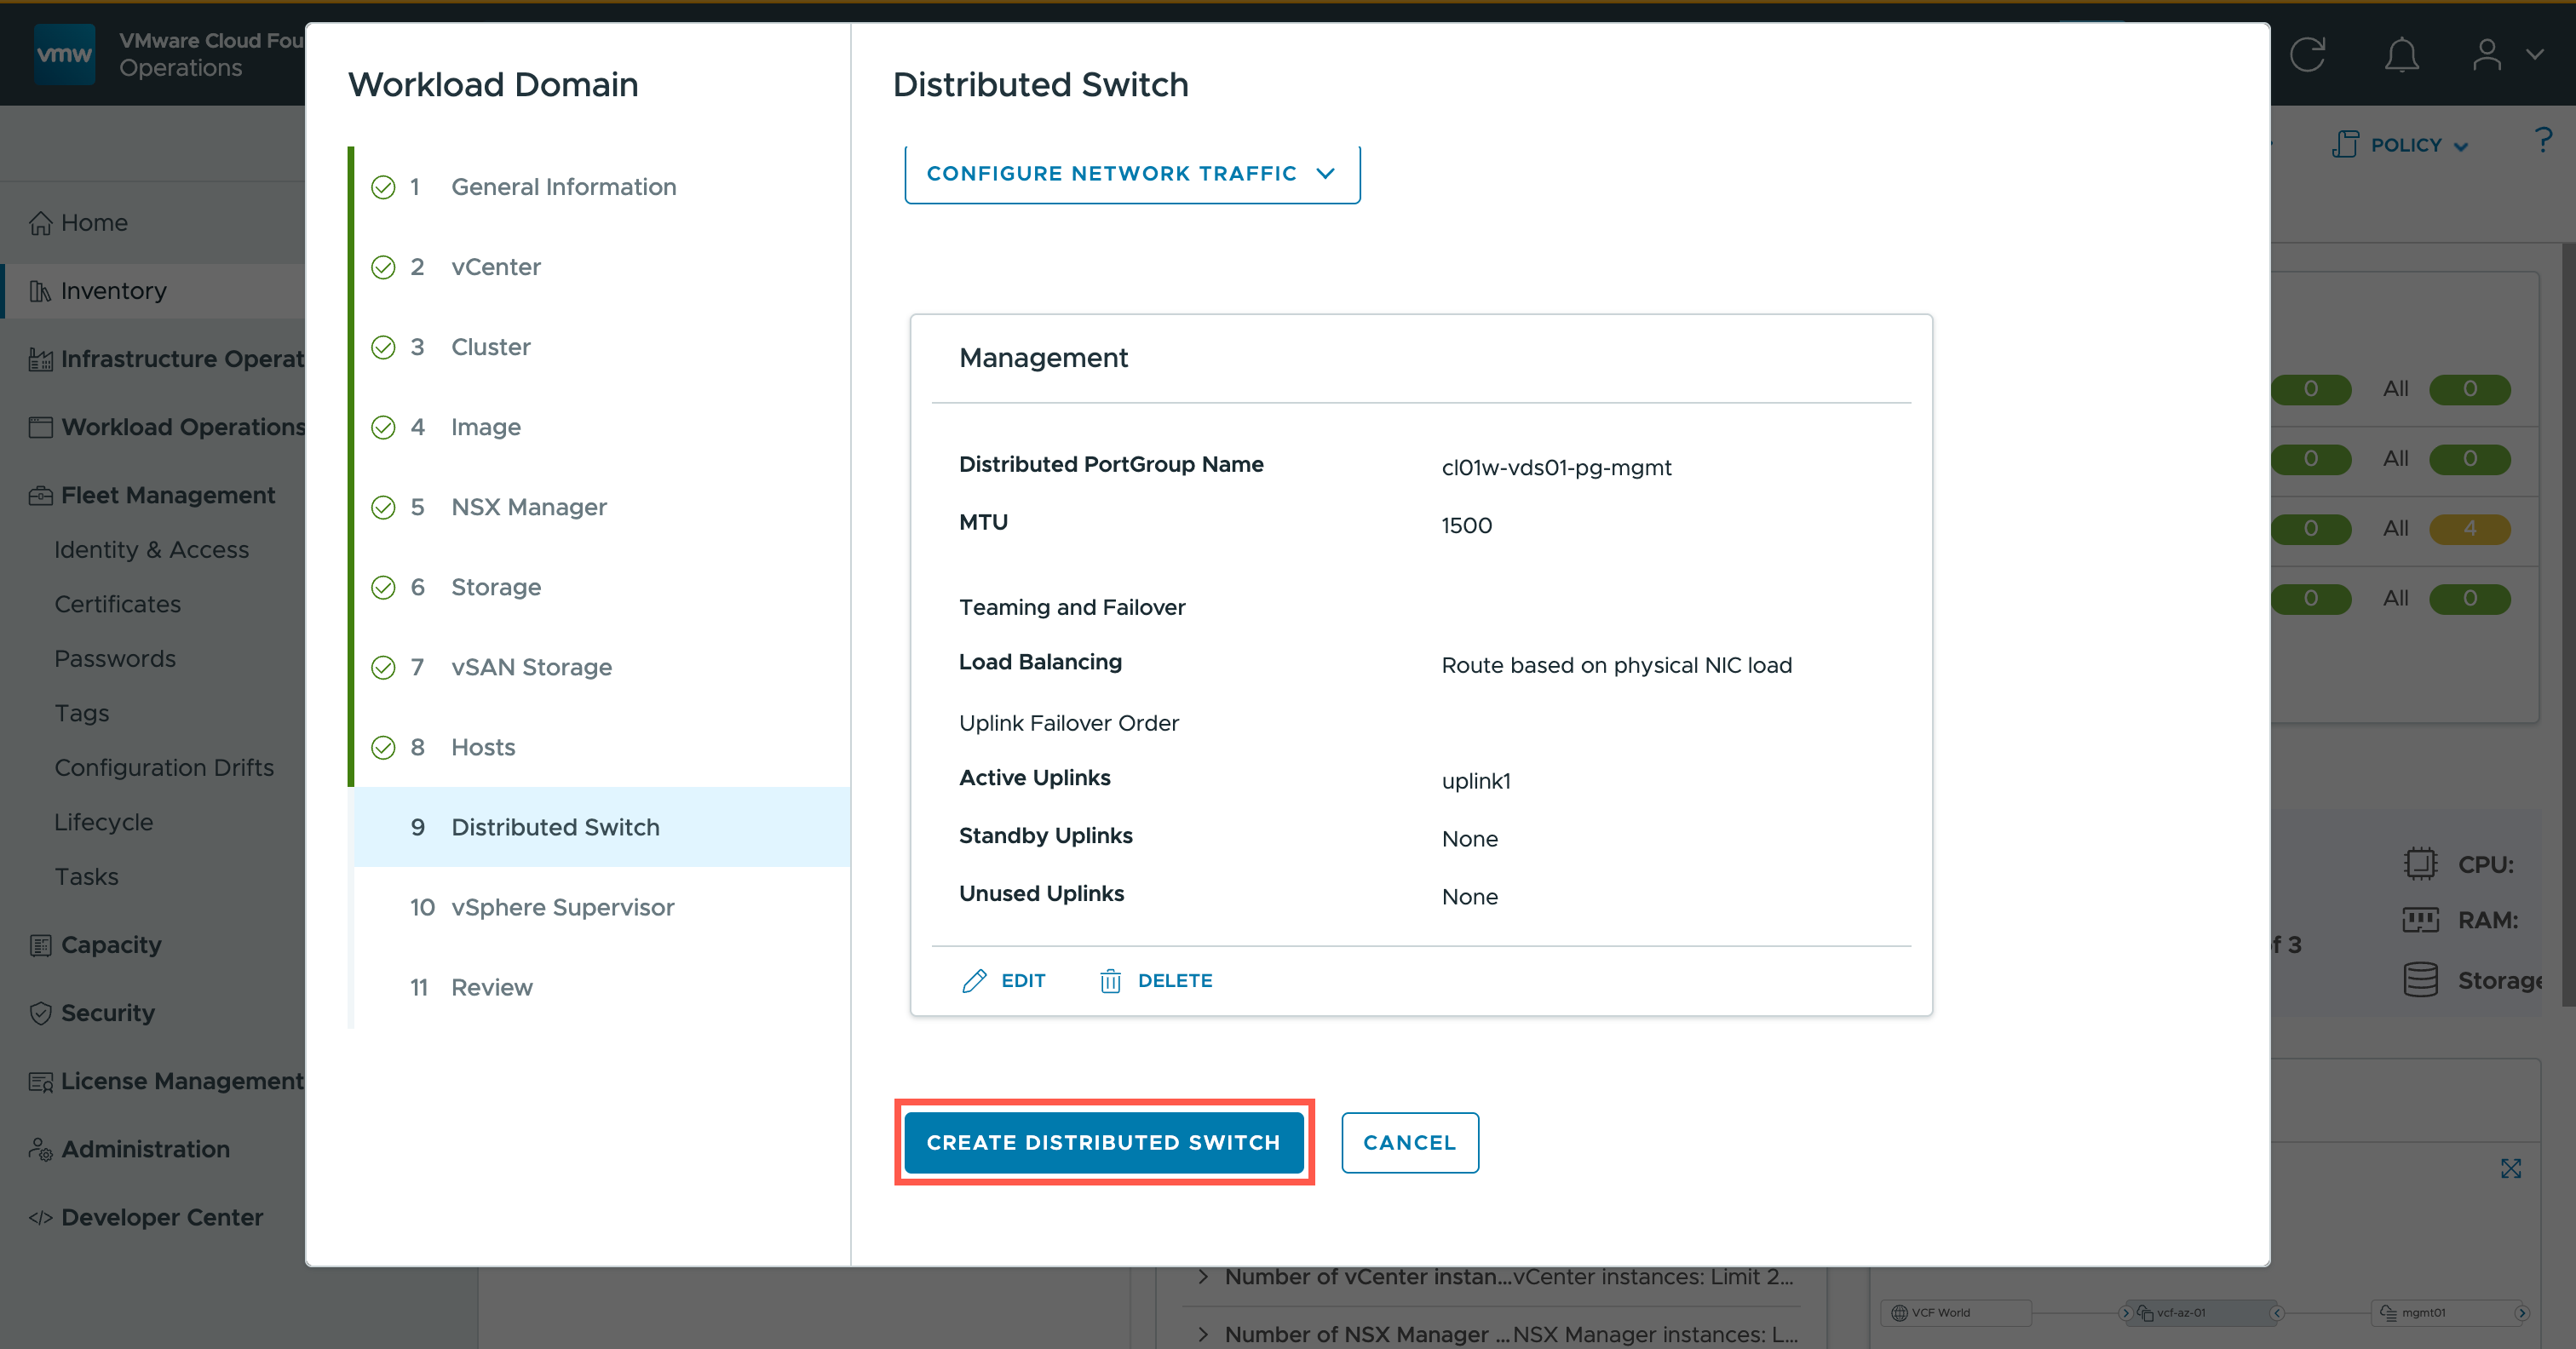
- At the Distributed Switch Name field, type
cl01w-vds01.- At the MTU field, type
<switch-mtu>.- At the Number of Uplinks field, type
1.- At the Network Adapter dropdown for uplink1, select vmnic0.
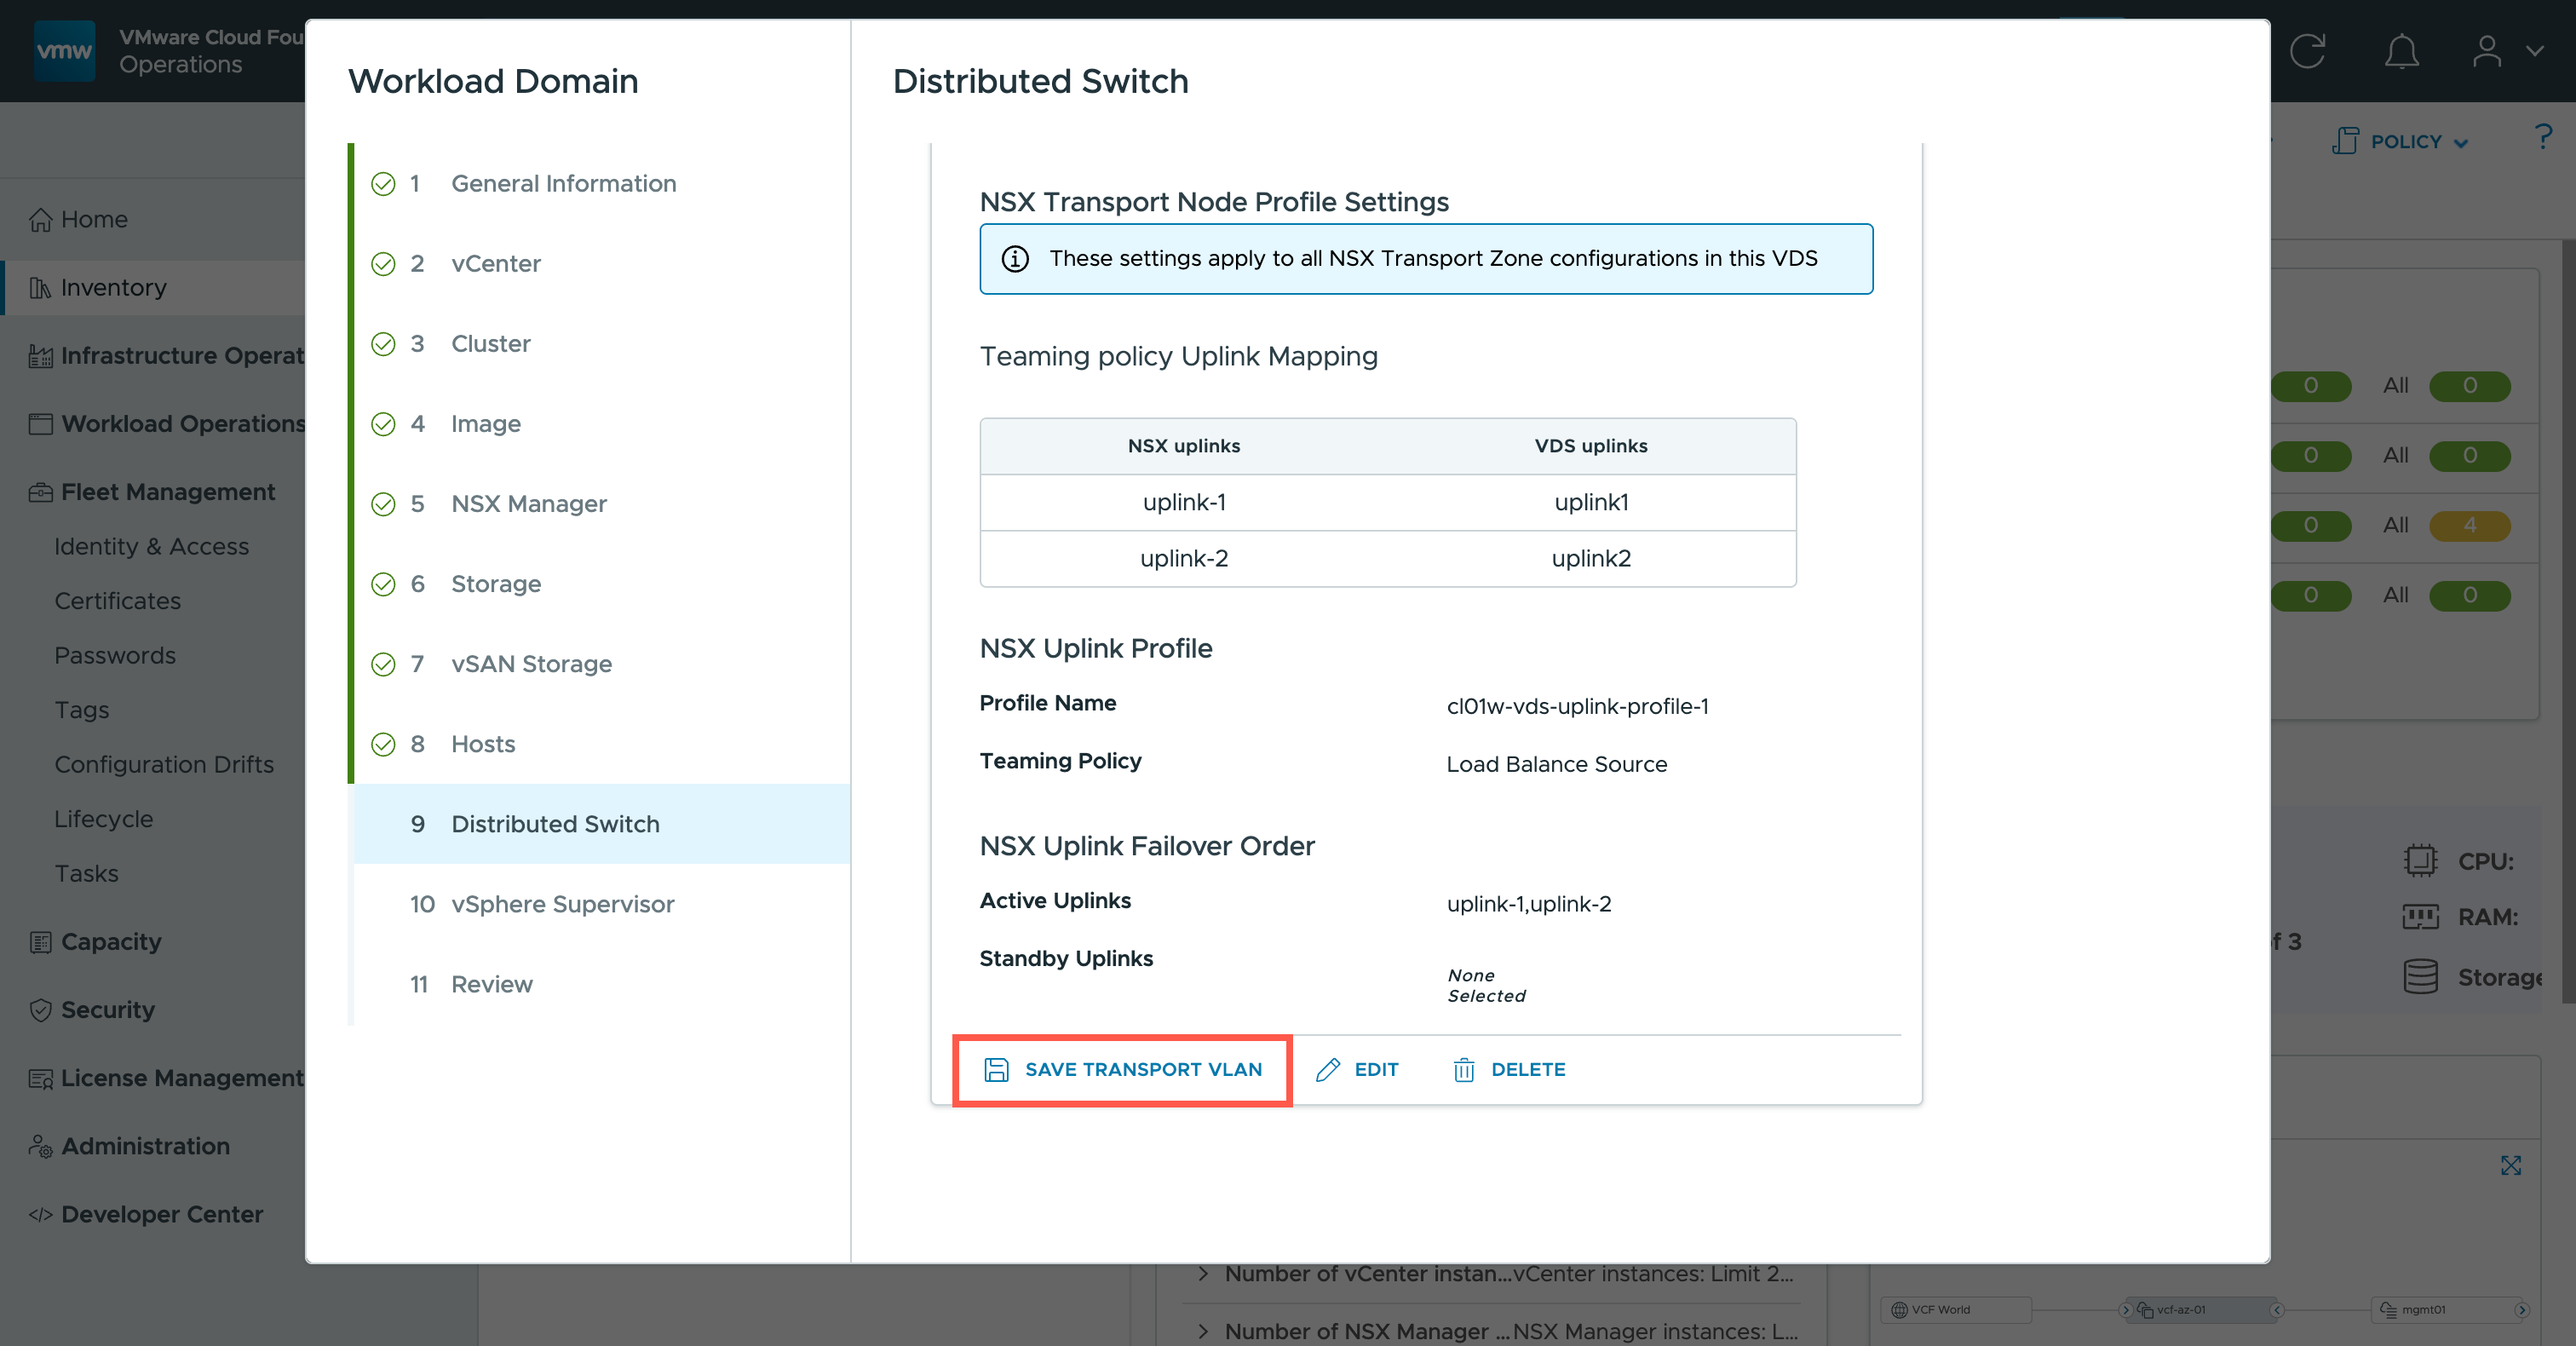
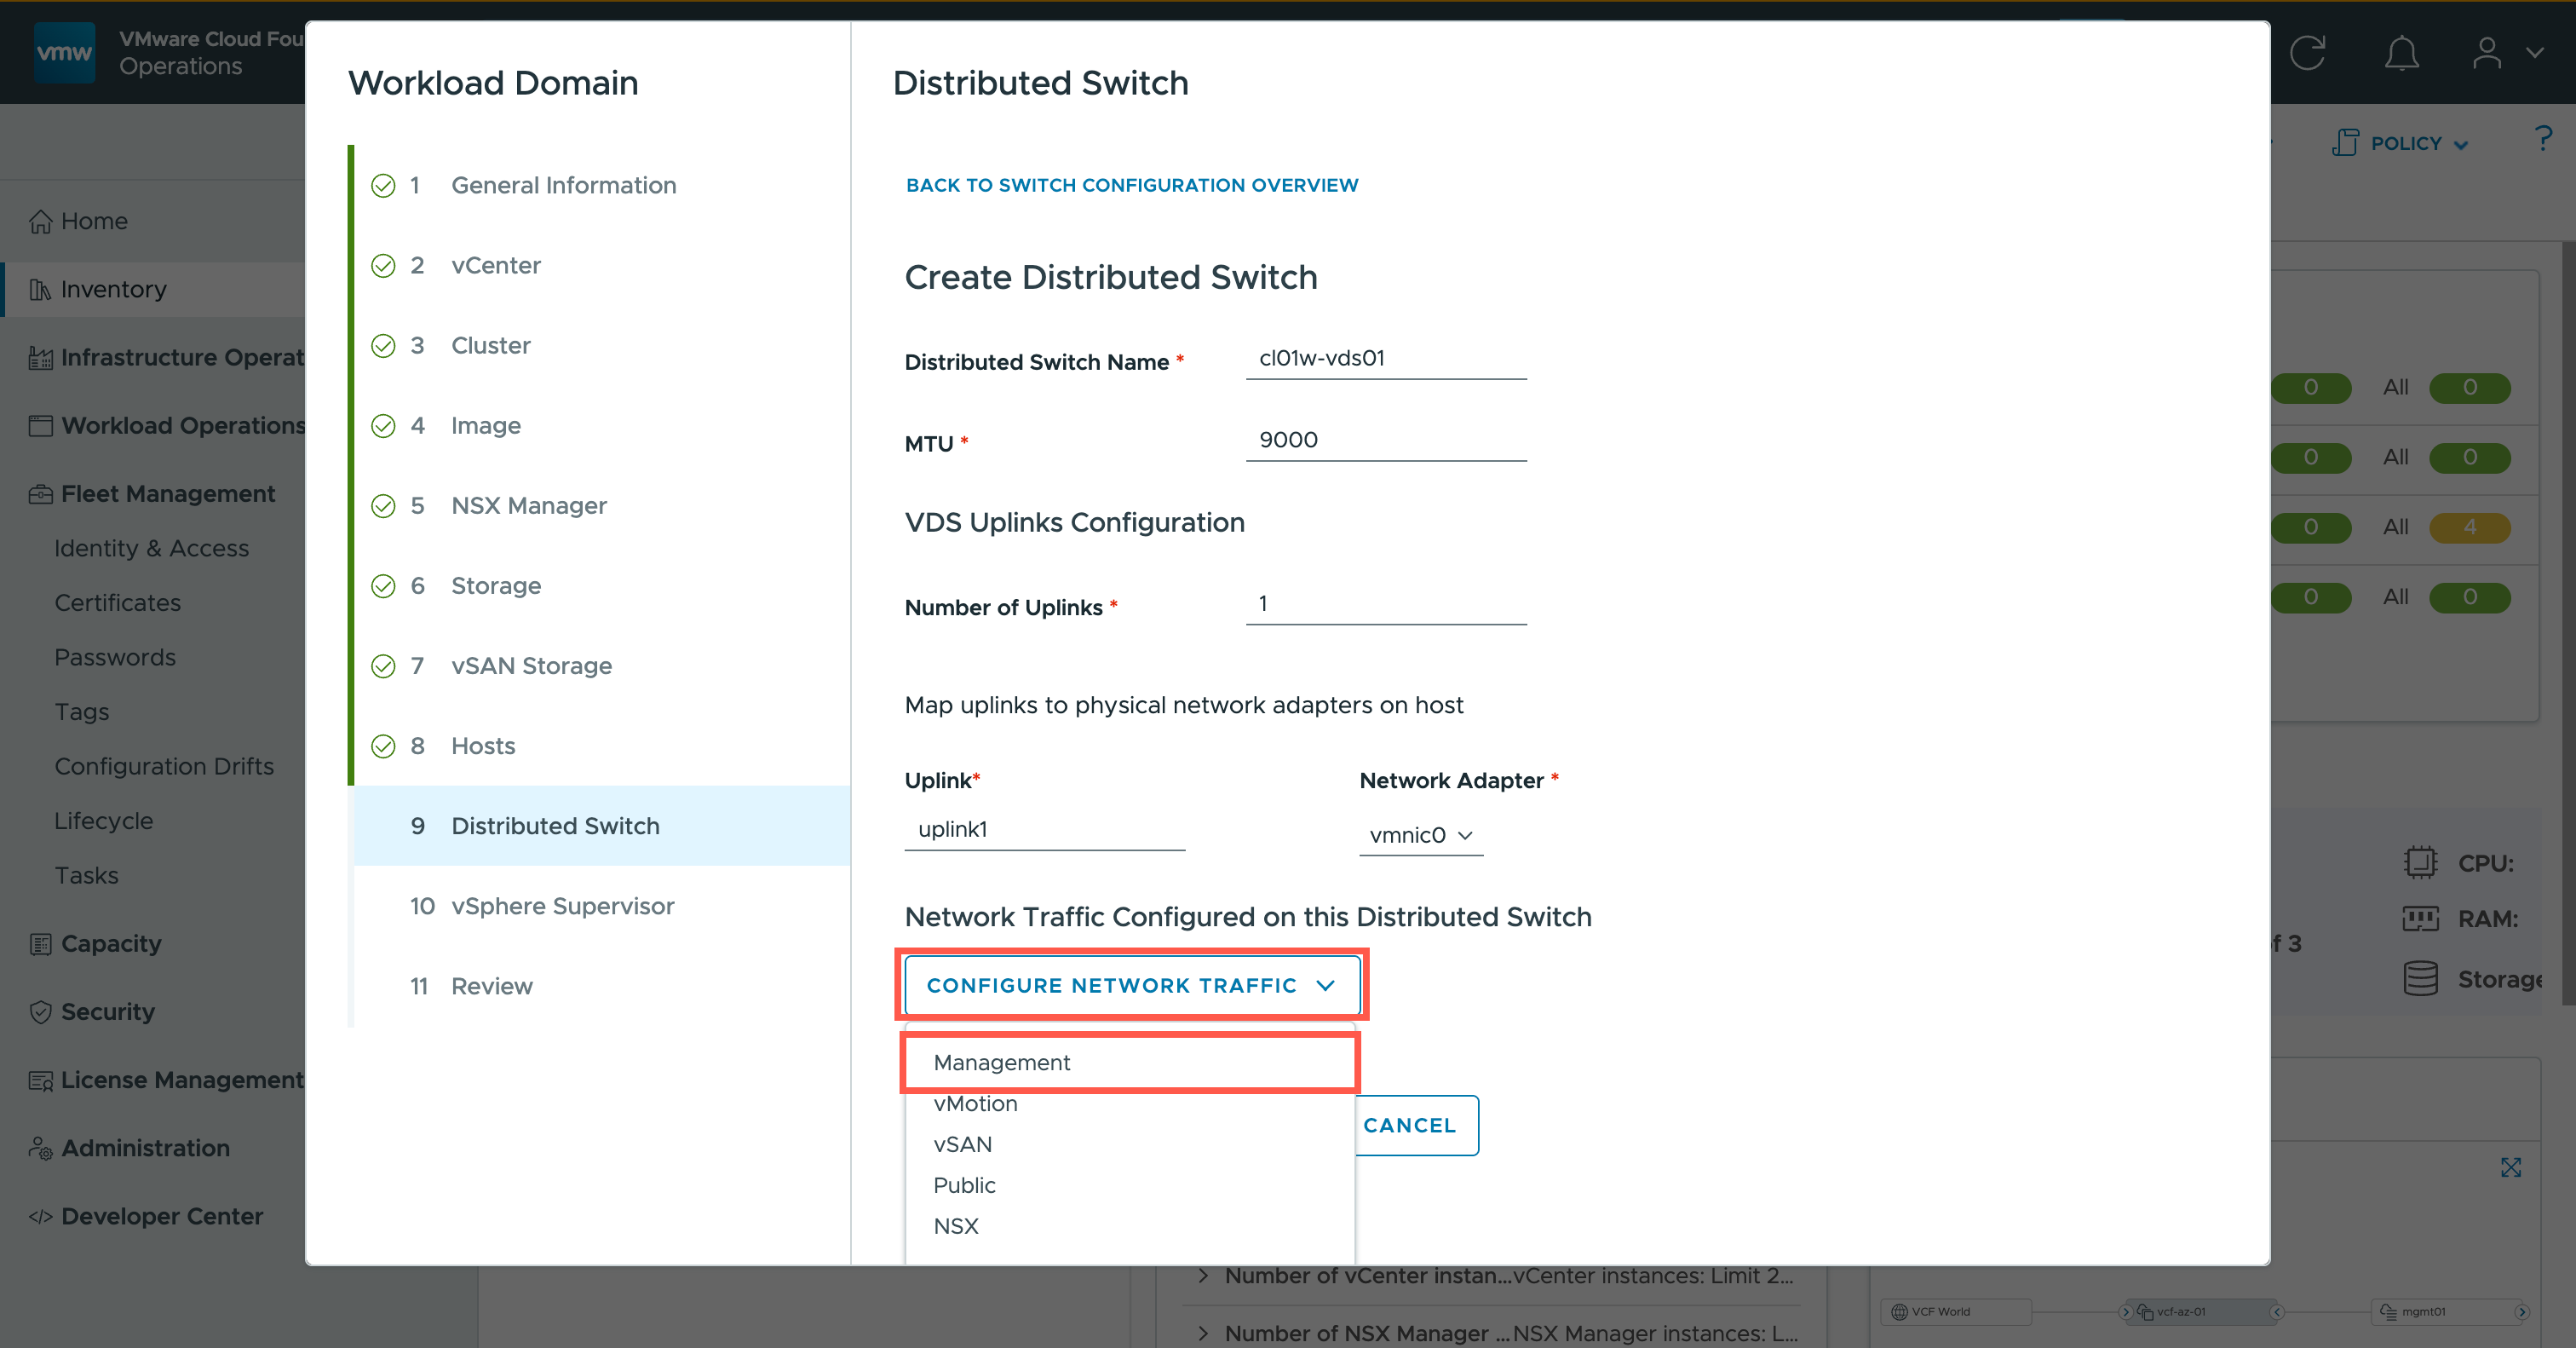
- Click CONFIGURE NETWORK TRAFFIC and then click Management.
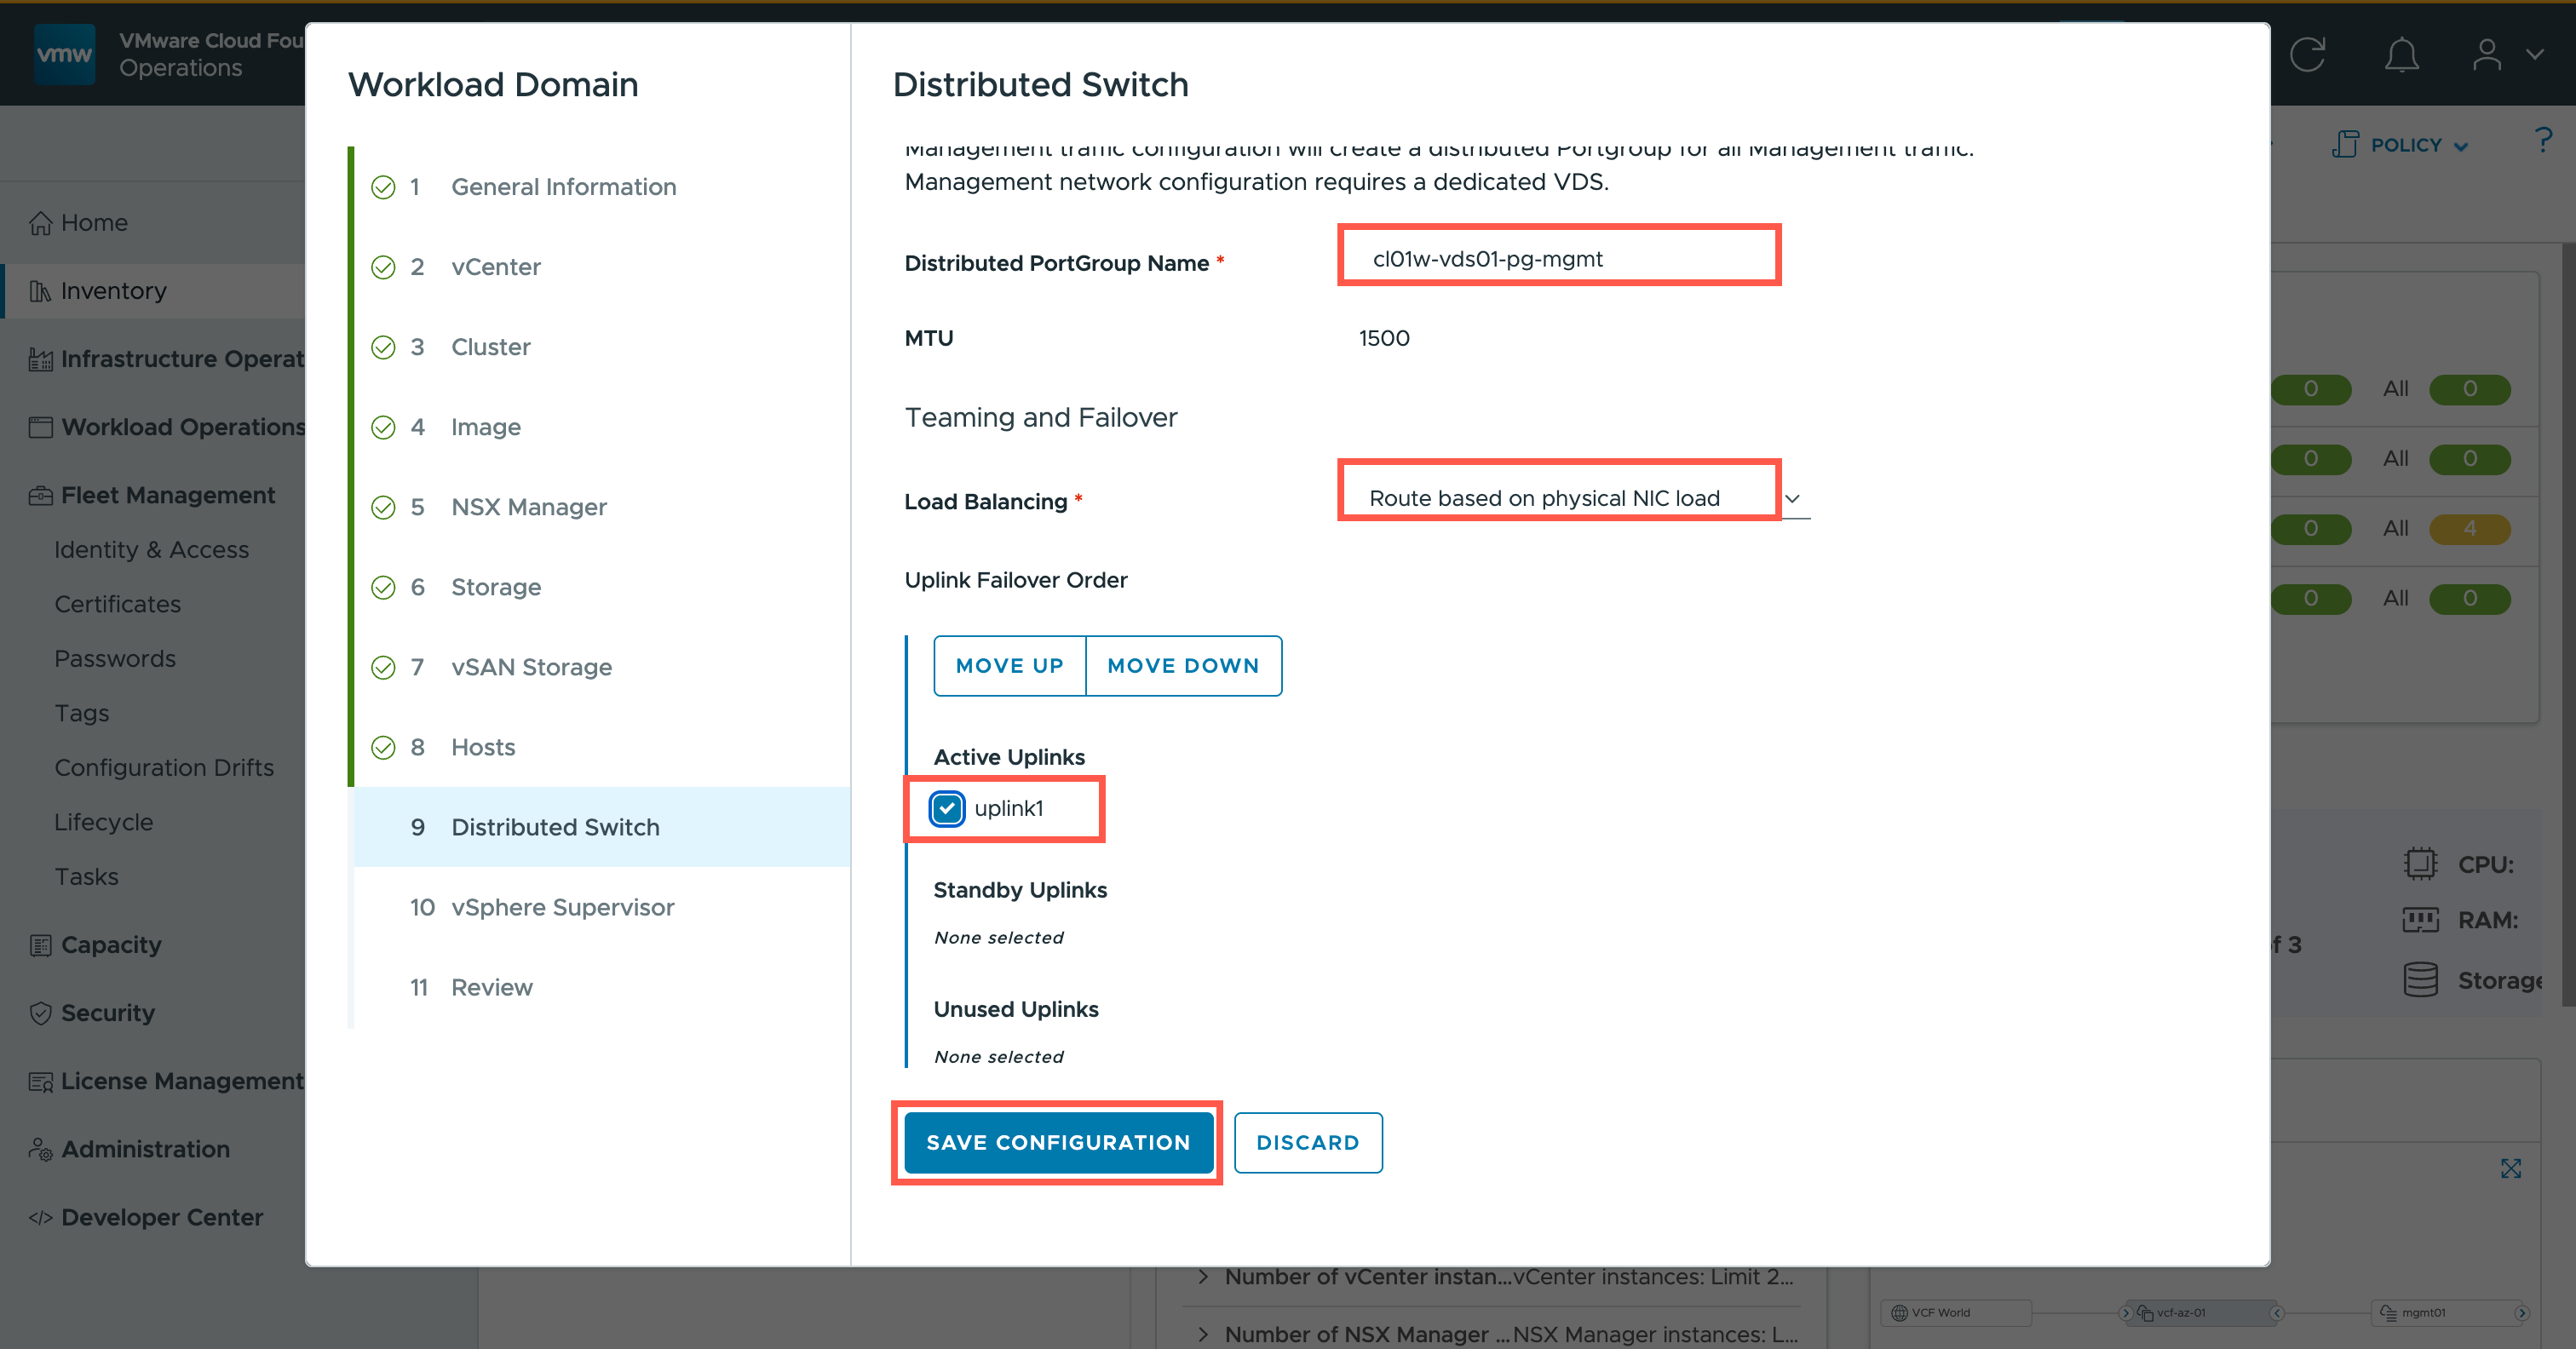
- At the Distributed PortGroup Name field, type
cl01w-vds01-pg-mgmt.- At the LoadBalancing dropdown, select Route based on physical NIC load from the list of available options.
- At the Active Uplinks field, check the uplink1 checkbox.
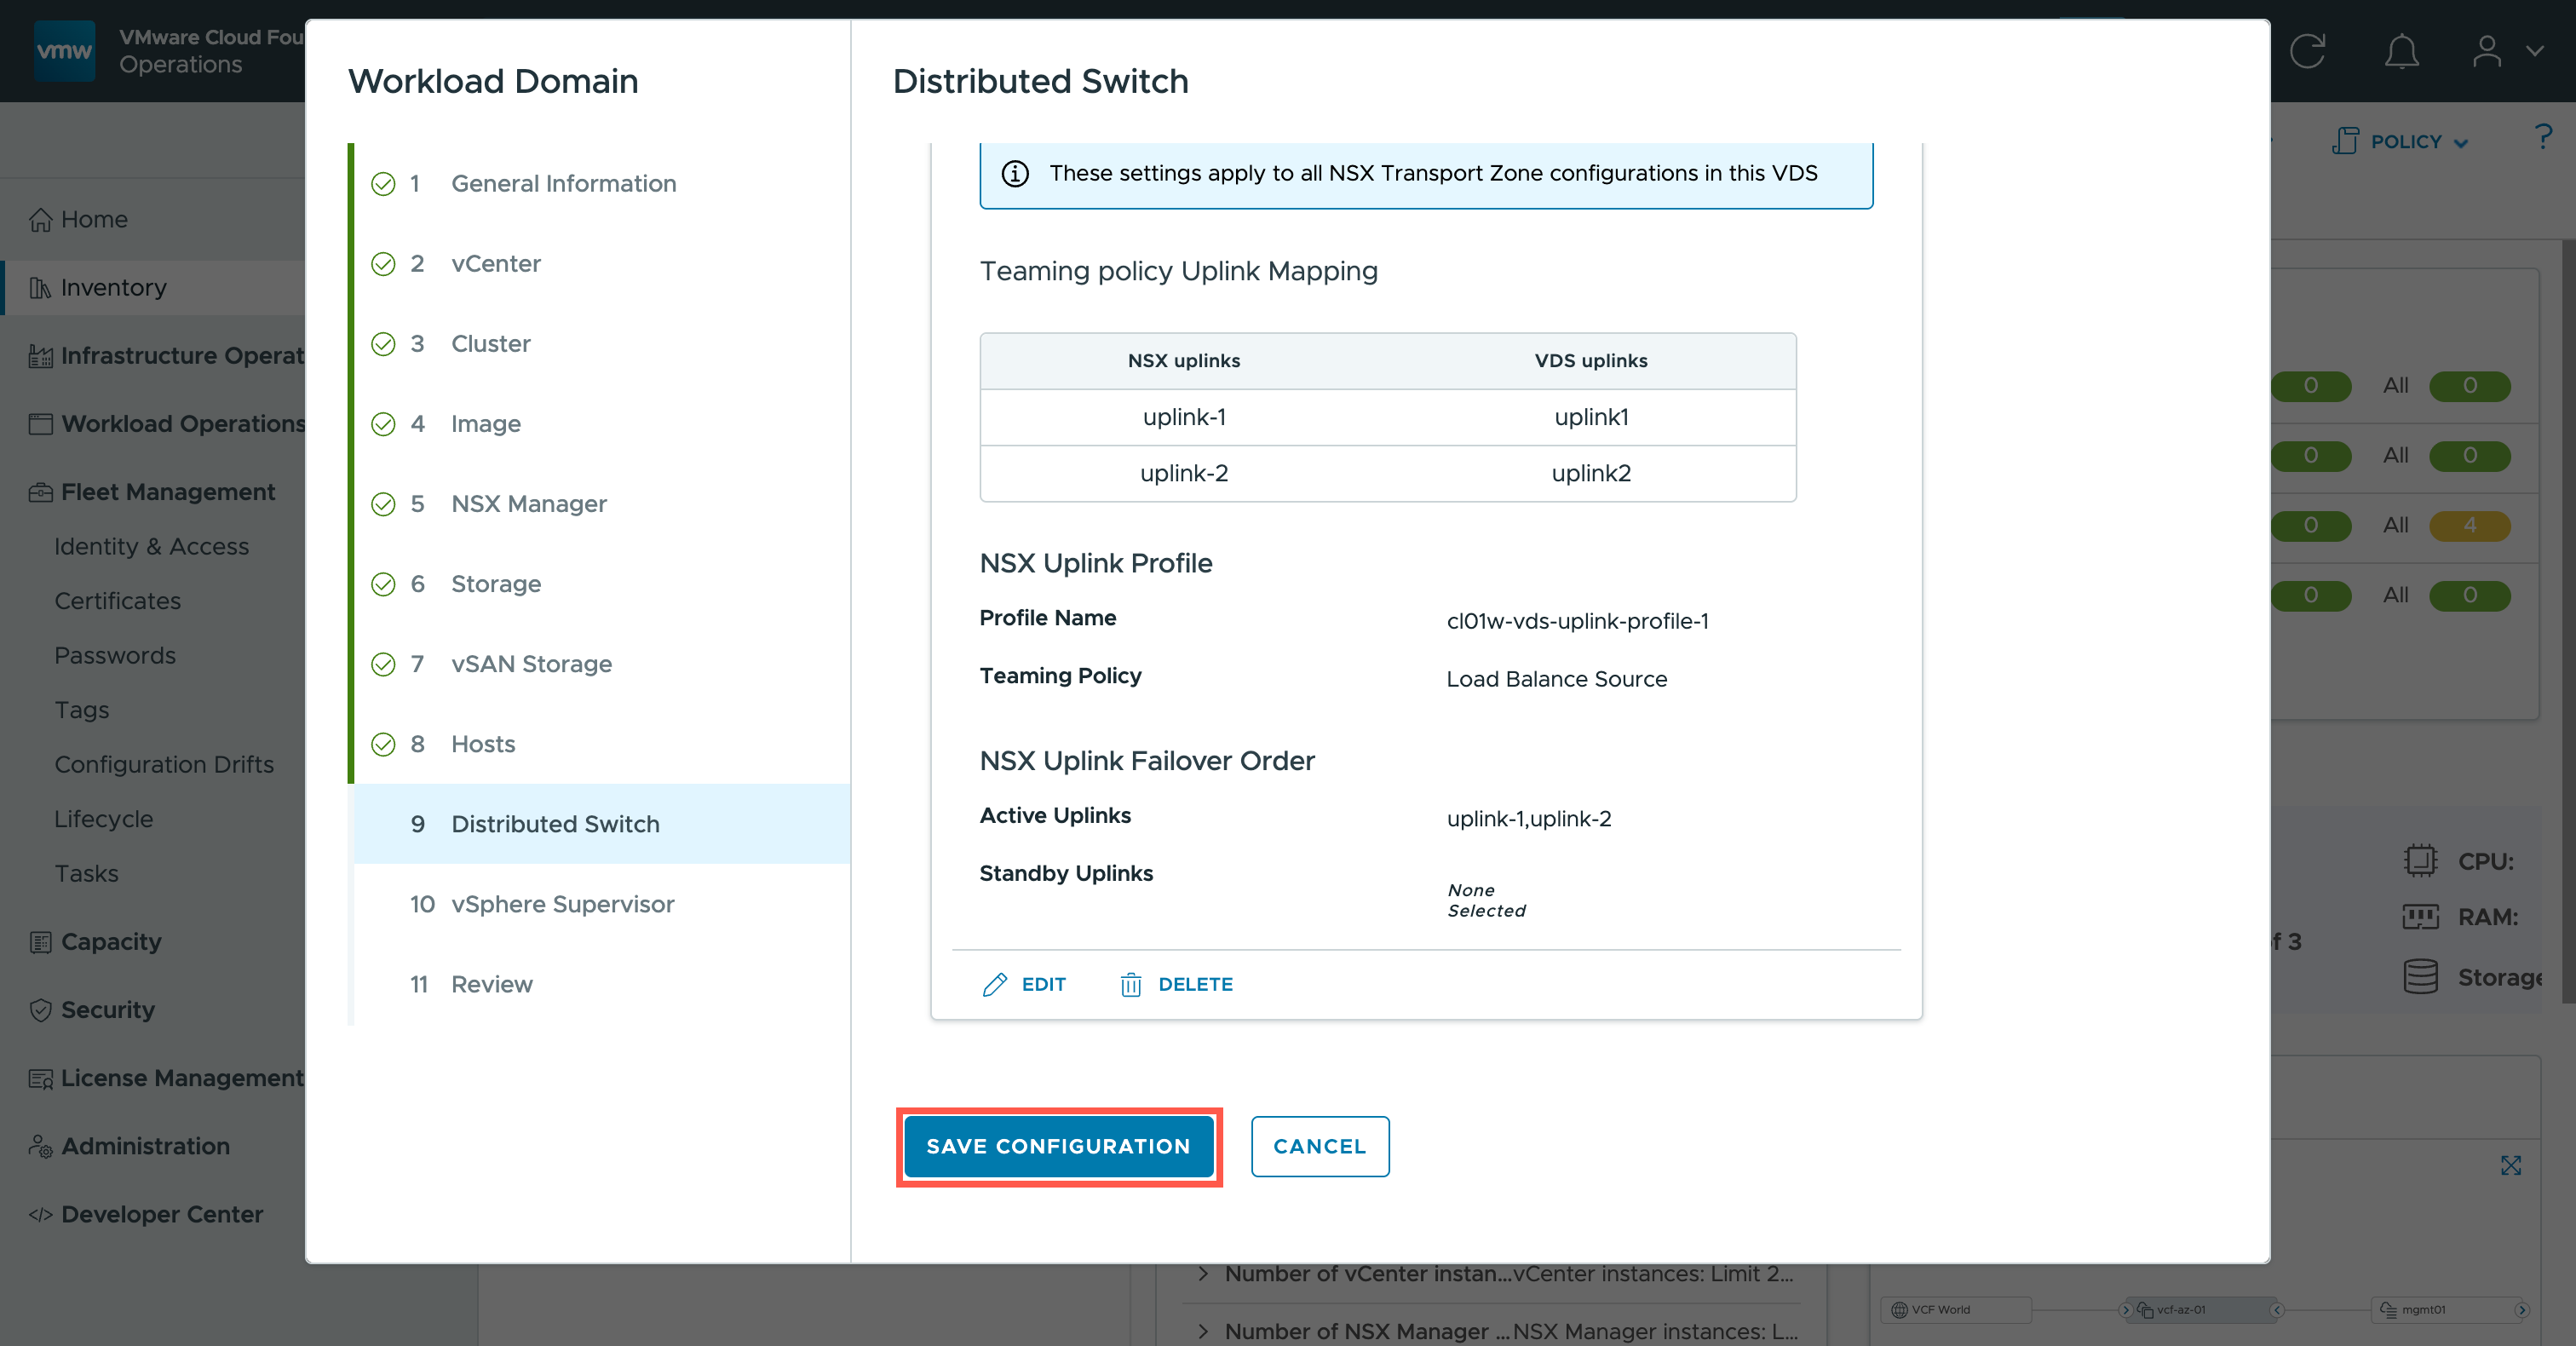
- Click SAVE CONFIGURATION.
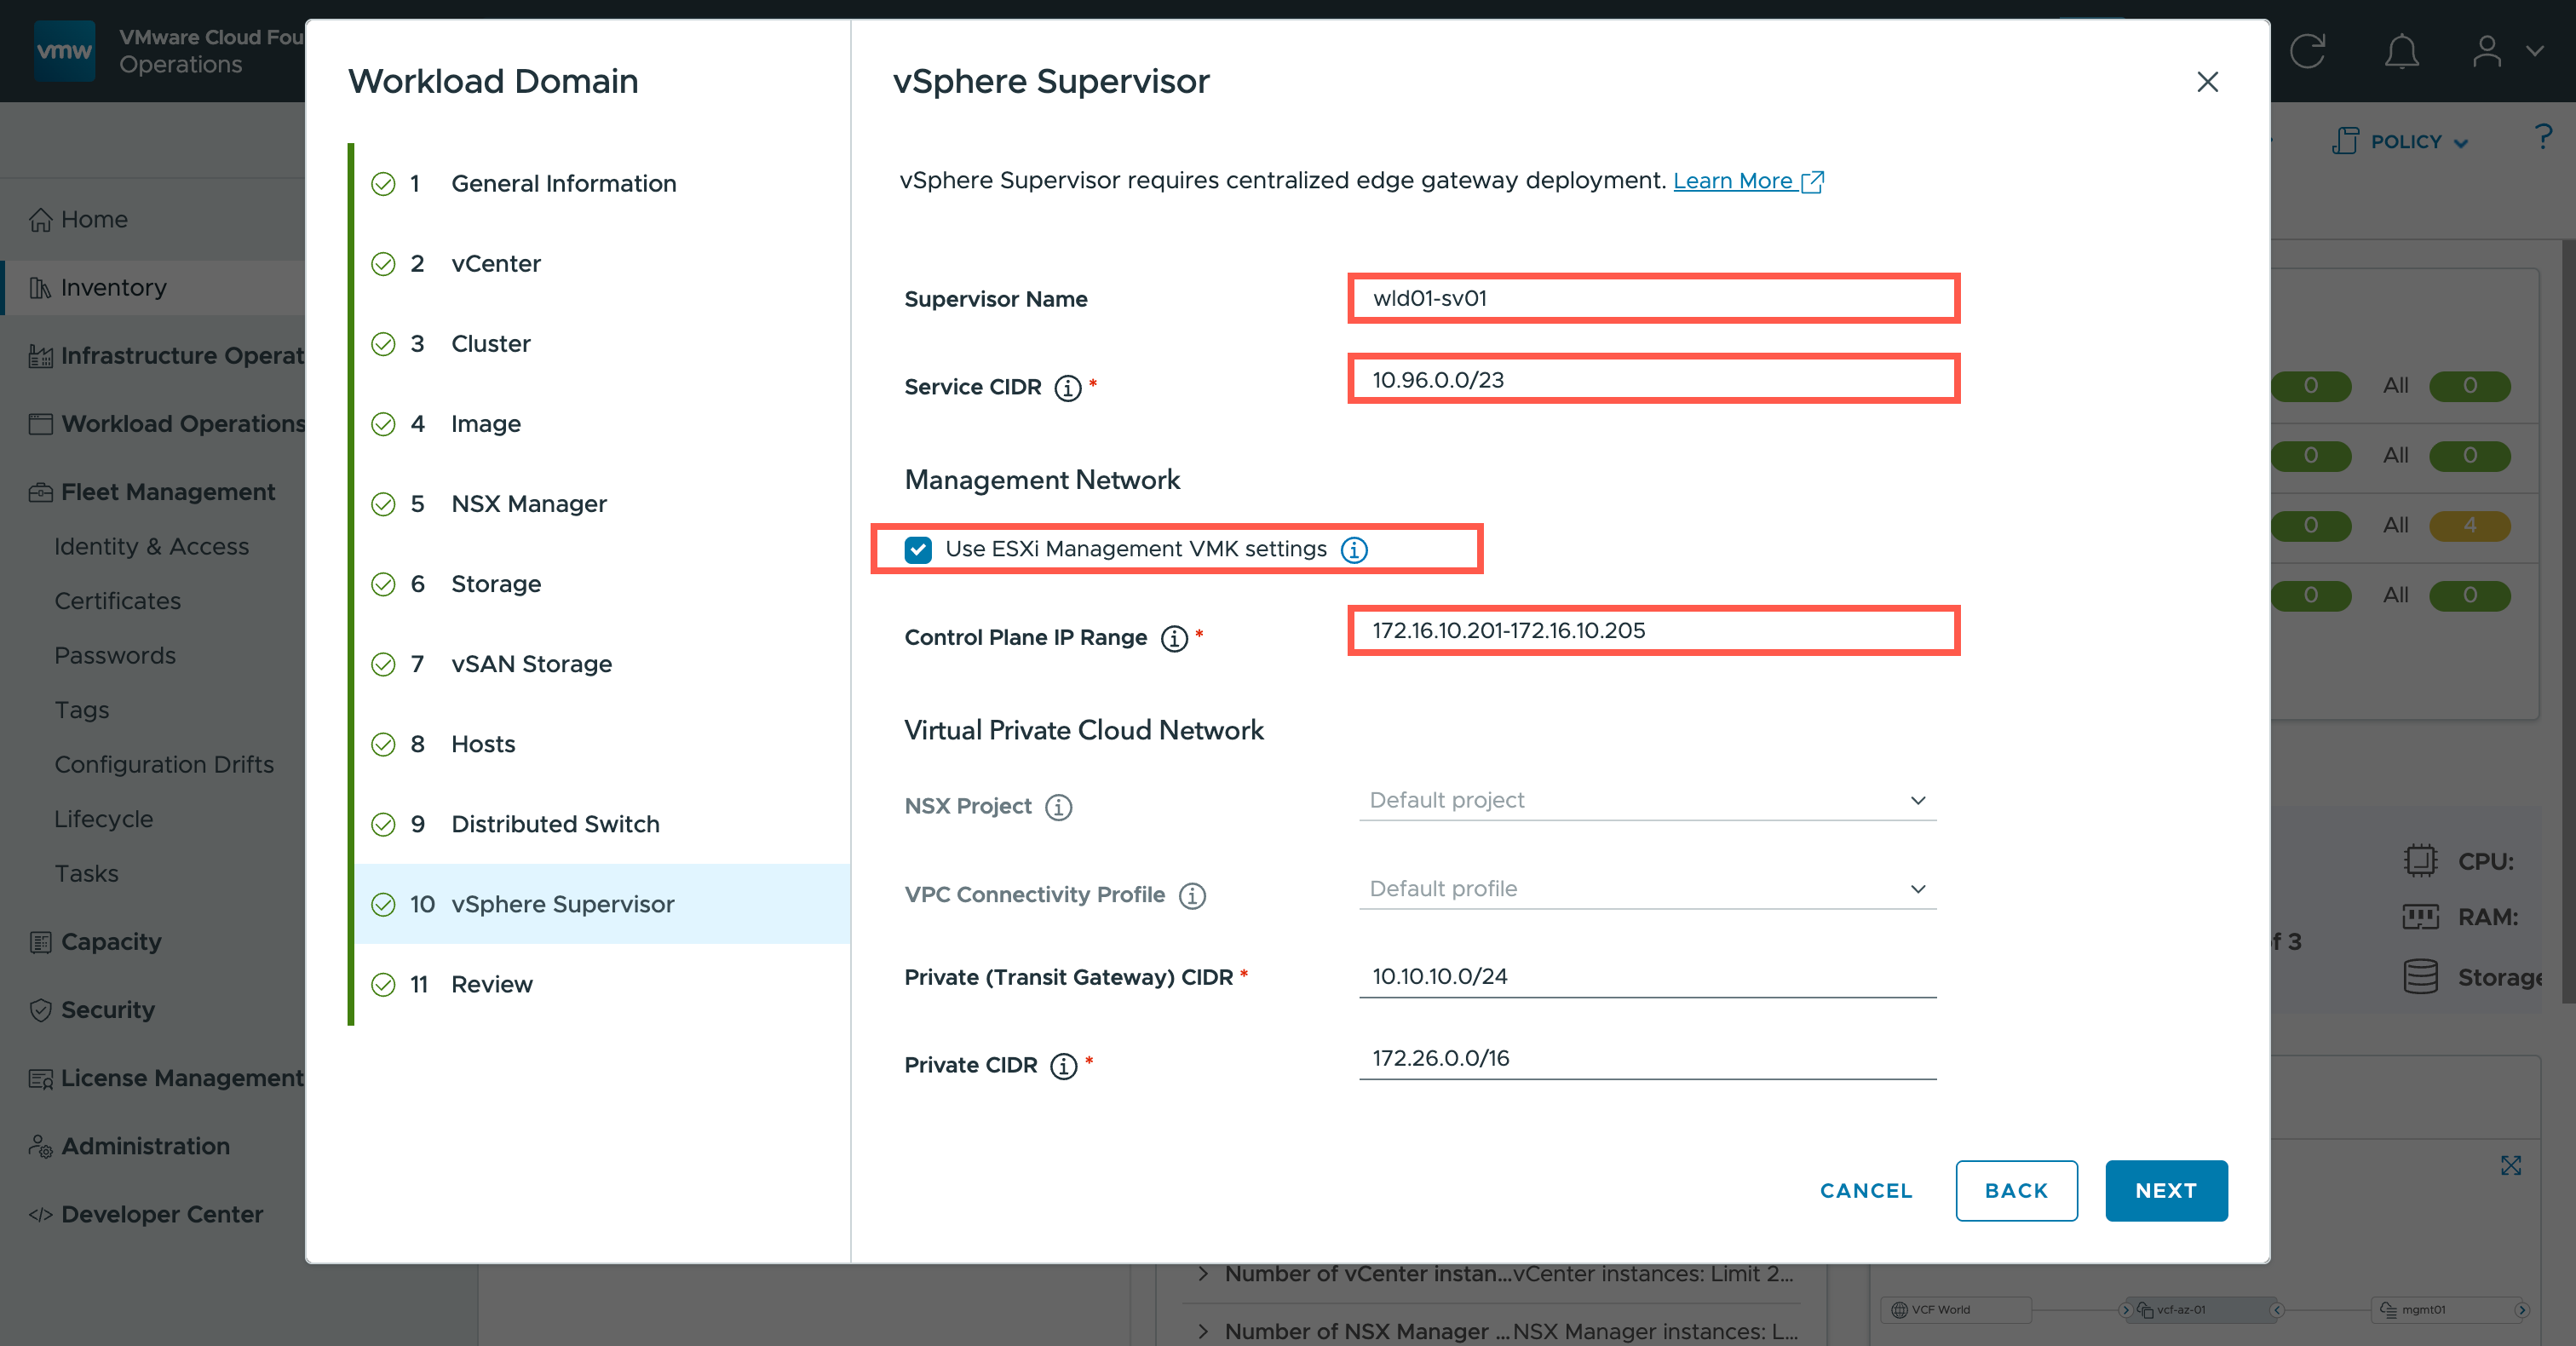
- At the Supervisor Name field, type
wld01-sv01.- At the Service CIDR field, type
10.96.0.0/23.- At the Management Network section, check the Use ESXi Management VMK settings checkbox.
- At the Control Plane IP Range CIDR field, type
172.16.10.201-172.16.10.205.
- Scroll down.
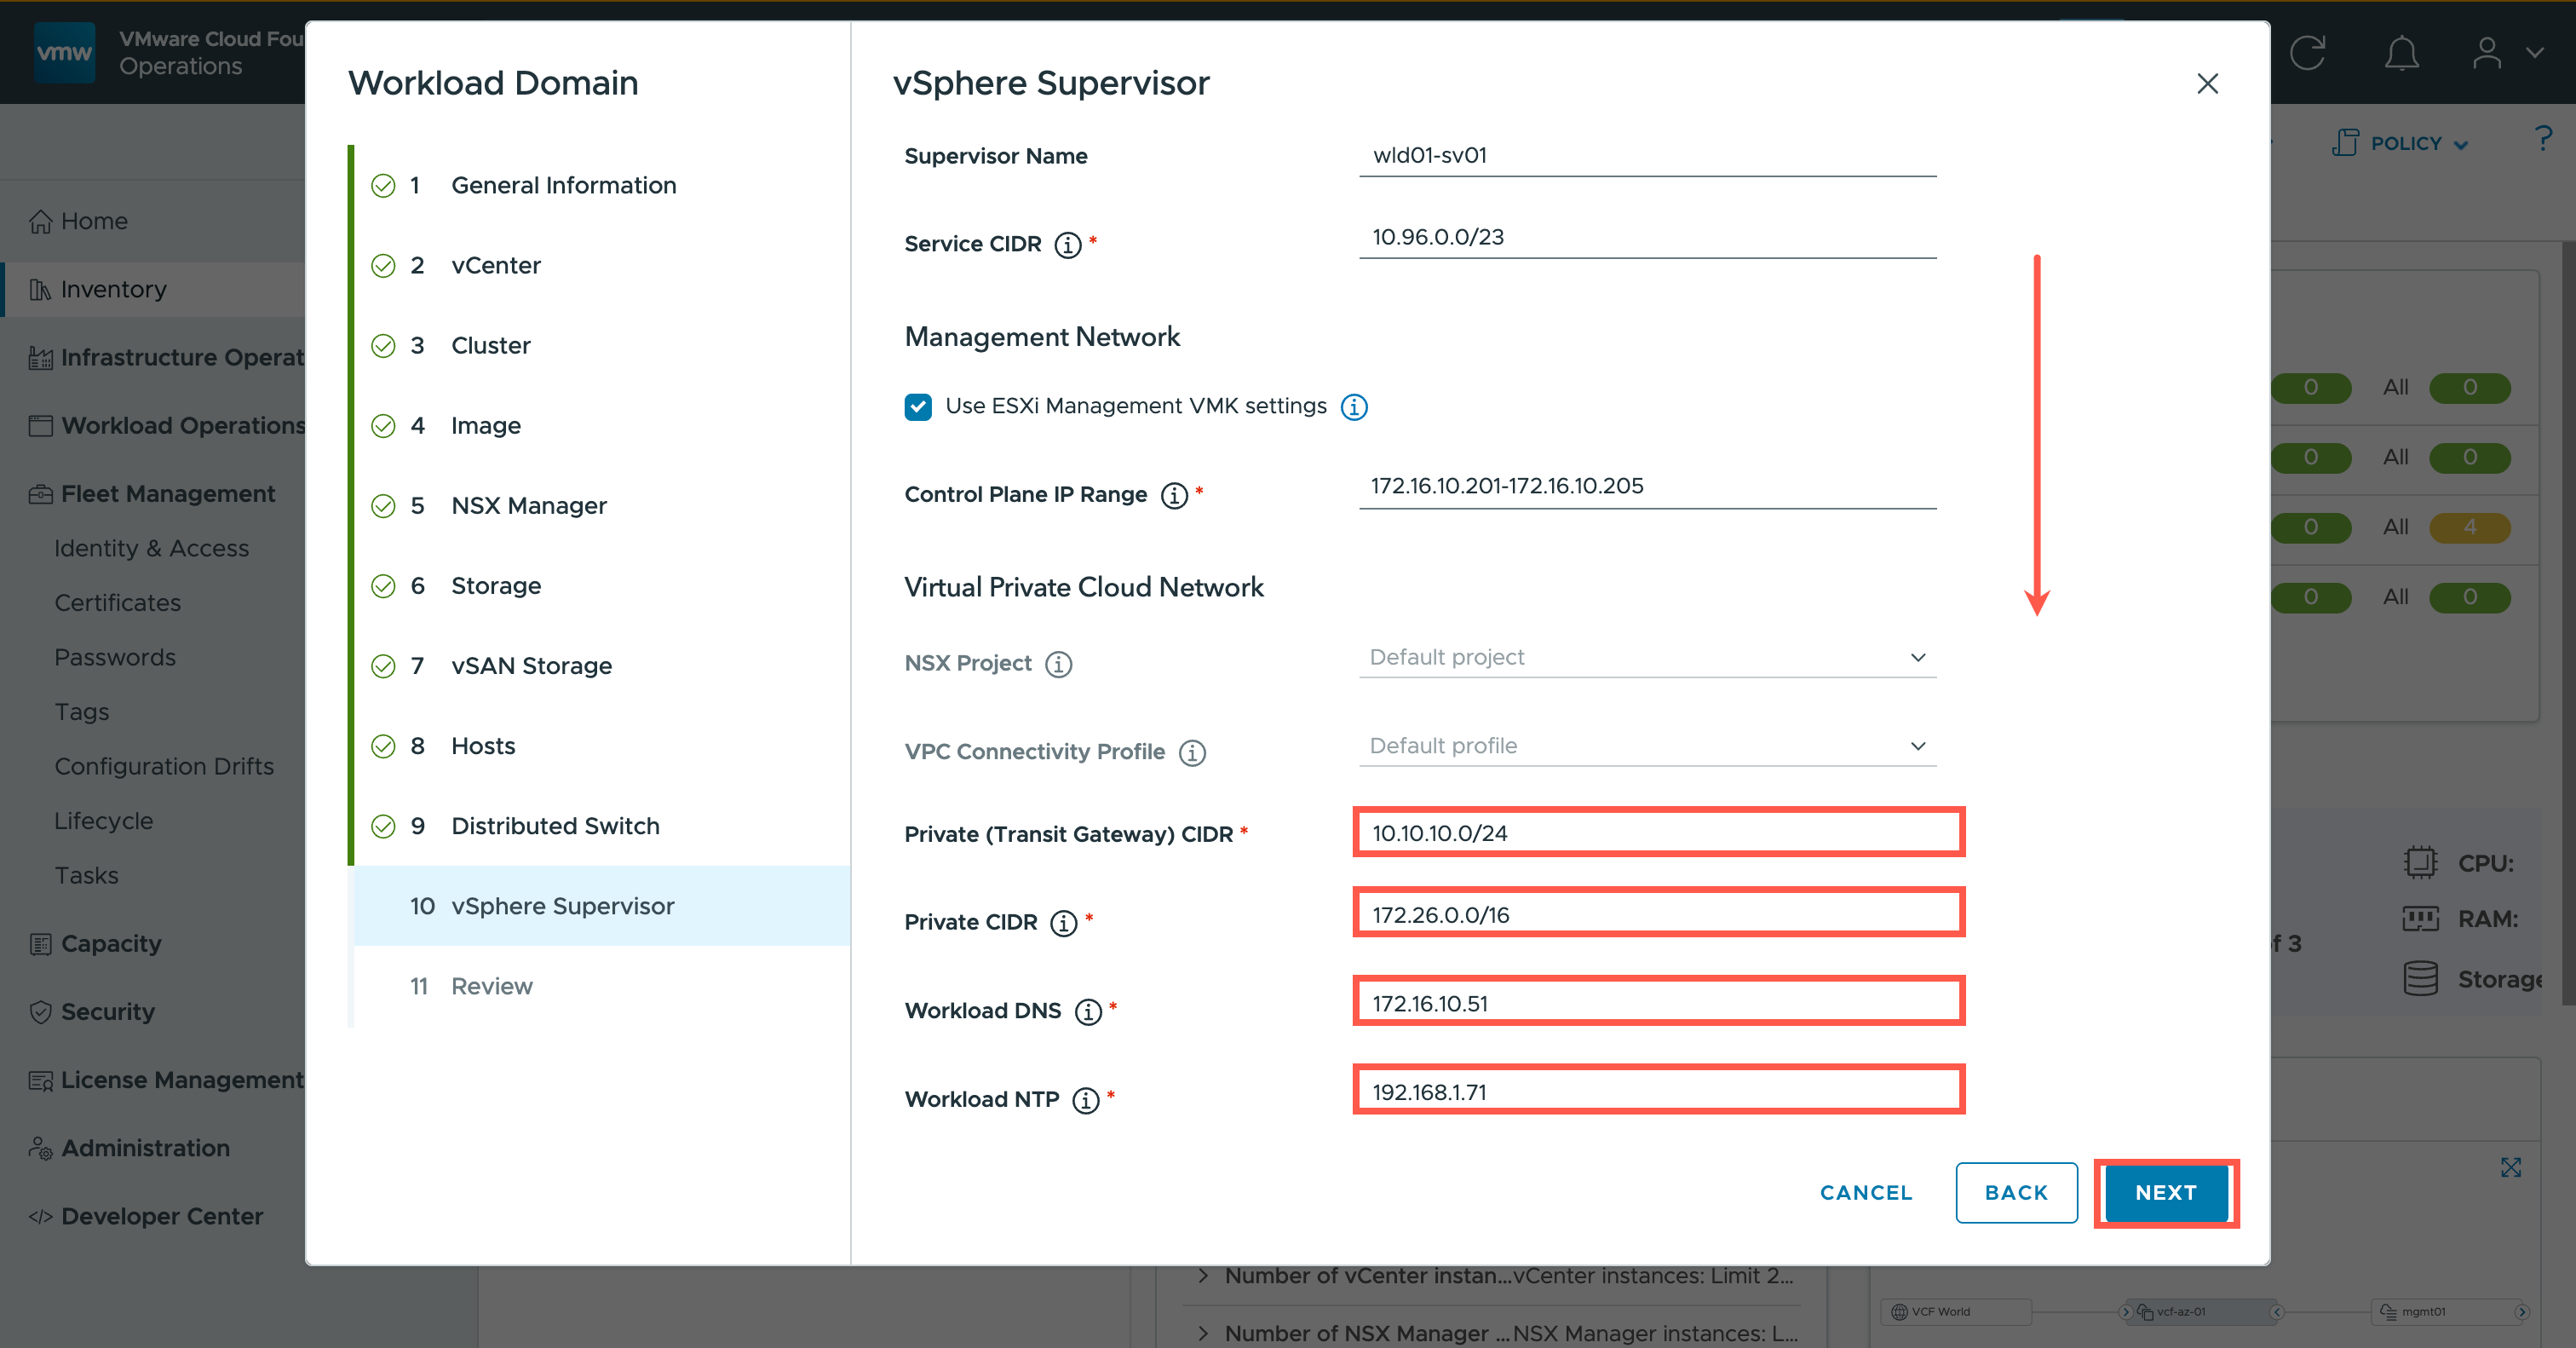
- At the Private (Transit Gateway) CIDR field, type
10.10.10.0/24.- At the Private CIDR field, type
172.26.0.0/16.- At the Workload DNS field, type
172.16.10.51.- At the Workload NTP field, type
192.168.1.71.- Click NEXT.
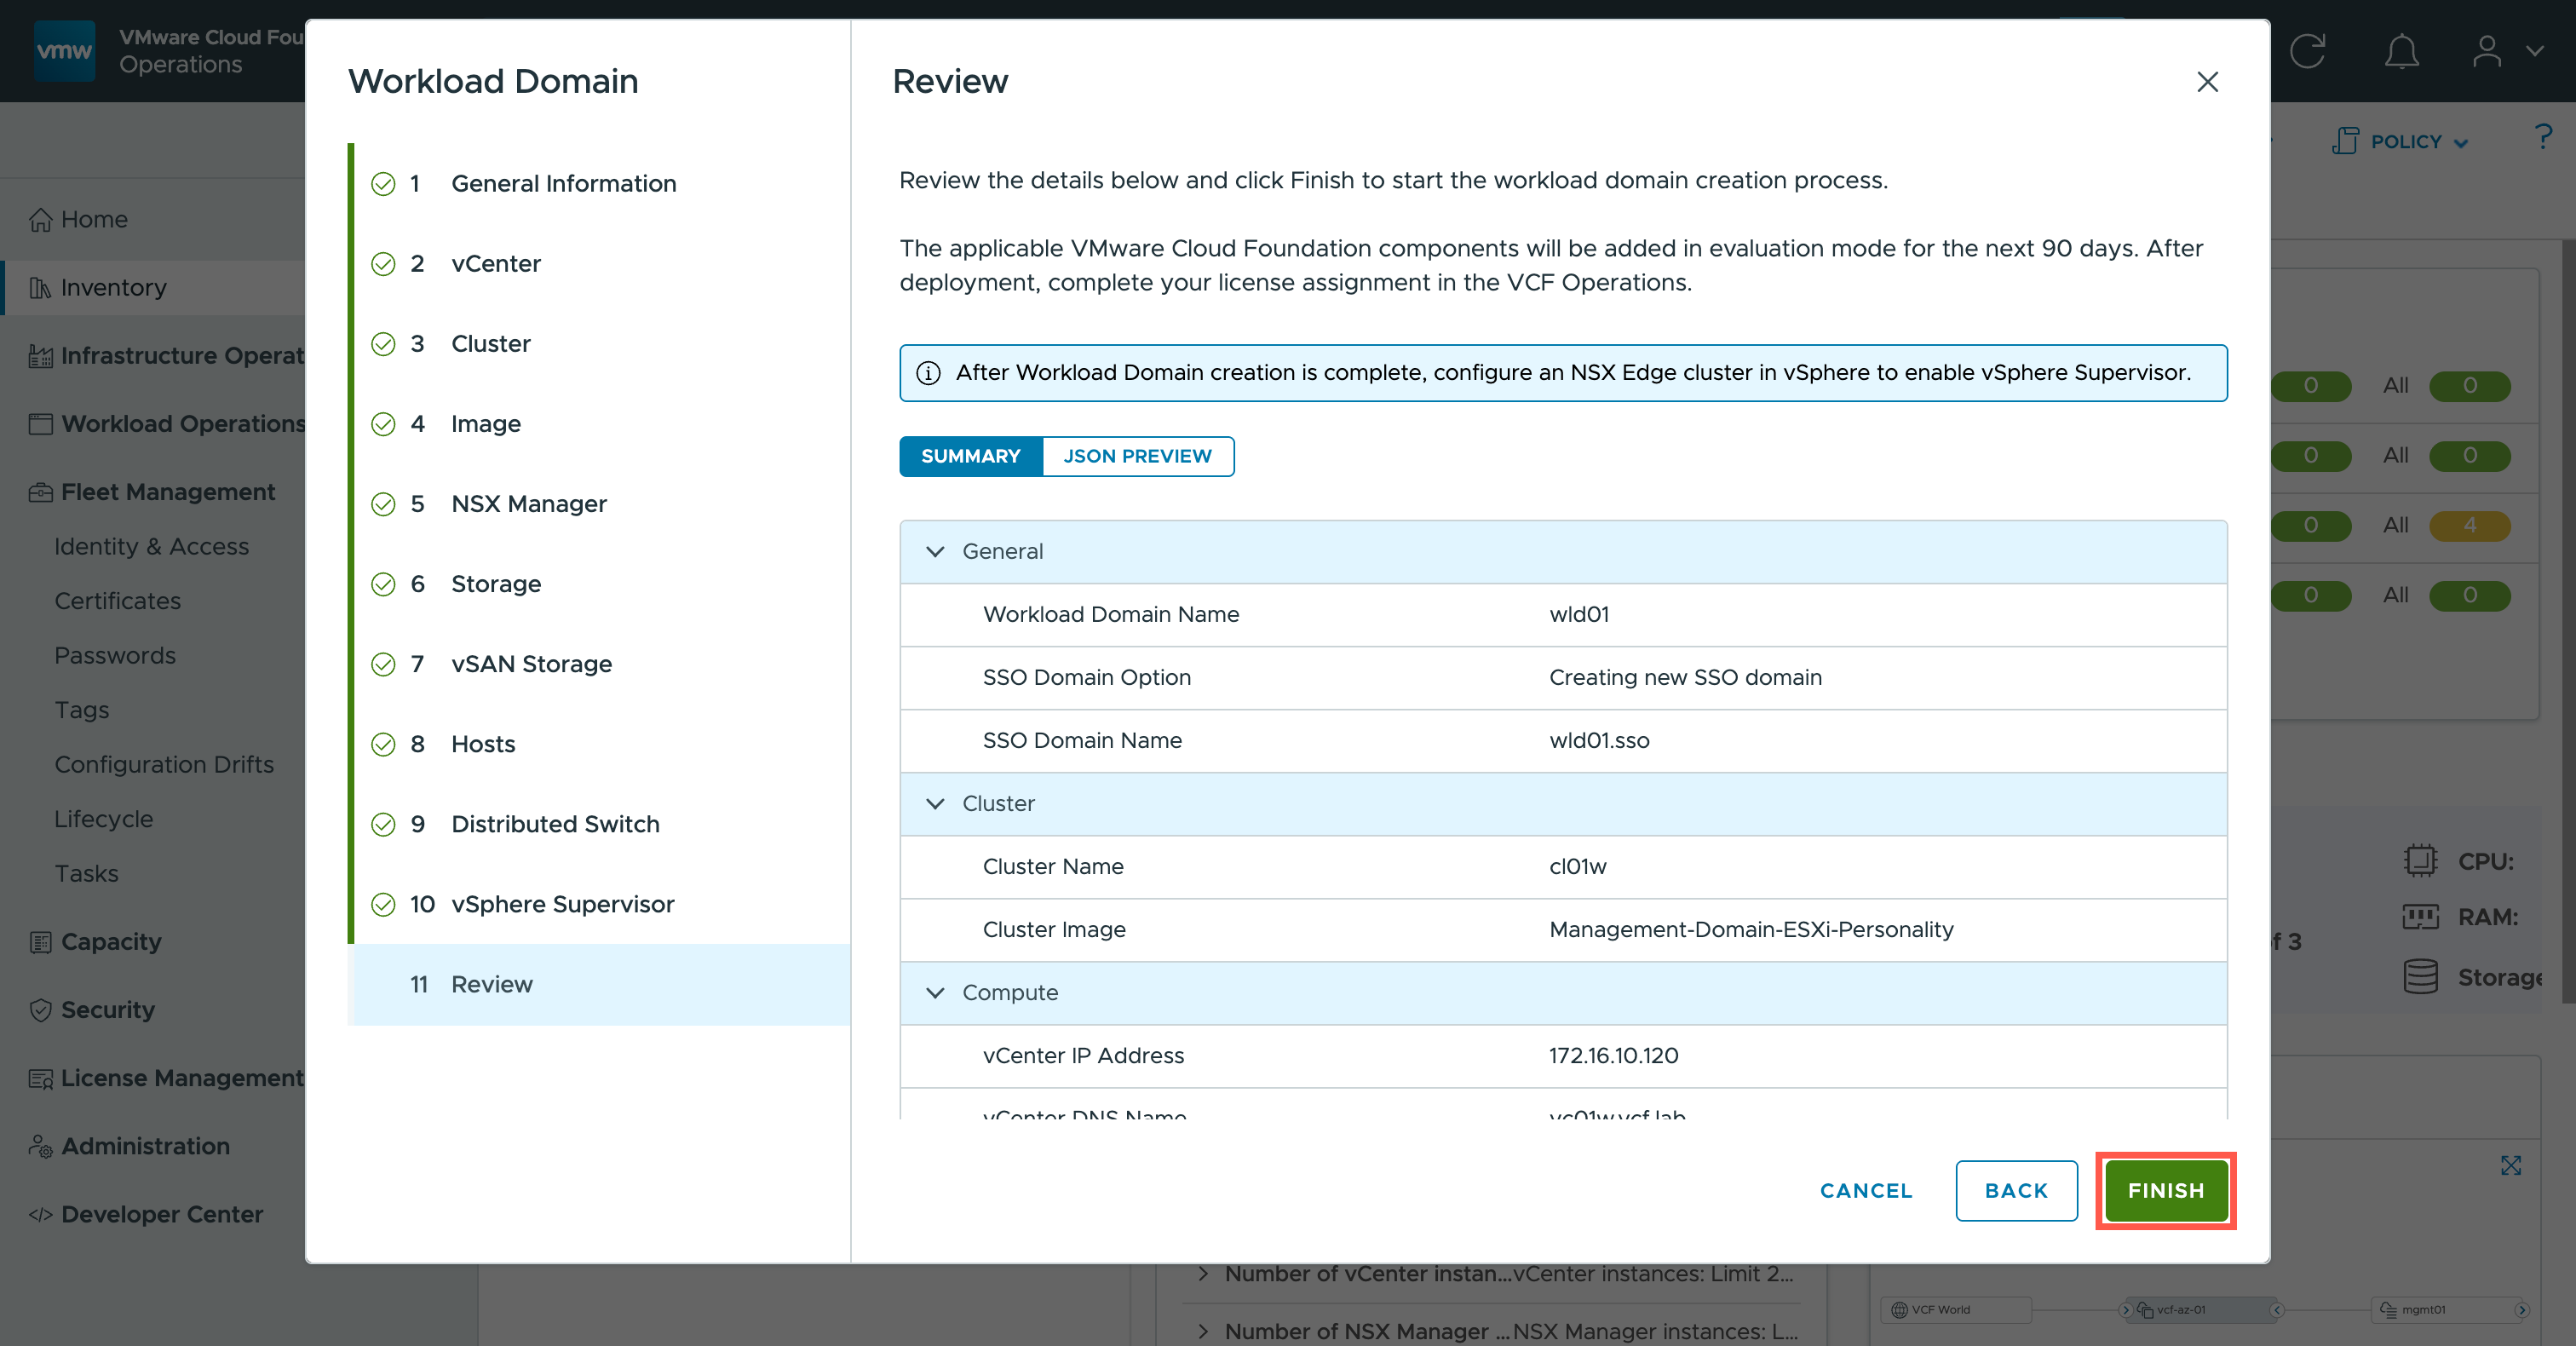
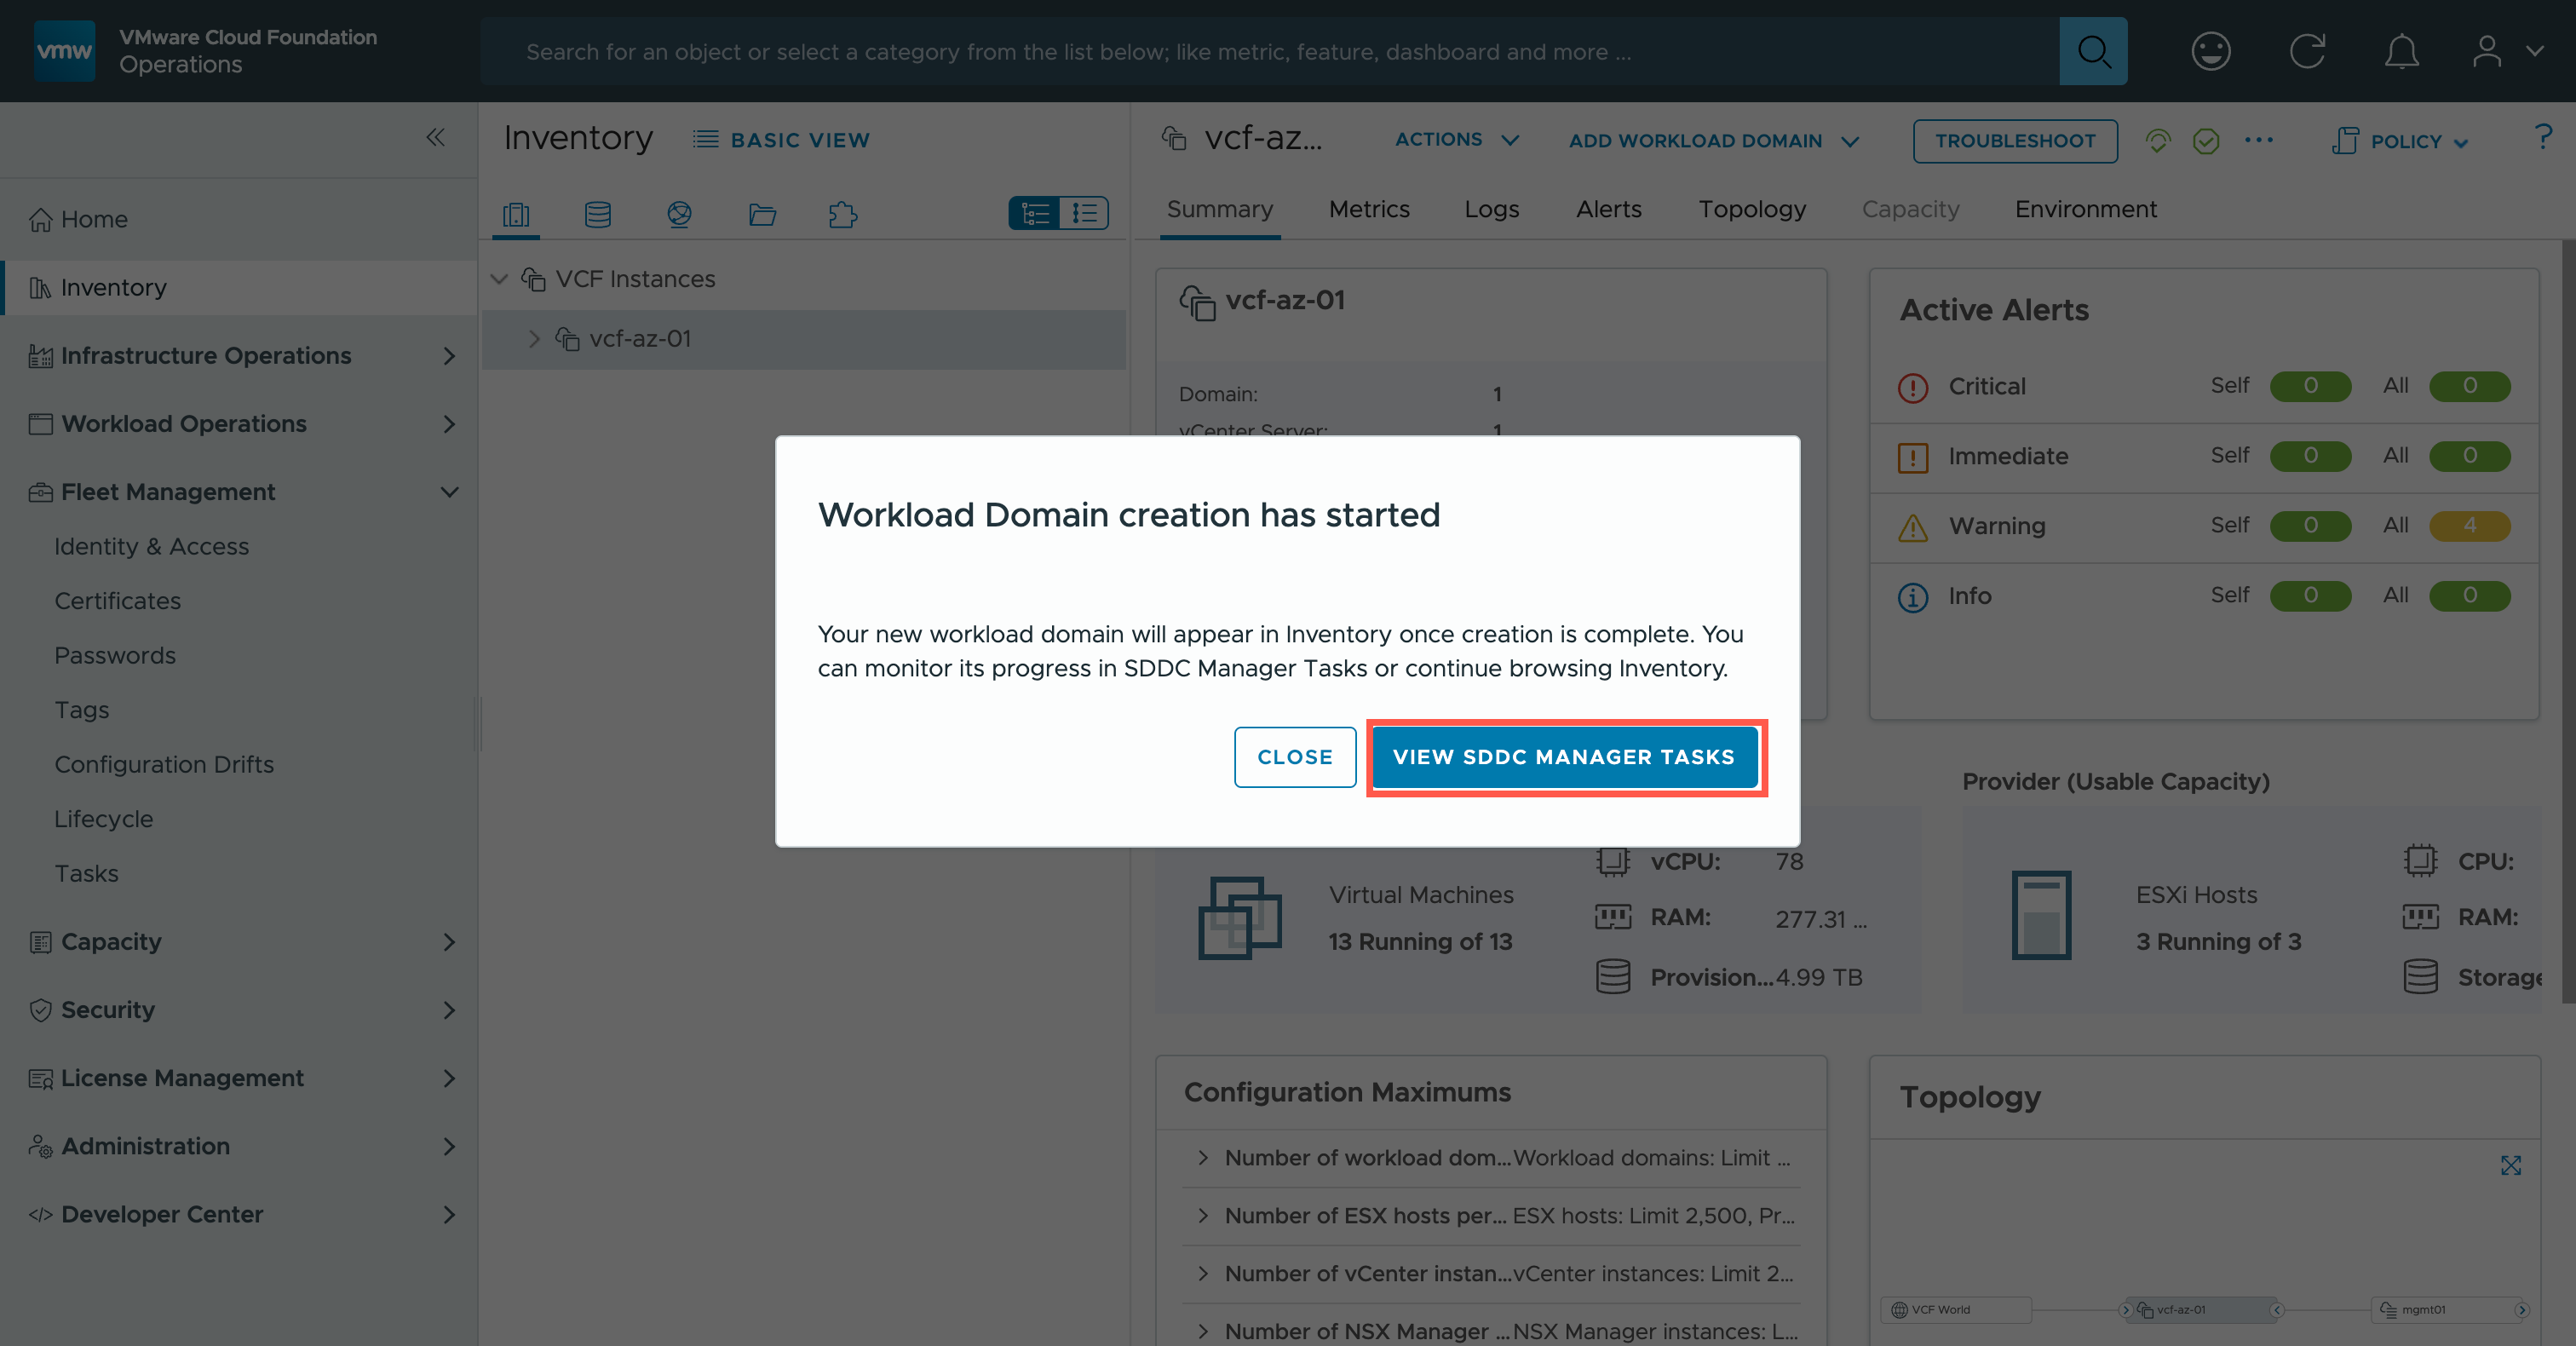

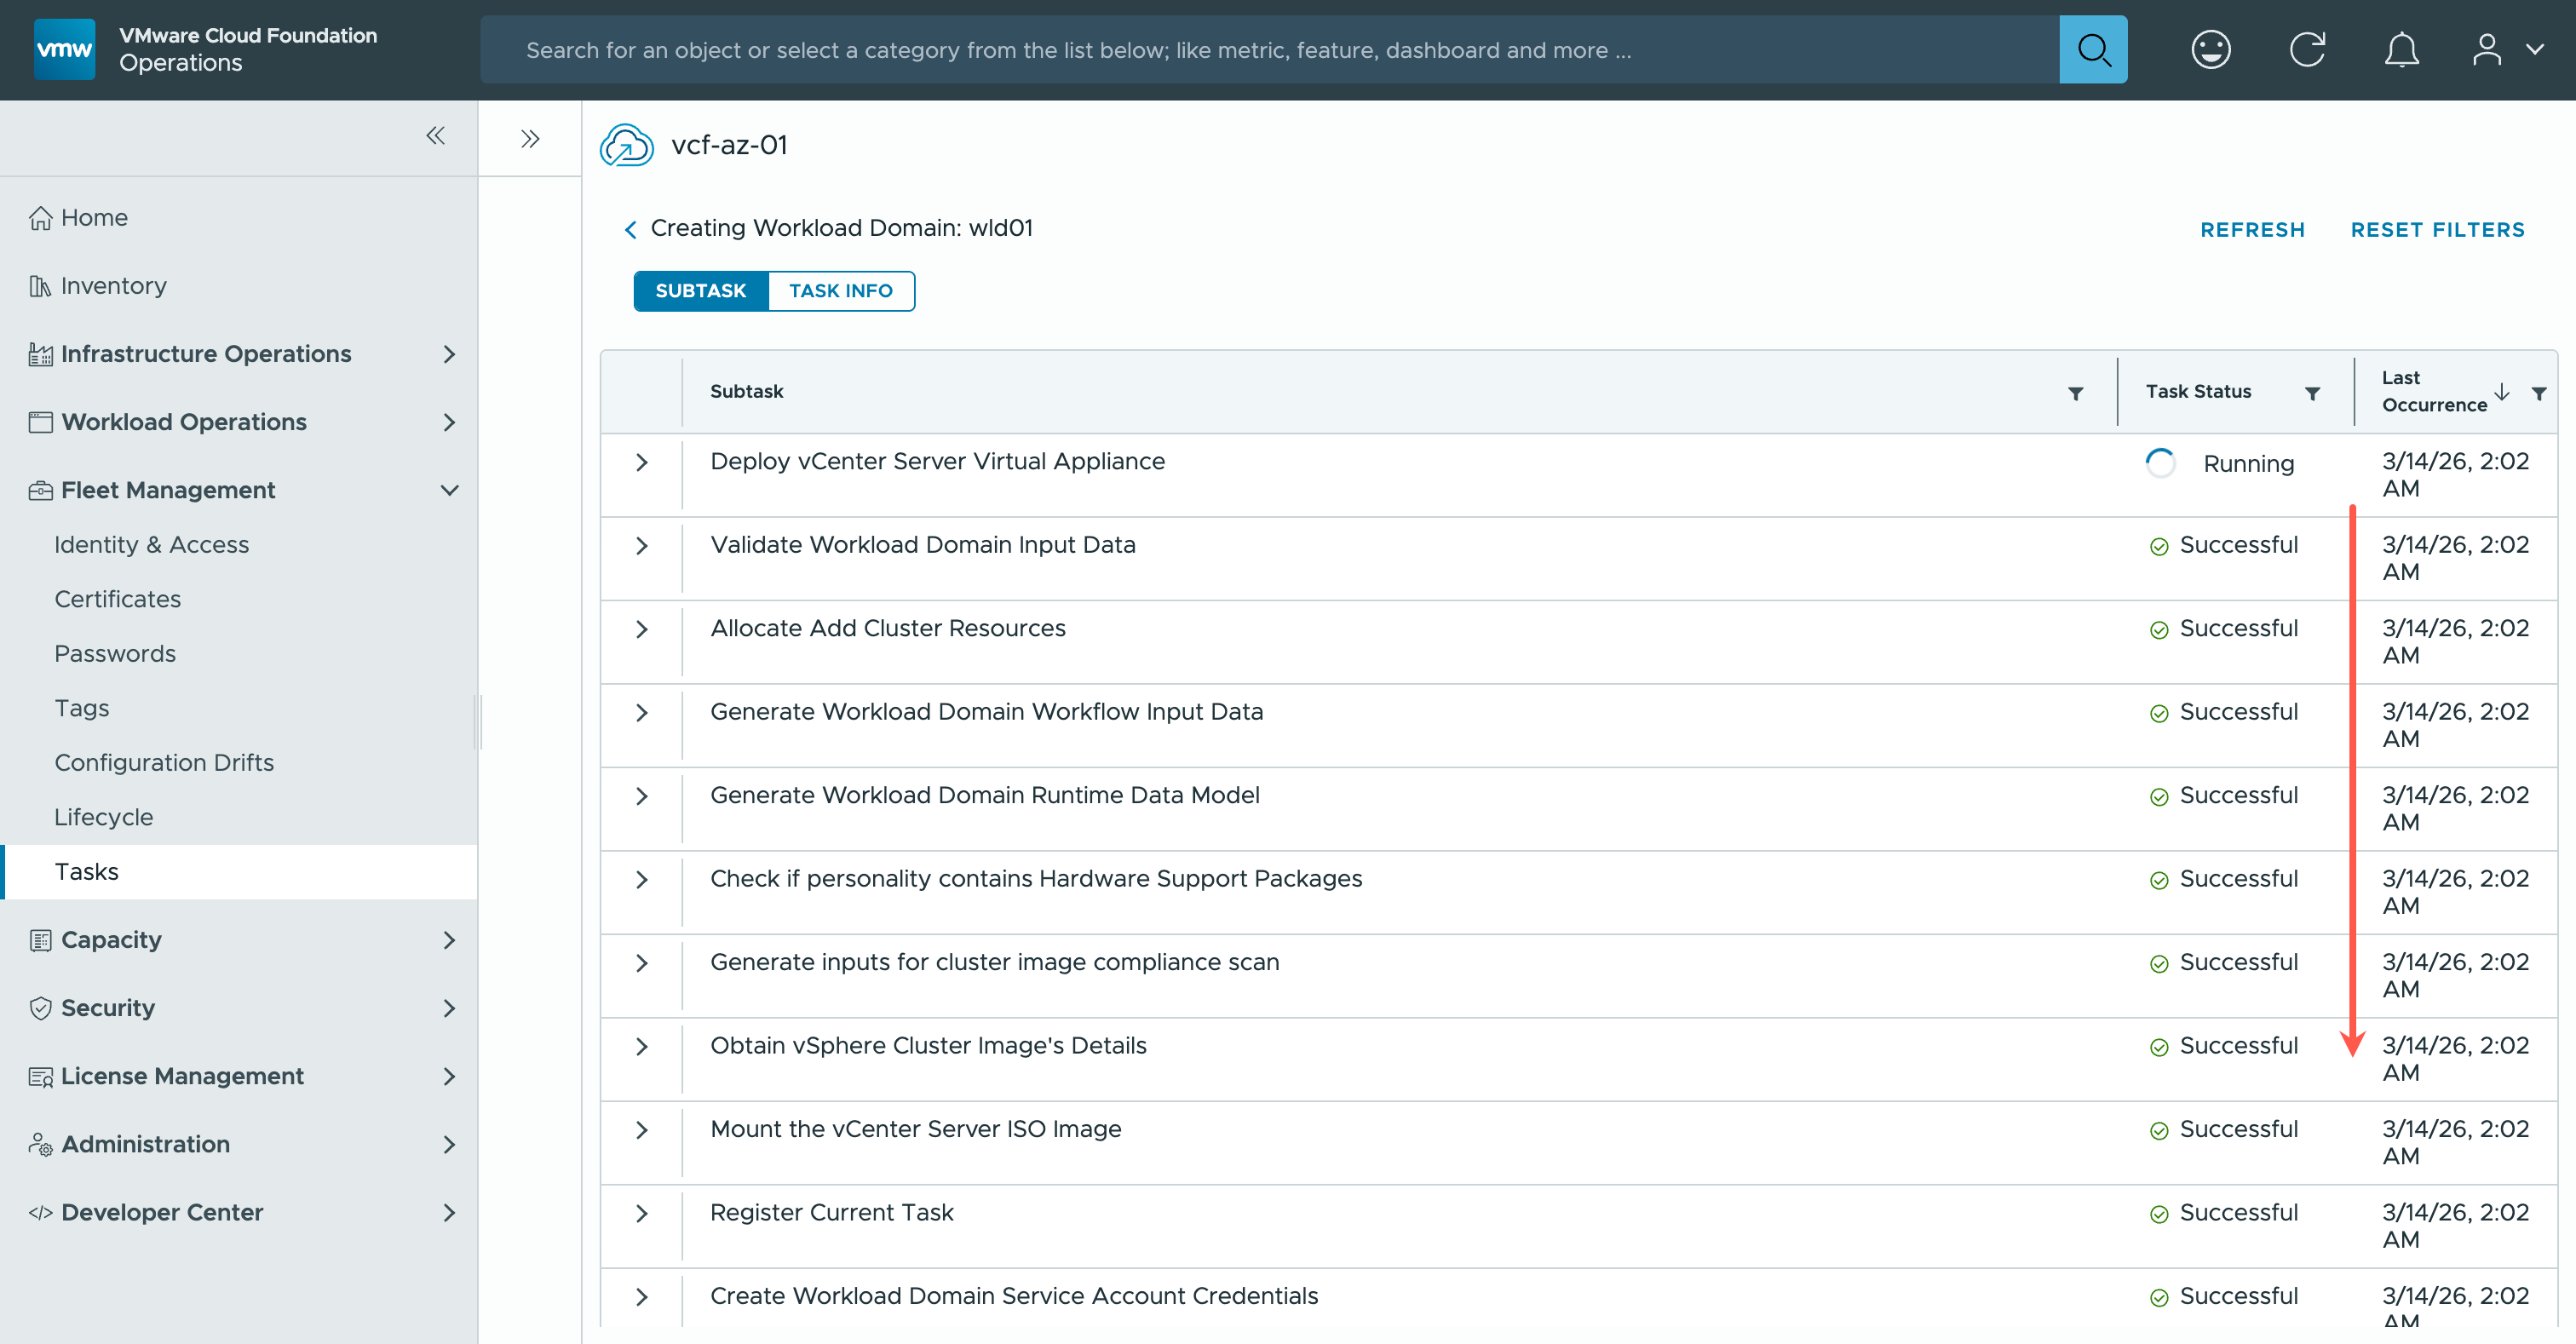
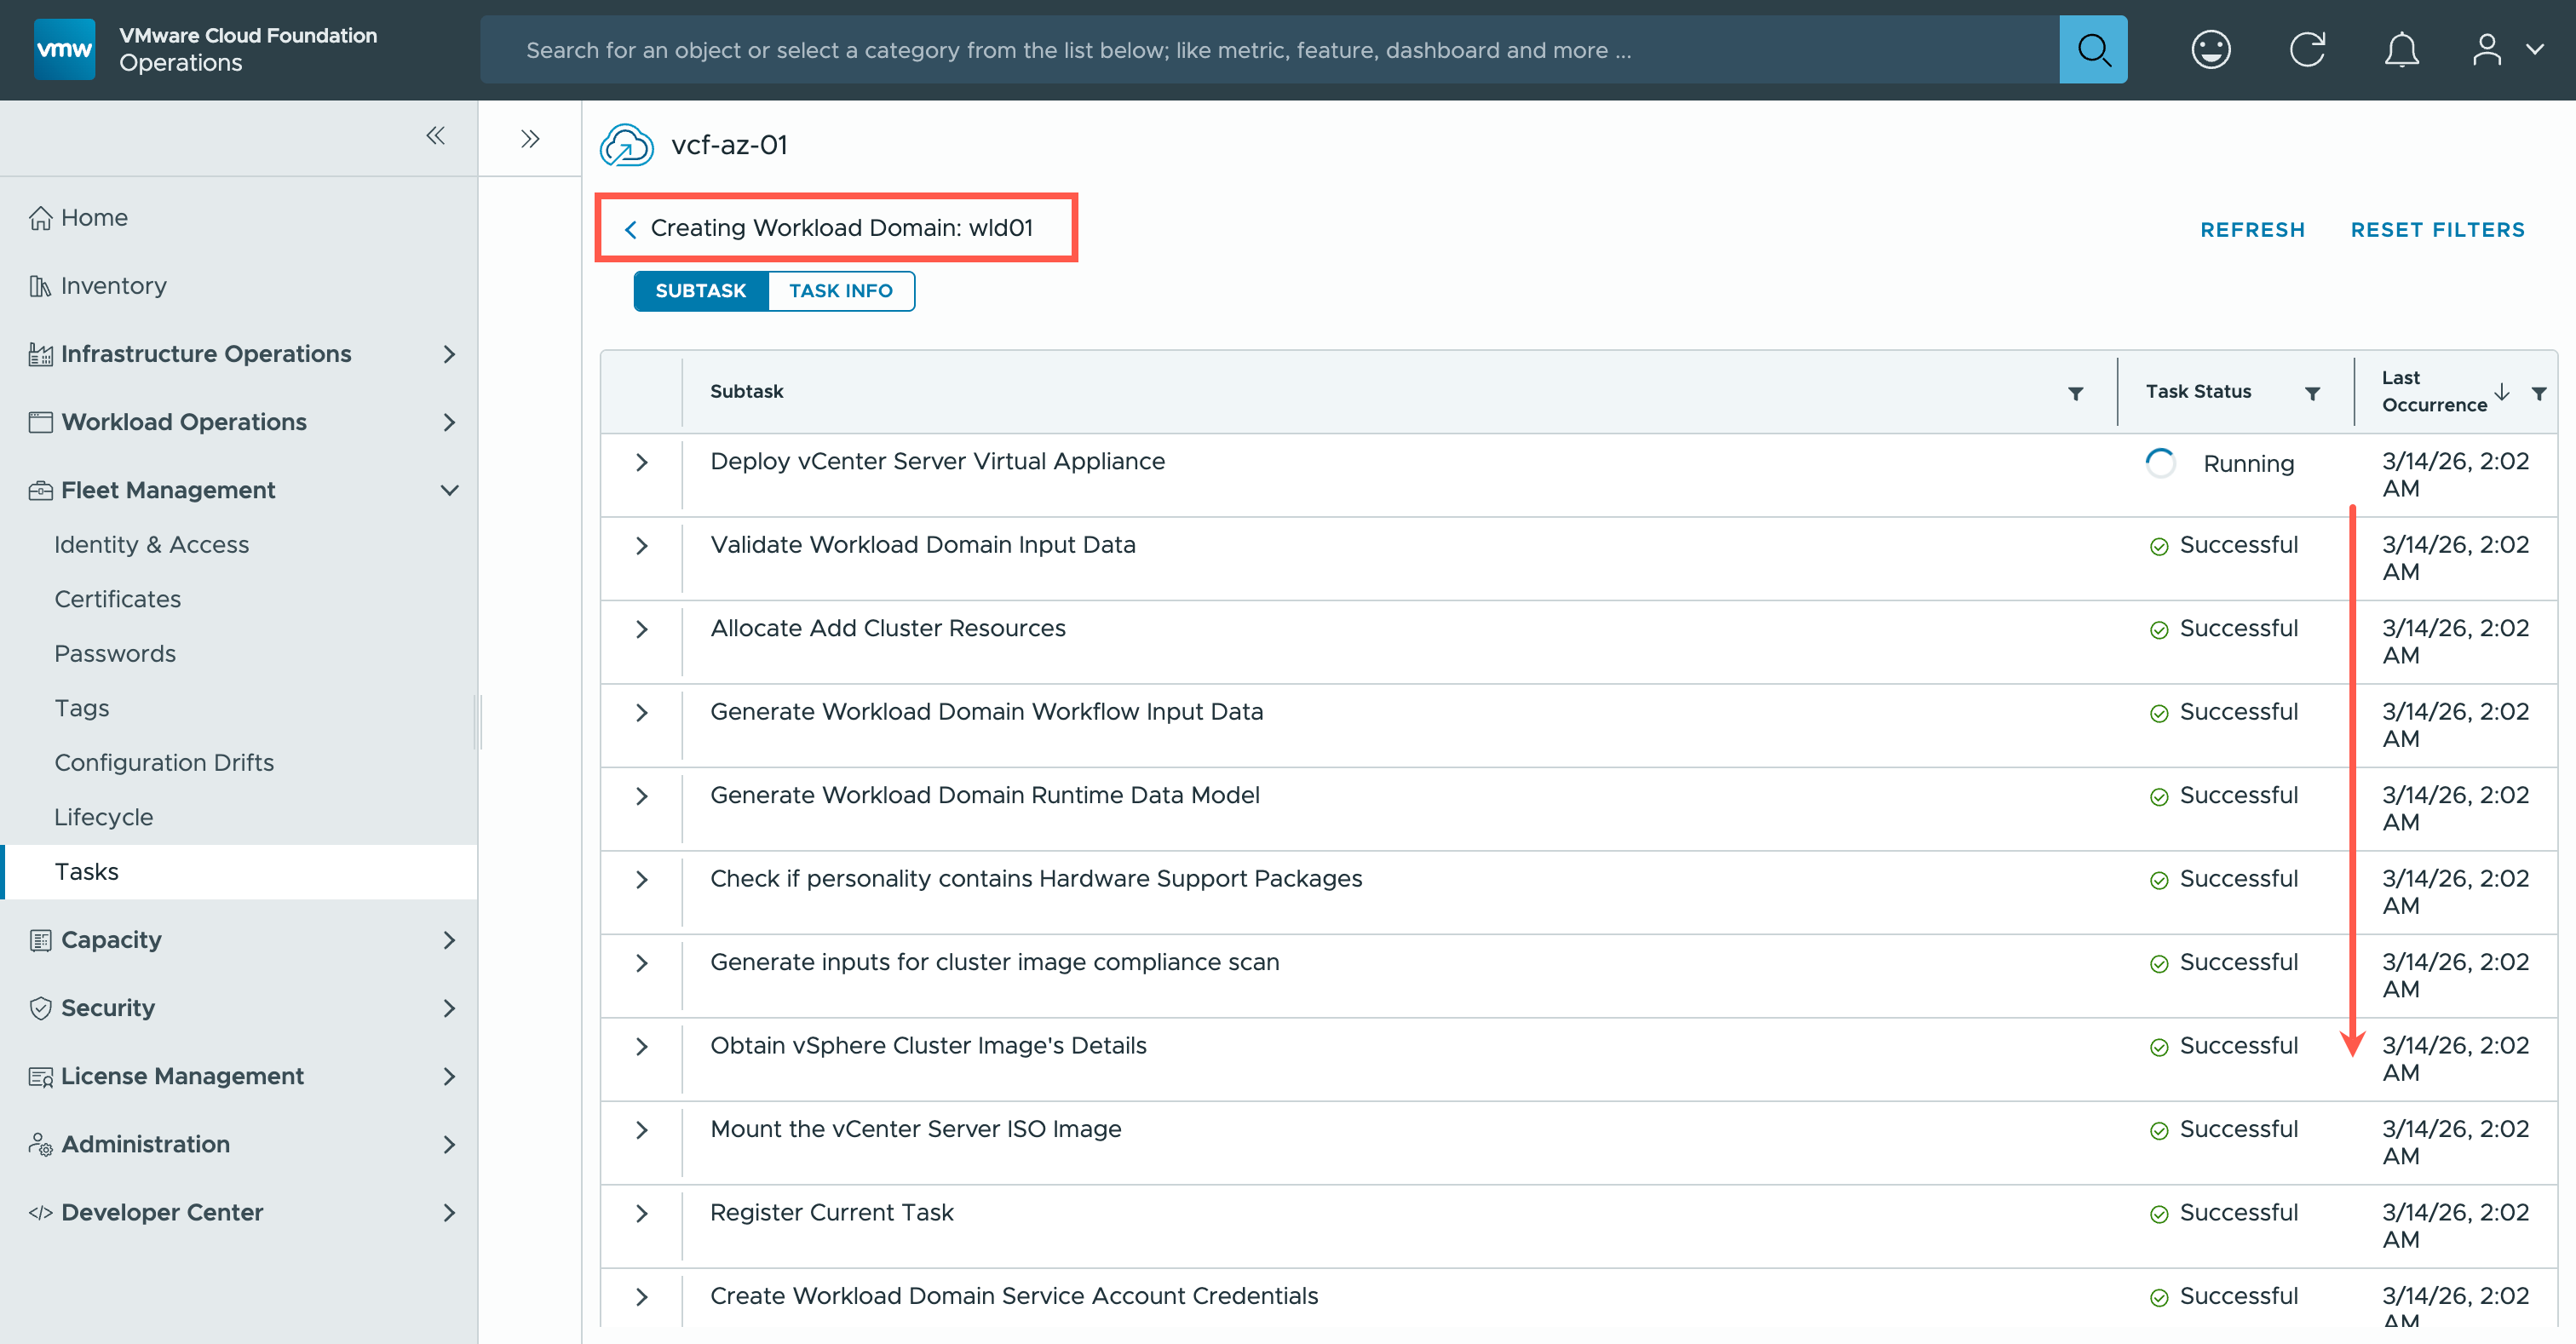
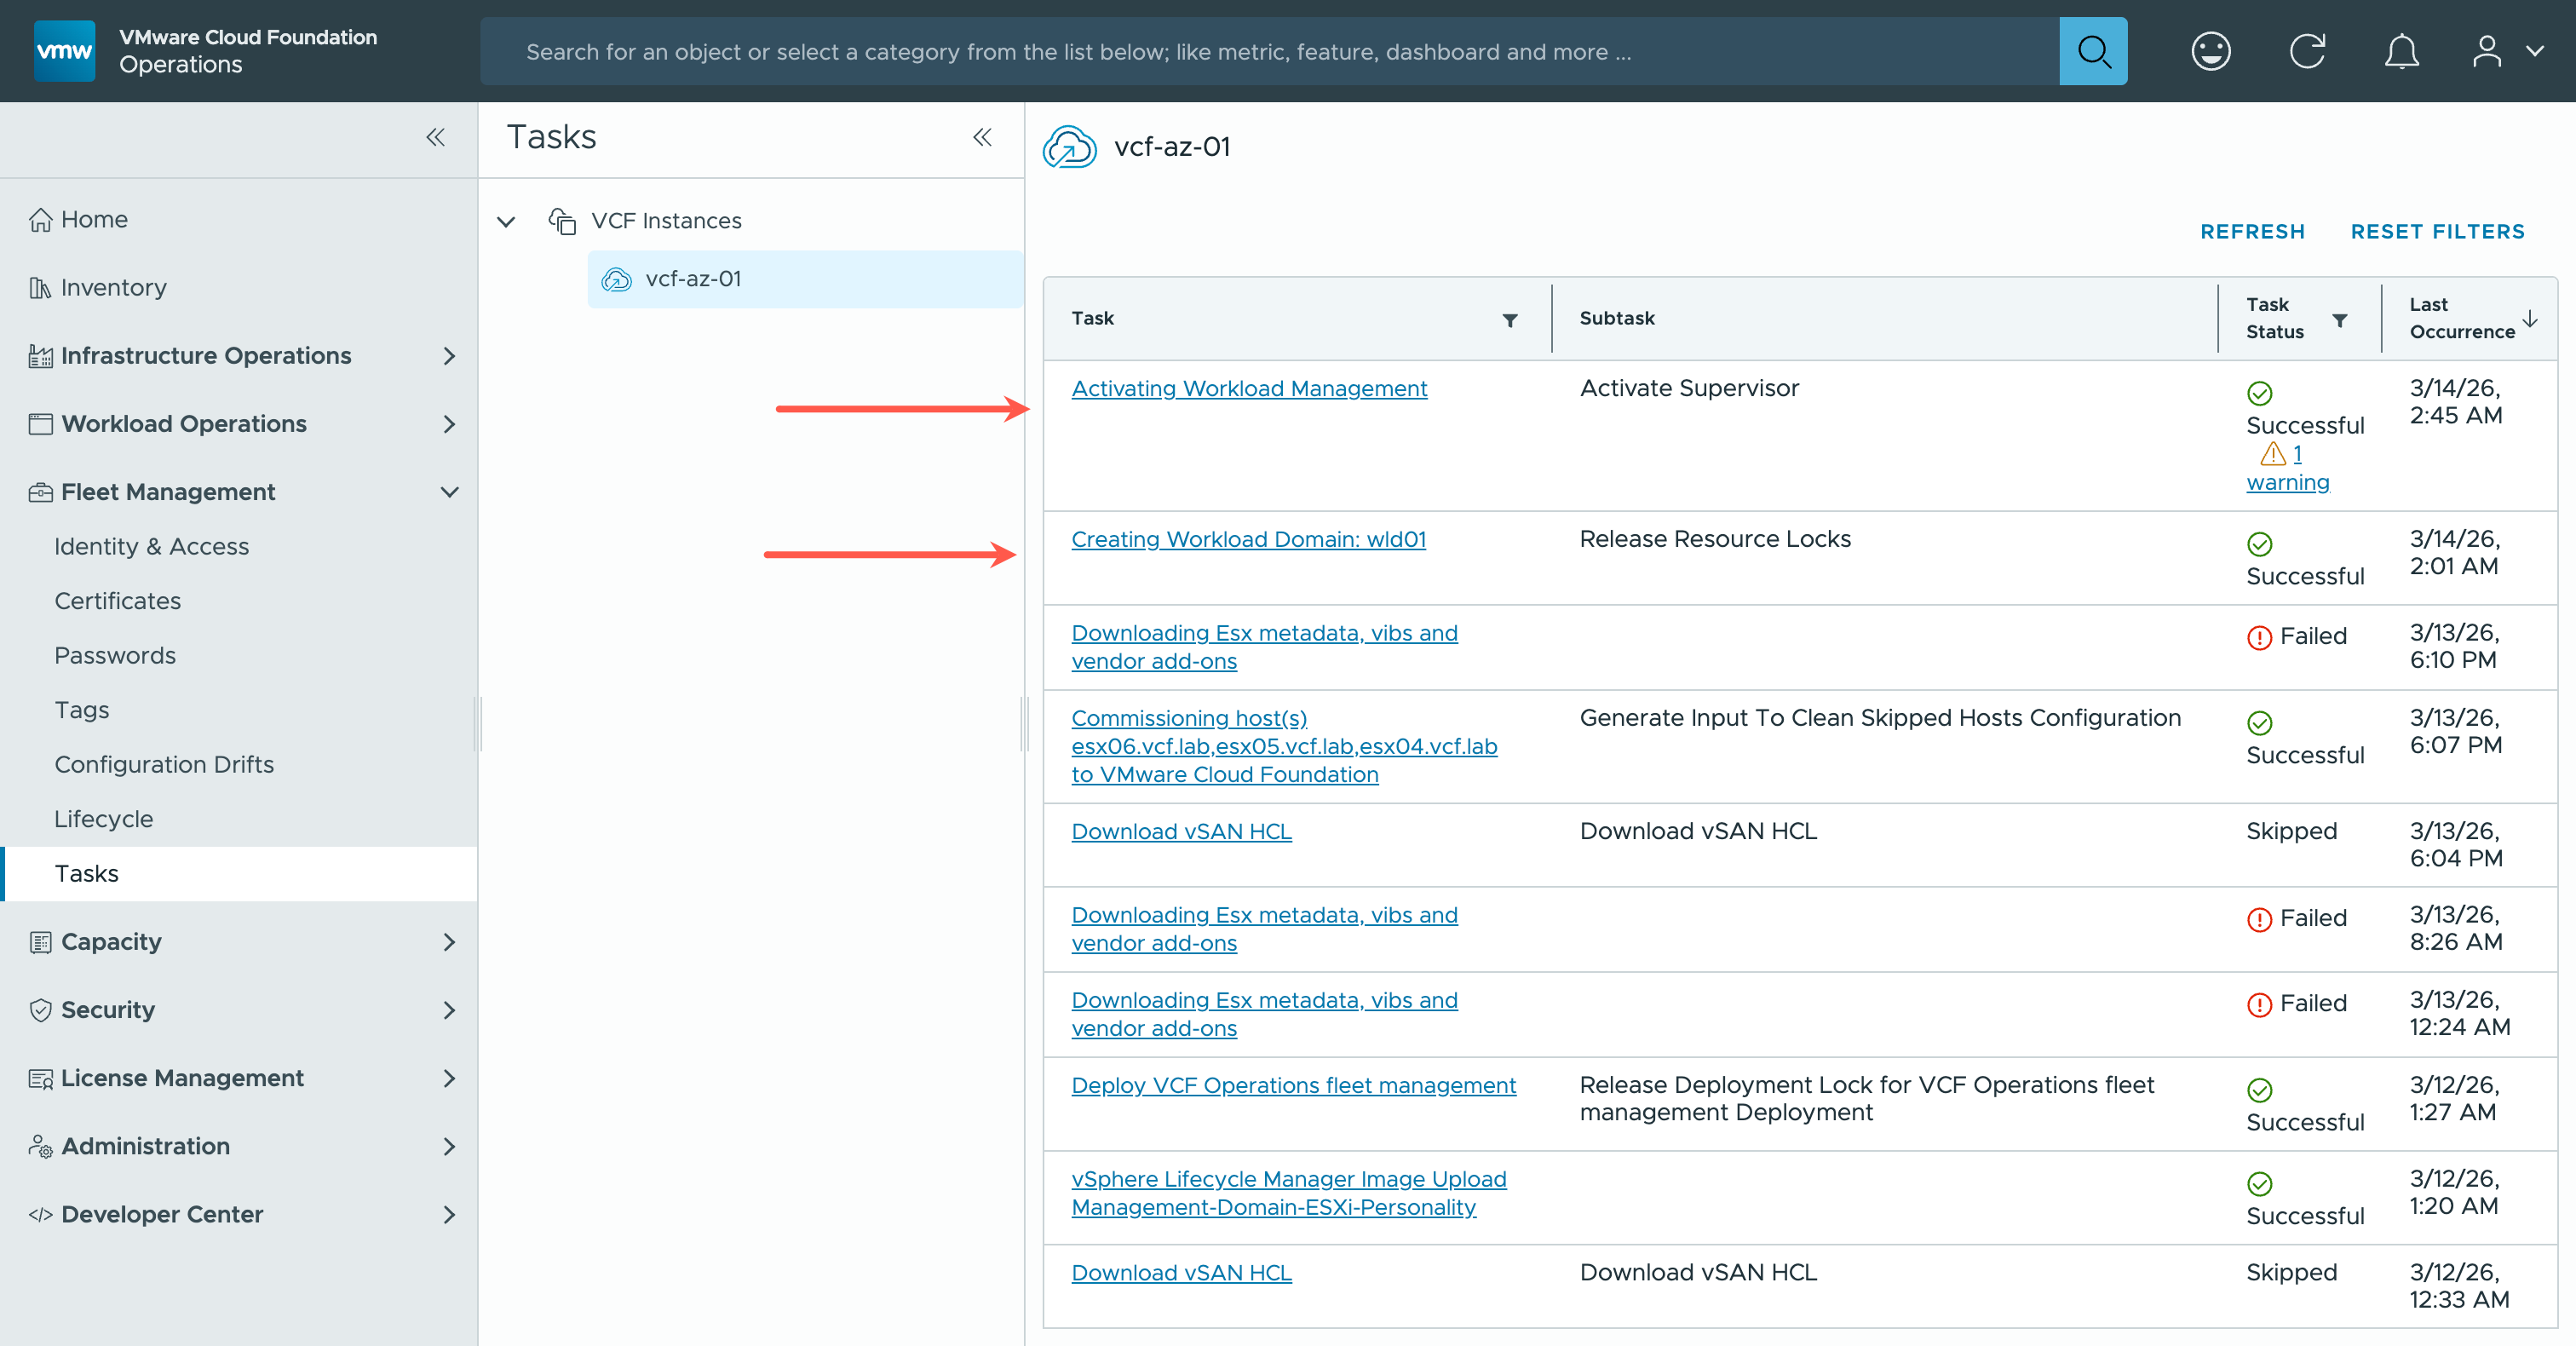
55 minutes later…
- At the Tasks screen, observe the last two tasks that completed.
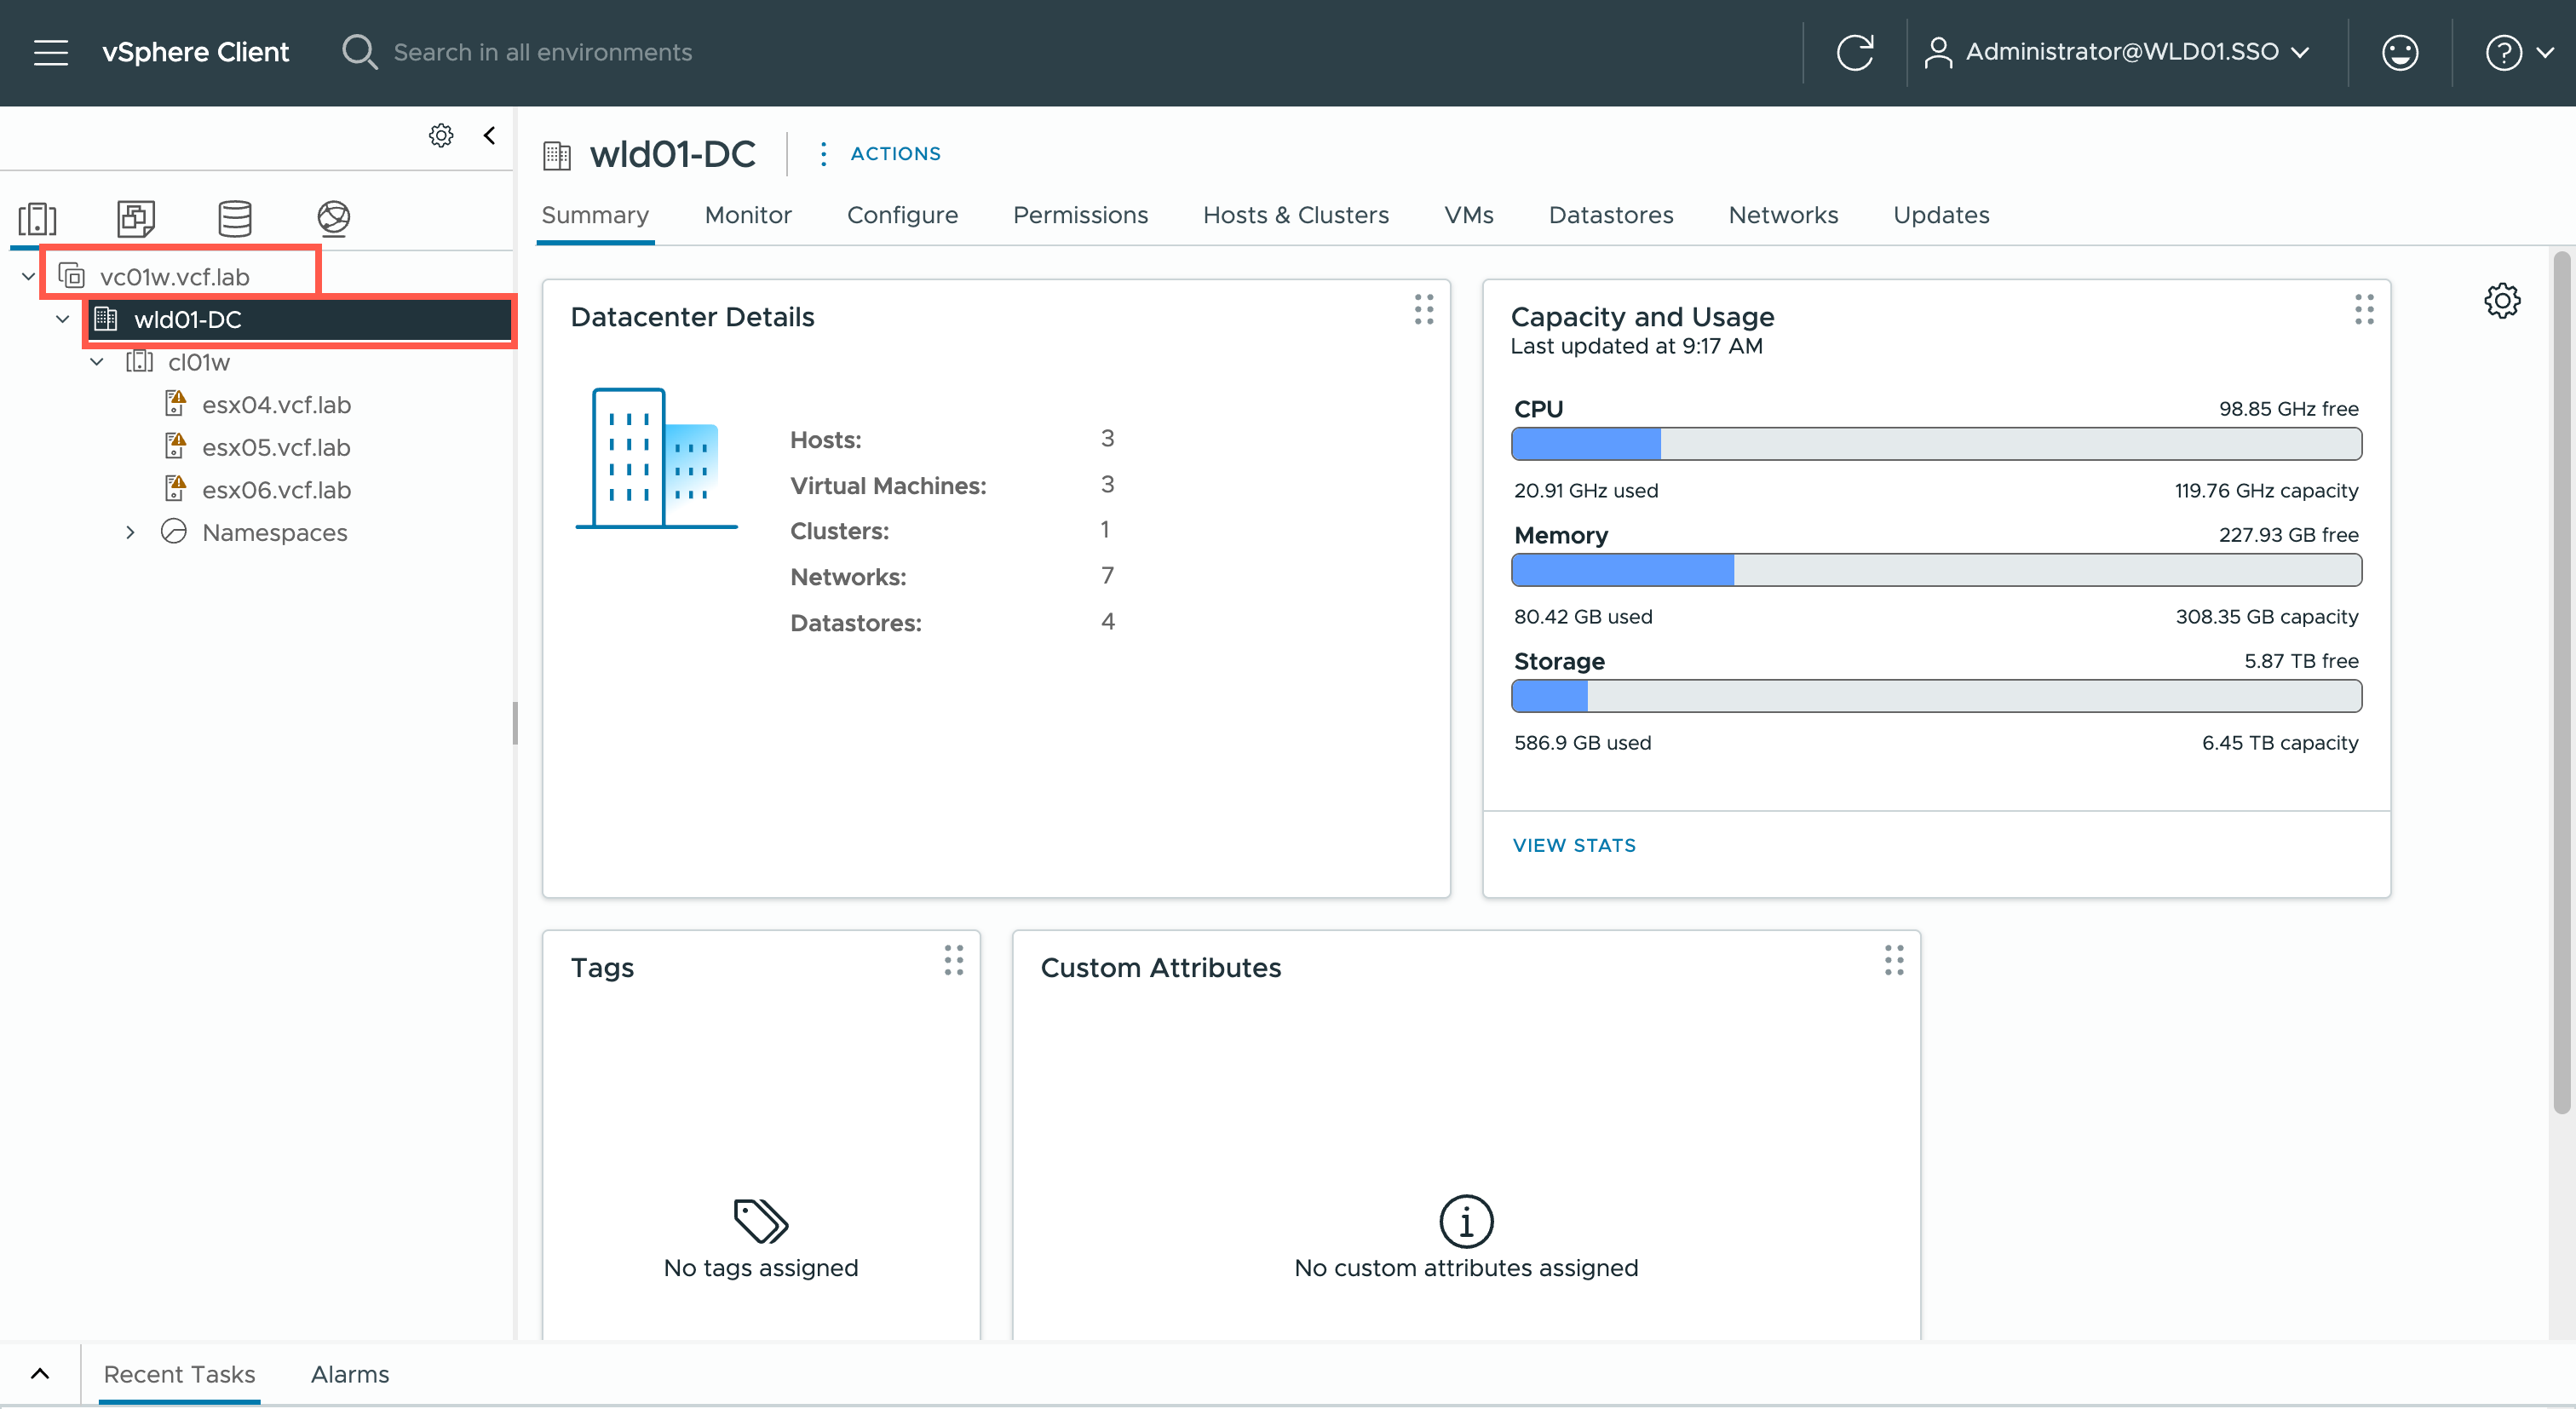
Check the New VCF Workload Domain
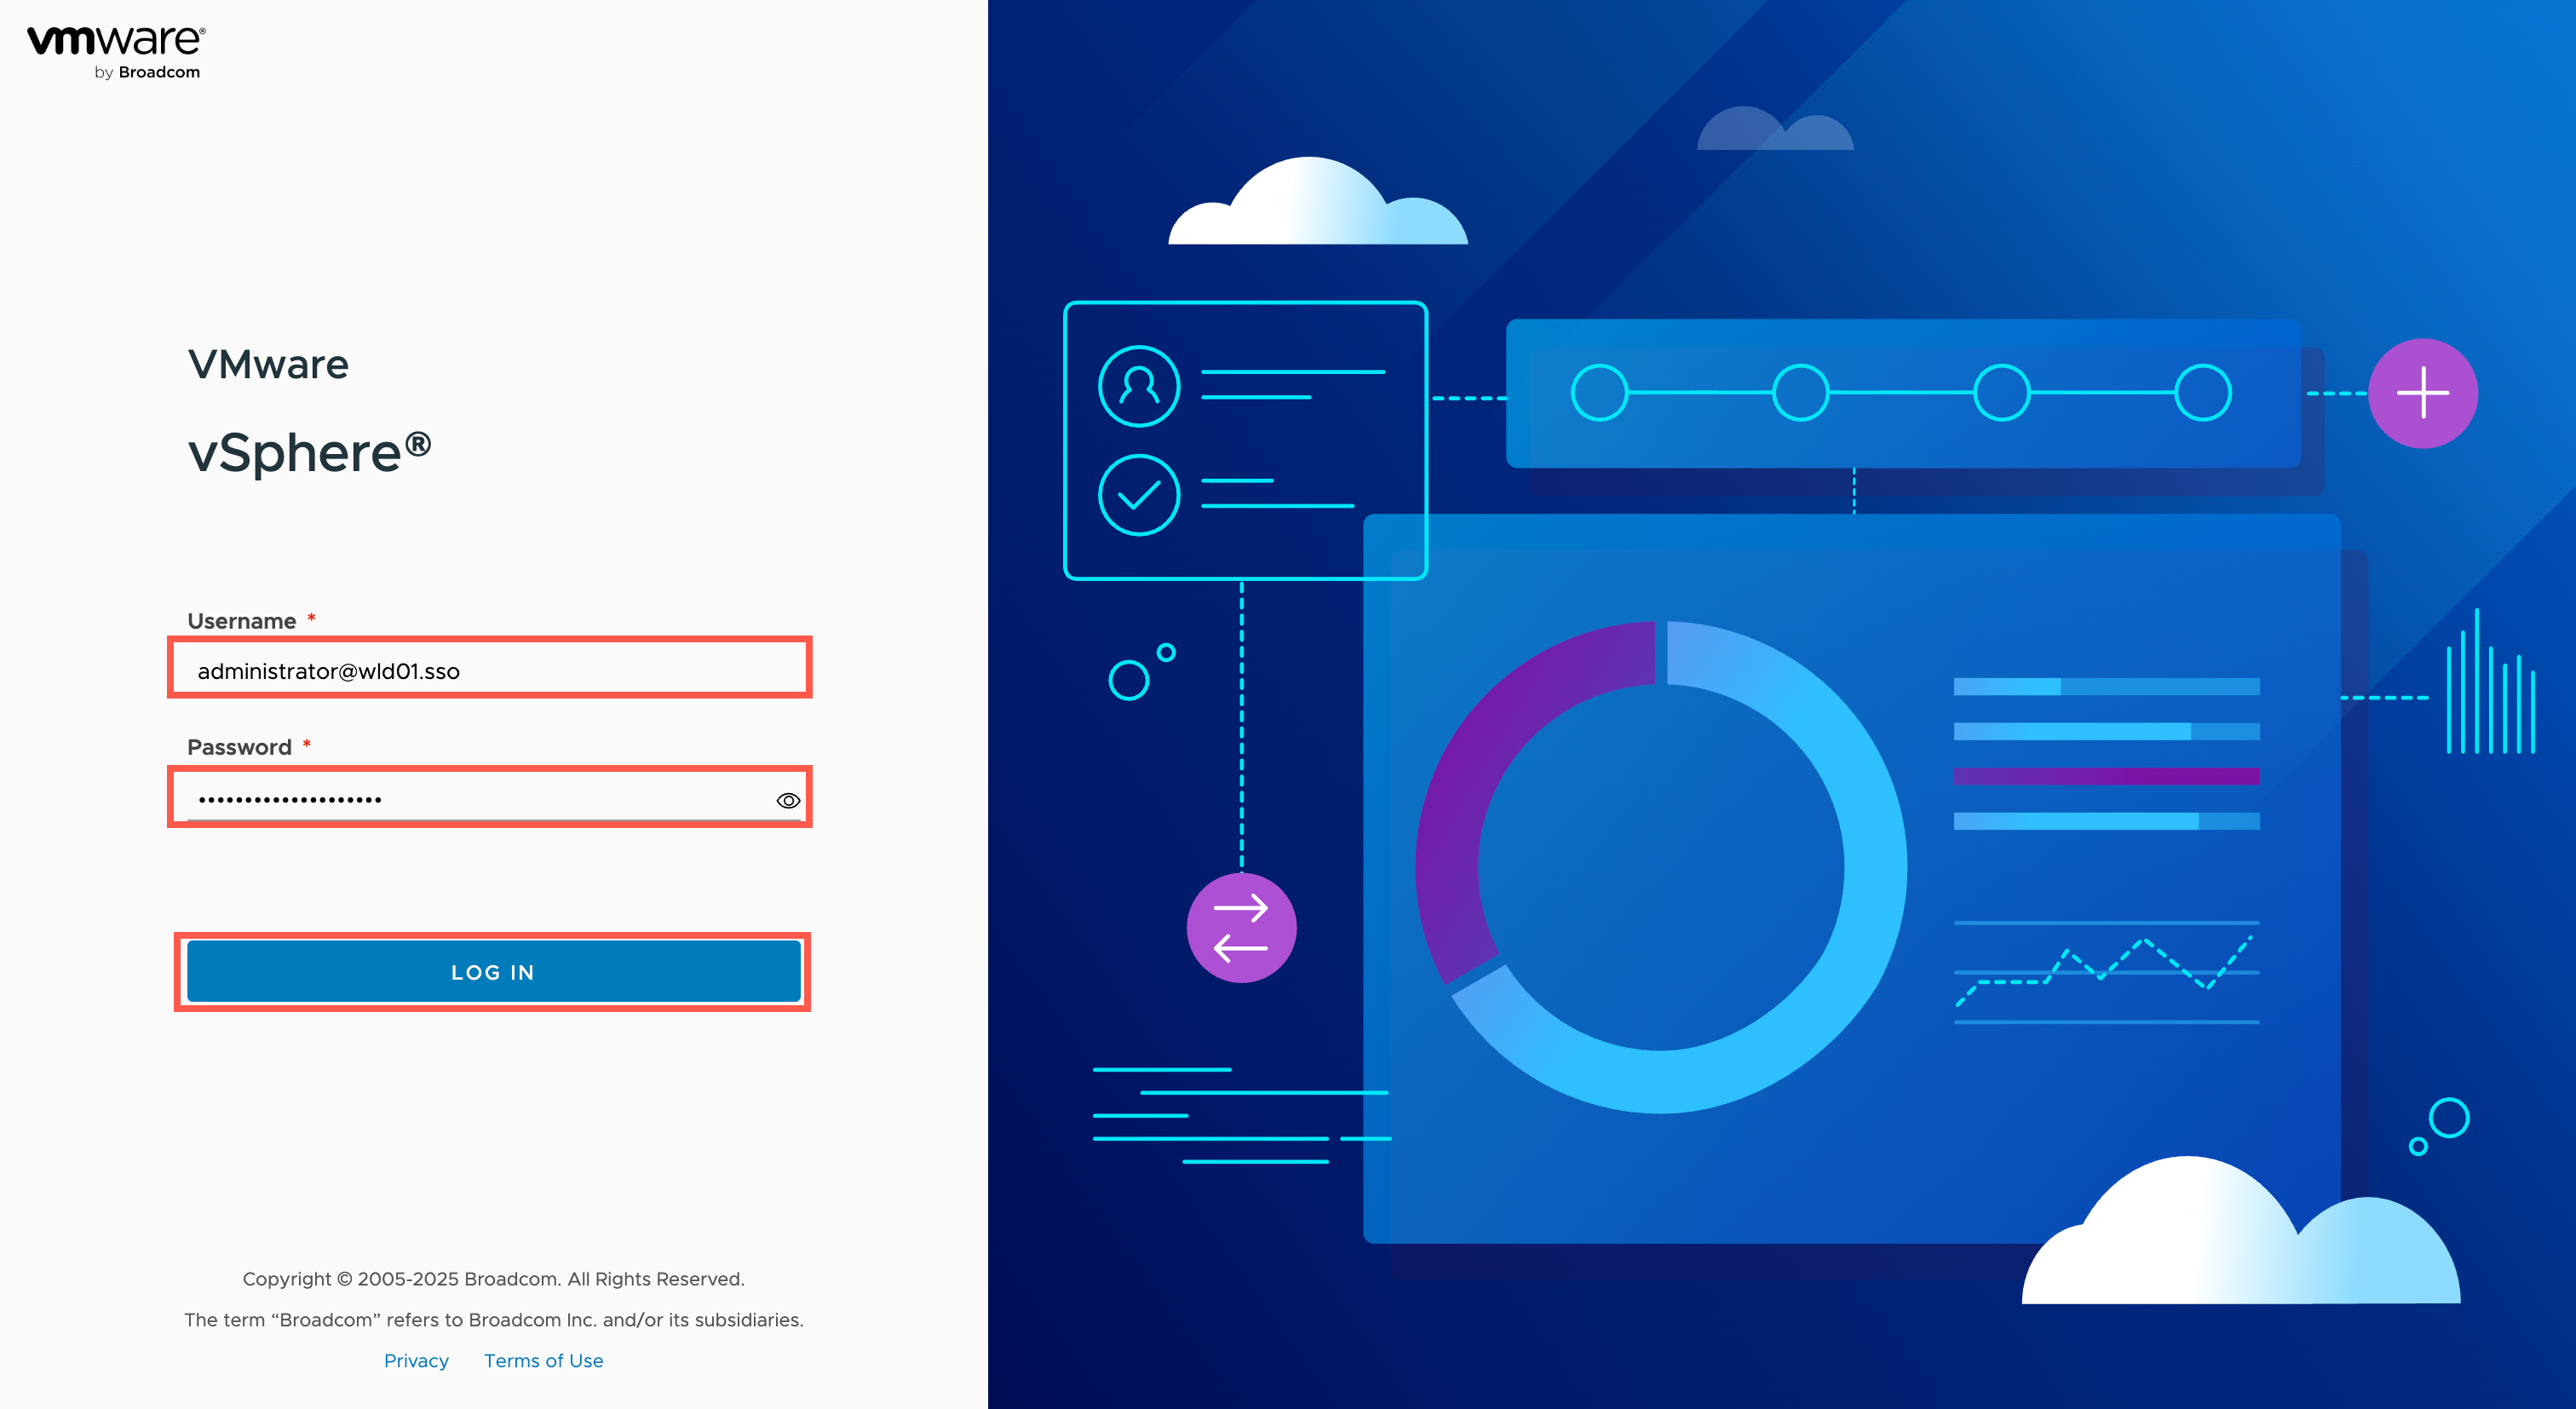
- In a new browser tab, navigate to the newly deployed Workload Domain vCenter (i.e.
wld-vc.fqdn) and click LAUNCH VSPHERE CLIENT.
Note:If prompted that the connection is not private, just accept it and move on. - At the vSphere Login, complete the following steps:
- At the Username field, type
administrator@wld01.sso.- At the Password field, type
<super-strong-password>.- Click LOG IN.
Recap
In this post, using VCF Operations, we walked through how to create a new VCF 9 Workload Domain. During the install we also enabled the vSphere Supervisor so that we can start using Kubernetes to natively deploy containers that sit right next to Virtual Machines in the vSphere infrastructure. What a great time to be alive!
Published on 13 March 2026 by Christopher Lewis. Words: 1370. Reading Time: 7 mins.